Hobby Boss 1/48 Bf-109G-6
| KIT #: | 81751 |
| PRICE: | 20 Euros |
| DECALS: | Two options: Hartmann and Barkhorn |
| REVIEWER: | Francisco Santoro |
| NOTES: | Easy Assembly kit |
| HISTORY |
Erich Hartmann was born on April 19th, 1922 in Weissach, Germany.
He joined the Luftwaffe in 1940 and finished his flight training in 1942. After being posted to JG 52, he began to gather victories, until reaching in 1944 the tally of 301 aircraft shot down, while also receiving the Knight´s Cross of the Iron Cross with Oak Leaves, Swords and Diamongs on August 25th of the same year. By the end of World War Two, Hartmann had gathered a total of 352 kills, 345 of them being Soviet aircraft, while the other 7 were Amercan aircraft.
After being imprisoned in the Soviet Union, he was released in 1955, and by 1956 he was back in Western Germany´s Luftwaffe, becoming Commander of JG 71 "Richtofen." Hartmann died on September 20th, 1997, in Weil im Schönbuch, Germany.
 From
the LET LET book about the Bf 109G: "The Bf 109G "Gustav" was the most
important variant of the Bf 109. It was also built in the largest
numbers, in particular during the last years of the war. The Gustav was
fitted with the new Daimler Benz DB605 engine, giving 1475hp.
Externally the (early) Gustav was similar to the preceding "F"
model. The most visible differences were the lack of the small
triangular cockpit window and the addition of small air openings on each
side of the nose.
From
the LET LET book about the Bf 109G: "The Bf 109G "Gustav" was the most
important variant of the Bf 109. It was also built in the largest
numbers, in particular during the last years of the war. The Gustav was
fitted with the new Daimler Benz DB605 engine, giving 1475hp.
Externally the (early) Gustav was similar to the preceding "F"
model. The most visible differences were the lack of the small
triangular cockpit window and the addition of small air openings on each
side of the nose.
The Bf 109G-6 was the most important Gustav version, and was built in the largest numbers. It could be fitted with a DB 605AM/AS or ASM engine. It was armed with two MG 131 machineguns in the nose and one MG 151/20 cannon firing through the propeller hub (this part wasn´t in the LET LET book). The Bf 109G-6/U4 was armed with a single MK 108 30mm cannon firing through the propeller hub, and had two MG 151/20 cannons fitted under the wings as the Bf 109G-6/R6. This combination was regarded as the most suitable for daylight bomber interception, although it lacked the performances to meet Allied fighter escorts on even terms. Like the Bf 109G-5, the G-6 could be fitted with WGr 21 mortar launchers under the wings."
| THE KIT |
 It
all started with Mr. van Aken´s
article regarding an anime called Strike Witches, which involves young
girls with the surnames of/based on
several famous WW2 aces fighting against an alien enemy known as the Neuroi
with machines attached to their legs, machines shaped similarly to WW2
fighters and called Striker Units. After watching it completely (together
with the movie and the spin-off Brave Witches), I decided to pull out my
Hobby Boss Bf 109G-6 out of the stash because: 1) I only have one Bf 109, 2)
I wanted a G-6 and, 3) Two of the charachters are named Erica Hartmann and
Gertrud Barkhorn.
It
all started with Mr. van Aken´s
article regarding an anime called Strike Witches, which involves young
girls with the surnames of/based on
several famous WW2 aces fighting against an alien enemy known as the Neuroi
with machines attached to their legs, machines shaped similarly to WW2
fighters and called Striker Units. After watching it completely (together
with the movie and the spin-off Brave Witches), I decided to pull out my
Hobby Boss Bf 109G-6 out of the stash because: 1) I only have one Bf 109, 2)
I wanted a G-6 and, 3) Two of the charachters are named Erica Hartmann and
Gertrud Barkhorn.
The kit has 78 pieces moulded in dark grey/clear plastic, and comes in four sprues of grey plastic and three clear ones (one has a solid canopy, the other one has a separate canopy, and the third one has a windscreen and the armoured headrest).
The kit has recessed panel lines, no flash, and is covered with tiny rivets that may make some people leave this model aside and go for the Hasegawa offering.
The instruction sheet comes as an 8-page booklet with 12 steps in black and white.
| CONSTRUCTION |
 I
began by painting with Revell 78 all the cockpit parts and the fuselage of
the aircraft. When the paint was dry, I began building the cockpit.
The cockpit is more or less detailed. I first attached the seat and
the rudder pedals to the floor and then the trim wheel and the control
stick. The control panel is the final step for the cockpit assembly, and
it´s a three piece construction. It was build and left to dry before being
glued to the cockpit floor.
I
began by painting with Revell 78 all the cockpit parts and the fuselage of
the aircraft. When the paint was dry, I began building the cockpit.
The cockpit is more or less detailed. I first attached the seat and
the rudder pedals to the floor and then the trim wheel and the control
stick. The control panel is the final step for the cockpit assembly, and
it´s a three piece construction. It was build and left to dry before being
glued to the cockpit floor.
Before adding the cockpit to the fuselage halves, one has to add what a small part of what I guess is the throttle to the left side of the fuselage. I glued it on, left it dry, and then added the cockpit. The cockpit didn´t fit. So I removed the little piece and put it on the box. You also have to glue the exhausts and make a hole for a circular antenna before closing the fuselage halves.
Step 3 is where I brain farted (too early, yeah I know) and, instead of glueing together pieces B8 and A17 to make the rear bulkhead (part B8 had two small notches for the headrest), I glued the incorrect part D8 (a single rear bulkhead piece) to one of the fuselage halves. With that added, I went ahead and glued both fuselage halves and left them to dry.
Step 4 deals with the addition of the horizontal stabilizers and cowlings, which maybe the easiet step of the entire build. I also glued the air intake at this time. The inner part of the cowlings (the ones that surround the exhaust) are some milimitres longer than the area where they have to be glued, so trim them a bit and test fit.
 I
skipped step 5 and went straight to 6, adding the oil cooler and the
tailwheel cover at this time. I also built and painted the propeller
assembly with the colours for Hartmann´s aircraft.
I
skipped step 5 and went straight to 6, adding the oil cooler and the
tailwheel cover at this time. I also built and painted the propeller
assembly with the colours for Hartmann´s aircraft.
Steps 7 and 8 have you build the wings, and the instructions tell you to open holes for the underwing cannons and for the two kidney shaped pieces that allowed for the installation of bigger wheels in the real aircraft. The first ones weren´t opened because there weren´t any underwing cannons on Hartmann´s aircraft, and the latter ones were already open, so I glued those two pieces without hesitation. Do not glue piece D10 (I guess it´s a fuel tank), it won´t let the wing assembly seat flush with the fuselage.
I jumped above steps 9 to 11 because they dealt with the installation of the fuel tank (again, not applicable for Hartmann´s aircraft) and the landing gear, and went straight to painting.
| COLORS & MARKINGS |
I had decided to paint this kit as Erich Hartmann´s aircraft, not only because I had watched the show, but also because I wanted to have an aircraft of the top scoring ace of WW2. I had also chosen to replace the kit´s painting instructions with the Hasegawa ones for their 1:32 Bf 109G-6.
I began by outlining the fuselage spine and nose with a pencil to mark the areas to paint in RLM 74/75, instead of using Tamiya tape to get a perfectly straight line. I used Revell 47 as RLM 75 and Revell 69 as RLM 74.
 Once
I had the fuselage spine and nose fully covered in paint, I began painting
the fuselage with Revell 49 (I don´t go after perfect accuracy) with many
water-thinned coats. That actually was something good, since the panel lines
were still visible after I finished painting.
Once
I had the fuselage spine and nose fully covered in paint, I began painting
the fuselage with Revell 49 (I don´t go after perfect accuracy) with many
water-thinned coats. That actually was something good, since the panel lines
were still visible after I finished painting.
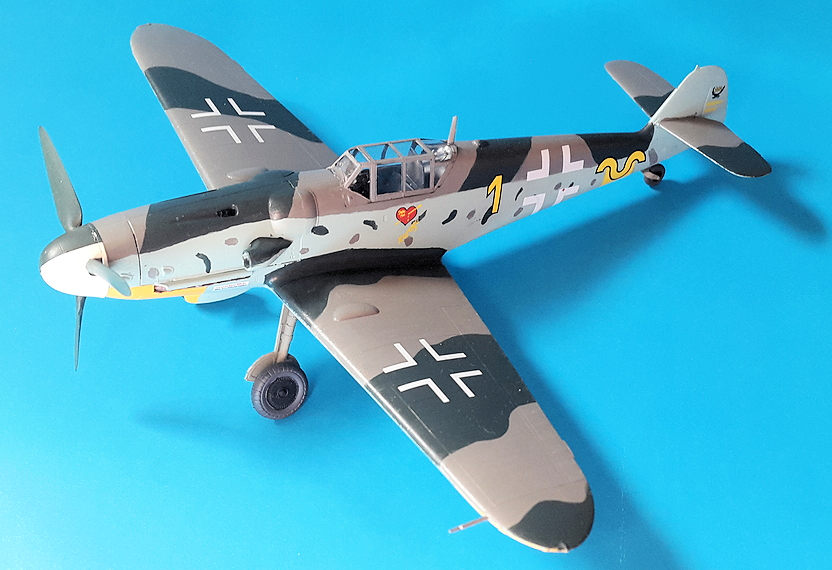
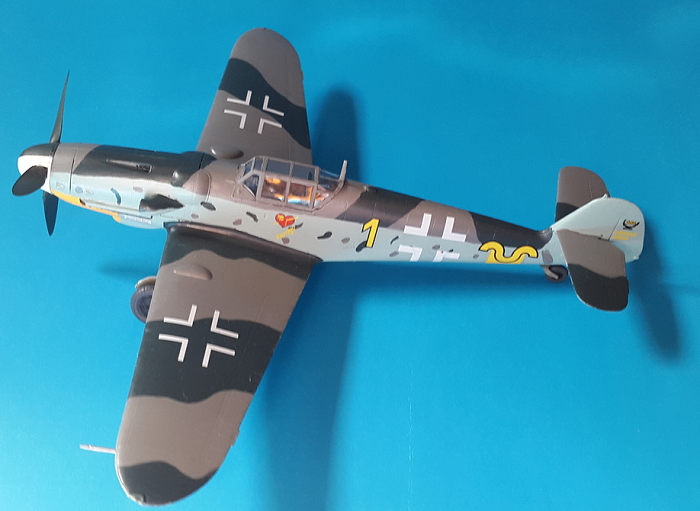
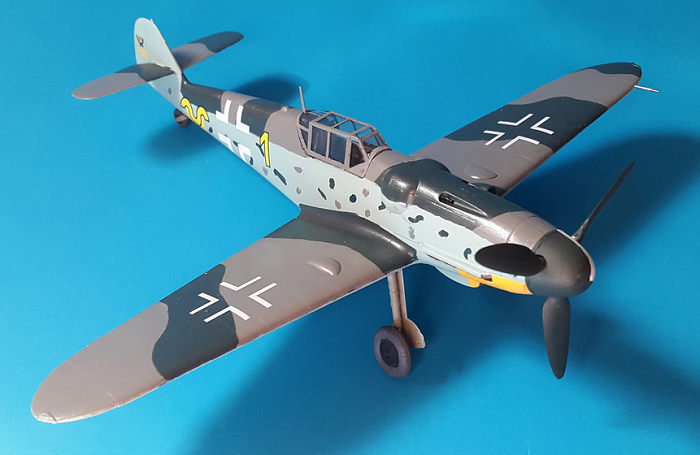
I used Hasegawa´s painting instructions to paint the mottling. I should have also looked better on the picture I had of the real aircraft, because I missed painting the mottling on the empennage (the mottling is even included on the kit´s painting instructions).
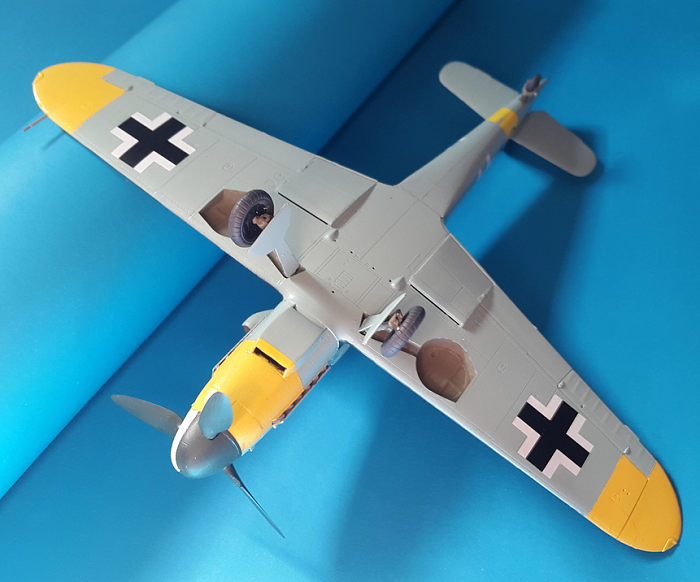
After letting the fuselage dry, I painted the wings, first with the lighter RLM 75, and then with RLM 74. I do like the wavy camouflage scheme of the Hasegawa instructions more than the sharp edge one on the Hobby Boss instructions. I painted the underside next with Revell 49, let that dry, and went on to paint the yellow bits for an Eastern front aircraft. These were painted with Revell 15. With the aircraft fully painted and dry, and added two coats of gloss varnish.
I had read on two articles here that Hobby Boss´s decals were thin and stuck instantly above the surface of the model, so I began the decalling with a warning stencil that goes just above the oil cooler, and I didn´t have any issues with it.
 The
bigger decals followed, and they did tend to stick to the surface, but
brushing the area with some water prevented any permanent effects, and they
were moved to their positions without problems. The only decals that were
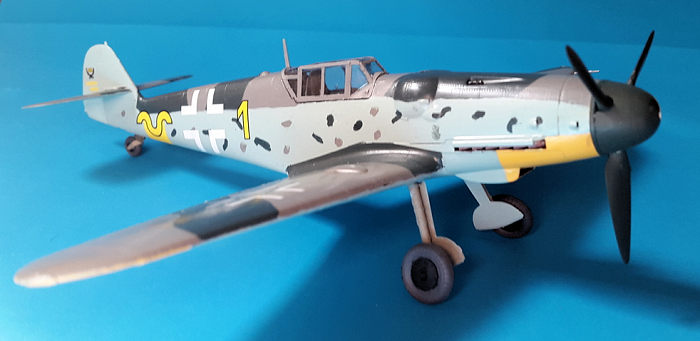
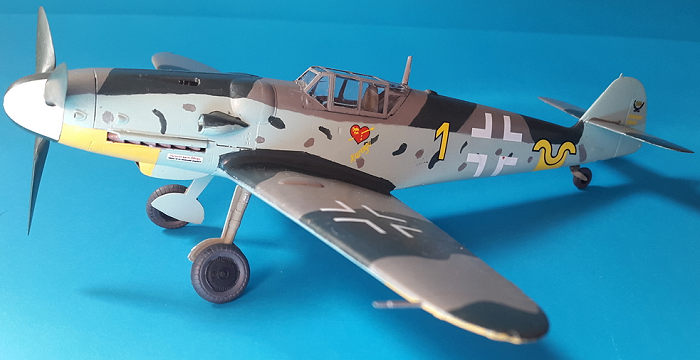
troublesome were the bars with the yellow wavy lines. They aren´t long
enough, and will end up crooked if you try to make them join at the centre
of the fuselage. With the aircraft
decalled, I brushed two coats of Revell´s flat varnish and left it to dry.
The
bigger decals followed, and they did tend to stick to the surface, but
brushing the area with some water prevented any permanent effects, and they
were moved to their positions without problems. The only decals that were
troublesome were the bars with the yellow wavy lines. They aren´t long
enough, and will end up crooked if you try to make them join at the centre
of the fuselage. With the aircraft
decalled, I brushed two coats of Revell´s flat varnish and left it to dry.
The landing gear came next, and it doesn´t have a very positive attachment point, only a pin over a hole, so you´ll have to hold it until the glue sets. Once both gears were dry, I glued the tailwheel, the main gear doors, and the propeller. The canopy was the last part to be added. It was painted in RLM 75 and later glued with clear glue to the cockpit opening. The small aileron mass balances were left on their sprue because I didn´t want to lose them, should I ever move my model from my shelf.
| CONCLUSIONS |
This is my second 109, and I have to say that I had a good experience building it. It was cheap, easy to assemble, and gave me some nice spare parts, and had decals for THE top scoring ace of all time.
I can´t really comment about accuracy, but the upper wing halves don´t have the panel lines that start in the middle of the slats, a panel line that appears in the Bf 109Gs and later variants. This is something that is carried over from the Hobby Boss Bf 109F.
Unless you want to build a Bf 109G-6/R6, don´t open the holes for the underwing cannons.
Make sure to also check the Strike Witches anime, I thought it was pretty good. There´s a lot of fanservice though.
| REFERENCES |
http://www.letletlet-warplanes.com/wp-content/uploads/2014/11/Bf109G.pdf
https://modelingmadness.com/scott/axis/previews/hasegawa/72/52179.htm
August 2018
Copyright ModelingMadness.com
If you would like your product reviewed fairly and fairly quickly, please contact the editor or see other details in the Note to Contributors.
Back to the Main Page Back to the Review Index Page Back to the Previews Index Page