Eduard/Alley Cat 1/32 Bf-109T
| KIT #: | 3003/32007C |
| PRICE: | £48.00/20.00 |
| DECALS: | Six options |
| REVIEWER: | Frank Reynolds |
| NOTES: | Eduard kit is profipack |
| HISTORY |
 The
Messerchmitt 109T was intended to provide the fighter element of an air group
for Germany’s aircraft carrier the Graf Zeppelin. It was an adaptation of the
109E airframe for shipboard operations. featuring a wing extended by about six
feet with small retractable spoilers to the upper surfaces, a deck landing hook
and catapult hooks. The German Carrier project was beset by delays, and was
never completed before the end of World War 2. A handful of carrier-capable
109T-1 s were built but the majority were a de-navalised version , the 109T-2,
that had provision for an underbelly 300 litre drop tank, or four SC50 bombs or
one SC 250 bomb. Ten of the early machines were built by Messerchmitt and some
sixty built by Fieseler. Comparable in performance to a 109E-7, the type was
issued to Luftwaffe fighter units in occupied Norway where its unique shorter
take off characteristics were suited to the small mountain airfields in theatre,
primarily with squadrons JG 11 and JG 77. A handful saw limited service over the
Reich as night fighters. The 109T lingered on in service until 1944 when the
inevitable attrition of the relatively small fleet saw the type become extinct.
The
Messerchmitt 109T was intended to provide the fighter element of an air group
for Germany’s aircraft carrier the Graf Zeppelin. It was an adaptation of the
109E airframe for shipboard operations. featuring a wing extended by about six
feet with small retractable spoilers to the upper surfaces, a deck landing hook
and catapult hooks. The German Carrier project was beset by delays, and was
never completed before the end of World War 2. A handful of carrier-capable
109T-1 s were built but the majority were a de-navalised version , the 109T-2,
that had provision for an underbelly 300 litre drop tank, or four SC50 bombs or
one SC 250 bomb. Ten of the early machines were built by Messerchmitt and some
sixty built by Fieseler. Comparable in performance to a 109E-7, the type was
issued to Luftwaffe fighter units in occupied Norway where its unique shorter
take off characteristics were suited to the small mountain airfields in theatre,
primarily with squadrons JG 11 and JG 77. A handful saw limited service over the
Reich as night fighters. The 109T lingered on in service until 1944 when the
inevitable attrition of the relatively small fleet saw the type become extinct.
| THE KIT |
 Alley
Cat’s conversion comes well packed in a small pizza-type box that reveals ten
resin parts that are cleanly cast in a pale grey showing good subtle engraved
surface detail that matches well to Eduard’s plastic. New parts are provided for
the enlarged wings, extended ailerons and wing slats and the large underbelly
fuel tank . A small etched fret contains the catapult hooks and the same fret
serves as a pattern for scribing the spoilers to the top wing .
Alley
Cat’s conversion comes well packed in a small pizza-type box that reveals ten
resin parts that are cleanly cast in a pale grey showing good subtle engraved
surface detail that matches well to Eduard’s plastic. New parts are provided for
the enlarged wings, extended ailerons and wing slats and the large underbelly
fuel tank . A small etched fret contains the catapult hooks and the same fret
serves as a pattern for scribing the spoilers to the top wing .
There are three pages of instructions including colour profiles of the six options. The well printed decal sheet by Fantasy Printshop offers unit codes and badges. National markings and stencilling are to be obtained from the kit’s decal sheet
Eduard’s 1:32 scale 109Es have a justified reputation for being of good quality. This E-4 came from their Profipack range which includes full colour instructions, canopy masks and two frets of coloured etch that include instrument panels and set belts. Six major parts frames and two minor ones were neatly bagged and the parts were found to be nicely detailed with simple recessed panel lines.
The Eduard ‘109 kit has been around in different guises for about 15 years but seems to be getting scarce. None were listed on the manufacturers’ website and I ended up getting one from an internet vendor based in France. The parts are moulded in a light Olive Drab plastic. The was noticeable flash around the major components and this suggests that the mould are getting a little tired.
| CONSTRUCTION |
This is a conversion of medium difficulty since the Eduard wing structure a has to be cut about and new resin outer wing panels grafted on. Alley Cat provides the conversion parts in resin and etch, together with decals and conversion notes. Eduard’s Bf109E-4 is the recommended donor kit since it features the square-edged canopy of the later E versions. I used a Profipack edition of the kit but a less costly Weekend version can be found.
 Some
forward planning is useful for a project of this kind. Like most of my build
projects I prefer to construct everything closed up with hatches and control
surfaces fixed. Eduard give the option for an open cowling with a full engine on
view and all of these parts were eliminated. The upper nose cowl is a
substantial one piece unit which simplifies the build. The exhaust stubs are
moulded individually and this is a bit of a fiddle especially since they must be
installed early in the build stage and need to be masked off when painting the
assembled airframe.
Some
forward planning is useful for a project of this kind. Like most of my build
projects I prefer to construct everything closed up with hatches and control
surfaces fixed. Eduard give the option for an open cowling with a full engine on
view and all of these parts were eliminated. The upper nose cowl is a
substantial one piece unit which simplifies the build. The exhaust stubs are
moulded individually and this is a bit of a fiddle especially since they must be
installed early in the build stage and need to be masked off when painting the
assembled airframe.
The resin parts were washed in a mild detergent to remove mould release and various pour stubs removed with a fine-toothed craft saw. These are essentially straight lines cuts that require minimal clean up with a sanding stick. It is a good idea to wear a filter mask during these operations since the resin dust can should not be inhaled. Next the parts that Eduard call out as “not for use” were consigned to the spares box.
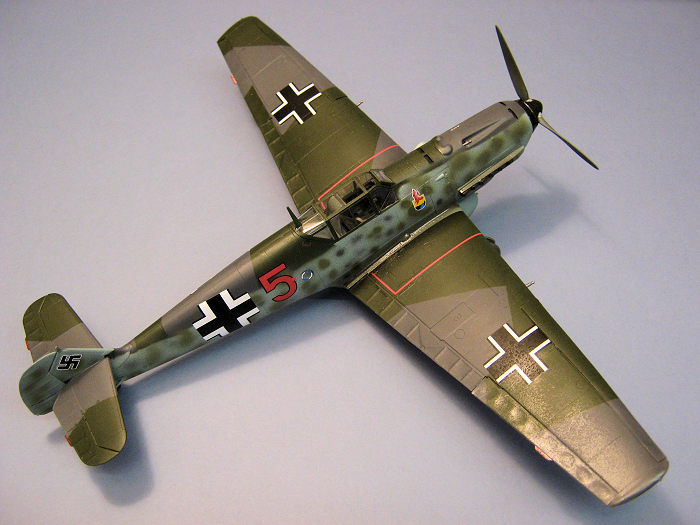
The Alley Cat Instructions give clear advice as to the cut lines required to the upper and lower wing sections so as to incorporate the substantial one piece outer wing panels. I chose to insert some brass wire pins into the end of the resin wing sections to stabilise the joints. Having carried out basic modifications to the wing parts and cleaned up the joints for dry fitting I could then follow the build sequence sat out in Eduard’s instructions.
 The
fuselage is built as per the standard kit instructions without significant
modification.
The
fuselage is built as per the standard kit instructions without significant
modification.
Eduard’s cockpit is well designed and sufficiently detailed for most. The cockpit side walls have moulded in ribs and a series of chains, levers and boxes are glued on to provide good three-dimensional detail. The basic colour of the cockpit area is RLM Grau 02 and most of the parts were airbrushed in Tamiya XF-22 while still on the parts frame. The bucket seat is located on convincing brackets and the rudder pedals built up from a plastic swivel section with etch metal footboards. The very distinctive flap lever and trim wheels are located next to the seat along with an oxygen bottle. The basic cockpit is completed with a pedestal mounted instrument panel which is built up from a sandwich of painted etch parts. Eduard’s instructions helpfully include detailed notes on the colours of individual cockpit parts. The seat belts were built up from the etch parts provided and tacked onto the seat with super glue.
Eduard provides a firewall and shelf for the nose guns and associated ammunition boxes. Only the bulkhead and shelf, unadorned, are required when the engine mouldings are omitted so the raised detail was cut away. The cockpit assembly and firewall was glued into the right hand fuselage half, leaving the left half unglued while the main cowling was test fitted. The fuselage halves were glued together and left overnight to set.
The truncated lower wing
panel was glued to the fuselage assembly and left for a couple of days to
stabilise. The resin and styrene sections of the outer wing were tacked together
with fast setting superglue then the joint was strengthened with a smear of
epoxy resin to bind the brass wire to the plastic. The wings were fixed together
with standard polystyrene glue with a little superglue worked into the
styrene/resin joint. This was set aside for a few days to cure. When everything
seemed to be set and stabilised I set about filling any imperfections. The
well-worn mouldings around and under the nose a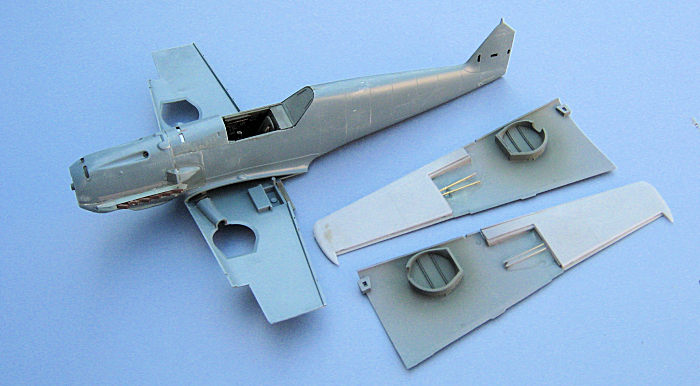 nd
wing centre section needed some filler, as did the joint for the extended wing.
For some reason, at least in this modelling household, resin to styrene joints,
however snug at the dry fitting stage, always demand some filling during the
build.
nd
wing centre section needed some filler, as did the joint for the extended wing.
For some reason, at least in this modelling household, resin to styrene joints,
however snug at the dry fitting stage, always demand some filling during the
build.
I normally turn to Squadron Green Putty for the job, my go-to filler for decades. I have, however exhausted my supply and a trawl of the web showed me no obvious supplier in Europe. On advice from my LHS I tried Deluxe Materials Perfect Plastic Putty. It went on well enough, with a nice buttery texture but seems to require 24 hours drying and on completion had sunk slightly into the joints. It was overlaid with a smear of Ammo/Mig acrylic Arming Putty – even softer than the Deluxe Materials stuff and really only useful for light scratches but it did the trick. The rest of the construction rolled along nicely, aided by Eduard’s well designed and well-engineered parts. The tailplane horizontal structures consist of upper and lower panels with single piece elevators that could be displayed deflected but I chose to glue them in the neutral position. The tail support struts and rudder were set aside to be installed after painting. The wings were completed with the installation of the new resin ailerons and leading edge slats glued shut.
The canopy and windscreen were masked up with the Eduard pre-cut masks and the canopy fixed in place with Humbrol Clearfix
| COLORS & MARKINGS |
After some 15 years of faithful service my Iwata HP-C airbrush has been transferred to the reserve and replaced with a sparkling new Ammo/Mig Airacobra which is apparently based upon the Badger/Thayer line of airbrushes. It has a 0.3m nozzle and a 5ml paint cup. Typical of the Ammo product range in comes luxuriously packaged in a cute tin box with transparent lid to show off the machine. I paid £125-00 for mine.
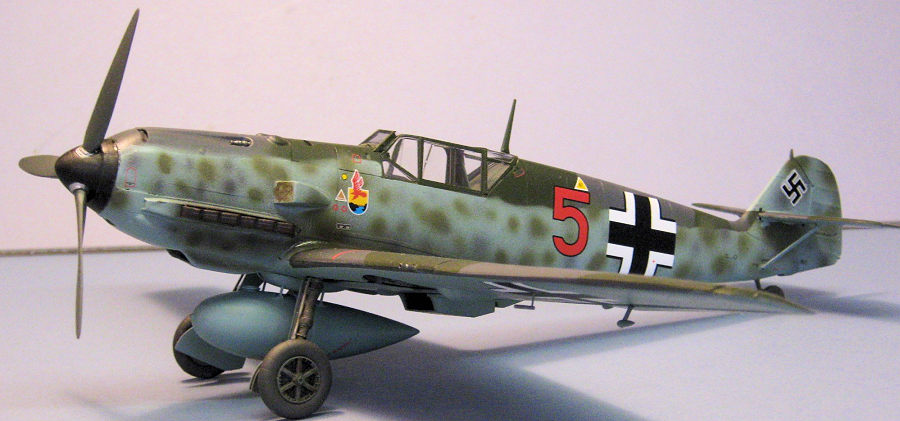
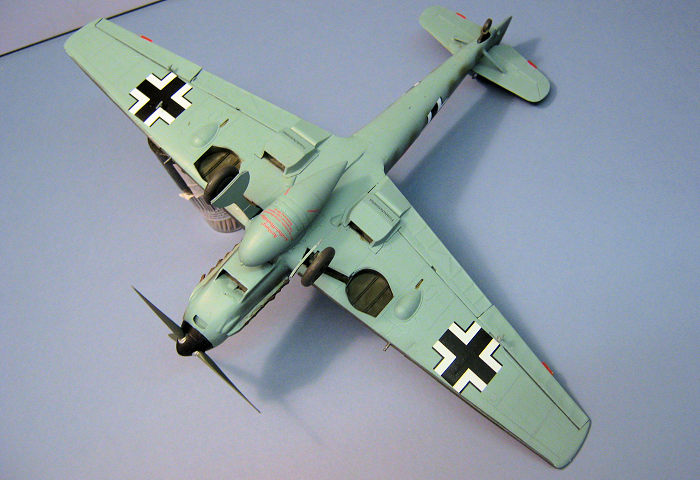
The basic airframe and cockpit area was sprayed over with Dark Grey auto primer from a rattle can which gives a dark grey interior to the canopy framing. The camouflage schemes offered for each decal choice is the standard one for mid/late war 109s, being RLM 74 Green (Tamiya XF-13), RLM 75 Dark Grey (XF-77) and RLM 76 Light Grey (XF-23). I chose “Red 5” of JG 77, Norway, late 1941.
 The Tamiya
acrylics were thinned about 30% with Tamiya’s own thinner and the airbrush set
at around 17 PSI. The demarcation between upper and lower surface colours on the
fuselage side was achieved by cutting a mask from thin card that was trimmed to
shape with a sharp knife blade. When the main colours had dried they were masked
off with Tamiya tape while the sides were mottled in 74 and 75 with the airbrush
set at about 12 PSI. I found the new airbrush to be just right for my needs,
well engineered, well balanced and easy to use (and apparently made in the
USA!).
The Tamiya
acrylics were thinned about 30% with Tamiya’s own thinner and the airbrush set
at around 17 PSI. The demarcation between upper and lower surface colours on the
fuselage side was achieved by cutting a mask from thin card that was trimmed to
shape with a sharp knife blade. When the main colours had dried they were masked
off with Tamiya tape while the sides were mottled in 74 and 75 with the airbrush
set at about 12 PSI. I found the new airbrush to be just right for my needs,
well engineered, well balanced and easy to use (and apparently made in the
USA!).
The airframe was sealed with a hand brushed coat of Future/Klear floor polish to provide a gloss base coat for decalling. The basic decals from the Edward kit went on easily and required just a little Micro Sol and Micro Set to help them settle down. Similarly, the Alley Cat decals went on without fuss
An airbrushed coat of Xtracrylix Matt Varnish was overlaid and a quick blast of Tamiya X-19 Smoke down the sides of the engine and over the wing roots completed the paint job.
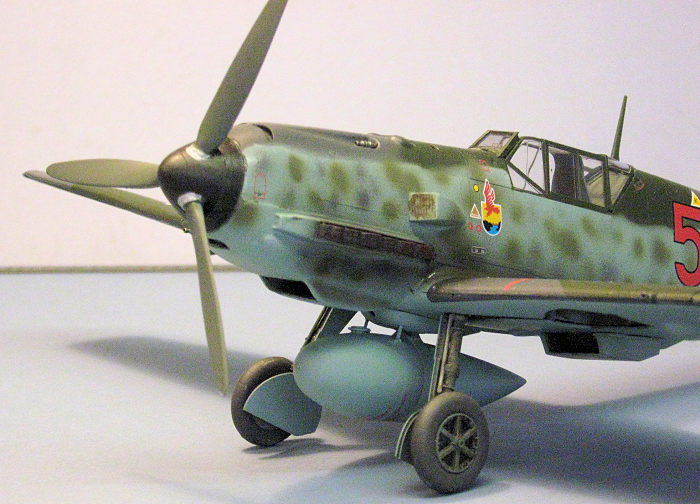
Assembly was finished with the installation of the propeller, rudder, landing gear and tail support struts. I carried out some extra work to cover one known bug with the Eduard kit – the over-long landing gear legs. Following a suggestion in one of Tom Cleaver’s builds I cut and shortened the main gear legs by about 1/8” strengthening the joint with a short piece of brass wire.
The canopy masking was stripped away and the job was complete.
| CONCLUSIONS |
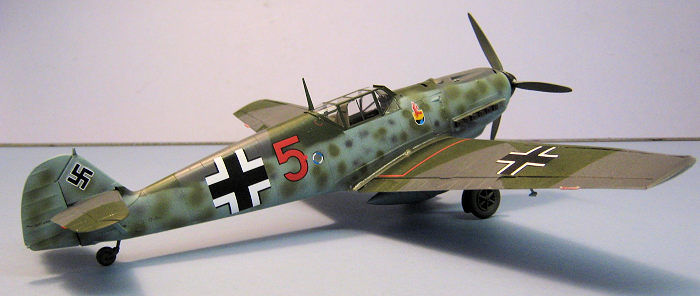
The BF109T is an elegant machine compared with the standard early 109 and the mid/late war colours add to an unusual look for an “E-based” airframe.
Given that the 109 had a reputation for difficult take-off and landing characteristics on that narrow track landing gear, it would surely have been a challenge to operate from a carrier deck and that side-hinged canopy would not have given any confidence to navy pilots when, in that period, other navies favoured take off and landing with the canopy slid open. It stands as an interesting “What If” in terms of its original purpose and, as a land-based operational type, an unusual addition to my collection of 109 derivatives, now numbering 22 models.
Not too difficult a conversion and recommended by me.
| REFERENCES |
The internet; Alley Cat’s instructions.
12 September 2019
Copyright ModelingMadness.com.
Kit courtesy of my wallet
If you would like your product reviewed fairly and fairly quickly, please contact the editor or see other details in the Note to Contributors.
Back to the Main Page Back to the Review Index Page Back to the Previews Index Page