Revell/Alley Cat 1/32 Bf-109H
| KIT #: | 04665/AC32037C |
| PRICE: | £40.00 total |
| DECALS: | One option |
| REVIEWER: | Frank Reynolds |
| NOTES: | Eduard JX043 Canopy masks £4-30; Scale Aircraft Conversions 32078 metal landing gear £12-00 |
| HISTORY |
The Messerschmitt 109H was an attempt to provide the Luftwaffe with a
dedicated high altitude fighter. Historical information seems to be thin on the ground. Even the internet
seems to have little other than pictures of models and artists’ impressions. The
first reference that I found was in the William Green “Fighters” book of 1960
and subsequent references seem to do little more than repeat
 the information
published by Green at that time. According to Green a “small number” of Bf
109H-1s were used for service evaluation by a fighter-reconnaissance unit in
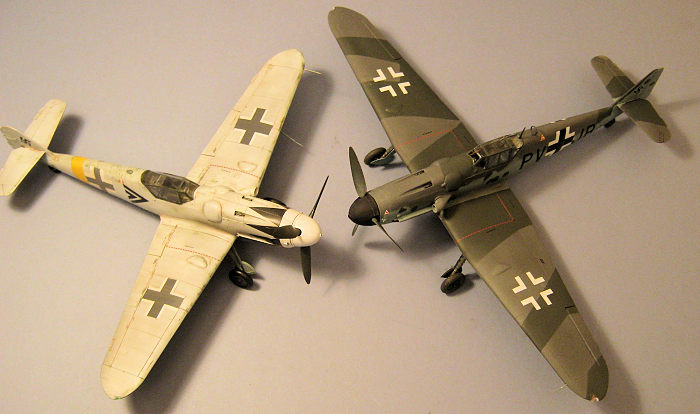
1944 from Guyancourt , France, near Paris. The type was fitted with an enlarged
constant-chord wing centre section, with essentially standard ‘109 outer wing
panels, complete with landing gear units fixed outboard, to provide a total wing
span of 39ft 1in. Armament consisted of one engine mounted 30mm MK 108 cannon
and two 7.9mm MG 17 machine guns on the upper cowl. It was capable of operations
up to 47,000 feet and the cabin was pressurised.
the information
published by Green at that time. According to Green a “small number” of Bf
109H-1s were used for service evaluation by a fighter-reconnaissance unit in
1944 from Guyancourt , France, near Paris. The type was fitted with an enlarged
constant-chord wing centre section, with essentially standard ‘109 outer wing
panels, complete with landing gear units fixed outboard, to provide a total wing
span of 39ft 1in. Armament consisted of one engine mounted 30mm MK 108 cannon
and two 7.9mm MG 17 machine guns on the upper cowl. It was capable of operations
up to 47,000 feet and the cabin was pressurised.
The type is reported to have unacceptable levels of wing flutter in a high speed dive so development was abandoned in favour of the Focke Wulf Ta 152H
| THE KIT |
This project was prompted when I revisited one of World War 2s most notable pilot autobiographies, “The Big Show” by Pierre Closterman. In it he refers to being based with the RAF in the North of Scotland in January 1944 and intercepting an Me 109H at 40,000 feet while flying a Spitfire VII.
One anomaly that found in the reference material concerns the wing
configuration. In the Green book of 1960, the three view drawings by Dennis
Punnet show the dihedral beginning at the main wing root and a straight wing
structure from root to tip. All other references, including Alley Cat, show a
flat centre section and a dihedral bre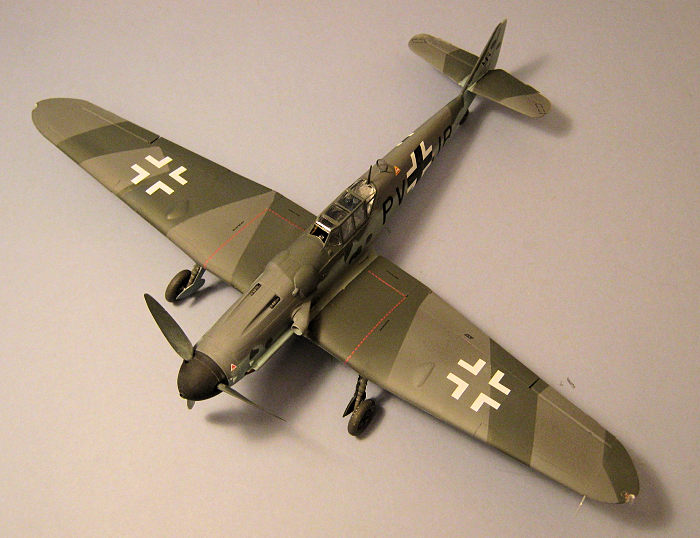 ak at the point where the landing gear
legs are fixed. The Punnet drawings also show a strut-braced horizontal tail
which is curious since even the pre-production ‘109H-0s were derived from 109F
airframes which did not have tail struts.
ak at the point where the landing gear
legs are fixed. The Punnet drawings also show a strut-braced horizontal tail
which is curious since even the pre-production ‘109H-0s were derived from 109F
airframes which did not have tail struts.
I decided to go with what Alley Cat had provided.
Alley Cat’s conversion comes well packed in a small pizza-type box that reveals 21 resin parts that are cleanly cast in a pale grey and one in clear, showing good subtle engraved surface detail that matches well to Revell’s plastic. The contents are dominated by the massive one-piece wing centre section and a two-part tail fin/rudder assembly. The noticeable weight of these parts persuaded me that Scale Aircraft Conversions’ cast metal main gear legs and tail wheel forks would be a good idea for extra support.
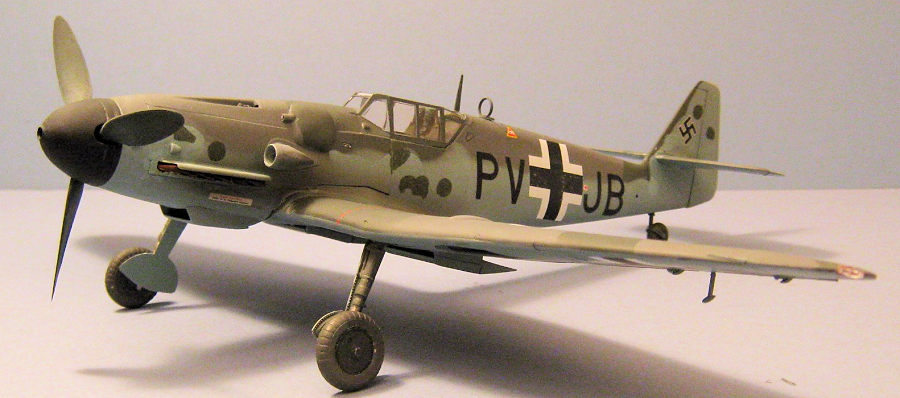
National markings and airframe stencilling are to be obtained from Revell’s decal sheet. Only one choice of finish is offered by AlleyCat and a colour three view drawing shows an airframe finished in the common Luftwaffe warpaint of RLM 74 Graugrun, 75 Grauviolett and 76 Lichtblau. Alley Cat cautions that the scheme is “at best and educated guess”.
| CONSTRUCTION |
Some forward planning is useful for a project of this kind. Like most of my build projects I prefer to construct almost everything closed up with hatches and control surfaces fixed.
The resin parts were washed in a mild detergent to remove mould release and various pour stubs removed with a fine-toothed craft saw. These are essentially straight lines cuts that require minimal clean up with a sanding stick. It is a good idea to wear a filter mask during these operations since the resin dust can should not be inhaled.
Next, any parts that Revell call out as “not for use” were consigned to the spares box.
The Alley Cat Instructions give clear advice as to the cut lines required to the fuselage and lower wing sections so as to incorporate the substantial centre section. The original tail end was cut off and discarded.
Having carried out basic modifications to the fuselage and wing parts and
cleaned up the joints for d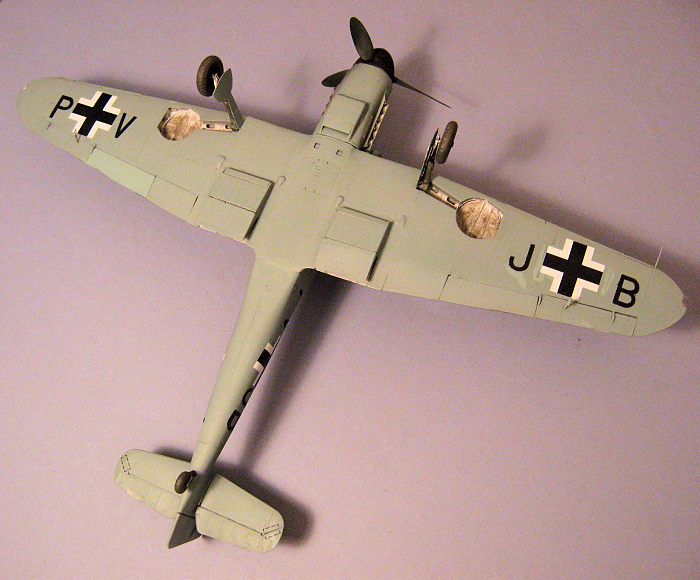 ry fitting I could then plan a build sequence based
on Revell’s instructions.
ry fitting I could then plan a build sequence based
on Revell’s instructions.
The fuselage is built as per the standard kit instructions without significant modification. The rear wall of the cockpit tub is replaced with a resin casting that incorporates a pair of oxygen bottles and the seat armour with a resin airtight bulkhead. Two further oxygen bottles are attached to the rear bulkhead.
A few sub-assemblies are always a good way to kick start a build and I began with the propeller unit. The blades were sprayed in RLM 70 Schwarzgrun using Tamiya XF-27 Black Green. The spinner was airbrushed in Tamiya XF-1 Flat Black. The propeller was then assembled with glued joints, trapping the blades in place.
Next came of the undercarriage. The metal main gear legs are cast in one piece requiring only the link arms to be tacked in place with cyano glue. The legs were painted RLM Grau 04 to the main legs, with the sliding sections in Silver.
The plastic main wheels consist of inner and outer halves with the inners having an inset hub. The hubs were painted in Schwarzgrau 66 and the tyres in Tamiya XF-85 Rubber Black. The metal tailwheel fork is a one piece casting and Revell’s tail wheel simply clips into place. The leg and hub were painted Grau 02 and the tyre Rubber Black.
Main construction begins with the cockpit tub and Revell provides a reasonable set of basic mouldings which builds up as a main floor, rear bulkhead with seat pan and well detailed cockpit side walls with throttle, trim wheels and separately moulded pipework and cables. It was a simple matter to swap out the replacement resin bulkheads and they blended with Revell’s plastic without fuss. The plastic parts have a representation of seat belts moulded in although I used a set of the excellent HGW models etch and fabric seat belts no 132011 which is a generic set for German World War 2 types.
The basic colour of the cockpit interior was sprayed in Xtracrylix XA1203
RLM66 Schwarzgrau Matt. A touch of colour was introduced by picking out the
pipes and wires to the side walls in yellow, silver and blue according to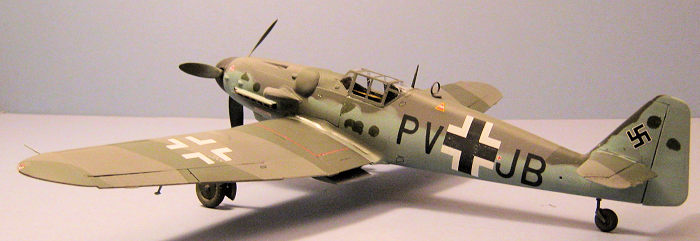 Revell’s call outs. The instrument panel was sprayed Schwarzgrau Matt and
finished with the kit-supplied decal for the instrument panel. The locating lugs
for the wing spar located under the cockpit floor were cut away since the spar
would not need to be installed in this area.
Revell’s call outs. The instrument panel was sprayed Schwarzgrau Matt and
finished with the kit-supplied decal for the instrument panel. The locating lugs
for the wing spar located under the cockpit floor were cut away since the spar
would not need to be installed in this area.
The flat centre section casting was fettled into position, secured with slow setting two-part epoxy glue and left for a week to cure.
As supplied the conversion offers no connection between the flat centre section and Revell’s wing assembly other than a butt joint. This made me nervous of a later structural failure so the plastic main spar was cut in two down the centre line and each half glued into place under the plastic inner upper wing sections. Revell provide positive locations for this. Next, I hacked a crude slot into each side of the resin centre section, about 2mm wide, running along the line of the wing spar. This was wide enough to permit a degree of fettling and juggling while the upper outer wing shells were aligned with the resin on the upper surfaces, ensuring there was a satisfactory amount of dihedral. The outer wing shells and spars were tacked in place with superglue and after a further curing period the ragged slots in the wing were packed with two-part epoxy putty to secure the joints.
Revell’s lower inner wing sections require attention by the removal of the
radiator mouldings and the area that normally sits under the fuselage centre
section. Alley Cat provides a plain rectangle of cast resin to fill the gap but
on this occasion a simple copy panel in 20thou plastic card seemed to be ea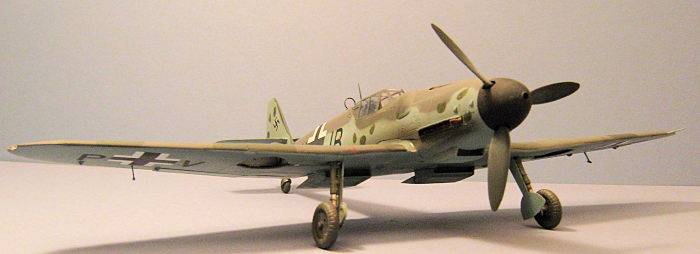 sier.
The rest of the main wing was assembled to standard kit instructions with the
wheel well parts firmly stabilising the structure and the upper and lower panels
were firmly taped into place and the new rear fuselage/fin fixed with cyano;
again the structure was set aside for a few days to cure.
sier.
The rest of the main wing was assembled to standard kit instructions with the
wheel well parts firmly stabilising the structure and the upper and lower panels
were firmly taped into place and the new rear fuselage/fin fixed with cyano;
again the structure was set aside for a few days to cure.
It took about a week of careful building to put the rest of the wing structure together. The resin split flaps to the trailing edge of the new centre section were carefully aligned with the wing root and secure with cyano. The redundant plastic trailing edge flaps were installed to line up with the plated over section, followed by the mid-wing flaps, ailerons and leading edge slats. The plastic horizontal tail parts were added to the tail fin and the large resin rudder completed the basic build. The canopy was masked off with Eduard’s kubuki tape masks and the whole airfame coated in grey auto primer from a rattle can in order to establish where any scratches or open joints required filler. There were plenty of them and a liberal application of Revell Plasto soft filler was needed.
The canopy and windscreen were masked up with the Eduard pre-cut masks and the canopy fixed in place with Humbrol Clearfix
| COLORS & MARKINGS |
The camouflage scheme is the familiar one for mid/late war 109s, being RLM 74 Green (Tamiya XF-13), RLM 75 Dark Grey (XF-77) and RLM 76 Light Grey (XF-23).
The Tamiya acrylics were thinned about 30% with Tamiya’s own thinner and the airbrush set at around 17 PSI. The demarcation between upper and lower surface colours on the fuselage side was achieved by cutting a mask from thin card that was trimmed to shape with a sharp knife blade. When the main colours had dried they were masked off with Tamiya tape while the sides received minimal mottled in 74 and 75 with the airbrush set at about 12 PSI.
 The vinyl masks for the fuselage were carefully positioned and more masking
applied to the airframe so that a quick blast of Black paint created the
fuselage code letters.
The vinyl masks for the fuselage were carefully positioned and more masking
applied to the airframe so that a quick blast of Black paint created the
fuselage code letters.
The airframe was sealed with a hand brushed coat of Future/Klear floor polish to provide a gloss base coat for decalling. The basic decals from the Revell kit, national markings and airframe stencils went on easily and required just a little Micro Sol and Micro Set to help them settle down. The tail swastika came from an Xtradecal generic sheet.
An airbrushed coat of Xtracrylix Matt Varnish was overlaid and a quick blast of Tamiya X-19 Smoke down the sides of the engine and over the wing roots completed the paint job.
Assembly was finished with the installation of the propeller, rudder, landing gear and aerials.
The canopy masking was stripped away and the job was complete.
| CONCLUSIONS |
The original has so little reference material that I could find, so it is something of a “What If”, if not a “Might Have Been”’ It is not a click and fit conversion and the wing requires a patient and steady build. The result is an unusual addition to a 109 collection. Parked up in my showcase it looks distinctively different from my regular 109s. I rather like but it took twice as long as I expected. Recommended for fans of the unusual who maybe have carried out one or two simpler conversions.
| REFERENCES |
Alley Cat’s instructions.
Warplanes of the Second World War, Fighters Vol 1, by William Green, MacDonald, London, 1960.
The Fighting 109, by Uwe Feist, Arms and Armour Press.
Messerschmitt Bf 109, The Operational Record, by Jerry Scutts. Airlife 1996.
7 May 2021
Copyright ModelingMadness.com. All rights reserved. No reproduction without express consent.
Kit courtesy of my wallet.
If you would like your product reviewed fairly and fairly quickly, please contact the editor or see other details in the Note to Contributors.