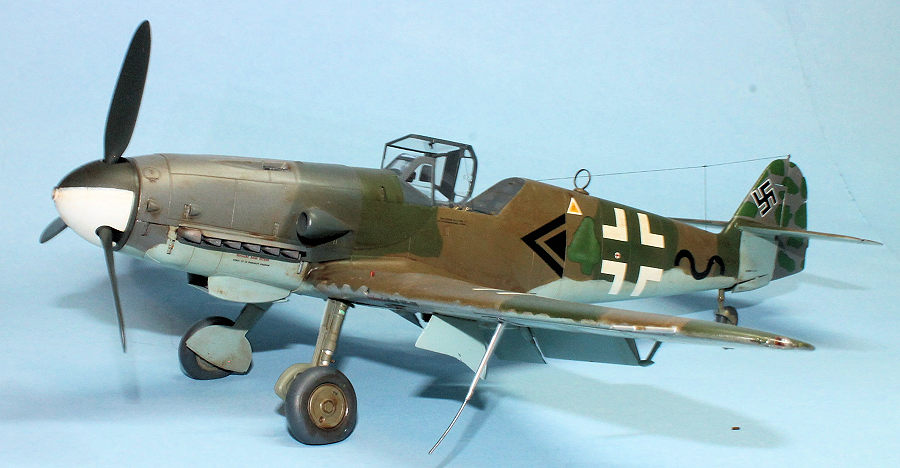
Kotare 1/32 Bf-109K-4
| KIT #: | K32009 |
| PRICE: | $109.00 |
| DECALS: | Three options |
| REVIEWER: | Otis Goodin |
| NOTES: | Great kit, lots of information provided, and no fit problems anywhere |
| HISTORY |
The Messerschmitt Bf109K-4 was the last in a long line of Messerschmitt 109 fighters going all the way back to the Spanish Civil War in the late 1930s. With a need to standardize and streamline production among the many variants in service, the K-4 version was introduced in very late 1944 and early 1945, with a goal to integrate the best features of previous 109G fighters. The K-4 used a pressurized cabin, a more aerodynamic cowling, a larger vertical tail, bigger main wheels with new gear doors, new wing bulges to accommodate the larger tires, heavier armament, and a retractable tailwheel to improve ground handling. Unfortunately, the tailwheel improvements were inconsistent at best, with many aircraft discarding the tailwheel doors. The K-4 also featured a new instrument panel based on the Me262 version.
 Powered by the Daimler-Benz DB 605D inverted V-12
engine, the “K” could achieve speeds of more than 440 mph under ideal
conditions, making it one of the fastest piston-engine fighters of the war. It
was armed with a 30mm MK 108 cannon firing through the propeller hub and was
supplemented by two 13mm MB 131 machine guns mounted above the engine.
Powered by the Daimler-Benz DB 605D inverted V-12
engine, the “K” could achieve speeds of more than 440 mph under ideal
conditions, making it one of the fastest piston-engine fighters of the war. It
was armed with a 30mm MK 108 cannon firing through the propeller hub and was
supplemented by two 13mm MB 131 machine guns mounted above the engine.
The 109K was primarily used to defend against Allied bombing raids. Pilots appreciated its exceptional speed, climb rate, and high-altitude performance, although the aircraft could be difficult to fly and suffered from shortages of parts, fuel and pilots. Because of production limitations caused by Allied bombing and fuel shortages, only about 1,200 K-4 were ever completed. Many of the Luftwaffe pilots in this late stage of the war were inexperienced and suffered large losses at the hands of Allied pilots flying P-51s, P-47s, and advanced Spitfires. Allied fighters were also destroying aircraft on the ground, leading many German bases to conceal their aircraft in forests. This led to many K-4s being painted in green and brown shades to better hide them.
The Bf109K-4 represented a last gasp attempt at turning the tide from inevitable defeat, but under relentless Allied pressure it was unable to do so.
| THE KIT |
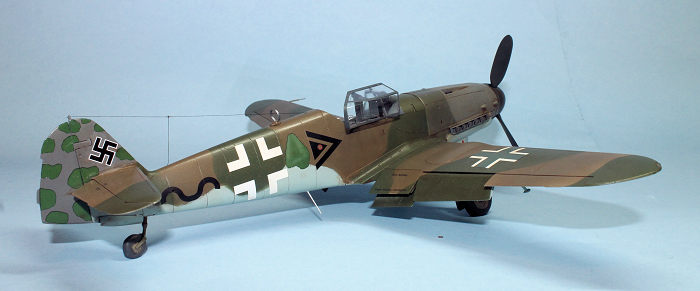
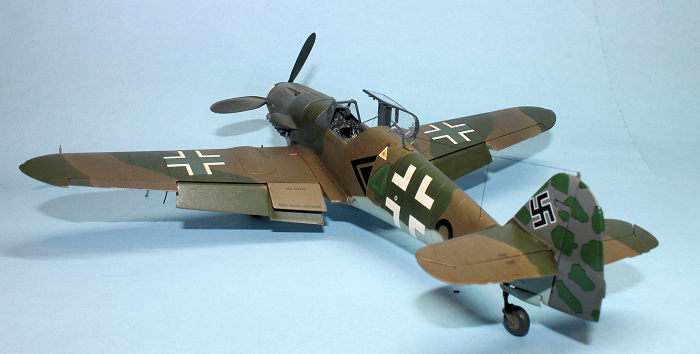
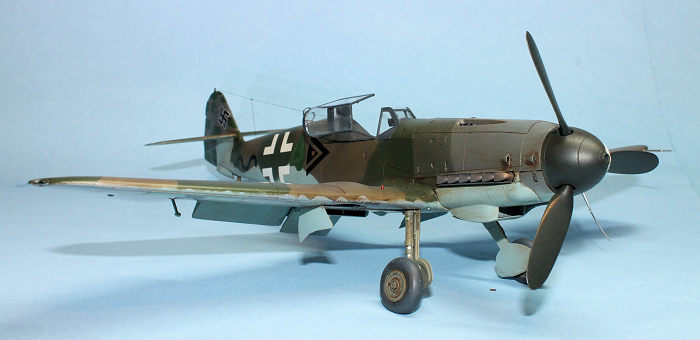
Kotare introduced the Bf109K-4 kit in July 2025. The kit contains 139 injection molded plastic parts, with options for 3 different aircraft: (1) Bf 109K-4 “Black 28” flown by Walter Kopp in January 1945, (2) Bf 109K-4 “USAAF”, a captured aircraft with US markings in May-June 1945. You can also build it with its original markings when captured. (3) The aircraft I chose to build, Bf 109K-4, flown by Adolf Borchers April-May 1945. This aircraft is finished in primarily RLM 81 Braunviolett and RLM 82 Light Green on the upper surfaces. The underside is finished in a possible combination of RLM 76 Light Blue, Aluminum, and possibly RLM 76 Light Green. I chose to just use Light Blue and Aluminum. There were few decent photos of this aircraft available, so some of its details are conjecture.
 The kit also includes a clear sprue with various clear
parts including a canopy that can be displayed open or closed, and several other
clear parts. Decals are by Cartograf and include markings for the three
aircraft, detailed instrument dials, and a complete set of stencils (probably
more than you need). One thing the decal sheet does not include is swastikas for
the vertical tail. There are incomplete markings to represent the swastikas, but
nothing that a modeler wanting to build an accurate 109K would ever use. The box
art also shows the 109K flying from an angle that doesn’t show the swastika.
Kotare is obviously sensitive about the whole Nazi element involved with this
aircraft, including a statement in the instructions acknowledging the use of
slave and concentration camp labor to build much of the Nazi war machine, as
well as a memoriam addressing the many victims. It’s an apology that also says
that if we are going to build a successful business, from time to time we are
going to be faced with issues like this. The statement is a bit awkward, as this
was definitiely an awkward issue for them to deal with. I don’t know if there is
an “unawkward” way to deal with it.
The kit also includes a clear sprue with various clear
parts including a canopy that can be displayed open or closed, and several other
clear parts. Decals are by Cartograf and include markings for the three
aircraft, detailed instrument dials, and a complete set of stencils (probably
more than you need). One thing the decal sheet does not include is swastikas for
the vertical tail. There are incomplete markings to represent the swastikas, but
nothing that a modeler wanting to build an accurate 109K would ever use. The box
art also shows the 109K flying from an angle that doesn’t show the swastika.
Kotare is obviously sensitive about the whole Nazi element involved with this
aircraft, including a statement in the instructions acknowledging the use of
slave and concentration camp labor to build much of the Nazi war machine, as
well as a memoriam addressing the many victims. It’s an apology that also says
that if we are going to build a successful business, from time to time we are
going to be faced with issues like this. The statement is a bit awkward, as this
was definitiely an awkward issue for them to deal with. I don’t know if there is
an “unawkward” way to deal with it.
If you want to build an accurate 109K, you’re going to have to add swastikas. I obtained mine from a sheet by ASK for 109K-4s.
The instructions are contained in a 44-page glossy booklet that contains lots of historical photos and information. They exceed anything I’ve ever seen, including the Wingnut Wings instructions.
| CONSTRUCTION |
Construction begins in the cockpit with an incredibly detailed layout of the various instrument panels and cockpit controls, with detailed references to the various decals needed to complete the internal markings. I began by spraying the cockpit surfaces in RLM 66 Black Gray, then applying Future to the individual dials and surfaces that would receive decals. Once dry, I then applied the decals where indicated, then another drop of Future to represent the glass covers for the various gauges and panels. I used 3D seatbelts from Quinta Studio. The numerous cockpit parts went together with no problem, then the instrument panel is fitted to the cockpit cover and attached to the completed cockpit. A few parts, such as the reflector gunsight and bulletproof front glass, are installed much later in construction.
 The completed cockpit is installed to the port side of
the fuselage, along with the rear wheel well and the propeller shaft. Once these
are installed, the starboard half of the fuselage is added. There is no engine,
but that doesn’t bother me because I prefer not to have to deal with them
anyway. The rear cockpit panel is added to the cockpit assembly, and the coaming
piece (E1) is added to the front of the cockpit section. The instructions call
for you to make sure that the lower edges of the coaming piece sit “slightly
proud” of the fuselage sides.
The completed cockpit is installed to the port side of
the fuselage, along with the rear wheel well and the propeller shaft. Once these
are installed, the starboard half of the fuselage is added. There is no engine,
but that doesn’t bother me because I prefer not to have to deal with them
anyway. The rear cockpit panel is added to the cockpit assembly, and the coaming
piece (E1) is added to the front of the cockpit section. The instructions call
for you to make sure that the lower edges of the coaming piece sit “slightly
proud” of the fuselage sides.
Construction continues on the fuselage by adding the lower front panel that contains the distinctive oil cooler. The supercharger intake is added to the front port side of the fuselage. Don’t worry about achieving a perfectly smooth look, as the instructions note that many panels fit less than perfectly on the actual aircraft, and weld lines were common in various spots. The centerline seams on the top and bottom of the fuselage were often visible, depending on how much attention was given to concealing them. I decided to leave mine in less than perfect condition. Basically, I puttied and sanded them one time, leaving an uneven result.
The tail section is added next, starting with the horizontal stabilizers composed of top and bottom halves. Several parts of the 109K were made of wood, including the stabilizers. The one-piece elevator is added to this, and the unit is installed at the rear of the fuselage. The tall vertical tail is assembled and added to the stabilizer. Take care when dealing with the vertical tail, as I must have inadvertently removed the antenna attachment, although I don’t remember doing so. Anyway, I had to make a new one later. The rudder and the trim tab control rod were added, and the tail assembly was complete.
The instructions call for the tail wheel and doors to be added next, but I chose to wait until later. When I added the tail wheel, I accidentally broke the strut. To successfully repair it, I had to drill out the broken halves, add a wire with CA glue, then glue the parts together.
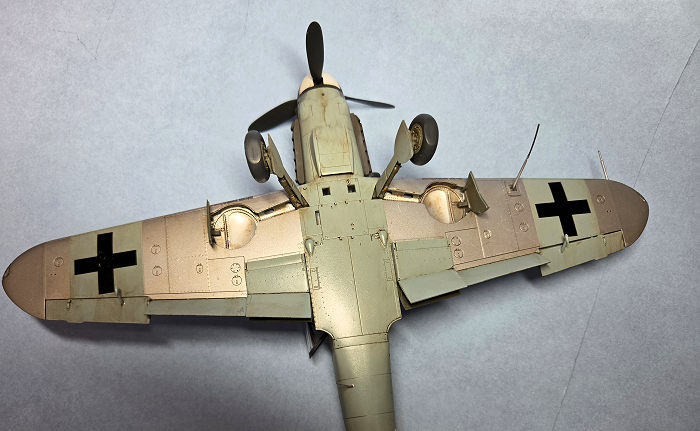 Attention next
turns to the wings which, if you have built one of Kotare’s Spitfires, are done
similarly. The individual wheel wells are attached to a horizontal spar.
Retraction jacks are added to the wells and are just barely visible from the
underside of the wing. Undercarriage door jambs are added to each end of the
wheel well assemblies and then the completed assembly is placed into the lower
half of the wing. If you choose to add the underwing drop tank (I did not), be
sure to drill out the holes where indicated.
Attention next
turns to the wings which, if you have built one of Kotare’s Spitfires, are done
similarly. The individual wheel wells are attached to a horizontal spar.
Retraction jacks are added to the wells and are just barely visible from the
underside of the wing. Undercarriage door jambs are added to each end of the
wheel well assemblies and then the completed assembly is placed into the lower
half of the wing. If you choose to add the underwing drop tank (I did not), be
sure to drill out the holes where indicated.
The top halves of the wings are added next. Be sure to drill out the gun camera opening in the front of the port wing. The slats on the front of the wings can be displayed in either the deployed or retracted position. You may also prefer to add the slats later in assembly. Since I showed them in the retracted position, I installed them now. The wing tip lights can be added now or later. To avoid getting them scratched, I added them later. The partially assembled wing is then added to the bottom of the fuselage. The wing to fuselage fillets sit on top of the wing and fuselage surface, so there is a slight lip to each. Most fillets were made of wood, although a few were made of aluminum.
The underwing radiators are assembled next. Most of the photos show them in the “open flap” position, so that’s how I did mine. If you are going to show them open, don’t forget to add the flap actuators to each radiator. The instructions discuss the painting of the interior of the radiators and flaps. Basically, you can paint them RLM 02, or painted or unpainted aluminum (not sure how you tell the difference). It’s hard to go wrong. I painted mine RLM 02 but didn’t worry about the result too much. Mine even have a little overspray from the camouflage color on the top of the wings. The assembled radiators are added to the bottom of each wing. I then turned the model over and added upper flaps to each radiator. Port and starboard flaps and ailerons are then added to the wing.
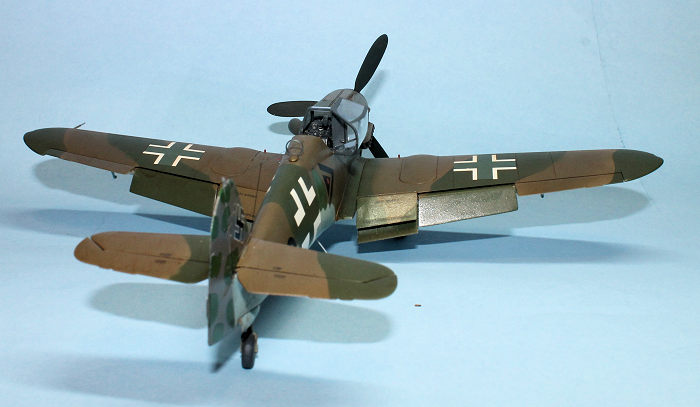 Attention next turned to the undercarriage assemblies,
port and starboard. Each set consists of a strut, a flap, a wheel (in two
halves) and a hub. Detailed instructions for painting are included. The
assembled undercarriages are then attached to the wheel wells. Close-up photos
are included in the instructions.
Attention next turned to the undercarriage assemblies,
port and starboard. Each set consists of a strut, a flap, a wheel (in two
halves) and a hub. Detailed instructions for painting are included. The
assembled undercarriages are then attached to the wheel wells. Close-up photos
are included in the instructions.
The propeller and spinner are added next, along with the exhaust manifolds. I used the included “high detail” resin exhaust parts rather than the standard plastic ones. I added the pitot tube to the port wing, the outer undercarriage doors, aileron mass balances, and the base for the Morane aerial. The base is clear, so be sure to mask the center portion before painting the bottom of the wings. I added the Morane antenna last so it wouldn’t get broken during the build.
Turning again to the cockpit, the bulletproof screen is attached to the instrument panel. Make sure it’s installed far enough back so that the front part of the canopy doesn’t hit it. The reflector sight is installed on the instrument panel just below the bulletproof screen. The second bulletproof glass assembly is added to the canopy hood behind the pilot’s seat. Take care when adding the tiny latch to the canopy interior. Mine shot across the room a couple of times, but I miraculously found it each time. I added the rigging line to the canopy interior using EZ Line. I added the loop antenna to the top of the fuselage and the FuG25z aerial to the bottom. Next, I installed the aerial wires, again using EZ Line, and construction was basically finished.
| COLORS & MARKINGS |
For the most part I used Vallejo Air colors throughout. Painting began in the cockpit where most everything was painted RLM 66 Black Gray, with some minor scuffs and scratches using Aluminum and Steel. The instrument dials were given a drop of Future to provide a gloss base for the instrument decals. Once applied and set, I added another drop to represent the glass covers over the instruments. Yellow was used for a few cables, knobs and hoses, light gray for some exposed wires, and brass for some tubes connected to the fuel feed selector. The canopy frames were painted in RLM 66 as well. I used the masking set from ASK for the canopy, as well as the Morane Aerial base. I used artist liquid mask for the wingtip lights, which I removed once the painting was complete.
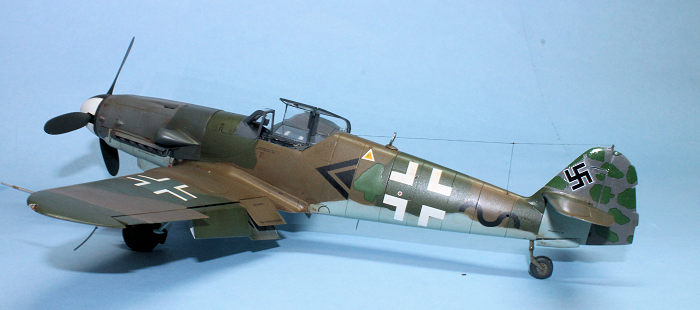 Most of the painting involved the exterior camouflage.
I painted the lower surfaces in RLM 76 Light Blue, except for a few areas on the
underside of the wings that were painted in Aluminum. Apparently, this was
standard practice at this late stage of the war to preserve what paint was
available. The upper surfaces were painted in RLM 81 Braunviolett and RLM 82
Light Green, except for the front cowlings which were painted RLM 75 Grau
Violett and RLM 74 Grau Grun. The tailfin was painted Grau Violett as well, then
covered with the light green decals. The undercarriage struts and wheel hubs
were painted RLM 02 Grau, and the tires were painted RLM 66 Black Gray, then
weathered with Medium Gray. The spinner and propeller were painted RLM 70
Schwartzgrun, except for one third of the spinner which was painted White. The
two machine guns on the front cowling were painted in Metallic Black, then
weathered slightly with Medium Gray.
Most of the painting involved the exterior camouflage.
I painted the lower surfaces in RLM 76 Light Blue, except for a few areas on the
underside of the wings that were painted in Aluminum. Apparently, this was
standard practice at this late stage of the war to preserve what paint was
available. The upper surfaces were painted in RLM 81 Braunviolett and RLM 82
Light Green, except for the front cowlings which were painted RLM 75 Grau
Violett and RLM 74 Grau Grun. The tailfin was painted Grau Violett as well, then
covered with the light green decals. The undercarriage struts and wheel hubs
were painted RLM 02 Grau, and the tires were painted RLM 66 Black Gray, then
weathered with Medium Gray. The spinner and propeller were painted RLM 70
Schwartzgrun, except for one third of the spinner which was painted White. The
two machine guns on the front cowling were painted in Metallic Black, then
weathered slightly with Medium Gray.
Before applying the decals, I sprayed the fuselage and wings with Future to give it a glossy surface. The numerous decals, including the stencils, went on with no trouble. I gave everything another shot of Future, then once dry, I sprayed the surfaces with some leftover Polly Scale Satin to tone down the glossy surface. The pitot tube, FuG 25a aerial and Morane Aerial antenna were all painted in Aluminum, with a spot of Gun Metal at the tip of the Morane Aerial.
After several weeks of work, my 109K-4 was finally finished. I'm not a 109 expert, but this looks like an excellent kit to me. I'll build a few more just to try out different camouflage schemes. Highly recommended.
| REFERENCES |
Kotare kit instructions
Wikipedia, The Bf109K
Plenty of reference material is available everywhere, so you should have no trouble finding what you need.
9 July 2026
Copyright ModelingMadness.com. All rights reserved. No
reproduction in part or in whole without express permission.
If you would like your product reviewed fairly and fairly
quickly, please
contact
the editor
or see other details in the
Note to
Contributors.