Hasegawa 1:48 Bf 109G-2 "Finnish Air Force."
| KIT #: | 07329 |
| PRICE: | 34$/1500ARS |
| DECALS: | Three options |
| REVIEWER: | Francisco Santoro |
| NOTES: | Kit missing clear and resin parts |
| HISTORY |
The Bf 109G "Gustav" was the most
numerous and, operationally, the most important variant of the Bf 109 to enter
service in WW2. It was a highly effective fighter, and even more with the
addition of several types of different weaponry which made it an effective
tactical fighter. Nevertheless, this capacity was obtained by adding an engine
which was too powerful for the basic design, making it less maneuverable than
the Bf 109F which, at the same time, was less armed. This was a penalty that
Luftwaffe pilots were happy to pay when testing the Bf 109G at the beginning of
1942 because, in mid-1941, the maneuverability of the Bf 109F had
 become less
important than the use of more powerful weapons, which would need a reduction in
maneuverability.
become less
important than the use of more powerful weapons, which would need a reduction in
maneuverability.
The Bf 109G had been designed at the beginning of 1941 as a replacement of the Bf 109F with a more powerful engine and, because combats were being fought at higher altitudes, a pressurized cockpit. The pressurization system made the basic design heavier, and that needed the introduction of a reinforced structure and a heavier landing gear.
The engine chosen was the Daimler Benz DB 605A in inverted Vm which was a development of the DB 601E with bored out cylinders for a greater swept capacity: this resulted in an engine with the same exterior dimensions of the DB 601E but rated at 1475hp for takeoff and 1355hp at 5700m. The acommodation of the new engine needed a modification to the shape of the cowling, which now possesed an upper line of virtually constant contour between the spinner and the windscreen. The lower contour was changed by the need to fit a larger oil cooler.
| THE KIT |
 This kit is one of the many reboxings of
the Hasegawa Bf 109G-6. It comes (or at least, it should have come) with the
appropriate clear and resin parts (cowling and wheels) to transform the G-6 base
kit into a G-2 one. The plastic parts have recessed panel lines, there's the
option to pose the flaps and slats in the open position, and you have to open
the well for the retractable tail wheel.
This kit is one of the many reboxings of
the Hasegawa Bf 109G-6. It comes (or at least, it should have come) with the
appropriate clear and resin parts (cowling and wheels) to transform the G-6 base
kit into a G-2 one. The plastic parts have recessed panel lines, there's the
option to pose the flaps and slats in the open position, and you have to open
the well for the retractable tail wheel.
There're three decal options for three machines that served with the Finnish Air Force, which are MT222 of Eino Ilmari Juutilainen, MT213 of E. Riihikalio, and MT225 of Lauri "Lapra" Nissinen.
I had bought this kit used from a seller on Mercadolibre.com.ar, who after asking several question, told me the kit didn´t have the clear parts nor the resin ones to make it into a G-2 standard. Since I was looking after the decals only, I bought it and stole the kit's decal sheet, planning to use it on Eduard's Bf 109G-2. Fast forward to May of 2019, and with a spare decal sheet from the Eduard G-2 109 and with spare wheels and clear parts from Eduard's G-14 109, I sat to work onto completing this kit.
| CONSTRUCTION |
 I began with the wings. I decided I
didn´t want to have the flaps and slats extended, so I superglued them into
place and allowed them to dry. After some minutes, I glued the wings together,
making sure to open the holes for the underwing cannons, and left that inside
the box while I focused on the cockpit and fuselage.
I began with the wings. I decided I
didn´t want to have the flaps and slats extended, so I superglued them into
place and allowed them to dry. After some minutes, I glued the wings together,
making sure to open the holes for the underwing cannons, and left that inside
the box while I focused on the cockpit and fuselage.
Cockpit construction was a simple task, I painted the sidewalls with Revell 78 Tank Grey, the rudder pedals and trim wheel in steel (Revell 91), and glued everything together when everything was dry. Before gluing the cockpit to the fuselage, I cut the rear of the fuselage to make way for the opening of the tail's wheel well. With that done, the cockpit was glued to the fuselage, and both fuselage halves were glued together, the wings were glued too a bit later.
| COLORS & MARKINGS |
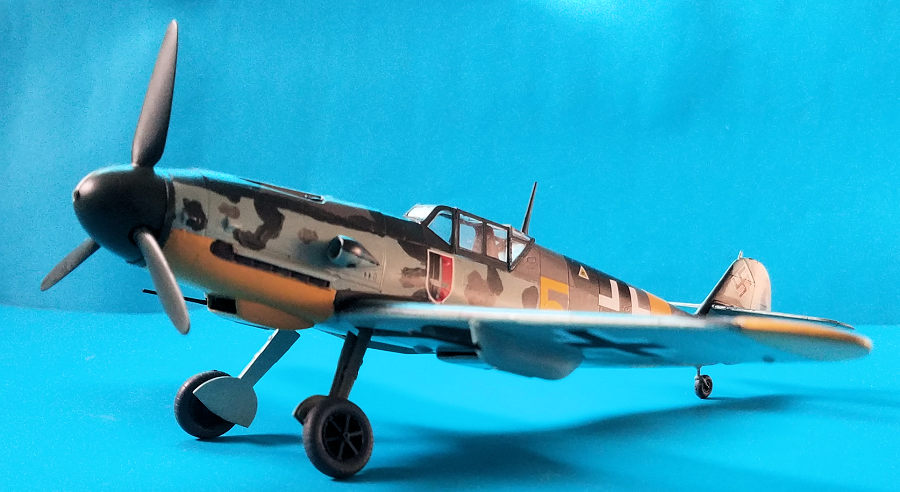
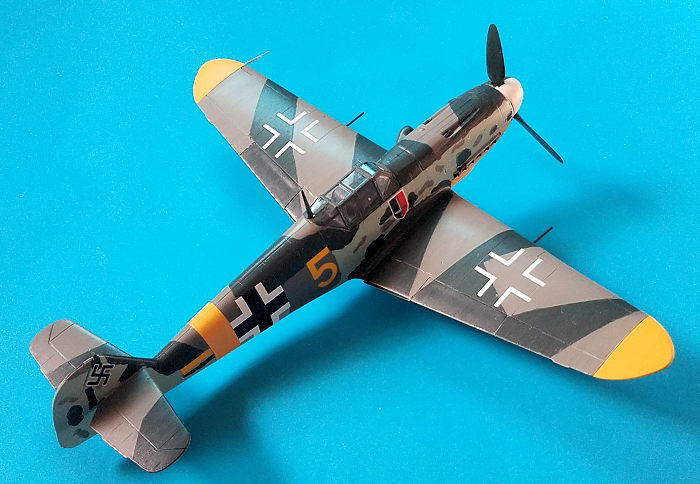
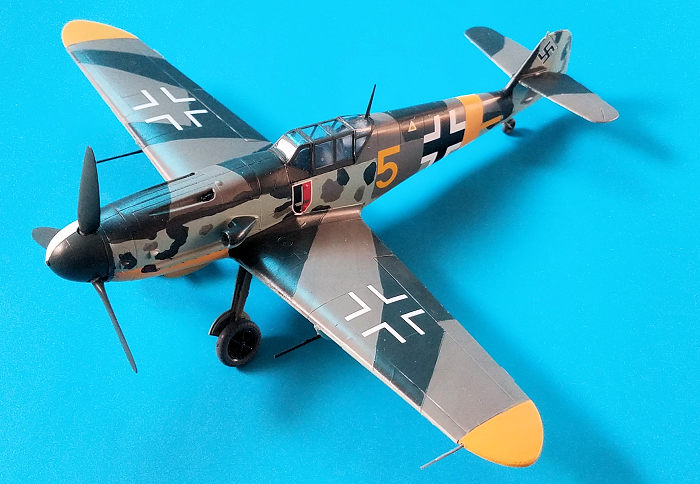
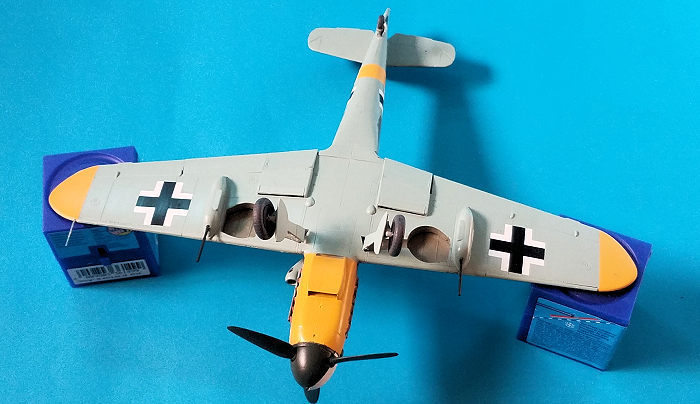 I wanted to paint this kit as Water
Krupinski's machine, Bf 109G-2 "Yellow 5," which came in the decal sheet of
Eduard's Profipack Bf 109G-2. I followed Eduard's painting instructions, and
used Revell Aqua 69 (RLM 74), 47 (RLM 75), 49 (RLM 76) for the main camouflage
colours. When everything was dry, I masked the areas that had to be painted in
yellow. With the aircraft fully painted, I glosscoated it with Revell's gloss
varnish, and applied the decals (crosses came from an Aeromaster decal sheet,
the personal markings of Krupinski came from the Eduard decal sheet). The model
was then brushed with a coat of Revell's matt varnish.
I wanted to paint this kit as Water
Krupinski's machine, Bf 109G-2 "Yellow 5," which came in the decal sheet of
Eduard's Profipack Bf 109G-2. I followed Eduard's painting instructions, and
used Revell Aqua 69 (RLM 74), 47 (RLM 75), 49 (RLM 76) for the main camouflage
colours. When everything was dry, I masked the areas that had to be painted in
yellow. With the aircraft fully painted, I glosscoated it with Revell's gloss
varnish, and applied the decals (crosses came from an Aeromaster decal sheet,
the personal markings of Krupinski came from the Eduard decal sheet). The model
was then brushed with a coat of Revell's matt varnish.
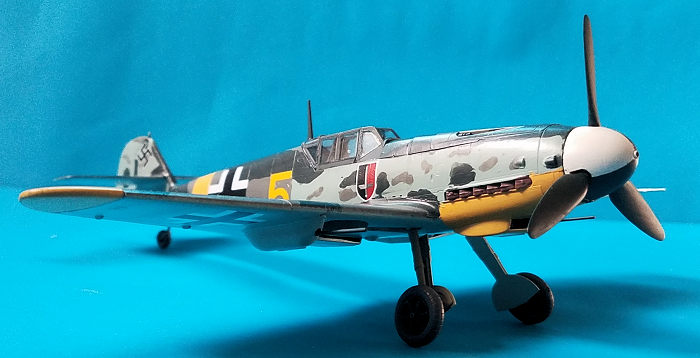
I painted the remaining pieces (landing gear struts, wheels and landing gear doors), glued them into place and let them dry for 24 hours. Once that was dry, and set the model aside, painted the clear parts (from Eduard), and glued them into place. Eduard's clear parts were a bit narrower, but that issue didn´t really bother me, I had a complete kit!
| CONCLUSIONS |
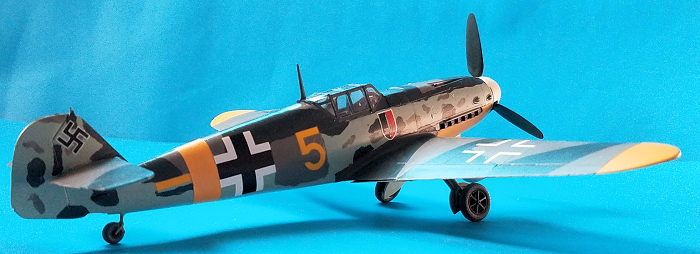 l really enjoyed building this kit, it
looks great sitting with its Eduard contemporaries, and I´ll buy some more if I
ever get my hands on another one.
l really enjoyed building this kit, it
looks great sitting with its Eduard contemporaries, and I´ll buy some more if I
ever get my hands on another one.
November 2019
Copyright ModelingMadness.com
If you would like your product reviewed fairly and fairly quickly, please contact the editor or see other details in the Note to Contributors.
Back to the Main Page Back to the Review Index Page Back to the Previews Index Page