Academy 1:48 Bf 109G-2/G-6 "JG 27"
| KIT #: | 12321 |
| PRICE: | $34.00 |
| DECALS: | Nine options |
| REVIEWER: | Francisco Santoro |
| NOTES: | Can´t be built accurately as a G-2 because the fuselage halves lack the retractable tailwheel opening. |
| HISTORY |
Hans Joachim Marseille, also known as "The Star of Africa," was a Luftwaffe pilot who achieved 158 kills during his combat career. 152 of of his 158 victories were over Western aircraft. No other WW2 Luftwaffe pilot claimed as many aircraft of this type as Marseille.
Marseille was born on December 13th 1919 in Berlin, Germany. He enlisted in the Luftwaffe in 1938, and participated in the Battle of Britain without any notable success. Due to poor discipline, he was transferred to JG 27, unit that was moved to North Africa in April 1941, to support Rommel´s advance. There, his new Commander, Eduard Neumann, helped him develop his skills as a fighter pilot.
 On
September 1st 1942, Marseille shot down 17 Allied aircraft in three combat
sorties. He was awarded the Knight´s Cross of the Iron Cross with Oak Leaves,
Swords and Diamonds because of this.
On September 30th
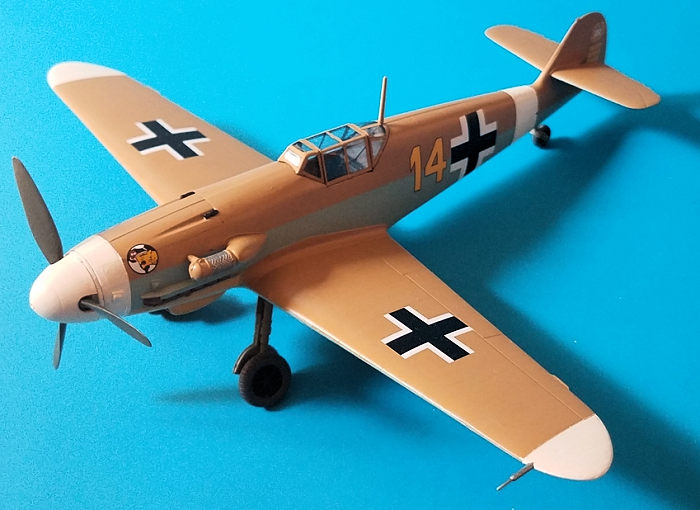
1942, while flying back to his base on his brand new Bf 109G-2/Trop "Yellow 14",
the cockpit of his aircraft began to be filled with smoke and, upon reaching
friendly lines, Marseille bailed out. He struck the horizontal stabilizer of his
aircraft, leaving him unconscious and unable to use his parachute, and plummeted
to earth.
On
September 1st 1942, Marseille shot down 17 Allied aircraft in three combat
sorties. He was awarded the Knight´s Cross of the Iron Cross with Oak Leaves,
Swords and Diamonds because of this.
On September 30th
1942, while flying back to his base on his brand new Bf 109G-2/Trop "Yellow 14",
the cockpit of his aircraft began to be filled with smoke and, upon reaching
friendly lines, Marseille bailed out. He struck the horizontal stabilizer of his
aircraft, leaving him unconscious and unable to use his parachute, and plummeted
to earth.
Hans Joachim Marseille died on September 30th 1942, at 22 years of age. A pyramid was build by Italian engineers in the area where Marseille fell. In 1989 and, with the help of the Egyptian government, the members of JG 27 (including Eduard Neumann) built a new pyramid. His grave is marked by the word "Undefeated."
| THE KIT |
This kit is Academy´s latest reboxing of the Hobbycraft Bf 109G-6, but with Cartograf decals and 9 decal options. The aircraft is molded in a smooth light grey plastic and clear. The grey parts have recessed panel lines, with a bit of flash present on some parts.
Instructions come in two foldable sheets of paper, the first ones being the building instructions consisting of 10 steps, and the second one being the painting and decalling instructions. The first set of instructions has indications to open holes for the nose bumps and underwing cannons for the G-6 version.
| CONSTRUCTION |
 Step
1: First thing I did was to paint the cockpit pieces on their sprue with Revell
78. The rudder pedals were painted in silver. With the main pieces dry, I cut
them from the sprue, and glued the control stick, rudder pedals, cannon breech
and seat to the cockpit floor.
Step
1: First thing I did was to paint the cockpit pieces on their sprue with Revell
78. The rudder pedals were painted in silver. With the main pieces dry, I cut
them from the sprue, and glued the control stick, rudder pedals, cannon breech
and seat to the cockpit floor.
Step 2: Next came the fuselage halves. They were separated from their sprue, and had the cockpit openings painted with Revell 78. With that dry, I glued the cockpit to the right hand side. Meanwhile, I also painted the the instrument panel in black, with some yellow details. With the instrument panel dried, it was time to glue it to the fuselage, together with the cockpit. It was a rather difficult task to glue it, because the fit wasn´t very positive, and took a lot of time to get itself fixed in place.
You have the choice at this time to open holes to add the nose bumps for the G-6 version. I didn´t, because I was modelling the G-2 version. It was at this time that I painted the exhausts with Revell 83 (Rust) and to the fuselage halves, because you can´t add them from the outside. The nose radiator was painted black and glued in place too. The spinning mounting peg for the propeller also has to be added at this stage.
Step 3: I glued the fuselage halves next, widening the mounting peg for the propeller first, because it didn´t allow for a good nose fit otherwise. The insert for the nose guns was also glued, together with the machineguns. It was in this step that I deviated a bit from the instructions, and left the tropical filtre on its sprue, to avoid having masking complications.
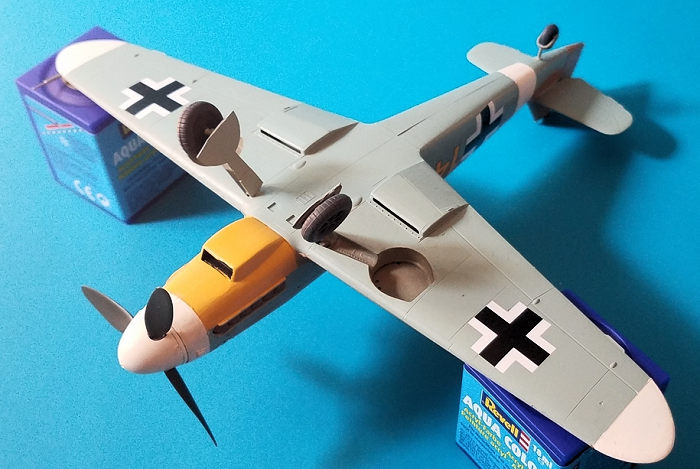
 Steps
4 and 5: These two steps are pretty straighforward, you glue the top halves of
the wings to the lower, single piece wing. You also have the choice of opening
the optional holes for the G-6 wing bumps, underwing cannons, and fuel tank. All
those choices were ignored, because they weren´t on the version I was building,
and I assembled the wings together.
Steps
4 and 5: These two steps are pretty straighforward, you glue the top halves of
the wings to the lower, single piece wing. You also have the choice of opening
the optional holes for the G-6 wing bumps, underwing cannons, and fuel tank. All
those choices were ignored, because they weren´t on the version I was building,
and I assembled the wings together.
Step 6: Landing gear construction. The landing gear was the last thing to be built.
Step 7: It was in this step that I realised the fuselage difference between the Bf 109G-2 and G-6. I had glued to the fuselage part F18, which is the boot for the tailwheel in the G-6 version. However, I luckily was the idea of checking out another model of Marseille´s G-2/Trop, and I noted it didn´t have the boot, so it was removed and the area sanded.
I skipped steps 8 to 10 because they dealt with the addition of the fuel tank, underwing cannons, propeller and clear parts.
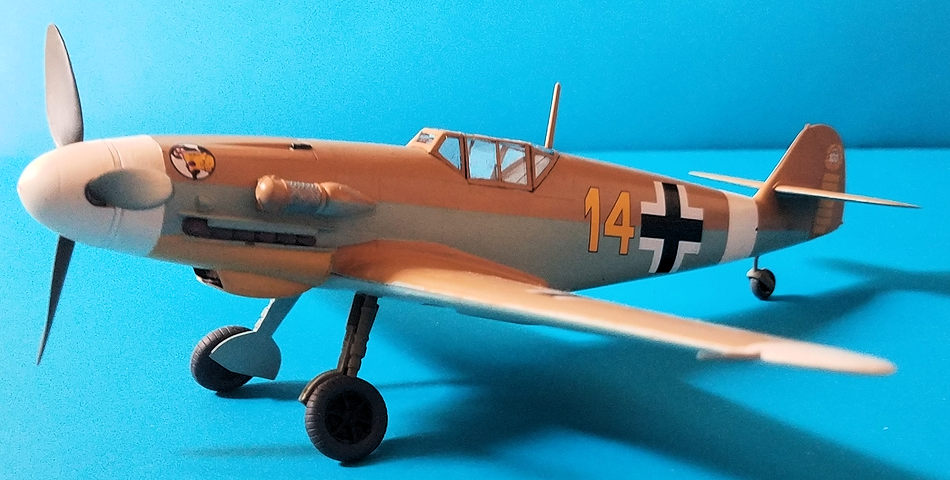
| COLORS & MARKINGS |
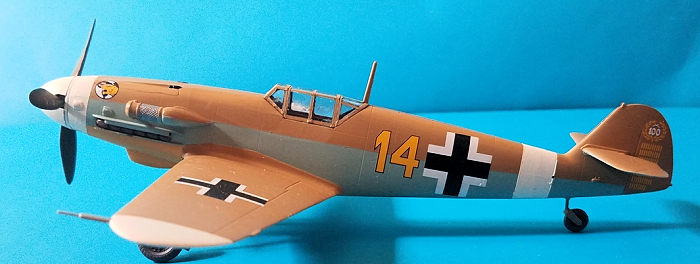
I wanted to paint this model as Hans Joachim Marseille´s last aircraft, his Bf 109G-2/Trop. Instead of using the kit´s painting instructions, I chose to use Hasegawa´s one for their Marseille G-2/Trop, because the former labeled the lower cowling as painted in white instead of yellow. The camouflage for this aircraft was simple, RLM 79 uppers, with RLM 78 undersides, yellow lower cowling and white fuselage band and wingtips.
 I
first brush painted the fuselage and upper areas of the wings with several
thinned coats of Revell 17 Africa Brown (RLM 79) and, once those areas were
completely covered and dry, they were masked to avoid over painting them with
the light blue. Using Revell 49 (RLM 65), I brush
painted the lower half of the fuselage and lower wings, also giving the areas
several thinned coats of that colour, to prevent the buildup of thick coats of
paint.
I
first brush painted the fuselage and upper areas of the wings with several
thinned coats of Revell 17 Africa Brown (RLM 79) and, once those areas were
completely covered and dry, they were masked to avoid over painting them with
the light blue. Using Revell 49 (RLM 65), I brush
painted the lower half of the fuselage and lower wings, also giving the areas
several thinned coats of that colour, to prevent the buildup of thick coats of
paint.
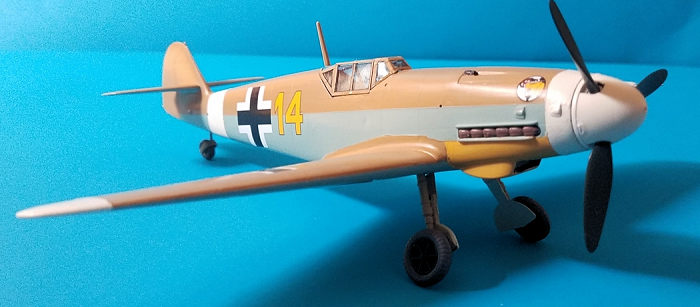
With the main camouflage done and fully dried, I began sanding the resultant paint ridge in the fuselage due to the brush painting. The ridge was successfully dealt with, leaving a more or less smooth transition between the RLM 79 and 65 (I know, it should have been 78, but it was a light blue).
Next came the more difficult and delicate paints, the yellow (Revell 15) and white (Revll 5). The areas for the white tailband, wingtips and nose were masked with Tamiya tape, and given several coats of white paint. After they were dry, I masked the lower cowling area for the yellow, also giving the area several coats of paint.
After everything was dry, I brushed the entire model with two coats of Revell´s gloss varnish (Revell 1) in preparation for the decals. While I waited for everything to dry, I painted the propeller with Revell 40 (RLM 70) and the spinner and propeller backing plate in white.
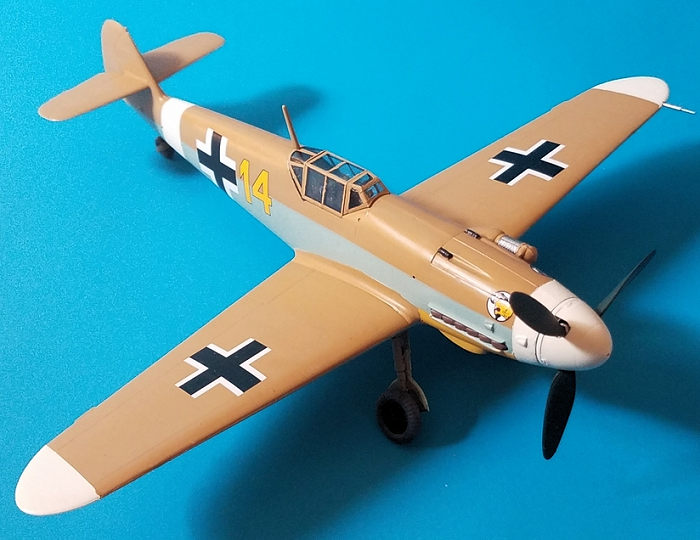
 The
instructions provide two options for Marseille´s last aircraft, the first one
without any numbering and the second one with the Yellow 14 and JG 27´s emblem.
I decided to decal my aircraft as the second option, because I thought it´d look
better. Decalling was uneventful and, true to their name, the Cartograf decals
performed perfectly, sinking into every panel line. While I was checking the
model, I pressed too hard on one of the JG 27 emblems, and unwillingly moved it
to another position, something I hadn´t noticed before it ocurred to me to check
the model again. Luckily, by applying some water and pressure, I was able to
move it back to its correct position, and it was left alone while it dried. All
the decals were given a coat of a decal softener to help them settle even more
into the panel lines.
The
instructions provide two options for Marseille´s last aircraft, the first one
without any numbering and the second one with the Yellow 14 and JG 27´s emblem.
I decided to decal my aircraft as the second option, because I thought it´d look
better. Decalling was uneventful and, true to their name, the Cartograf decals
performed perfectly, sinking into every panel line. While I was checking the
model, I pressed too hard on one of the JG 27 emblems, and unwillingly moved it
to another position, something I hadn´t noticed before it ocurred to me to check
the model again. Luckily, by applying some water and pressure, I was able to
move it back to its correct position, and it was left alone while it dried. All
the decals were given a coat of a decal softener to help them settle even more
into the panel lines.
After the decals were dry, I brushed water over them to remove the decal softener remnants. Soon after, the water was wiped with a kitchen towel, and the model was brush coated twice with Revell´s matt varnish (Revell 02).
| FINAL CONSTRUCTION |
With
the model fully covered in varnish, it was time to add the final bits.
The landing gear was painted and glued in place and the tailwheel strut
was superglued to its position. The wheels of the main landing gear are a very
lose fit, so one has to hold them in
 place until the glue starts to get a grip.
The tailwheel was also glued to its strut.
I also
glued the tropical filtre to the aircraft´s nose, after it was painted in RLM
79/78.
place until the glue starts to get a grip.
The tailwheel was also glued to its strut.
I also
glued the tropical filtre to the aircraft´s nose, after it was painted in RLM
79/78.
The propeller assembly was also added. I had ruined the spinning system earlier while I was trying to make the spinner backing plate´s hole wide enough to make it fit on the propeller shaft, so it, together with the propeller, were fixed to the nose. The spinner was also glued after that.
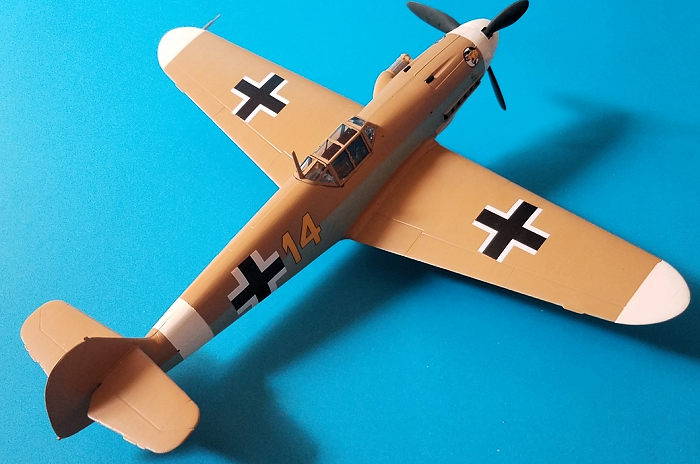
One has to be cautious with how one glues the propeller. Since it isn´t keyed, one can easily get it to spin in the wrong way. Make sure to place the propeller like the one on the second photo of this article.
Thus, the model was completed.
| CONCLUSIONS |
The model is nice, but one can only build a G-6 out of this boxing, because the fuselage halves lack the opening for the retractable tailwheel. You can try to open it by yourself, but I didn´t dare to do it. However, I wanted to have Marseille´s last aircraft, so I ignored this little fact.
Once finished, one is left with many spare parts in the shape of bombs, (if not used) a fuel tank and underwing cannons, and WGr 21 mortars.
If you want to build an accurate G-2, look for the Hasegawa models or Hobbycraft´s explicitly labelled Bf 109G-2s
| REFERENCES |
https://en.wikipedia.org/wiki/Hans-Joachim_Marseille
8 October 2018
Copyright ModelingMadness.com
If you would like your product reviewed fairly and fairly quickly, please contact the editor or see other details in the Note to Contributors.
Back to the Main Page Back to the Review Index Page Back to the Previews Index Page