Hasegawa 1/48 A6M3 Type 32
|
KIT # |
JT 18 |
|
PRICE: |
$26.95 |
|
DECALS: |
Three versions: See review |
|
REVIEW : |
|
|
NOTES: |
|
|
HISTORY |
Guadalcanal, Tulagi, Rendova, Munda, Vella Lavella, Kolombangara, Choiseul, Treasury, Shortland, and Bougainville in the Solomon Islands were completely unknown to most American citizens prior to 1942, and if told they were islands in the southwest Pacific, most would think of a tropical island paradise. Unfortunately for the thousands of military personnel who were posted to these far-flung islands, they were not idyllic vacation spots, but places where they would spend their final days on earth fighting in some of most daunting jungle terrain imaginable.
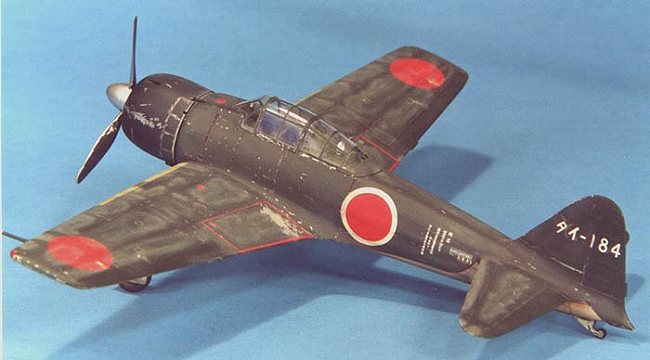
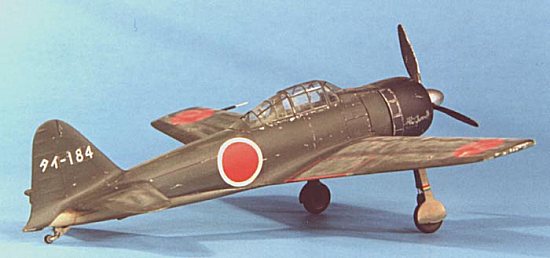
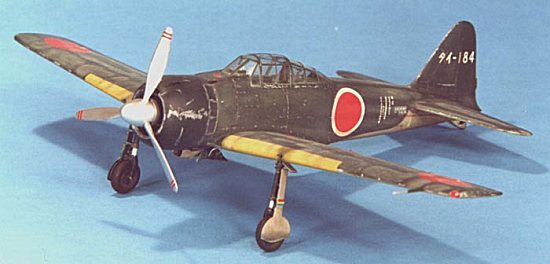
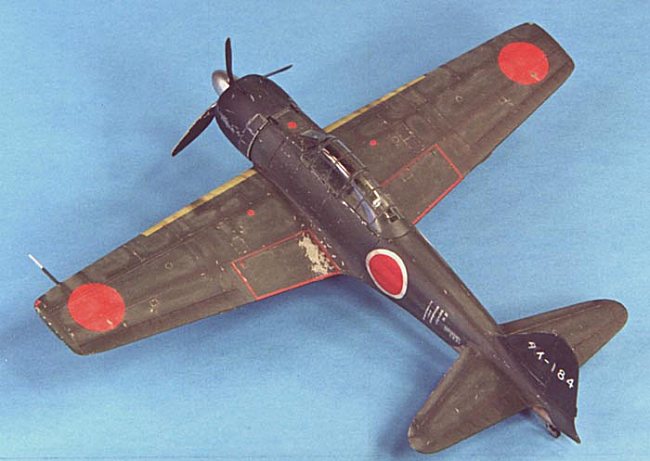
One of the principal Japanese single seat fighters used in the Solomon campaign was the A6M3 Zero Type 32. This variant of the famous Zero fighter was easily recognized by it’s "clipped" wings that were intended to increase maneuverability and decrease weight. The Type 32 had a very short production run of about 340 aircraft and was used almost exclusively in the Solomon’s. The aircraft modeled was flown by NAP 1/C Takeo Tanimizu from the famed Tainan Flying Group who posted 18 kills during the war.
|
THE KIT |
The kit is typical Hasegawa; a high quality injected molded plastic with detailed engraving. The kit consists of 60 injected molded plastic parts that are the envy of the business in quality. The instruction sheet is typical Hasegawa, an eight-page foldout with color references for Gunze-Sangyo paints.
|
CONSTRUCTION |
 After
washing the parts in mild dishwater soap and letting them dry, I then
pre-painted all the parts as indicated in the instructions. For the interior I
used Aeromaster acrylic Mitsubishi Interior Green. Starting with the interior, I
built up the kit as per the instructions. The interior builds up very nicely
with no significant problems. I especially like the multi-piece instrument panel
decals (which actually fit!) that makes a painting klutz like me capable of
building a nice interior.
After
washing the parts in mild dishwater soap and letting them dry, I then
pre-painted all the parts as indicated in the instructions. For the interior I
used Aeromaster acrylic Mitsubishi Interior Green. Starting with the interior, I
built up the kit as per the instructions. The interior builds up very nicely
with no significant problems. I especially like the multi-piece instrument panel
decals (which actually fit!) that makes a painting klutz like me capable of
building a nice interior.
The Sakae 21 radial engine assembly consists of four parts that build up into a very nice engine that one would consider an after-market replacement a waste of money.
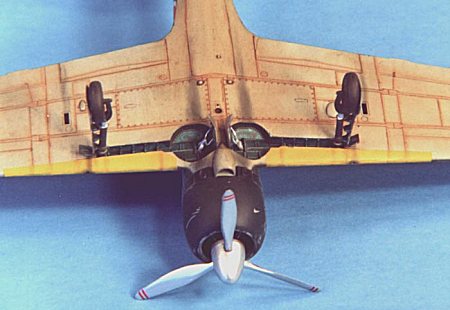
Main wing assembly and installation was flawless, without the all too typical Hasegawa wing root gap. The only problem was that the carburetor intake assembly doesn’t fit very well leaving a noticeable step in the leading edge wing root and also in the wheel wells. A little putty fixed the leading edge problem, but the wheel wells were joined as best as possible as any fixes would destroy the nice detail. I really wish Hasegawa would figure out a better solution to these basic kits that are intended for different variants.
Filing off the mold lines and dry fitting the horizontal stabilizers will also permit a flawless, putty free installation. After a quick sanding down of all the joins the model visited the paint shop where it was painted, decaled, and weathered before final assembly took place.
For final assembly I installed all the landing gear components, fuselage pieces, and cockpit details. All pieces went together easily, except for the aileron mass balances, which fell into the carpet to be eaten by the modeling part gremlins!
|
PAINT & DECALS |
 The first
order of business was to spray the entire model with Floquil Bright Silver,
including the propeller and spinner, as I was planning to flake off the
overcoated paint to simulate chipping. The bottom and top were airbrushed with
Tamiya acrylic J.N. Grey (XF-12) and J.N. Green (XF-11), respectively. The cowl
was airbrushed with Aeromaster acrylic Mitsubishi Cowl Blue/Black. The wheel
wells were hand painted with Gunze-Sangyo Metallic Blue Green. After drying
overnight, I chipped off paint with a sharp toothpick to lightly remove the top
layer of paint along panel lines and to simulate random scratching. After the
toothpick "attack" I shot a light topcoat of Future to prepare the
flat surface for decaling.
The first
order of business was to spray the entire model with Floquil Bright Silver,
including the propeller and spinner, as I was planning to flake off the
overcoated paint to simulate chipping. The bottom and top were airbrushed with
Tamiya acrylic J.N. Grey (XF-12) and J.N. Green (XF-11), respectively. The cowl
was airbrushed with Aeromaster acrylic Mitsubishi Cowl Blue/Black. The wheel
wells were hand painted with Gunze-Sangyo Metallic Blue Green. After drying
overnight, I chipped off paint with a sharp toothpick to lightly remove the top
layer of paint along panel lines and to simulate random scratching. After the
toothpick "attack" I shot a light topcoat of Future to prepare the
flat surface for decaling.
 The kit
decals are adequate, but a bit on the thick side. Three decal variants are
provided for the 2nd Flying Group, Tsukuba Flying Group and Tanimizu’s
aircraft. The only problem with the decals were the Hinomaru’s that are
applied over the formation/navigation lights as they will wrinkle when setting
solution is applied. After drying overnight, I wiped the decals off with a Polly
S Plastic Prep to remove any residue and after drying I shot a very light coat
of Future thinned with rubbing alcohol (50:50 mix) over the decals to seal them.
The kit
decals are adequate, but a bit on the thick side. Three decal variants are
provided for the 2nd Flying Group, Tsukuba Flying Group and Tanimizu’s
aircraft. The only problem with the decals were the Hinomaru’s that are
applied over the formation/navigation lights as they will wrinkle when setting
solution is applied. After drying overnight, I wiped the decals off with a Polly
S Plastic Prep to remove any residue and after drying I shot a very light coat
of Future thinned with rubbing alcohol (50:50 mix) over the decals to seal them.
For weathering, I chose to accentuate the engraved panel lines and surface detail with a light burnt umber oil wash.
I then sealed everything with a light coat of PS Flat Finish to provide a surface for pastel application. I then used a pastel pencil to highlight the panel detail on the wings/tail surfaces and randomly applied some ground up pastels with a soft brush to simulate dirt staining on the lower surfaces. Lastly, I applied a fading pattern of light yellow pastels to the interior of the topside panels to simulate the intense fading effects of sun and salt spray.
|
CONCLUSIONS |
This is an excellent model of an important WW II aircraft. It would be an extremely easy build suitable for first time modelers if not for the carburetor fit problems. A little careful work with that portion of the kit and you will be rewarded with an excellent model.
|
REFERENCES |
Presidio Press, The War In The Pacific, $18.95
Time-Life Books, The Carrier War, (Sold as a set)
Copyright ModelingMadness.com
If you would like your product reviewed fairly and quickly, please contact the editor or see other details in the Note to Contributors.
Back to Reviews Page 2019