Tamiya 1/48 J2M3 Raiden
| KIT #: | 61018 |
| PRICE: | $13.50 |
| DECALS: | Two options |
| REVIEWER: | Jonathan Prestidge |
| NOTES: | Techmod insignia used |
| HISTORY |
 larger engine diameter and giving larger air
resistance, was not best suited to be used in a fighter. The Raiden was designed
by Jiro Horikoshi and his designers who had taken charge of the Zero fighter.
larger engine diameter and giving larger air
resistance, was not best suited to be used in a fighter. The Raiden was designed
by Jiro Horikoshi and his designers who had taken charge of the Zero fighter.
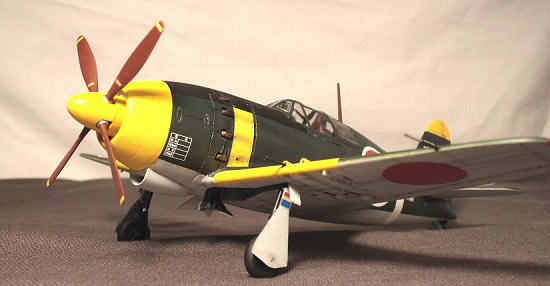
To lessen air resistance, the propeller shaft of the engine
was made longer and the cowling was made slenderer. To obtain higher cooling
efficiency, the forced-cooling fan was used. The body was spindle-shaped with
its largest section at the 40% of its overall length. The wing load was as large
as 145 kg/m2 and, in due consideration of dogfights, Fowler flaps were employed.
The retracting system and propeller pitch changing system of the electric type
were employed in place of those of the hydraulic type which had a bad
reputation.
The 14-Shi Interceptor made its
first flight at Kasumigaura Airfield on 20th March, 1942. As a result
of various test flights made thereafter, defects such as insufficient power of
the Kasei engine, bad vibration of the extended propeller shaft and poor
visibility were pointed out. A production type which bettered visibility by
shortening the nose and remodeling the canopy and mounted the more powerful
Kasei 23 engine equipped with the water-methanol injection system made its first
flight on 13th October, 1942.
 The production type also developed many
troubles in the engine and other sections, and it was in December 1943 that the
plane was accepted for use under the name of Raiden Type 11 (J2M2). In the
meantime, the Raiden Type 21 (J2M3), an anti-bomber fighter which had more
powerful armament consisting of four belt-fed 20mm machine guns, was completed
in October 1943 and now became the main object of production. The production of
the Type 21 totaled about 300.
The production type also developed many
troubles in the engine and other sections, and it was in December 1943 that the
plane was accepted for use under the name of Raiden Type 11 (J2M2). In the
meantime, the Raiden Type 21 (J2M3), an anti-bomber fighter which had more
powerful armament consisting of four belt-fed 20mm machine guns, was completed
in October 1943 and now became the main object of production. The production of
the Type 21 totaled about 300.
The Raiden Type 21 first saw action in the battle of the Marianas in September 1944. Subsequently, some were sent to the Philippines and Formosa and took part in actions, but the result was not as good as the Japanese had expected. It was in air defence actions for the mainland by the Raiden unit of the 302nd Air Group based on Atsugi that the Raiden exercised its own power to the full and showed the most brilliant activity. The Raiden unit distinguished itself by shooting down a total of about 300 enemy planes in the short period from the end of 1944 to the end of the war. It owed much of its success to the fact that it could readily obtain necessary material from the nearby Koza naval air arsenal which produced the Raiden, the geographical conditions that its base Atsugi was located near the course of B29 bombers into the Kanto district, and the best consolidated air defense system and air defense control by means of radar network.
| THE KIT |
The instructions for this kit are dated 1974 so it is at least as old as I am. That said, this kit holds up very well in spite of its age. There is a mix of finely engraved and raised detail, a 10-piece interior with a decal for the instruments, very clear one-piece canopy, minimal flash, and no parts warpage. The only area that NEEDS help is the decals. With a price of only $13.50 currently at Squadron, one can afford to spring for some aftermarket goodies.
| CONSTRUCTION |
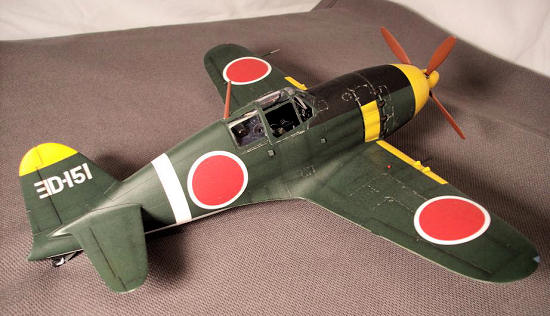
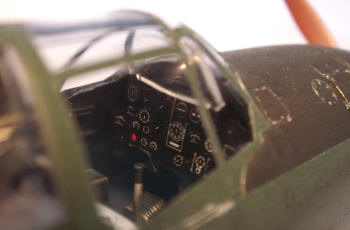
 Naturally, the interior came first.
Because of the expansive canopy, the interior on this plane is very visible. I
did not use any aftermarket items for the interior but do I think that some
photoetch seatbelts would look nice. I simply took my time and painted the
molded-in seatbelts, applied the insrtument decal and did the usual
paint/wash/dry-brush on the rest of the interior. I did drill out the lightening
holes in the structural member behind the pilot's head.
Naturally, the interior came first.
Because of the expansive canopy, the interior on this plane is very visible. I
did not use any aftermarket items for the interior but do I think that some
photoetch seatbelts would look nice. I simply took my time and painted the
molded-in seatbelts, applied the insrtument decal and did the usual
paint/wash/dry-brush on the rest of the interior. I did drill out the lightening
holes in the structural member behind the pilot's head.
Once the interior was finished the fuselage was glued together, wings and tail planes added, and the front cowl section installed. Minimal seam cleanup is all that was required. No putty needed on this one. As there was no option for an open cockpit, I used white glue to attach the canopy at this time (after a dip in Future, of course). I masked the canopy with Tamiya tape and a new no. 11 X-acto blade. I painted the masked cockpit area with the interior color and set the plane aside – for several years!
Moving into a house that needs remodeling does that.
| COLORS & MARKINGS |
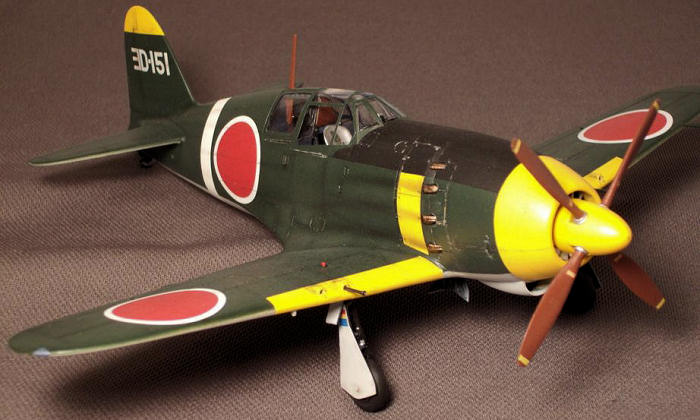
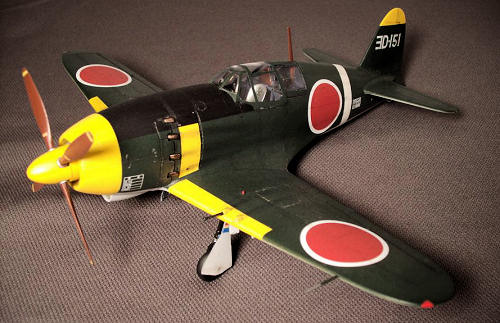
Aside from the move, part of the problem for me was that I
couldn't find a non-boring paint scheme for a J2M3. I.J.N. green over I.J.N.
gray blah-blah-blah! Then, while perusing a color profile book at the local
Borders, I happened upon a yellow-nosed Raiden with cool yellow “gills” and a
white band around the fuselage. The plane was part of the famous 302 Flying
Group based out of Atsugi between March 1944 and August 1945. It was still green
over gray but it was enough to get me motivated. I purchased the
 book and
decided to finish the Raiden. Now I must say, as much as I enjoy my color
profile book, some of the profiles are fanciful at best. I would not have
proceeded with my chosen paint scheme had I not seen another finished model of
this same aircraft on J-aircraft.com. The builder of that model claimed to have
seen an actual picture of the plane. I decided to use the color profile as a
loose guide, applying the added color over the standard J2M3 colors.
book and
decided to finish the Raiden. Now I must say, as much as I enjoy my color
profile book, some of the profiles are fanciful at best. I would not have
proceeded with my chosen paint scheme had I not seen another finished model of
this same aircraft on J-aircraft.com. The builder of that model claimed to have
seen an actual picture of the plane. I decided to use the color profile as a
loose guide, applying the added color over the standard J2M3 colors.
I broke out my Badger Anthem air-brush and shot some Polly Scale acrylic “aircraft interior black” on the anti-glare panel in front of the cockpit. I then primed the areas that would end up yellow and the fuselage band with flat white. I used automotive pin striping to mask the fuselage band. It stretches more than masking tape and allowed me to get a nice line around the tapered surface. Next, I shot the yellow and masked that off with Tamiya tape. Then the gray underside and finally the green uppers.
Now I removed all but the canopy masking and applied various shades of pastels with a fine soft brush to simulate weathering and exhaust stains. I gave the plane a gloss coat of Future to seal the pastels and to prep the plane for decals.
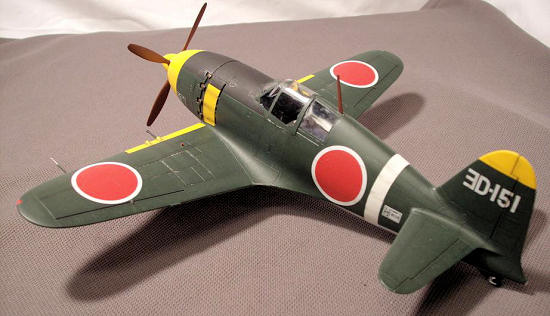
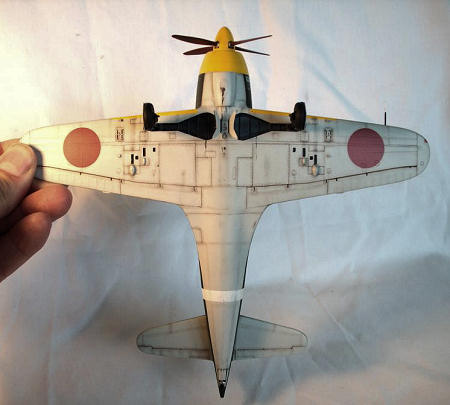
 The kit “meatballs” are truly junk.
Use them only if you don't care how
the finished model looks. I decided to try some
Techmod Hinomarus I had purchased on my birthday. The Techmod decals are nicely
printed, in register and the color seems spot-on. My only problem with the
Techmod decals is that one of them wrinkled/cracked, refusing to settle down
even after repeated application of setting solution. The final effect is not
very noticeable and resembles a slightly over-stressed airframe in that small
area. It just adds to the realism right? The other five Hinomarus went down
fine. For the remainder of the markings, I used the kit decals and they worked
great. I had to cut and paste to get the correct tail code. Once the decals were
dry, I used pastels to weather them and then sealed everything with a thinned
Tamiya flat base and Future mix (thanks to Tom Cleaver for that tip).
The kit “meatballs” are truly junk.
Use them only if you don't care how
the finished model looks. I decided to try some
Techmod Hinomarus I had purchased on my birthday. The Techmod decals are nicely
printed, in register and the color seems spot-on. My only problem with the
Techmod decals is that one of them wrinkled/cracked, refusing to settle down
even after repeated application of setting solution. The final effect is not
very noticeable and resembles a slightly over-stressed airframe in that small
area. It just adds to the realism right? The other five Hinomarus went down
fine. For the remainder of the markings, I used the kit decals and they worked
great. I had to cut and paste to get the correct tail code. Once the decals were
dry, I used pastels to weather them and then sealed everything with a thinned
Tamiya flat base and Future mix (thanks to Tom Cleaver for that tip).
I spent another day or so attaching all the final bits (landing gear, etc.) and applying the finishing touches on my weathering with Testors silver.
| CONCLUSIONS |
 I am really happy with how this kit turned out. Construction
was straightforward enough that a beginner could tackle this one with ease. I
really enjoyed researching the color scheme and practicing my weathering skills.
The fact that there are some raised panel lines may deter some, but the kit
decals are the kits only real failing. However, even with the aftermarket decals
I used it was cheaper than the competition. Highly recommended!
I am really happy with how this kit turned out. Construction
was straightforward enough that a beginner could tackle this one with ease. I
really enjoyed researching the color scheme and practicing my weathering skills.
The fact that there are some raised panel lines may deter some, but the kit
decals are the kits only real failing. However, even with the aftermarket decals
I used it was cheaper than the competition. Highly recommended!
October 2008
If you would like your product reviewed fairly and fairly quickly, please contact the editor or see other details in the Note to Contributors.