Hasegawa 1/72 Kyushu J7W1 "Shinden"
| KIT #: | JT 22 |
| PRICE: | $18.00 |
| DECALS: | One option |
| REVIEWER: | Francisco Santoro |
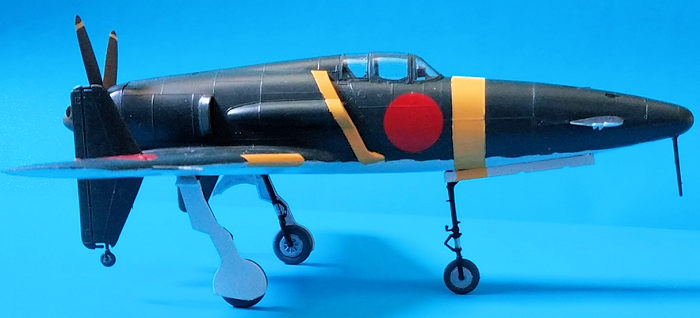
| NOTES: | The tall and skinny main landing gear will benefit from having two supporting wedges glued in front of them, so they can resist the weight of the model better. |
| HISTORY |
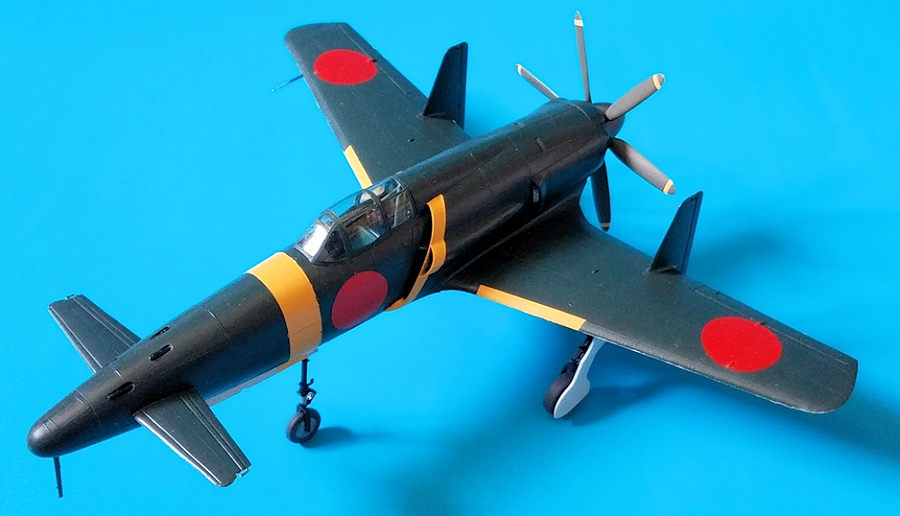
The Kyushu J7W1 "Shinden" (not to be confused with "Shiden," that was the Kawanishi N1K2) was a Japanese WW2 propeller aircraft, which flew only as a prototype. The nickname Shinden stands for Magnificent Lightning. The decision to use a canard design was proposed Masayoshi Tsuruno, member of the Technical Staff of the Imperial Japanese Navy in 1943. Test flights with this design were done in Yokosukas MXY6 gliders.
 The first two
prototypes were started in June 1944, with one of them being finished in April
1945. A 2130hp Mitsubishi MK9D engine was installed in the back of the plane,
driving a six-bladed propeller.
Three test flights
were made, the first one in August 3 1945, and the other two done on the days of
the bombings of Hiroshima and Nagasaki (August 6 and 9 of 1945). After that, and
with Japan´s surrender, flights were terminated.
The first two
prototypes were started in June 1944, with one of them being finished in April
1945. A 2130hp Mitsubishi MK9D engine was installed in the back of the plane,
driving a six-bladed propeller.
Three test flights
were made, the first one in August 3 1945, and the other two done on the days of
the bombings of Hiroshima and Nagasaki (August 6 and 9 of 1945). After that, and
with Japan´s surrender, flights were terminated.
Of the two prototypes built, one was scrapped, and the other was dismantled and taken to the United States. The aircraft was donated by the US Navy to the Smithsonian Institution in 1960. Today, the forward fuselage can be seen at the Steven F Udvard-Hazy Center annex (at Dulles Airport) of the National and Air Space Museum in Washington DC.
The Shinden can be recreated in 1:72, 1:48 and 1:32 scale by building models from Hasegawa (1:72 and 1:48) and from Zoukei Mura (1:48 and 1:32). Hasegawa did the jet version of the Shinden, the J7W2, by adding resin pieces to the original kit. Zoukei Mura also reboxed their 1:32 J7W1 with decals for the manga "Ah! My Goddess."
| THE KIT |
 Originally released in 1981, the kit has stood the
test of time perfectly. It´s molded in light grey plastic with fine raised panel
lines, no flash, a nicely detailed cockpit, and comes with the figure of a
standing pilot. A label "Made in Japan" is displayed proudly on one of the
sprues. One of the good parts of this kit is that you can leave the propeller
assembly and the canards off the model until after painting and decalling, in
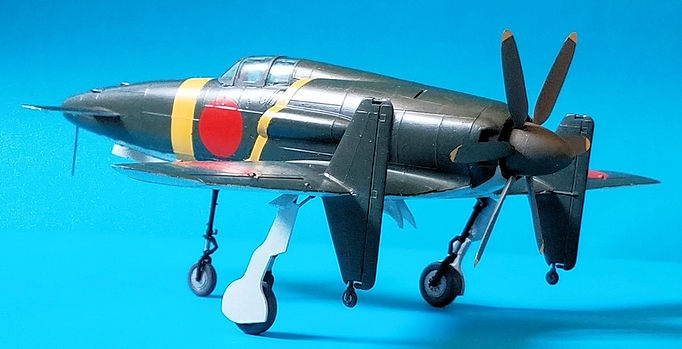
case you need to add more weight in front of the aircraft. The landing gear is
also long and skinny, and is wobbly and fragile as a consequence, so let it
thoroughly dry before placing the aircraft on its wheels, and don´t go around
moving it too much after that.
Originally released in 1981, the kit has stood the
test of time perfectly. It´s molded in light grey plastic with fine raised panel
lines, no flash, a nicely detailed cockpit, and comes with the figure of a
standing pilot. A label "Made in Japan" is displayed proudly on one of the
sprues. One of the good parts of this kit is that you can leave the propeller
assembly and the canards off the model until after painting and decalling, in
case you need to add more weight in front of the aircraft. The landing gear is
also long and skinny, and is wobbly and fragile as a consequence, so let it
thoroughly dry before placing the aircraft on its wheels, and don´t go around
moving it too much after that.
Decals have only one option, and that´s for the first prototype aircraft. They´re nicely printed with minimal carrier film, though they should be dipped in hot water, to get the best mileage out of them.
| CONSTRUCTION |
I began by painting the control stick, cockpit tub, rudder pedals and cockpit framing with Revell Sea Green 48 (the colour callouts mentioned "Interior Green"). I painted the instrument panel and the oxygen bottles flat black, and another bottle in red. The grip of the control stick was also painted black after the interior green had dried, and the rudder pedals were over painted with silver. The complete cockpit was then glued into one fuselage half.
 With the cockpit
in place, I began to ponder how and where should I add the nose weight. Hasegawa
recommends to place 1g as forward as possible in the nose, but I chose to add
10g above the nose gear well. Since the shape of the nose gear well ends up in
an angle, I glued two cut sprues to the sides, let them dry, and glued the
weight after that. The nose gear well was then glued in place.
With the cockpit
in place, I began to ponder how and where should I add the nose weight. Hasegawa
recommends to place 1g as forward as possible in the nose, but I chose to add
10g above the nose gear well. Since the shape of the nose gear well ends up in
an angle, I glued two cut sprues to the sides, let them dry, and glued the
weight after that. The nose gear well was then glued in place.
I then decided to glue the fuselage halves. I first test fitted them, to see if there would be any troublesome areas, and after checking there were none, I glued and taped both of them together. While the fuselage was drying, I thought I wouldn´t have enough weight in front of the nose, so I glued a smaller weight to the nose gear well.
I set the fuselage to one side and began to work on the wings. These are the usual single lower half and two separate upper halves. They were glued together and left to dry for some minutes. After that, the two vertical stabilisers were glued to the wing. These are a loose fit, and will have to be held until the glue dries enough for them to be left hanging alone.
I concentrated on the canards by gluing the two separate guns. I left this piece aside until the end.
I mated the fuselage and the wings together, a simple assembly with a nice fit. This left me basically with the complete airframe, sans the engine and the other parts. With the aircraft in this stage, I went to the paint shop.
| COLORS & MARKINGS |
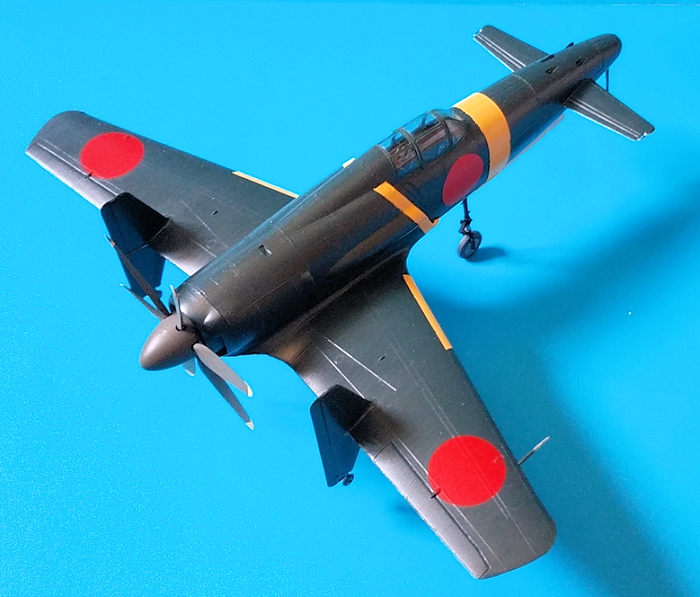
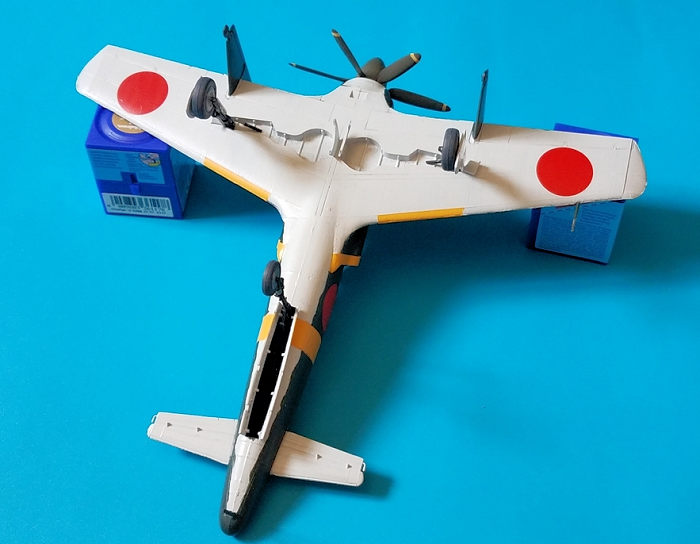
I painted the aircraft with RLM 70, and the undersides were painted with Revell Light Silky Grey 371 (which took several coats for it to cover decently). Then I painted the wheel wells with the underside colour (as stated on the instructions), and I also painted in yellow the leading edge ID bands, the nose band and the intakes. After all that, I gave the model two coats of Revell gloss varnish.
 I also painted the propeller, the spinner and
spinner plate with Revell 46 NATO Brown (I understand the correct colour should
be red brown or "Mahogany," but I didn´t have it) and detailing the tips of the
propeller with yellow. The landing gear doors were painted with Revell 371 Silky
Light Grey, and I painted the continuation of the yellow band on the nose gear
doors. The landing gear struts were painted in black with silver oleos, and the
wheels were painted with Revell 78 Tank Grey and silver hubs.
I also painted the propeller, the spinner and
spinner plate with Revell 46 NATO Brown (I understand the correct colour should
be red brown or "Mahogany," but I didn´t have it) and detailing the tips of the
propeller with yellow. The landing gear doors were painted with Revell 371 Silky
Light Grey, and I painted the continuation of the yellow band on the nose gear
doors. The landing gear struts were painted in black with silver oleos, and the
wheels were painted with Revell 78 Tank Grey and silver hubs.
Before proceeding to glue all the other parts, I decalled the entire model, using hot water to counteract the usual thickness of Asian decals. I placed the upper wing Hinomarus on their place, and sliced the parts of the decal that went above the wing bumps. I later painted the sliced areas with red. Next I added the lower wing Hinomarus. I put one on its correct place on the first try, but the second one was a bit more sticky, and had to be lifted multiple times before I was able to place it correctly (this is where the thickness of Asian decals benefited me). I did apply them over a pool of water. I then added the fuselage Hinomarus. All the decals were brushed over with a coat of Vallejo decal softener. After the decal softener was dry, I wiped the surface with water and varnished the aircraft with two coats of Revell matt varnish.
| FINAL CONSTRUCTION |
After decalling, I glued the landing gear struts in place. These are long, skinny, and won´t resist much movement, so once the model is on its wheels, one should leave it alone. Before proceeding further, I left the landing gear legs to dry thorouhgly before adding the wheels.
While the aircraft was lying upside down with the landing gear drying, I built the propeller assembly. The engine front plate was painted with the fuselage colours, and internally painted silver. Then the propeller shaft was added and trapped by adding a circular piece that glues to the back of the engine plate (don´t glue the shaft to the circular piece if you want the propeller to spin). The propeller was glued to its backing plate, and then the spinner was glued to the backing plate. I put CA into the propeller hole and then pushed it into the propeller shaft, securing me a spinning propeller.
 I glued the wheels to the landing gear, and then
added the landing gear doors. I next glued the propeller assembly, and with a
bit of fear, I put the aircraft over its wheels, and it didn´t collapse. However,
the main landing gear struts did flex a bit forward, and to secure them, I cut
two toothpicks, and CA glued them to the base the main landing gears, preventing
them from moving forward. Since the weight I had added earlier was enough, I
glued the canards in place.
I glued the wheels to the landing gear, and then
added the landing gear doors. I next glued the propeller assembly, and with a
bit of fear, I put the aircraft over its wheels, and it didn´t collapse. However,
the main landing gear struts did flex a bit forward, and to secure them, I cut
two toothpicks, and CA glued them to the base the main landing gears, preventing
them from moving forward. Since the weight I had added earlier was enough, I
glued the canards in place.
Before completing the plane, I painted the clear parts. It was now that a revolutionary thought struck me. I always had issues when gluing the clear parts to the cockpit openings because I didn´t clean the leftovers of the paint after masking. After cleaning them up, I dry fitted them, and glued them with Revell Contacta Clear-
The final detail to add was the big nose antenna. This is a butt join, and will break after you look at it funny, so I opened a hole over the area, and glued the antenna in place.
| CONCLUSIONS |
I had bought this kit once and sold it, regretting it some time later. When I found it again, I bought it instantly, because I wanted to have this remarkably different aircraft on my collection. Since the real aircraft flew three times before the end of World War Two, you can either paint it as the prototype of paint it with whatever colours you like. The other option in the market for the Shinden in 1:48 is the Zoukei Mura kit, which is much more detailed and has a stronger landing gear.
7 January 2019
Copyright ModelingMadness.com
If you would like your product reviewed fairly and fairly quickly, please contact the editor or see other details in the Note to Contributors.
Back to the Main Page Back to the Review Index Page Back to the Previews Index Page