| KIT #: | 61018 |
| PRICE: | $35.00 |
| DECALS: | Three options |
| REVIEWER: | Francisco Santoro |
| NOTES: | Canopy fits more or less ok, lower wing has a gap when glued to the fuselage. (which is why there is filler. Ed) |
| HISTORY |
 The Mitsubishi J2M "Raiden," or "Jack" for the
Allies, was a WW2 Japanese fighter first flown on March 20 1942, and introduced
into active service on December of the same year.
The Mitsubishi J2M "Raiden," or "Jack" for the
Allies, was a WW2 Japanese fighter first flown on March 20 1942, and introduced
into active service on December of the same year.
It was designed by Jiro Horikoshi, the creator of the famous A6M "Zero," for an specification that required the aircraft to be a high altitude interceptor against high-flying bombers. Thus, it sacrificed maneuverability for armament, speed and climb performance.
The J2M3 model was produced in parallel to the J2M2 version, first appearing in October 1943, with the first units being delivered to operational units in February of 1944.The "Raiden" first appeared in combat in the Battle of the Philippine Sea in June 19-20 1944. Due to the lack of a supercharger, the aircraft suffered at high altitude, ironic, since it was produced to bring down bombers. The aircraft was retired with the surrender of Japan on August 20 1945, with 671 units produced since 1942.
| THE KIT |
 This kit is not new being listed by Scalemates
as a 1973 release. As such, the kit comes with finely raised panel lines and
engraved detail for the ailerons, flaps, rudder, and some other areas.
The kit comes with three sprues, two in light grey and one in clear. The
parts were cleanly molded, with no flash visible and without any sign of
warping. Build options include lowered or raised
landing gear and a spinning propeller.
This kit is not new being listed by Scalemates
as a 1973 release. As such, the kit comes with finely raised panel lines and
engraved detail for the ailerons, flaps, rudder, and some other areas.
The kit comes with three sprues, two in light grey and one in clear. The
parts were cleanly molded, with no flash visible and without any sign of
warping. Build options include lowered or raised
landing gear and a spinning propeller.
Tamiya provided two set of instrucions, one in Japanese and another in English, plus a coloured profile page showing the left side of two of the model´s decal options. Each instruction sheet is divided into six construction steps, alongside written instructions on how to paint the interior.
There´re three decal options for the kit:
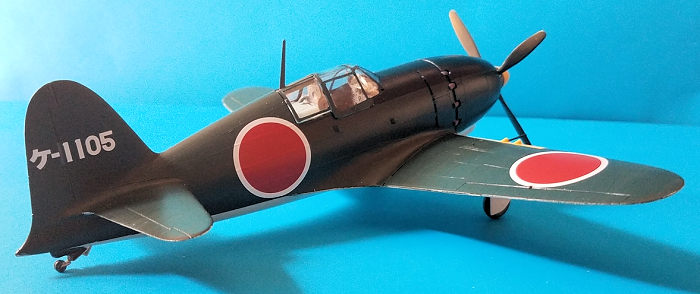
1) J2M3 Genzan Flying Group, November 1943, based at the Kagoshima airfield.
2) J2M3 of the 302nd Flying Group, flown by Lieutenant Sadaaki Akamatsu, March 1944 to August 1945, Atsugi airfield.
3) J2M3 of the 352nd Flying Group, flown by Lieutenant Yoshihiro Aoki, April 1945, Kanoya airfield.
| CONSTRUCTION |
I chose to build this aircraft as the first decal option, and that meant removing the radio equipment on the back of the cockpit, which was done with a sharp knife.
I began by painting the entire cockpit, as
indicated by the instructions, with silver (Revell 90), and picking up the
details with with black (Revell 08). The inside of the cockpit was painted with
light blue (Revell 49) because I
 didn´t have the required Blue-Green coloures
asked on the instructions. I left aside the cockpit in
order to focus on the instrument panel. This is a flat piece of plastic that
needs to have two decals applied. I painted it with Revell 45, varnished with
clear (Revell 01), left to dry, and added the decals. They were then covered
with flat varnish (Revell 02). With the decals dry, I
installed the control panel to the right hand fuselage half, while also gluing
the cockpit (great fit) and the tail wheel in the extended position.
didn´t have the required Blue-Green coloures
asked on the instructions. I left aside the cockpit in
order to focus on the instrument panel. This is a flat piece of plastic that
needs to have two decals applied. I painted it with Revell 45, varnished with
clear (Revell 01), left to dry, and added the decals. They were then covered
with flat varnish (Revell 02). With the decals dry, I
installed the control panel to the right hand fuselage half, while also gluing
the cockpit (great fit) and the tail wheel in the extended position.
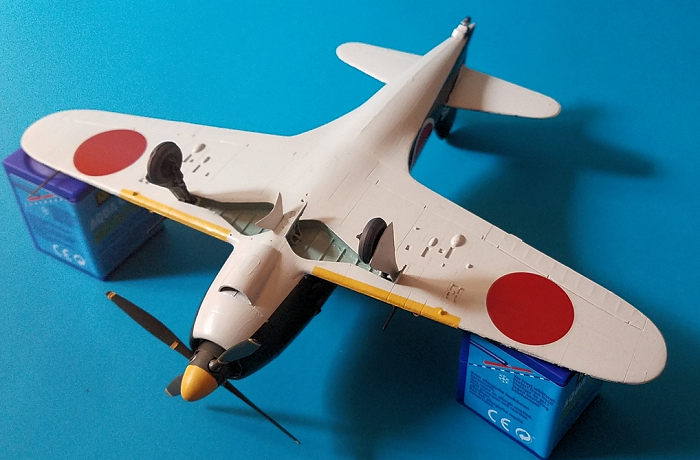
I cut the wings from their sprue and glued them together, and while they were drying, I assembled cowling (which contains the propeller shaft and its backing plate). I glued the wings to the fuselage, and the assembly had a gap where the end of the lower wing joined the fuselage. After the assembly was fully cured, I used CA to cover the area, while rescribing the panel lines that got lost due to the sanding.
With the aircraft more or less fully built (with the landing gear and other small parts left out to ease the painting), I began painting the aircraft.
| COLORS & MARKINGS |
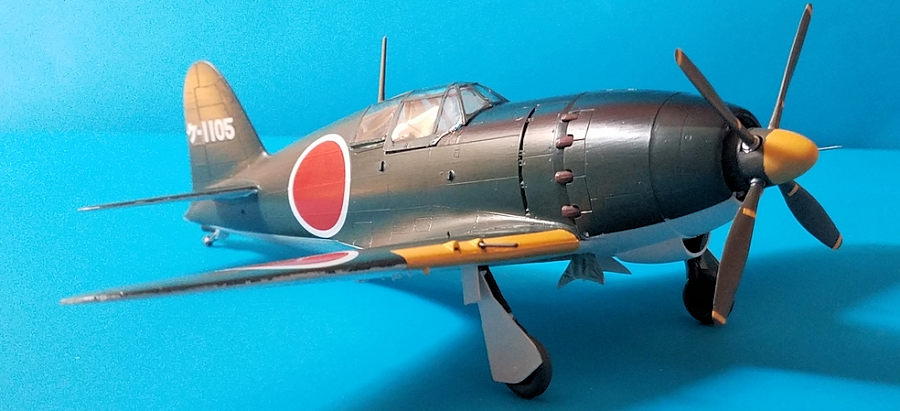
The colour scheme for the Raiden was really simple, dark green over light grey (as told by the instructions, and that´s what I also saw while checking internet photos) with a black antiglare panel and yellow leading edges. After looking at several internet photos and seeing the constant variation of shades on the upper surfaces (from a really dark green to dark green with a bluish tinge), I decided to use Revell 40 Black Green and Revell 371 Silky Light Grey (because the matt 76 version wasn´t available).
I brushpainted the upper surfaces with Revell
Black Green 40 until it was fully covered. With the black green cured, I masked
the demarcation line for the light grey, and began brushing the silky light grey
to the underside of the aircraft. Covering the entire lower fuselage with this
colour took me quite some time, because silk paints don´t cover as well as matt
paints (I must have given the lower sides more than 10 coatings). The paint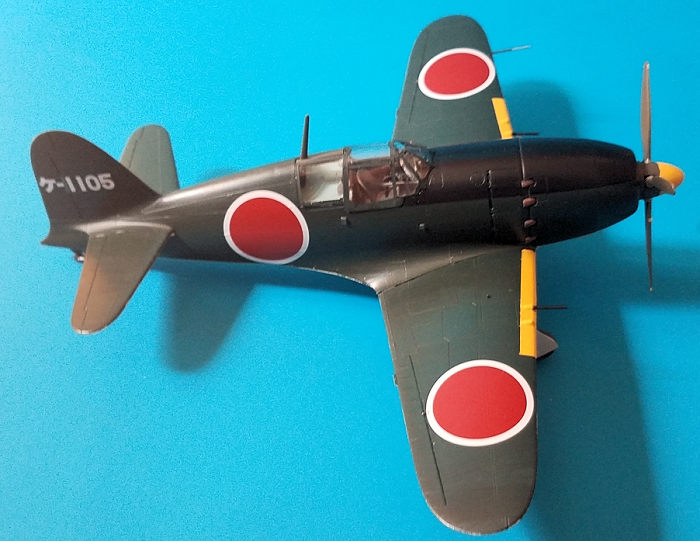 also
tended to accumulate and form blobs, and had to be brushed to avoid ending up
with bubbles of paint. The good side of the Revell 371 paint is that it looks
pretty much like the whitish grey I saw on the internet pictures and on photos
of other models.
also
tended to accumulate and form blobs, and had to be brushed to avoid ending up
with bubbles of paint. The good side of the Revell 371 paint is that it looks
pretty much like the whitish grey I saw on the internet pictures and on photos
of other models.
After the lower sides were fully painted and cured, I painted the wheel wells with light blue (Revell 49), and with that dry, I masked and painted the antiglare panel with black (Revell 08). The ridges between the black and green were sanded away with wert sandpaper. The yellow leading edges were first masked and then painted with yellow (Revell 15). The aircraft was then fully covered in clear varnish, to give the surface a smooth surface for the decals.
I had read many people say they had issues with Tamiya decals being too thick and not conforming to the panel lines, however, a thread on Britmodeller on how to deal with them surfaced an answer, use hot water. I first tried the Hinomarus for the undersides of the fuselage, I dipped one in hot water, and placed it over the wing as soon as it came off the backing paper. The decal immediately began to conform to the engraved detail, so I repeated the steps above for the other decal.
Next came the Hinomarus for the upper wings and fuselage. The two that go on the wings need to be put over the aileron hinges, and this is where they didn´t completely conform. The fuselage decals were placed, also conforming to the raised detail. The final decalling came in the form of the tail numbers and service stenciling. The first ones sunk well into the panel lines, and the last ones sticked well to their surface.
As a security measure, each decal received a brush with a decal softener. The softener residue was then removed with water, and the aircraft received two coats of matt varnish to seal the decals in place.
| FINAL ASSEMBLY |
The aircraft was virtually done, but it needed to have its landing gear, propeller and canopy installed. The landing gear covers proved to be a game of patience, since they had to be painted with the silk light grey multiple times to get a good cover. The landing was painted with black.
While all th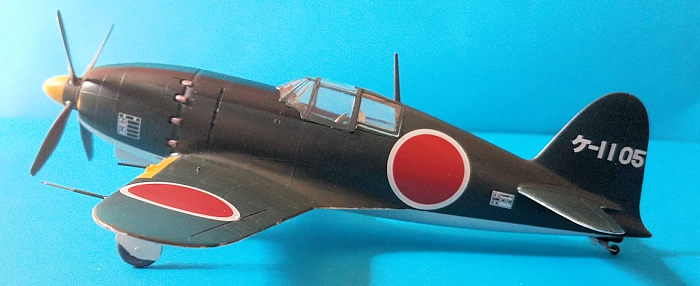 at was drying, I began to build
the propeller. This consists of a cooling fan, another piece, the propeller and
the spinner. I dry fitted the cooling fan first, and saw it wouldn´t spin
freely, so I trimmed it a bit and checked again. It was better.
I used Revell 46 (NATO Brown) to paint the propeller and the spinner. The
cooling fan was painted in silver. With the propeller fully covered and dry, I
painted with yellow the tip and base of the propeller. The spinner front was
also painted yellow as per the instructions.
at was drying, I began to build
the propeller. This consists of a cooling fan, another piece, the propeller and
the spinner. I dry fitted the cooling fan first, and saw it wouldn´t spin
freely, so I trimmed it a bit and checked again. It was better.
I used Revell 46 (NATO Brown) to paint the propeller and the spinner. The
cooling fan was painted in silver. With the propeller fully covered and dry, I
painted with yellow the tip and base of the propeller. The spinner front was
also painted yellow as per the instructions.
The landing gear was then glued in place, making sure have both gears in the same position, and left to dry. Moments later, the wheels were glued, the gear covers following soon after. The guns were also painted black and glued into their openings (I almost lose both of them).
With the model now standing by itself, I glued the propeller in place, masked the canopy and glued on its opening. The canopy was a so so fit, because even though it fitted perfectly on the front, the back of it was left hanging in the air.
| CONCLUSIONS |
My first Tamiya kit, but not my last, I can only assume the gap (the only one) was because of the age of the molding. The kit is a great starting point for a future Japanese aircraft collection, and doesn´t involve too much masking, unlike Luftwaffe aircraft. The low part count makes it also great for a weekend build.
| REFERENCES |
https://en.wikipedia.org/wiki/Mitsubishi_J2M
9 March 2021
Copyright Modeling Madness.com. All rights reserved.
If you would like your product reviewed fairly and fairly quickly, please contact the editor or see other details in the Note to Contributors.
Back to the Main Page Back to the Review Index Page Back to the Previews Index Page