Hasegawa 1/48 A6M3 type 22
| KIT #: | 09117 (Jt 17) |
| PRICE: | $25-30.00 |
| DECALS: | Two options |
| REVIEWER: | Fernando Rolandelli |
| NOTES: | Techmod 48118, Eduard p.e., Montex masks |
| HISTORY |
Mitsubishi A6M3 Type 22, CPO Hiroyoshi Nishizawa, 251st AG, Aichi Prefecture, Japan, 1943
 The need to improve the high-altitude and
climb performance of the Zero led to the fitting of a new Sakae model, type
21, rated at 1.130 hp at take-off. It required redesigning the cowling for
the heavier bearers. Moreover, the wings were squared off by deleting the
folding outer section. The modification increased the rate of roll, reduced
the stick forces and increased level speed.
The need to improve the high-altitude and
climb performance of the Zero led to the fitting of a new Sakae model, type
21, rated at 1.130 hp at take-off. It required redesigning the cowling for
the heavier bearers. Moreover, the wings were squared off by deleting the
folding outer section. The modification increased the rate of roll, reduced
the stick forces and increased level speed.
Ironically, these modifications, which were actually a step in the right direction (as the later A6M5 showed), were disliked by the Japanese pilots, who complained on the reduction of fuel load and thus tactical radius. It certainly didn’t help that the IJNAF was involved on the fight over Guadalcanal, out of reach of these Model 32 Zeroes.
Therefore, Mitsubishi designer mated the new engine and cowling to the old wing, adding an extra tank for good measure. The resulting Model 22 was the longer legged of any Zero variant, which is to say a lot. The uprated engine kept the Zero in the same performance class of the then-new F6F.
| THE KIT |
Though undoubtedly surpassed by the new Tamiya family of Zeroes, Hasegawa’s are competently made kits with plenty of fine surface detail. Interior is not up to present standards, but it can be upgraded with the help of PE and some scratch building. I made good use of an Eduard Zoom PE and a mask set (wonderful tool) I used Techmod decals and Montex vinyl masks.
| CONSTRUCTION |
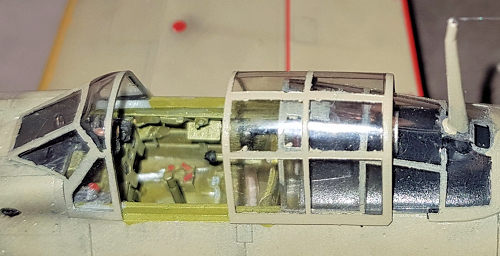
The kit assembles really well for the most
part. The cockpit was detailed with a lot of scratch building using the Mikesh
book as a reference. Many details added to the rear deck will not be visibly but
on the 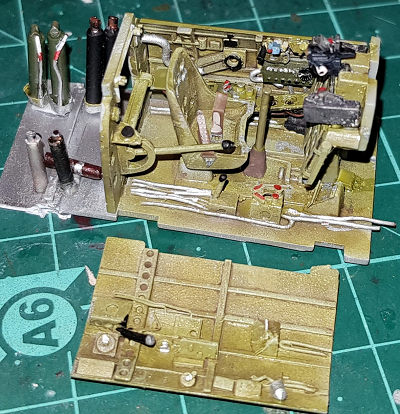 most intently scrutiny. The seat fits too far forward, you can see that
in one photo, but I later corrected it. I detailed the very prominent gunsight
adding the auxiliary ringsight. I put the canopy in place at this stage, mainly
to protect the sight, though the fit is so good that you could leave it for the
final assembly.
most intently scrutiny. The seat fits too far forward, you can see that
in one photo, but I later corrected it. I detailed the very prominent gunsight
adding the auxiliary ringsight. I put the canopy in place at this stage, mainly
to protect the sight, though the fit is so good that you could leave it for the
final assembly.
I detailed the engine with electrical cables, the pushrods being included on the crankcase part. The fit of the two stars of the Sakae engine and of the crankcase is not positive, neither is the fit of the cowling to them, though it is well planned. You must watch the crankcase is properly centered or the propeller will fit squint.
The second big problem I had was self-inflicted and came from my decision to detach the ailerons and use a KMC resin replacement to fit them deflected. The resin parts would not fit, leaving huge, uneven gaps all along the hinge line. Therefore I recovered the plastic parts, reconstructed them and glued them in the desired deflected attitude. They didn’t add much to the model and were the source of much grief.
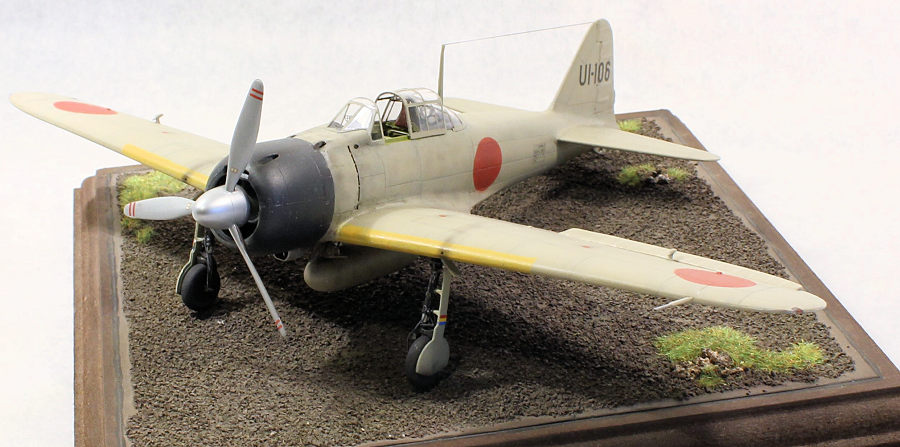
| COLORS & MARKINGS |
I have been for long a follower of Nick
Millman in his research on Japanese aviation colours, and was itching to paint
my Zero accordingly. I used WEMM’s “Mitsubishi Amber Green (Ame-Iro)” colour,
which fitted the bill exactly. To give interest to the surface, a heavy preshade
was first painted and then the various panels were retouched with slight
variations of the base colour, both using masks and “mottle-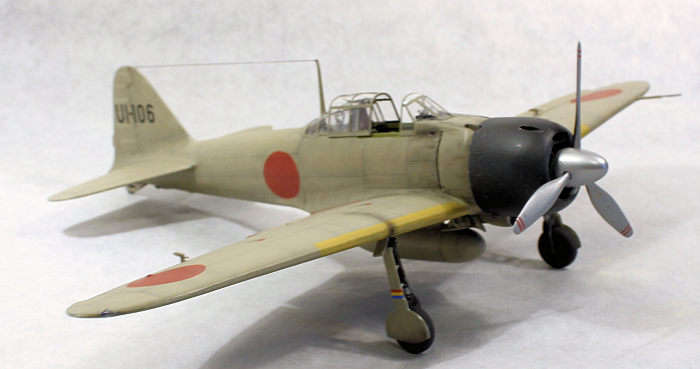 fashion”. The
surface was dirtied with post- shading using several dark concoctions, and
finally a very restrained chipping was added.
fashion”. The
surface was dirtied with post- shading using several dark concoctions, and
finally a very restrained chipping was added.
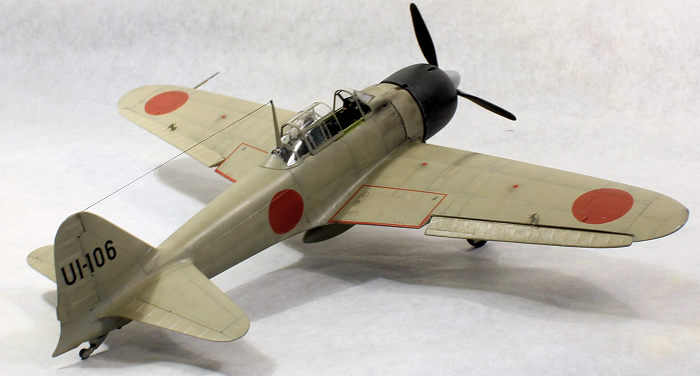
The detail painting was made as per a Mitsubishi built machine: Blue-Black rear decking, Black u/c legs, Ame-iro wheel bays and inner u/c doors and Mitsubishi Interior Green. Cowling was painted using “Cowling Blue-Black” which also depicts Mitsubishi’s grayish, bluish version of Black.I had to use Aotake somewhere (hey, it is a Japanese plane, isn’t it?) and found the inner cowling a perfect spot to do that.
I painted the ailerons, elevators and rudder structure in different shades to show their fabric/ribs construction. It was a bit tiresome but the result was most pleasing.
The plain simple Hinomarus were just begging to be painted. I took a Montex mask for British insignia and found some appropriately sized roundels (there are so many concentric circular masks, they would fit any size you need). Tactical number and stencils came from the Techmod sheet.
| CONCLUSIONS |
 The kit is a simple straight forward build
and a good result is almost guaranteed. The interior allows for some improvement
to suit your taste. I failed to enjoy this build as I should because of my folly
with the ailerons, but the kit was not to blame!
The kit is a simple straight forward build
and a good result is almost guaranteed. The interior allows for some improvement
to suit your taste. I failed to enjoy this build as I should because of my folly
with the ailerons, but the kit was not to blame!
| REFERENCES |
“Japanese Aircraft Interiors 1940-1945”, Robert C. Mikesh, Monogram (2000)
“Imperial Japanese Navy Aces 1937-1945”, Henry Sakaida, Osprey Publications
“Mitsubishi Zero”, Bunrin do (1974)
“A6M Colours”, Nick Millman.
Fernando Rolandelli
6 July 2021
Copyright ModelingMadness.com. All rights reserved. No reproduction in part or in whole without express permission.
If you would like your product reviewed fairly and fairly quickly, please contact the editor or see other details in the Note to Contributors.