MPM 1/72 J8M Sushui
| KIT #: | 72037 |
| PRICE: | $20.00 or so |
| DECALS: | Two options |
| REVIEWER: | Christopher Campbell |
| NOTES: | A small, but easy building kit. |
| HISTORY |
Japan was from the onset intrigue by the potential a rocket powered interceptor such as the Me.163. Had it worked as planned, it was potentially a devastating point defense fighter. With its speed and time to climb vastly exceeding anything up until that time, it might have been an ideal way to combat the high flying B-29 that would soon be coming.
This was not to be, though. The Me.163 itself never worked as well as it was hoped to and was only moderately effective when it did work. Japanese efforts to obtain it were fraught with troubles in the form of those submarines carrying plans and components being sunk enroute to Japan.
Negotiations were entered into to by the Japanese military to produce the Me.163 and its Walter HWK 509A engine under license in 1943. This was to include a complete aircraft, three complete engines, blueprints, and more to allow production to be started up in Japan. This was to be delivered by U-boat or submarine in early 1944
 Components
and documents were loaded aboard two different submarines, both of which were
lost to enemy action. The first, submarine RO-501 (formerly the U-1224),
carrying the airframe components, was sunk in the Atlantic in May of 1944 by
hunter elements from the U.S.S. Bogue. The I-29 carrying the engines,
blueprints, and other documents was sunk by the U.S.S. Sawfish in or near the
Philippine Sea two months later. Germany attempted to send a third Me. 163 to
Japan in early 1945, only to have this submarine, the U-864, sunk by British
sub, the HMS Venturer, this time.
Components
and documents were loaded aboard two different submarines, both of which were
lost to enemy action. The first, submarine RO-501 (formerly the U-1224),
carrying the airframe components, was sunk in the Atlantic in May of 1944 by
hunter elements from the U.S.S. Bogue. The I-29 carrying the engines,
blueprints, and other documents was sunk by the U.S.S. Sawfish in or near the
Philippine Sea two months later. Germany attempted to send a third Me. 163 to
Japan in early 1945, only to have this submarine, the U-864, sunk by British
sub, the HMS Venturer, this time.
Undaunted, though, the Japan pressed on with the project. Intended as a joint Army and Navy project, this led to the usual and frequent disagreement between the two services. In this case it was whether it was to be a new design or an attempt to generally replicate the German design. The Navy wanted the latter, while the Army wanted an entirely new aircraft.
The Navy project won out and Mitsubishi began to reverse engineer the Komet, in large part from a flight manual. Army interest in the project seemed to have largely waned after this to the point of uninterest through much of the remainder of th war. An Army variant was designated as the Ki-200, though no aircraft or even partial airframes were produced to Army specifications.
Like many late war Japanese fighter and interceptor projects, development and production were a race against time. The home islands were increasingly under near naval blockade as the allied fleets closed in, resulting in a shortage of raw materials of every type. Meanwhile, endless formations of B-29’s systematically pounded factories and cities flat from the air or burned them to the ground; sometimes both.
By December of 1944, when towed and glide tests commenced, there was little precious little realistic hope for victory or even a negotiated peace. Nor was it likely that any new weapon or aircraft then in development could even play a significant factor. This was added to by the growing lack of trained and experienced pilots as combat attrition took its inevitable toll.
Like the Me.163, the J8M1 would be armed with a pair of Type 5 30mm cannon for a powerful punch in a tiny package. The Army Ki-200 would carry either a pair of Ho-155 30mmm cannon or Ho-5 20mm cannon. However, all variants would carry fifty-three rounds per gun, whatever the caliber or variant.
Fuel would be of the same unpleasant, highly unstable, and dangerous type used in the Me.163. In Japan, these were known as Ko (T-Stoff) and Otsu (C-Stoff). The Japanese version of the Walter rocket engine would be known as the Toko Ro.2. This would produce slightly less trust than the German original at 3,307 lbs. This was still impressive with such a small aircraft made even lighter without its armored glass and plywood being substituted for metal in some parts such as the tail and main spar. Rate of climb would be three minutes, forty seconds to ten thousand meters with a top speed of 900 kph (559 mph).
 By early
1945, tooling was in place to enable production of the Sushui (literal
translation: Autumn Water, though taken to mean “sharp sword,” if used
poetically) was near readiness. Prototypes continued to glide tested and towed,
though none had flown under power. When it at last did, the Japanese incarnation
of the Komet showed itself to be no less mercurial to handle, with the same
proclivity for killing its pilots.
By early
1945, tooling was in place to enable production of the Sushui (literal
translation: Autumn Water, though taken to mean “sharp sword,” if used
poetically) was near readiness. Prototypes continued to glide tested and towed,
though none had flown under power. When it at last did, the Japanese incarnation
of the Komet showed itself to be no less mercurial to handle, with the same
proclivity for killing its pilots.
In July of 1945, a powered flight was conducted, initially going a planned with the aircraft rocketing into the sky. Then the engine cut out and test pilot Lieutenant Commander Toyohiko Inuzuka attempted to glide it back to land. This went well enough until contact was made with a structure on the airfield causing the aircraft to hit the ground hard and burn. Inuzuka died from his injuries the following day.
Development was halted while the cause was investigated. It was determined that the fuel tanks had been only partially filled. This caused the fuel pumps to starve and an automatic cutoff in the rocket engine to engage. No more powered flights would be made before the end of the War.
As the war was winding down, the Army seemed to have a renewed interest in the Ki.200, though mainly as ramming platform against B-29’s and other aircraft. Thus was the desperate and frenetic state of things in Japan in 1945. Fortunately for all, this never came to fruition and the J8M Sushui faded into obscurity as an Eastern mirror of the Me.163, just as flawed and just as fraught with tragedy for those who flew it.
Plans were still in place for production, with seven aircraft being completed. Two of these survive still survive, on display at Chino and at Mitsubishi’s private museum in Japan.
| THE KIT |
Released by MpM in 1995, this was, at the time, still considered something of a short run kit. However, I would assess it as being somewhat transitional, as MPM began producing kits that seemed more like just regular injection models. This was no longer one of those nasty short run injection kits where nothing fit together well, making you wish that you had bought a vacuform instead. The parts count is minimal, as this is a very simple aircraft. However, a very nice resin cockpit and photoetch came with it and the parts clean up very nicely, requiring less test fitting than any “short run” that I have ever built.
 Please
forgive me if my details on this are a little fuzzy, as I built it nearly twenty
years ago now. The canopy is vacuform and decals are provided for either a
prototype test aircraft or a “service” model.
Please
forgive me if my details on this are a little fuzzy, as I built it nearly twenty
years ago now. The canopy is vacuform and decals are provided for either a
prototype test aircraft or a “service” model.
This model originally sold in the $20-$25 range. It can still be found at that price or even less on e-Bay or at vendor tables. It also does not appear to be too difficult to find, unlike some MPM kits.
It is molded in the typical, somewhat soft grey plastic that we expect to find on this kit. So, exercise caution when cutting parts away from the sprues. It can be easy to damage things like the wings or smaller parts, resulting in frustrating and time-consuming repairs. However, if one uses caution and a surprisingly little test fitting, this kit is an easy build.
| CONSTRUCTION |
 This looked
like it was going be fairly simple and proved to be. I started with the cockpit,
spraying it in Tamiya Cockpit Green and then detailing it out appropriate colors
here and there and some judicious dry brushing with black and silver as deemed
appropriate. I gave it a light oil wash of Testors Flat black diluted in mineral
sprits.
This looked
like it was going be fairly simple and proved to be. I started with the cockpit,
spraying it in Tamiya Cockpit Green and then detailing it out appropriate colors
here and there and some judicious dry brushing with black and silver as deemed
appropriate. I gave it a light oil wash of Testors Flat black diluted in mineral
sprits.
The fuselage interior was also sprayed in the same Tamiya Cockpit Green and the inside of the exhaust area painted in Tamiya Flat Black. Then the cockpit was test fitted and proved to be spot on. Thus, it was glued in place with some CA glue. Once this had set, the fuselage and wing halved were glued together with Tenax.
Any seams were sanded smooth with 400 grit sandpaper and polished with 0000 steel wool, with a little CA glue used to fill and spots that remained and sanded out again. I will note, that there was very little sanding needed on my kit. This is probably the cleanest build that I have had with anything that was even on the fringes of short run. The tail wheel assembly was glued in place, a resin part as I recall, also with a minimum of cleanup. Then it was ready to paint.
| COLORS & MARKINGS |
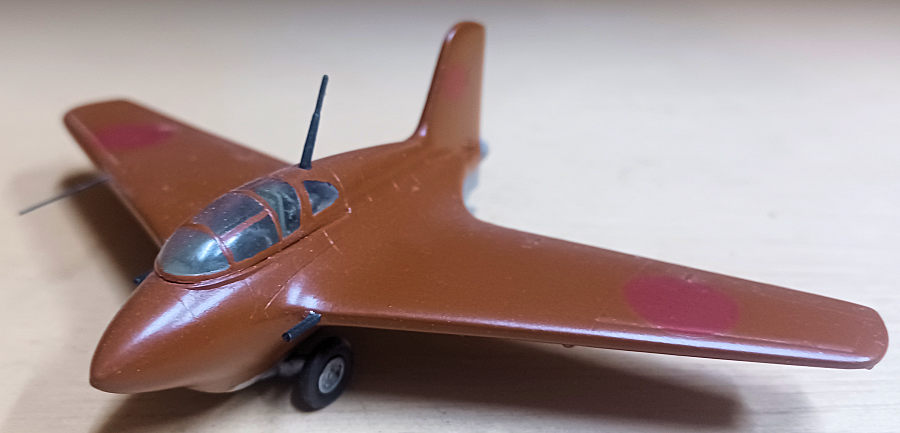
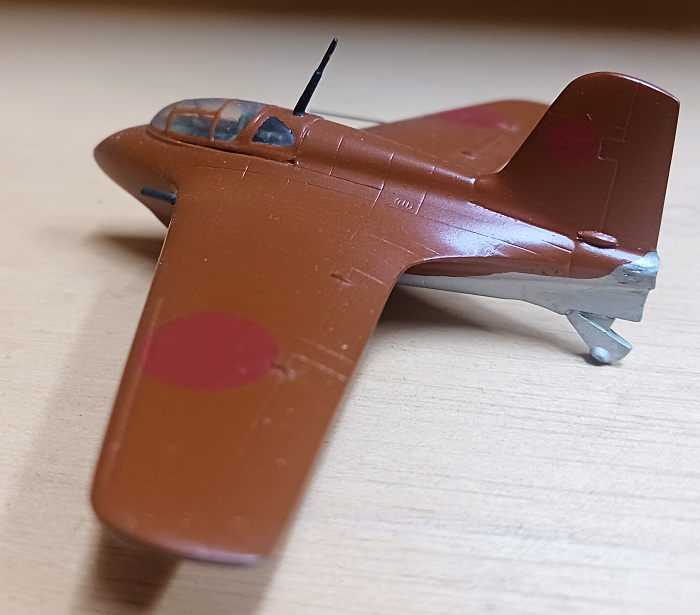
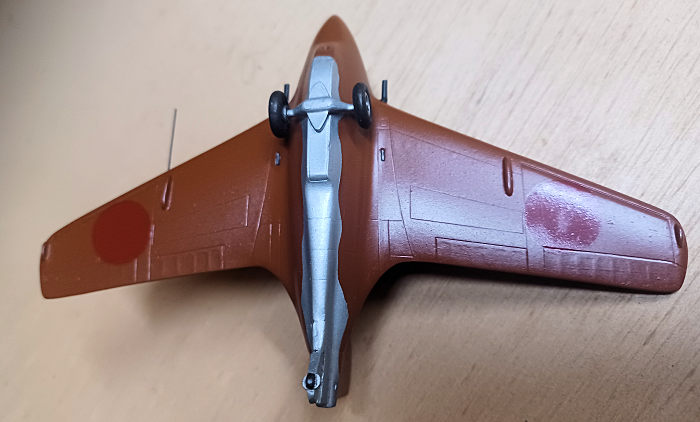
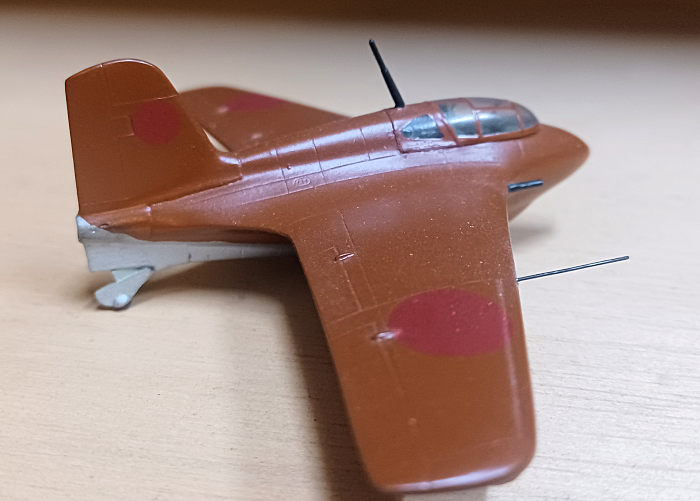
The cockpit was stuffed with dampened bits of paper towels and I prepared to paint. So, here is where it gets a little weird. I have seen illustrations of this aircraft in the same orange color that I used on my MXY8. It is also commonly illustrated in Imperial Japanese Navy Green. However, at some point, I have seen one depicted in the Japanese dark reddish brown color seen in some paint schemes that is very close to Tamiya Hull Red. This was the color that I decided that I wanted, saving the orange for the trainer or prototype should I later chose to build it (which I did, for the Yokosuka trainer) and the green for a 1/48 example.
Admittedly, while all surviving examples are orange, these were test/prototype/preproduction items. Should they have entered service, Japanese Navy Green is the color most likely to have been used. In retrospect, now recognizing that this color was most commonly used on some Japanese Army aircraft, I realize that I may have inadvertently modeled the Ki.200.
 I did not use
the Hull Red straight from the bottle. Instead, I added a few splashes of Tamiya
Flat Black, Tamiya NATO Brown, and Tamiya Orange. However, the final note is
still very close to the original Hull Red.
I did not use
the Hull Red straight from the bottle. Instead, I added a few splashes of Tamiya
Flat Black, Tamiya NATO Brown, and Tamiya Orange. However, the final note is
still very close to the original Hull Red.
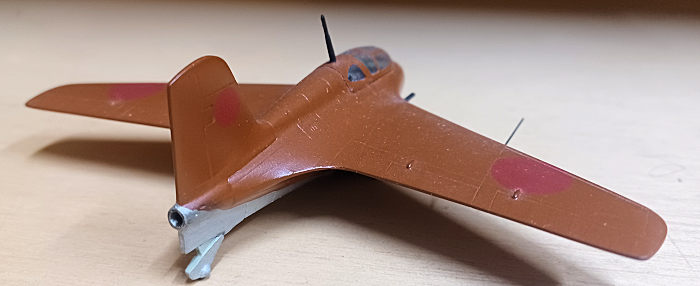
This went on with no problems. Once dry, I masked off a section of the ventral fuselage which was then sprayed with Tamiya Silver. With some simple mask cutting, I managed the nice, rippled effect seen in some of the surviving photos of the J8M. It is notable that, while black and white, the some of these photos seem to show color distinctly darker than the brighter orange that if oft seen. This could be something like the color that I am depicting, or possibly green. It could also be an effect of orthochromatic film, if that was type being known. If the color that I chose was actually ever used, it is now likely a mystery locked in a shadowy, dusty corner of history.
The whole thing was shot with Testors rattle can Model Master Gloss and once dry the kit decals were applied. These went on without issue, using Micro Sol. Once these had dried the model was shot again, this time in rattle can Model Master Semi-Gloss.
One note on the decals. The plain red disc Hinomarus are a bit translucent. When looking at the actual model in ordinary light, they look fine, especially on the color that I chose. However, the camera flash somewhat obliterated one of the underwing insignia. This is something that is worth being aware of, so keep this in mind if you go this route.
| FINAL CONSTRUCTION |
The landing skid was and undercarriage and wheel hubs were painted in the same Tamiya Silver. All tires were painted in the Testors Rubber. These were then glued in place using CA glue.
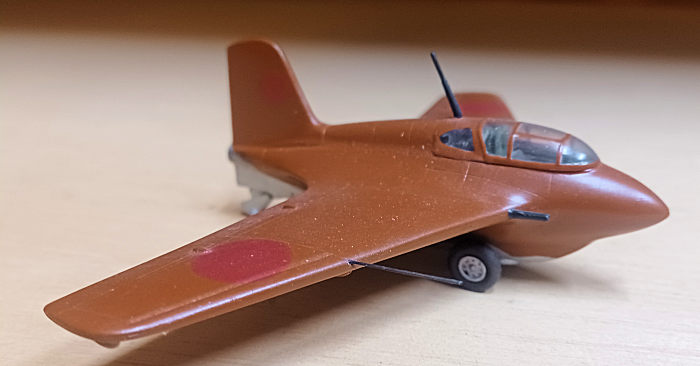
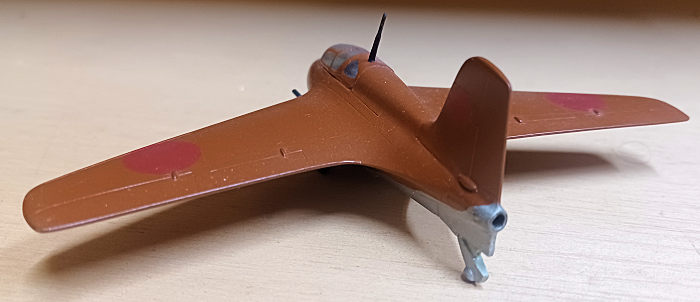 The long
pitot is metal, and part of the photo etch. This was detached from the fret,
prepped and glued in place with CA glue and then painted in Testors Gun Metal.
The cannon were made of resin, as I recall. These were cleaned up and also
painted in the same Testors Gun Metal and glued in place with CA glue after
drilling small pilot holes in the wing roots with a pin vise.
The long
pitot is metal, and part of the photo etch. This was detached from the fret,
prepped and glued in place with CA glue and then painted in Testors Gun Metal.
The cannon were made of resin, as I recall. These were cleaned up and also
painted in the same Testors Gun Metal and glued in place with CA glue after
drilling small pilot holes in the wing roots with a pin vise.
Finally, the canopy was cut away from the vacuform sheet. After some simple trimming, cleanup and test fitting the framing was hand painted with the same mix I had used for the airframe. Interior framing was painted in Tamiya Cockpit Green. Once dry, this was glued in place with Elmers Glue All and touched up with more of my custom “hull red” color.
Finally, the radio mast was painted in Model Master Burnt Iron and glued in place with a little CA glue. Then the canopy was covered and the whole thing was given a dusting with more rattle can Semi Gloss. Thus, it was done; finished. I had a little 1/72 J8M Sushui on my display shelves.
| CONCLUSIONS |
This was a fairly quick and easy build. I think that my total working time was around four to five hours. Would I recommend this kit? Definitely.
If one exercises a minimum of caution and test fitting, this is a very easy build. Something as simple as this could be a great first kit for something that borders on limited run. That being said, if you have a great time with this one, do not expect them to all be that easy. In any case, enjoy the build and have fun!
| REFERENCES |
Japanese Aircraft of the Pacific War by Rene J. Francillon, Naval Institute Press, 1979
https://en.wikipedia.org/wiki/Mitsubishi_J8M
7 May 2024
Copyright ModelingMadness.com. All rights reserved.
No reproduction in part or in whole without express permission. If you would like your product reviewed fairly and fairly quickly, please
contact
the editor
or see other details in the
Note to
Contributors.