| KIT #: | MA 113 |
| PRICE: | $7.00 from a vendor |
| DECALS: | Five options |
| REVIEWER: | Nicolai Plesberg |
| NOTES: | 1972 issue – all Japanese instructions. Two kits in the box! |
| HISTORY |
When World War II broke out in the Pacific, the Imperial Japanese Army Air Force (IJAAF) had the obsolete Nakajima Ki-27 “Nate” and the newer Nakajima Ki-43 “Oscar” just entering service. They were joined by the Nakajima Ki-44 “Tojo” and the Kawasaki Ki-61 “Tony” in 1942, but by the spring of 1944 the Allied Air Forces had won complete air superiority over virtually all fronts in the Pacific theatre; the Oscars, Tonys and Tojos were no match for the P-38s, P-47s, P-51s, F4Us, F6Fs and Spitfire Mk VIIIs operated by the Allied air forces. While the Imperial Japanese Navy’s policy was to pursue further development of existing designs, such as the Zero, the Imperial Army pressed on with the development of new designs, which resulted in the Army Type 4 general-purpose fighter, more commonly known as the Nakajima Ki-84 Hayate (Gale).
 The Ki-84
was called “Frank” by the Allies and possessed excellent performance as well as
high manoeuvrability and also self-sealing fuel tanks as well as full protection
for the pilot. The Frank was more than a match for all of the best Allied
fighters; it was able to out fly and outturn the P-51 for all but the highest
altitudes. It also possessed a powerful armament consisting of two 12.7mm Ho-103
machineguns and two 20mm Ho-5 cannons (30mm weapons were an option) and
able
to intercept the high-flying B-29s previously undisturbed, because of older
Japanese fighters inability to intercept them.
The Ki-84
was called “Frank” by the Allies and possessed excellent performance as well as
high manoeuvrability and also self-sealing fuel tanks as well as full protection
for the pilot. The Frank was more than a match for all of the best Allied
fighters; it was able to out fly and outturn the P-51 for all but the highest
altitudes. It also possessed a powerful armament consisting of two 12.7mm Ho-103
machineguns and two 20mm Ho-5 cannons (30mm weapons were an option) and
able
to intercept the high-flying B-29s previously undisturbed, because of older
Japanese fighters inability to intercept them.
When entering service in the spring of 1944 it came as a surprise to the Allies, but soon mishaps set in with landing gears that simply snapped on landing, because of the poor manufacturing quality of the gears. Also other material and workmanship issues caused other components to fail. The engine, the Nakajima Homare Ha-45 18-cylinder two-row radial, proved to be very maintenance heavy, because of its advanced fuel injection system and demanded skilled personnel for proper maintenance; some of these personnel had been drafted into Imperial Army service, because of the beginning shortage of manpower in the field!
Yet once in the air and in good maintained state and with a skilled man behind the stick, the Frank was a deadly opponent to any Allied fighter challenging it. Total production figures, including prototypes and trials aircraft (sort of pre-production machines), reached 3500. Had it entered service earlier, it could have presented the Allied war effort with a serious problem at hand, but, as with most of the Axis’ excellent late war aircraft, they were too few and too late to make any difference to the inevitable outcome of the war for Japan at this stage.
| THE KIT |
 This kit
according to the sprues stems from 1972, so I guess this must be such a kit –
with an all Japanese instruction sheet. It contains 52 parts in light grey
plastic and four in clear. The surface detailing is most engraved with a few
raised details; surprisingly nice for an early 1970s kit, which by the way
represents the Ki-84-1a, the most built version of the Hayate. The decal sheet
presents five options; four camouflaged and one in natural metal. As a nice
bonus, maybe because they were bought second hand, there was actually two kits
in a box designed only for one; the box looked a bit squashed, but both kits
were luckily undamaged. There were also two tubes of glue, one from each kit, a
1970s gimmick. The tubes were disposed of, as I don’t believe in 40 year old
tube glue!
This kit
according to the sprues stems from 1972, so I guess this must be such a kit –
with an all Japanese instruction sheet. It contains 52 parts in light grey
plastic and four in clear. The surface detailing is most engraved with a few
raised details; surprisingly nice for an early 1970s kit, which by the way
represents the Ki-84-1a, the most built version of the Hayate. The decal sheet
presents five options; four camouflaged and one in natural metal. As a nice
bonus, maybe because they were bought second hand, there was actually two kits
in a box designed only for one; the box looked a bit squashed, but both kits
were luckily undamaged. There were also two tubes of glue, one from each kit, a
1970s gimmick. The tubes were disposed of, as I don’t believe in 40 year old
tube glue!
Some rumours out there claims this kit is actually be to 1/50 scale (These are not rumors as I built this kit in 1974 while in Japan and the box clearly stated it was 1/50. Ed), but only when the kit has been finished, it is possible to ascertain whether this is true or not! However, as the lower wing come in one piece from tip-to-tip, I took a ruler and measured it to 23.7cm, which scaled up 48 times you get about the right wing span of the real aircraft! 50 times up it don’t get right! Let’s see along the build who’s right!
| CONSTRUCTION |
It’s most tempting just to begin with the obvious easy things, so I began construction by gluing wings, interior bits and drop tanks together and after a little sanding / filling the interior parts were readied for painting. I chose to use the same green color, as in my Zero kit, I built in parallel with these two, even though I’m not sure about the difference between Mitsubishi’s and Nakajima’s interior green colors, but as long as it looks “right” enough I’m satisfied.
 Some detail
painting was next and I decided to do the assembly sequence rather different.
Tamiya suggests you to cut the otherwise nice instrument panel decal in two in
order to attach it. “What?” I said to my self. “They really don’t mean that”,
but as things are engineered you don’t have a choice. Yes you do! If the
mounting slots in the right fuselage half for the interior are modified, you, 1)
can glue the fuselage together, 2) attach the instrument panel decal in one
piece and 3) attach the interior at last, it will provide a better solution for
that headache. If the slots have the bottom wall removed, the interior will slip
in place as described above. But before I actually did that, I painted the tail
gear plus tail gear bay before the fuselage halves were joined.
Some detail
painting was next and I decided to do the assembly sequence rather different.
Tamiya suggests you to cut the otherwise nice instrument panel decal in two in
order to attach it. “What?” I said to my self. “They really don’t mean that”,
but as things are engineered you don’t have a choice. Yes you do! If the
mounting slots in the right fuselage half for the interior are modified, you, 1)
can glue the fuselage together, 2) attach the instrument panel decal in one
piece and 3) attach the interior at last, it will provide a better solution for
that headache. If the slots have the bottom wall removed, the interior will slip
in place as described above. But before I actually did that, I painted the tail
gear plus tail gear bay before the fuselage halves were joined.
The join needed as always filler here and there, but no big amounts (it’s a Tamiya kit!) and after that had been dealt with, the above procedure for the interiors was implemented. The wings and tail planes were then glued to the fuselages. The joins here were also quite easy to deal with; the amount of filler was moderate on the fuselages / wing joins and less on the fuselage / tail planes ditto.
 The
propellers were next; painted black and with yellow tips and stripes at the
middle of the blades. The gun sights were enhanced by replacing the reflector
plate with a transparent one then painted and glued in place. Next were the
canopy parts; they were cleaned then glued in place with Humbrol Gloss Cote. At
this stage I realised that the sights had been glued in place the wrong way
around! As the canopy parts sat pretty firmly as they should it was just bad
luck to discover that!!
The
propellers were next; painted black and with yellow tips and stripes at the
middle of the blades. The gun sights were enhanced by replacing the reflector
plate with a transparent one then painted and glued in place. Next were the
canopy parts; they were cleaned then glued in place with Humbrol Gloss Cote. At
this stage I realised that the sights had been glued in place the wrong way
around! As the canopy parts sat pretty firmly as they should it was just bad
luck to discover that!!
The engines / cowlings and gear bays were next being painted suitable colors then glued into the nose and the cowling pieces glued in place to also strengthen the nose assembly. The nose cowling ring needed some filling and sanding to blend in perfectly.
Somewhere along this process, and I still don’t get how it happened, but one of the Franks went haywire and ended on the kitchen floor from my dining table; a drop of about 70 cm. As far as I could see no joins had sprung up and in need of repair, but the tail wheel had been bent a bit. If that was the only casualty, then it was pure luck that nothing more serious had happened! It otherwise proved to be solid constructed.
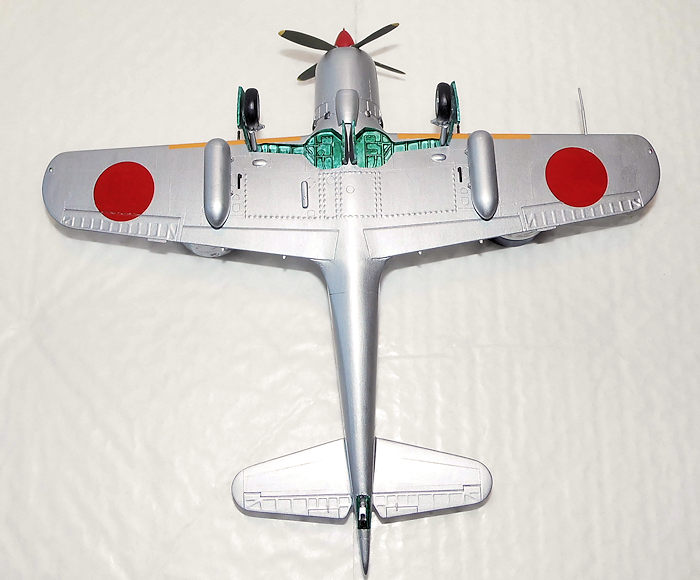
Gear went next; some ejector pin marks had to be dealt with before painting could proceed, but in the end it got the gear finished and before attaching it, the models were cleaned and painted in their respective colors around the gear bays plus the outer side of the doors were painted as well to avoid too much touch up afterwards. As soon as the gear had been attached the models went to the paint shop.
| COLORS & MARKINGS |
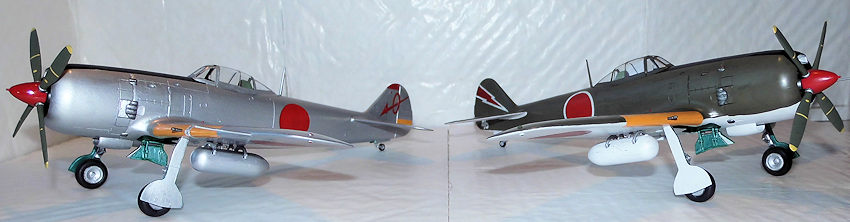
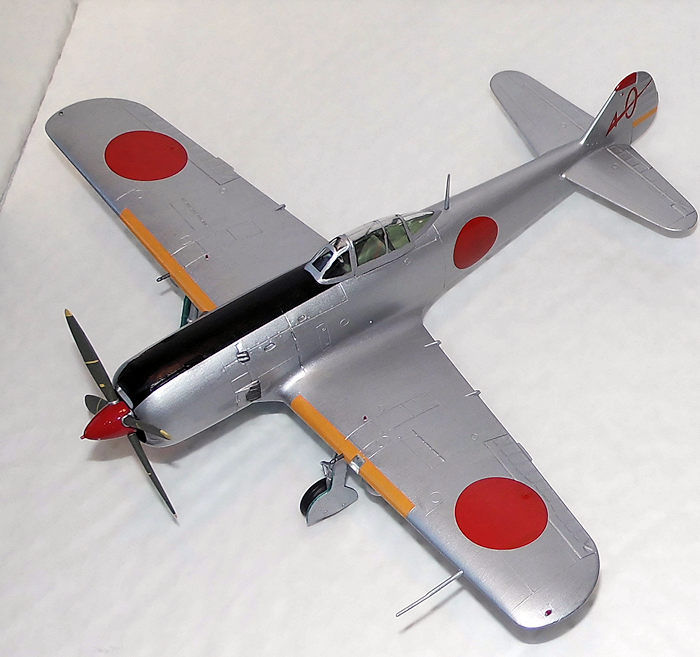
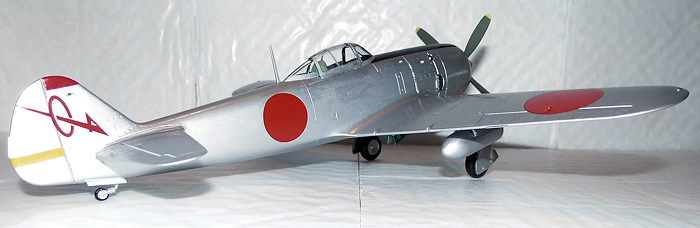
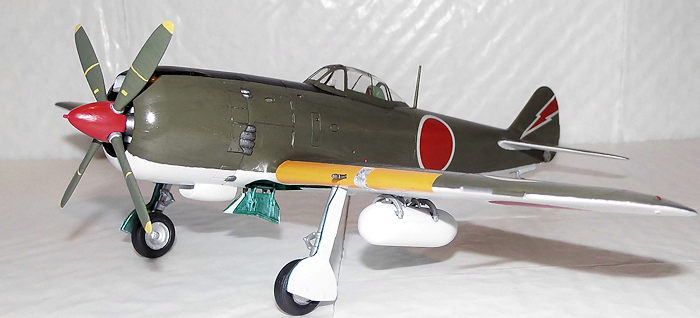
I had settled on an all silver Frank plus a camouflaged one; both had a red colored spinner in common. So the silver one got Humbrol Silver (11) three times and after the third layer was dry, I had a tedious session with cleaning turds out of the surface (why does this always happen?!); then a touch up session with the silver paint. In the end it turned out fine, but only because I strived for a perfect finish. The tip of the fin was painted red (Humbrol 19).
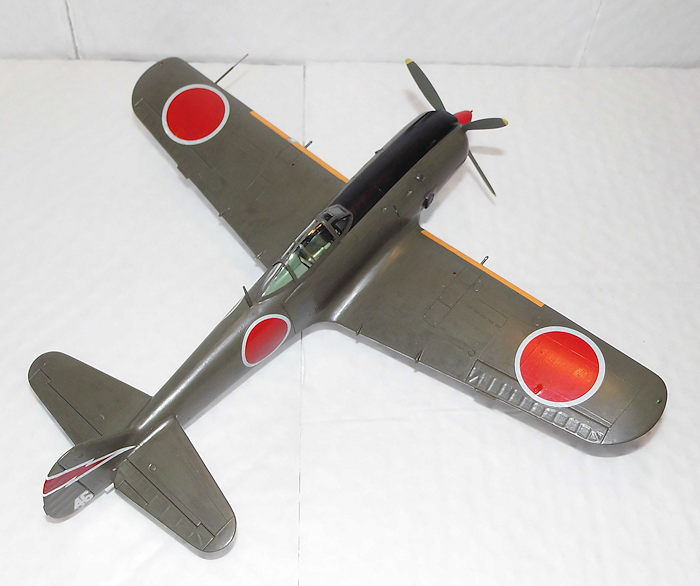
The
camouflaged Frank was painted Grey A/N.2 HJ.2 from Humbrols Authentic range.
Four layers were required before the coverage was perfect. The sides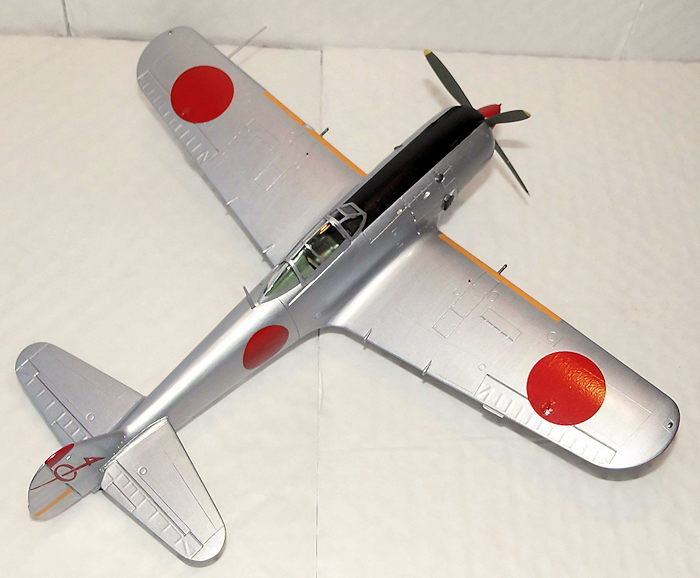 and upper surfaces were painted HJ. 3 Green again from Humbrols Authentic range.
This color was almost out of thinner, so after stirring and pouring considerable
amounts of thinner in it, it was ready for application… and what an effort – two
layers were sufficient to get a perfect coverage!
and upper surfaces were painted HJ. 3 Green again from Humbrols Authentic range.
This color was almost out of thinner, so after stirring and pouring considerable
amounts of thinner in it, it was ready for application… and what an effort – two
layers were sufficient to get a perfect coverage!
Both had the leading edges of the wings masked of (plus a bit on the rudder on the silver Frank) to be painted orange yellow (H24 Aqueous Hobby Color) from Mr. Hobby. Three layers were required to get a satisfactory coverage. The masking tape was removed immediately after the third layer had been applied. The black anti-glare panels on both models were masked off and painted then removing the tape after the last brush stroke to avoid the usual edges.
The next thing was to even out the demarcation lines followed up by a tedious touch up session, but once this was accomplished, the two models were glossed in preparations for the decals. The decals had been coated with Mr. Metal Primer to prevent disintegration, but it also caused the decals to be a bit stiff. They were also really slow to loosen from the base paper (some more slow than others), so I helped them along by carefully taking a scalpel blade and loosen the decals. In most of the cases it was actually quite successful, but in the case of one of the fin flashes for the silver Frank it was not possible to do it, as it totally refused to get loose, so I took the one from the other sheet and got my fin flash in place!
After drying and the obligatory touch up on the Hinomarus edges (red and white paint), because they had cracked a bit, the decals were given a gloss coat; when dry the silver Frank got a satin finish, with the exception of the anti-glare panel, which went flat, as with the camouflaged Frank got all over as well.
| FINAL CONSTRUCTION |
Now
there were only the last details left; they were painted their respective colors
then glued in place. At this stage I decided to repaint the prop blades, as
various sources spoke of that they were in fact some k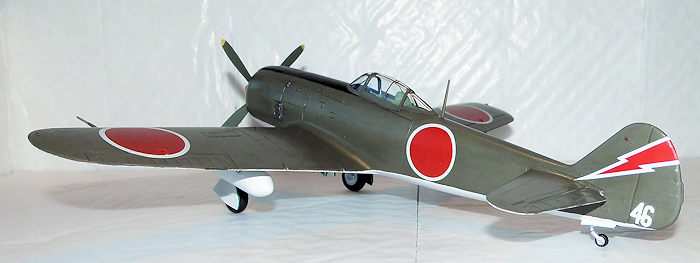 ind
of green color, which was a peculiar feature of the Hayate. So I chose to use
Humbrol 86 Light Olive to this correctional paintjob and without messing the
yellow tips and stripes! After the last touch ups the surface was treated with
the various finishes (satin on the silver Frank and flat on the camouflaged
Frank) then position lights were marked and the propellers glued in place. At
this stage I discovered one more casualty from the drop on the floor I told you
about earlier, because the propeller / spinner on the silver Frank sat with an
inclined upwards altitude, which the other model didn’t. The conclusion was that
the drop on the floor must have caused the entire engine assembly to be knocked
askew, so the prop shaft was not perpendicular to the cowling front. That was
really uncorrectable at this stage, so I just left it as it was. Anyway the
models were finished.
ind
of green color, which was a peculiar feature of the Hayate. So I chose to use
Humbrol 86 Light Olive to this correctional paintjob and without messing the
yellow tips and stripes! After the last touch ups the surface was treated with
the various finishes (satin on the silver Frank and flat on the camouflaged
Frank) then position lights were marked and the propellers glued in place. At
this stage I discovered one more casualty from the drop on the floor I told you
about earlier, because the propeller / spinner on the silver Frank sat with an
inclined upwards altitude, which the other model didn’t. The conclusion was that
the drop on the floor must have caused the entire engine assembly to be knocked
askew, so the prop shaft was not perpendicular to the cowling front. That was
really uncorrectable at this stage, so I just left it as it was. Anyway the
models were finished.
| CONCLUSIONS |
This is another fine kit of the old generation of kits that goes together well, if you have some experience, since beginners may find it a bit difficult to handle the engine / cowling assembly.
As I have read several reviews claiming that this one is actually in 1/50 scale, I took my steel ruler and measured the dimensions on my finished models. When calculating from the data of the real thing, I came to the conclusion, that Tamiya indeed tooled this kit in 1/48 scale and not to 1/50! The following table shows the values of the real aircraft as well as calculated in 1/48 scale, the models measured and calculated in 1/50 scale:
1/1 1/48(calc) 1/48(models) 1/50(calc)
Span : 11.24m 23.42cm 23.70cm 22.48cm
Length : 9.92m 20.67cm 20.60cm 19.84cm
Height : 3.39m 7.06cm 6.80cm 6.78cm
 A few
comments on the data:
A few
comments on the data:
The data for the real aircraft is what I consider to be correct, as it is the most repeated by different sources. The data for the height is the most difficult to assess, because it all depends on the position of the propeller blades; the prop being the most usual place to measure the height on single-engine propeller driven aircraft.
The 1/48 calculated is simply the data for the real plane divided by 48.
The 1/48 measured data is what the finished kits measure. The height difference may be a goof from Tamiya with too short propeller blades or too short a landing gear; of course it could also be a combination of these two possebilities, or maybe operator error even though I’m not sure how that happened. The span and length, however, seems to prove that Tamiya indeed tooled this kit in 1/48 scale, since the 1/50 scale data to the right shows what the finished kits should have measured, if the scale indeed had been in 1/50. Or else Tamiya would have made a very big goof somewhere down the line indeed, which I find highly unlikely!
| REFERENCES |
Profile Publications no 70:The Nakajima Ki-84,© René J. Francillon, Ph.D.,1966
The Illustrated Encyclopedia of Combat Aircraft of World War II, By Bill Gunston,Tiger Books International PLC, London 1990 ISBN 1-85501-096-8
25 October 2016
Copyright ModelingMadness.com
If you would like your product reviewed fairly and fairly quickly, please
contact
the editor or see other details in the
Note to
Contributors.