Nichimo 1/48 Ki-51 'Sonia'
| KIT #: | 18 |
| PRICE: | $10.00 'used' |
| DECALS: | three options |
| REVIEWER: | Randy Lutz |
| NOTES: |
| HISTORY |
None provided. Google it.
| THE KIT |
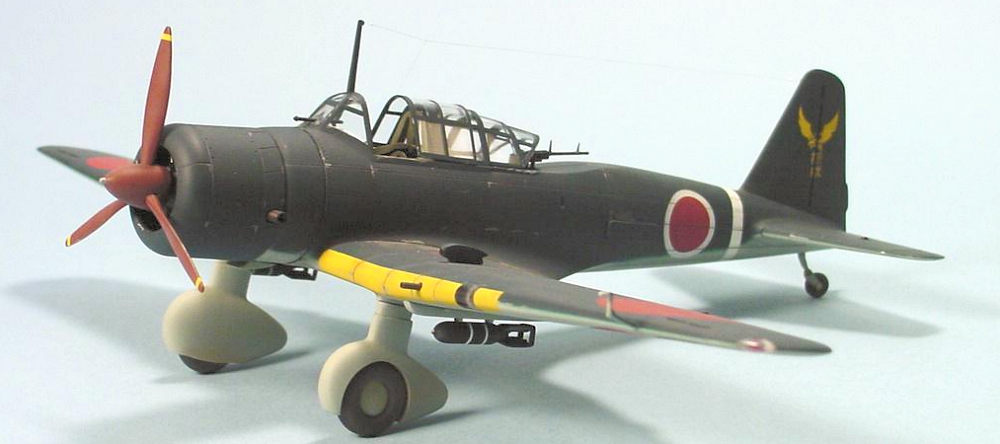
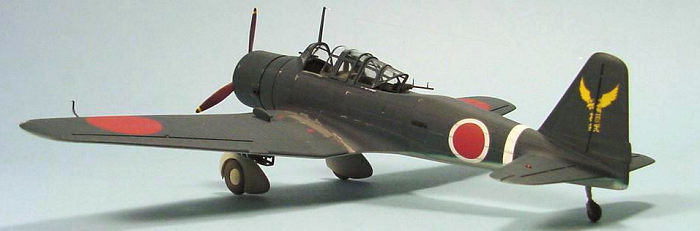
Using the ancient Nichimo kit, I modeled a Mitsubishi Ki.51 “Sonia” assault plane flown by Captain Yoshio Itsui of the 23rd Shinbu-tai while stationed at Mibu Airbase, Utsunomiya, Tochigi Prefecture in Japan during March 1945.
This is one of those kits that you almost never see built, which is a pity as it really is quite nice. I tend to think we are living in an era where we as modellers have become spoiled by the newer releases from Tamiya and Hasegawa and are not willing to even consider building anything else. I am not saying this is a bad thing, but it means we are overlooking some excellent kits at the risk of building Mustangs, Thunderbolts and Messerschmitts ad nauseam.
The Sonia was one of the first 1/48 aircraft I picked up when I made the switch from 1/32 back in 1997. It has sat on my shelf and taunted me ever since, slowly working its way to the top of the "to do" pile; only to be pushed back down by other projects I was committed to building, until recently.
 It is funny
how things come and go. Just compare this Nichimo kit from the mid-70's, with a
modern day kit from Trumpeter or Tamiya. The Sonia is polluted with recessed
rivets, the likes of which have recently popped up again on Trumpeter models and
the Sonia also gives the modeller the toy-like option of motorising the
propeller, something long forgotten until it reappeared in recent Tamiya
offerings. The kit also features nicely engraved panel lines, but grossly
exaggerated fabric detail on the control surfaces, both in terms of the hills
and valleys look and the weave in the fabric. Nor sure how many of you have ever
looked at a fabric airplane, but be advised the fabric is smooth with no hint of
texture.
It is funny
how things come and go. Just compare this Nichimo kit from the mid-70's, with a
modern day kit from Trumpeter or Tamiya. The Sonia is polluted with recessed
rivets, the likes of which have recently popped up again on Trumpeter models and
the Sonia also gives the modeller the toy-like option of motorising the
propeller, something long forgotten until it reappeared in recent Tamiya
offerings. The kit also features nicely engraved panel lines, but grossly
exaggerated fabric detail on the control surfaces, both in terms of the hills
and valleys look and the weave in the fabric. Nor sure how many of you have ever
looked at a fabric airplane, but be advised the fabric is smooth with no hint of
texture.
I counted 161 parts moulded in light grey plastic and another four pieces in clear. That is a sizeable part count, with no fewer than 66 related to the under wing ordnance. Nichimo was reknown for offering nicely detailed cockpits and this kit is no exception, as there are a total of 49 pieces that will end up trapped between the two fuselage halves. The remaining area, which consists of a large part count, is the engine area, with no less than 11 parts to go inside the engine cowl. All in all, a pretty complete offering on the part of Nichimo. The kit comes with a decal sheet offering four schemes (48th, 49th, 67th and 71st Sentais), but due to the age of the kit, I was unsure about the quality of the decals and elected to use the only aftermarket decals I was aware of, specifically Aero Master's Special Attack Squadron SP48-06.
| CONSTRUCTION |
The very first thing I did with this kit was to correct the overdone rib detail on the control surfaces, which ended up being a rather lengthy process. Using Mr. Surfacer 500, I brushed it into the depressions between the ribs, let it dry and repeated this process over and over until the depressions were almost gone. It took about 15 applications of Mr. Surfacer before I was satisfied with the result. Once it had fully cured, the control surfaces were lightly sanded, just leaving a hint of raised rib detail.
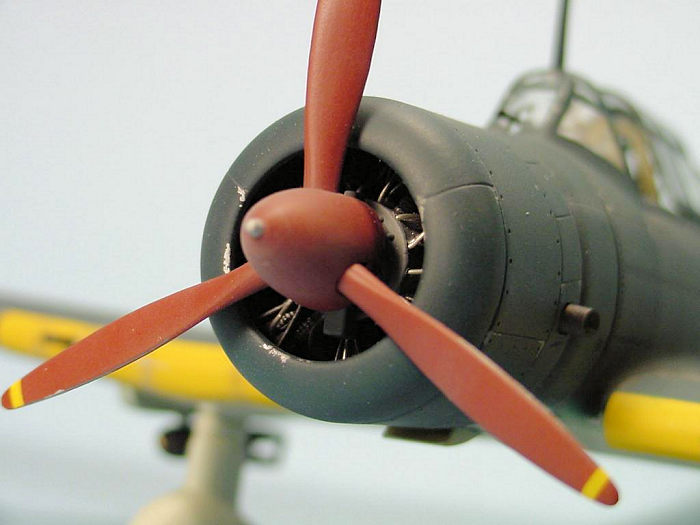
The first step in
the instructions is to assemble the engine and this is as good a place as any to
start. As I had no intention of displaying the engine and associated mounts,
part numbers B4, B20, B25, B26, B37, B38 and the front of A32 were all
airbrushed flat black. The two rows of engine cylinders, part numbers B1 and B2
were airbrushed with Testors Metalizer Steel and given a black India Ink wash, I
like to use India Ink as a wash on radial engines as it has a slight shine when
dry, giving the engine a bit of an oily appearance. The crankcase, part A1 was
finished in dark grey, given a black wash and then dry brushed with light grey.
 The engine
pushrods were finished in semi-gloss black and then using thin solder, ignition
wires were added to the engine.
The engine
pushrods were finished in semi-gloss black and then using thin solder, ignition
wires were added to the engine.
Situated in the aft fuselage of the Sonia are two small windows and two larger openings that had a sliding cover. Nichimo does not provide the windows as a clear piece, but instead has elected to mould the small windows in grey plastic. To more accurately represent the windows, they were drilled out using my pin-vise and the openings were refined with small files. Once the model was finished, Humbrol Clearfix was applied to represent the glass. As for the larger openings, I was unable to tell if Nichimo has moulded them with the sliding cover closed or open, so opting for the easy route, I decided they were closed and left them as is.
The cockpit is quite well detailed but I thought it could be improved upon, with some strip styrene. There is no rib and stringer detail in the kit, just faint outlines of some switches, wires and boxes, so I first sanded off all the internal details on the sidewalls and using the rows of rivets on the exterior of the fuselage as a guide for placement, I fashioned new structural detail using strips of plastic.
The cockpit interior was painted with Xtracolor X261 Olivgrun RAL6003, which is a very good match for Mitsubishi interior green. The green was followed by a dark wash made from X261, Winsor & Newton Ivory Black oil paint and turpentine. Once the wash had set up for a day, the interior was given a coat of Testors Dullcote and then treated to multi-step dry brushing starting with X261 and then adding a bit of Titanium White oil paint to X261. In each subsequent dry brushing, more Titanium White was added to the mix, resulting in a lighter shade of green than the previous, while at the same time the area being dry brushed was smaller than the previous. This has the effect of adding depth to the cockpit by varying the intensity of the green.
 In addition
to the electrical control panel, bomb release control unit, Type 96 transceiver,
data case, Type 96 camera film storage unit, battery boxes, oxygen bottles,
hand-held and Type 1 cameras, Type 89 7.7mm ammo drums, flap lever, wobble pump,
rudder pedals and a host of other items provided by Nichimo, I added a scratch
built throttle quadrant, elevator trim
wheel, bomb release electrical junction box, radio control and start-up relay,
camera electrical junction box and flight suit heater control unit. As the kit's
pilot seat looked like a Laz-y-Boy recliner, I made a new seat and seat support
out of sheet styrene and topped it off with a set of Eduard photo-etch lap
belts. There are no shoulder straps, as more often than not, Japanese Army
aircraft were only fitted with lap belts. After the instrument panels were
airbrushed a semi-gloss black and dry-brushed with light grey, generic
instrument panel dials were applied to both the front and rear panels as well as
to some of the radio equipment. To give the dials a glassy look, small drops of
Future floor polish were carefully applied to each dial.
In addition
to the electrical control panel, bomb release control unit, Type 96 transceiver,
data case, Type 96 camera film storage unit, battery boxes, oxygen bottles,
hand-held and Type 1 cameras, Type 89 7.7mm ammo drums, flap lever, wobble pump,
rudder pedals and a host of other items provided by Nichimo, I added a scratch
built throttle quadrant, elevator trim
wheel, bomb release electrical junction box, radio control and start-up relay,
camera electrical junction box and flight suit heater control unit. As the kit's
pilot seat looked like a Laz-y-Boy recliner, I made a new seat and seat support
out of sheet styrene and topped it off with a set of Eduard photo-etch lap
belts. There are no shoulder straps, as more often than not, Japanese Army
aircraft were only fitted with lap belts. After the instrument panels were
airbrushed a semi-gloss black and dry-brushed with light grey, generic
instrument panel dials were applied to both the front and rear panels as well as
to some of the radio equipment. To give the dials a glassy look, small drops of
Future floor polish were carefully applied to each dial.
The fuselage halves were assembled, trapping the completed engine and cockpit assemblies and here the fit is quite good with only a small amount of putty required to fill a few sink marks. I cut away the solid moulded rear navigation light and replaced it with a piece of clear sprue which was sanded to shape and polished. The pilot's rollover structure as provided is inaccurate in that it resembles a solid bulkhead. It should have two openings in it to allow the rear gunner to look forwards in the event he had to pilot the aircraft. This was a simple procedure to cut out two triangular shaped openings then install the rollover structure on the decking behind the pilot. Not having conclusive documentation, I had to choose between Mitsubishi Interior Green and Mitsubishi Exterior Green for the decking between the pilot and rear gunner and I went with the Interior Green, while the pilot's coaming was airbrushed flat black.
I assembled the
upper and lower halves of the main wing and then debated for a long time about
the landing lights. Nichimo does not provide them as clear parts, but instead
they are merely represented by
 outlines on
the wing. I wanted to cut them out and replace them with clear plastic, but the
hard part was finding clear plastic thick enough to match the wing thickness.
None of my clear sprue was of sufficient thickness and none of my local hobby
shops were able to obtain any of the correct size. Finally as luck would have
it, I noticed that my car windshield ice scraper was of the proper thickness to
use for the lights. So after cutting out the landing lights, I cut off a couple
cubes of plastic from the scraper and super glued them into the openings in the
wing. They were then filed to shape and then sanded and polished. I now have
landing lights, but I can no longer scrape the ice off my car windshield. The
wingtip lights were made from the same plastic and were installed after drilling
out the backside of each and painting in a red and green bulb.
outlines on
the wing. I wanted to cut them out and replace them with clear plastic, but the
hard part was finding clear plastic thick enough to match the wing thickness.
None of my clear sprue was of sufficient thickness and none of my local hobby
shops were able to obtain any of the correct size. Finally as luck would have
it, I noticed that my car windshield ice scraper was of the proper thickness to
use for the lights. So after cutting out the landing lights, I cut off a couple
cubes of plastic from the scraper and super glued them into the openings in the
wing. They were then filed to shape and then sanded and polished. I now have
landing lights, but I can no longer scrape the ice off my car windshield. The
wingtip lights were made from the same plastic and were installed after drilling
out the backside of each and painting in a red and green bulb.
The completed wing assembly was fastened to the fuselage and here the fit is quite good, with only a small gap showing at the front of the wing fillet. This was easily rectified by way of a sprue spreader bar, which pushed out the sides of the wing fillet slightly. The tail planes were next to go on and as with the wing, their fit is excellent. Overall, the kit does not require putty on any of the joints. After installing the landing gear spats, it was on to the clear parts.
Part C1 is the main greenhouse and consists of the windscreen, pilot’s sliding canopy and the fixed section between the pilot and rear gunner. Using this piece as a master, I vacuformed a copy to obtain a sliding canopy that would sit properly in the open position. Once the vacuformed piece has been made, part C1 can be cut apart into three sections. The inside of the windscreen has a ridge moulded in that needs to be removed by sanding and polishing. After you do all this, the windscreen and the remaining section between the pilot and gunner can be installed, along with part C2 which is the rear gunner's canopy. To mask the canopies I used the Cutting Edge Black Magic masks and they all fit quite well, although a word of caution is in order, as Cutting Edge forgot to define one of the small triangular windows on the windscreen. All the canopy frames were airbrushed with X261 Olivgrun and Xtracolor X11 RAF Trainer Yellow was applied to the leading edges of the wings and the band on the rear fuselage was sprayed white.
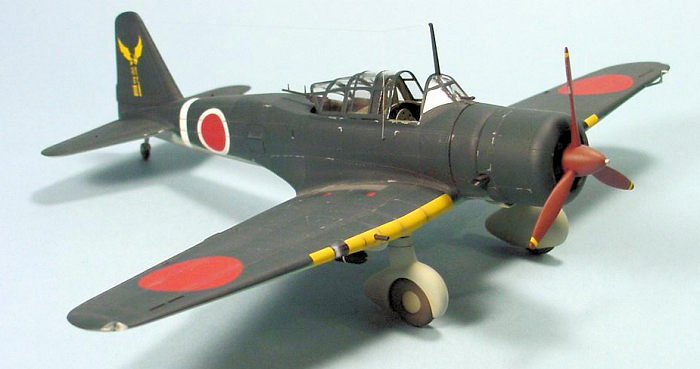
Once these
areas had dried, they were masked off and it was time to shoot the camouflage
colours. The undersides were easy as they were airbrushed with Xtracolor X352
Japanese Army Grey. The top side color was more difficult to obtain, as
Xtracolor's line of Japanese colours is very limited. Fortunately their civil
airline colour selection is quite extensive and according to the colour chip in
my Model Art book on Ja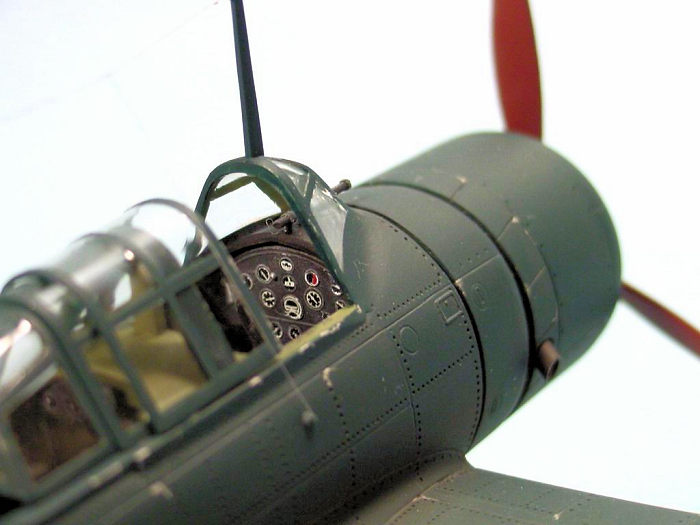 panese
aircraft, Xtracolor's X320 Air Canada Teal is a perfect match to
exterior green used by
Mitsubishi.
Interestingly, for such a dark colour it took quite a few passes to get proper
coverage.
panese
aircraft, Xtracolor's X320 Air Canada Teal is a perfect match to
exterior green used by
Mitsubishi.
Interestingly, for such a dark colour it took quite a few passes to get proper
coverage.
The decals were next to go on and if you do not want to use the kit decals, then your aftermarket choices are very limited (at the time of this build). As stated previously, to the best of my knowledge the only decals ever offered were Aero Master's Special Attack Squadron SP48-06, which provided a choice of four Sonias out of the total 27 marking options on the sheet. I use the past tense because this sheet is no longer in print, so if you do not have it you will need to search it out at swap meets, or on the internet. Typical of Aero Master decals printed by Micro Scale, they went on perfectly using small amounts of Solvaset as a setting solution. I noticed that the unit marking on the vertical fin is different from one side to the other and I don't know is this correct or an error on the part of Aero Master.
Next up I applied an oil paint wash to the panel lines and then followed this with some subtle shading using Tamiya Smoke. Chipping was replicated using Xtracolor X216 Silber RLM 01 and then Testors Dullcote was airbrushed over the entire model. I was on the home stretch and only had some final assembly and weathering remaining. Various shades of green and grey chalk pastels was applied to add shading and depict signs of wear, while black and dark grey pastels were added to represent the exhaust staining. The bombs were painted and fastened in place and a stretched sprue antenna wire was added. Overall, this kit was a trouble-free build and a nice change of pace from the more pedestrian kits commonly tackled. When I look at it in my display case it gives me a real feeling of accomplishment knowing I have built an older kit and brought it up to the same standard as more recent offerings.
| REFERENCES |
Asahi Journal Volume 1, Number 3
Japanese Aircraft Interiors 1940-1945, Monogram Technical Publications
22 May 2018
Copyright ModelingMadness.com
If you would like your product reviewed fairly and fairly quickly, please contact the editor or see other details in the Note to Contributors.
Back to the Main Page Back to the Review Index Page Back to the Previews Index Page