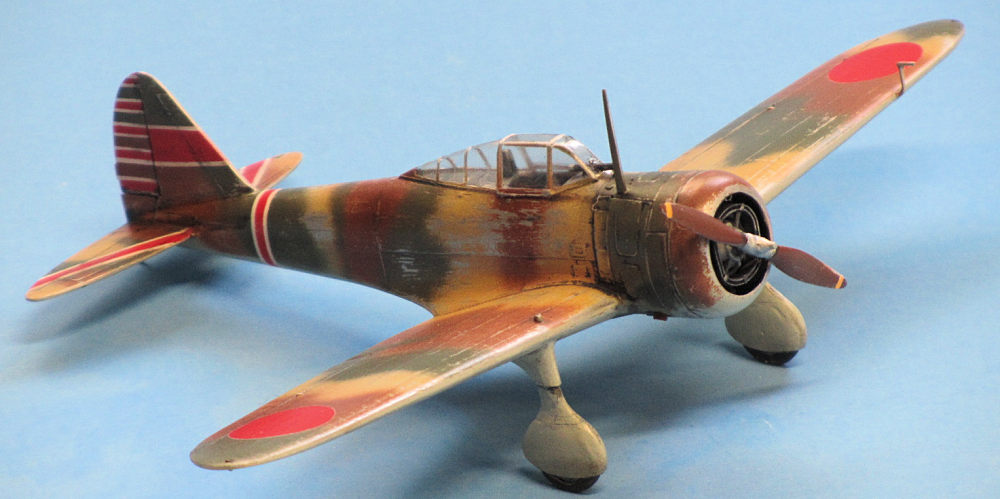
ICM 1/72 Ki-27b 'Nate'
| KIT #: | 72202 |
| PRICE: | $15.00 SRP($7 as a bagged kit from an online auction) |
| DECALS: | Four options |
| REVIEWER: | Ryan Grosswiler |
| NOTES: |
| HISTORY |
For a history of the subject and description of the kit contents, please visit the preview.
| CONSTRUCTION |
On a whim, I tagged this to another online purchase. Though I have the classic Hasegawa kit squirreled away I've always liked the Nate's dainty looks and was curious about ICM's rendition of it. Plus it was cheap, a bagged kit with instructions but no decals.
For a change of pace, I decided to simply glue the whole kit together one
non-flying day at work, and concern myself with painting later. Management
lets us do things like this so long as we get our work done and don't push
it. I worked my job for 45 minutes, then worked on the Nate for about ten or
fifteen. It actually was a nice diversion and interestingly made me more
productive. In this manner, by using MEK as
 cement, I
had the basic airframe together by the end of the day, having worked on it
for about 2.5 cumulative hours.
cement, I
had the basic airframe together by the end of the day, having worked on it
for about 2.5 cumulative hours.
ICM's assembly sequence naturally starts
you with assembling the interior parts, including an extremely involved
engine-firewall-and-
The completed powerplant assembly is then 'worked' into the
assembled fuselage halves. This is why I like to use fast-curing solvents
such as MEK or the late-lamented Tenax 7R (still available, by the way, from
Micro-Mark as "Same Stuff"); they set up quickly but still leave you some
time to flex the joints a little as you do further assembly. This is a very
useful attribute when assembling kits like this in which fit isn't
necessarily poor, just not
'positive-alignment'. Before the fuselage-engine assembly cured I dry-fit
the cowl ring a couple of times to make sure it would fit.
 The cockpit is built on to the wing center-section (part #A33) and offered
up to the fuselage, but on mine the wing wouldn't seat correctly until I'd
removed 1/16" from the trailing edge and about 1/8" from the leading edge
from that center section part. For the level of detail in the kit, oddly,
the cockpit sidewalls are rather bare. I omitted the
guns from their unusual location--on the bottom of the floor, ahead of the
rudder pedals--as they are invisible on the finished model and only cause
problems.
The cockpit is built on to the wing center-section (part #A33) and offered
up to the fuselage, but on mine the wing wouldn't seat correctly until I'd
removed 1/16" from the trailing edge and about 1/8" from the leading edge
from that center section part. For the level of detail in the kit, oddly,
the cockpit sidewalls are rather bare. I omitted the
guns from their unusual location--on the bottom of the floor, ahead of the
rudder pedals--as they are invisible on the finished model and only cause
problems.
The rest of the assembly went smoothly, except the main landing gear--be careful that you don't assemble the legs on backwards to the wheel pants, like I did. Drill out the receptacle holes in the wing a little more for the gear struts to slide into. The strut tops come up through to poke out a little above the top of the wing, depicting the landing gear under load, like the real aircraft. The tail cone (part # A3) also required a little trimming and finessing to fit properly.
 I sprayed the engine and cockpit from outside the assembled model with a
very dark gray, then picked out prominent details with a fine brush. When
done, the oil cooler ring was glued on to the engine and painted similarly.
I sprayed the engine and cockpit from outside the assembled model with a
very dark gray, then picked out prominent details with a fine brush. When
done, the oil cooler ring was glued on to the engine and painted similarly.
The late-version clear canopy fairing should be a little shorter
than the early metal one, but both versions are the same length in the kit.
It's a minor goof and not really noticeable, but simply used the Falcon vac-form
replacement, intended for the Hasegawa kit, which after a bit of sanding fit
fine. Antenna and pitot tube were replaced or reinforced with brass wire.
| COLORS & MARKINGS |
As noted, mine was a bagged kit missing decals. I also wanted to somehow
highlight ICM's superrealistic exterior detail, and experiment with
airbrushing the markings. So I chose the option shown in the instructions of
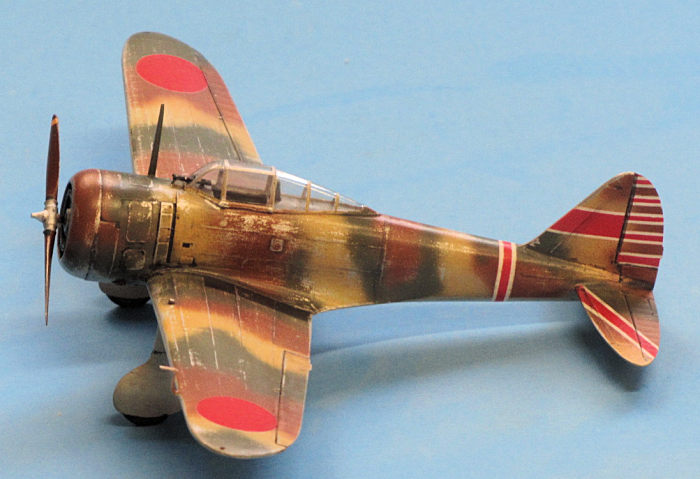
a camouflaged machine operational in China during December 1941, and did the
following:
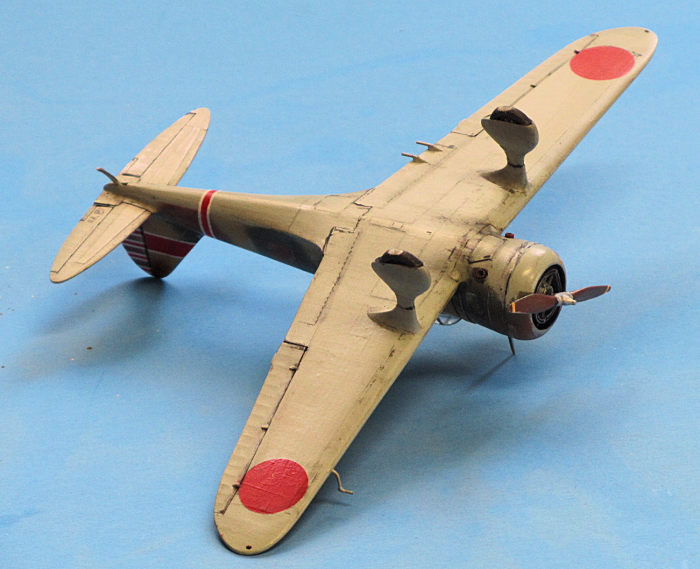 Canopy was masked and the whole model sprayed with Tamiya AS-12 Silver
lacquer straight from the can in two light coats. Grey underside was
airbrushed and the demarcation line from the wing root to the tail masked.
The browns and green of the top were airbrushed free-hand. All markings were
masked with Tamiya tape and sprayed, the Hinomarus courtesy of my new toy:
the DSPIAE stepless circle-cutter (That rather expensive little tool is
quickly proving its worth in my shop: I'm now masking little circles and
dots like a bat out of hell. Airfix Sunderland, you're in my crosshairs!).
Canopy was masked and the whole model sprayed with Tamiya AS-12 Silver
lacquer straight from the can in two light coats. Grey underside was
airbrushed and the demarcation line from the wing root to the tail masked.
The browns and green of the top were airbrushed free-hand. All markings were
masked with Tamiya tape and sprayed, the Hinomarus courtesy of my new toy:
the DSPIAE stepless circle-cutter (That rather expensive little tool is
quickly proving its worth in my shop: I'm now masking little circles and
dots like a bat out of hell. Airfix Sunderland, you're in my crosshairs!).
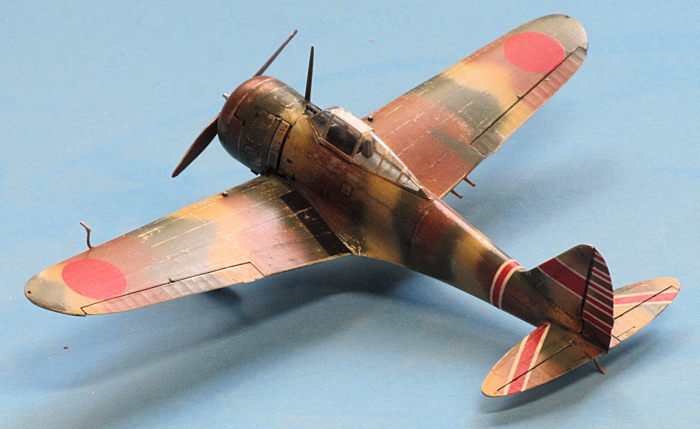
Painting complete, I then used a 1000-grit pad to gently wet-sand the leading edges, upper surfaces, cowling areas, and generally any place which would receive lots of contact with grabby, disassembling, and clambering crew plus other elements to gradually expose the silver (and that exquisite surface detail) beneath. Sort of like shabby-chic furniture. Not wanting to overdo it, I stopped when I felt it looked realistic. Well, maybe a bit too far! This was a most enjoyable step and it would have been very easy to get carried away. Protected under a layer of Future, a dark-gray wash followed, then an enamel semigloss final coat. Canopy masks came off after 24 hours.
Done! A completed model in less than six hours, two of it masking.
| CONCLUSIONS |
 The RS
kit apparently being a real beast, there are going to be natural comparisons
between this ICM offering and the good ol' Hasegawa one. ICM's obviously has
much better detail and looks more refined externally when done. If you
simply want to get a Nate in your lineup soonest, then go with the
tried-and-true Hasegawa product; you'll spend less than half the time
assembling it. But I found the construction challenges of ICM's release not
too daunting and will build another sometime--possibly with an opened-up
cowl.
The RS
kit apparently being a real beast, there are going to be natural comparisons
between this ICM offering and the good ol' Hasegawa one. ICM's obviously has
much better detail and looks more refined externally when done. If you
simply want to get a Nate in your lineup soonest, then go with the
tried-and-true Hasegawa product; you'll spend less than half the time
assembling it. But I found the construction challenges of ICM's release not
too daunting and will build another sometime--possibly with an opened-up
cowl.
| REFERENCES |
Maru Mechanic Editorial Staff. #25 Nakajima Type 97 Army Fighter. Maru Mechanic, 1980
Copyright ModelingMadness.com
If you would like your product reviewed fairly and fairly quickly, please contact the editor or see other details in the Note to Contributors.
Back to the Main Page Back to the Review Index Page Back to the Previews Index Page