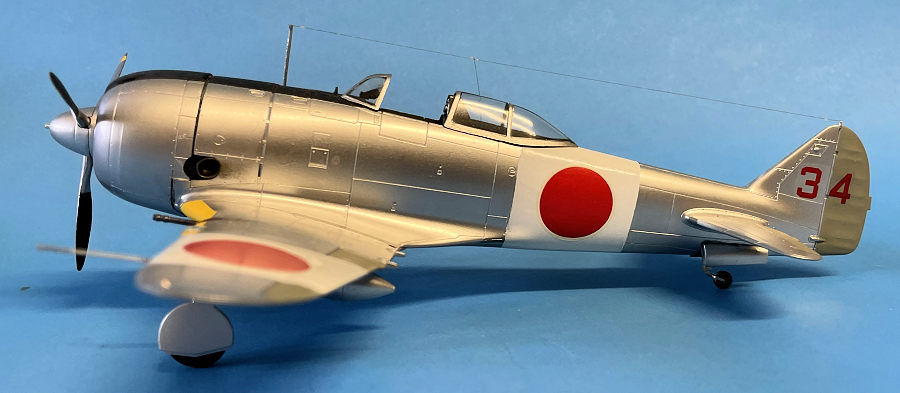
| KIT #: | 09182 |
| PRICE: | $30.00 SRP |
| DECALS: | Three options |
| REVIEWER: | H Davis Gandees |
| NOTES: |
| HISTORY |
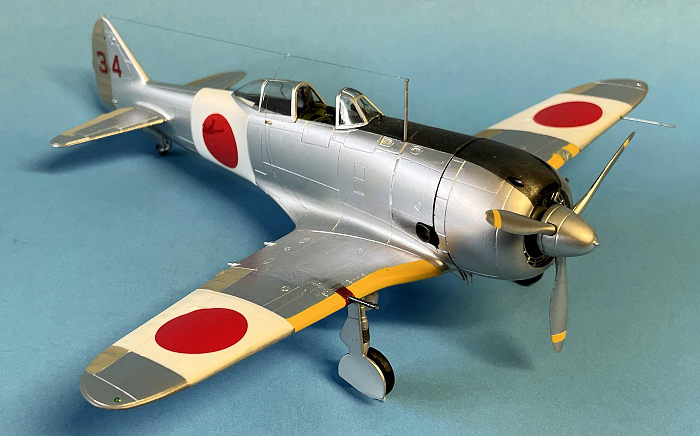 The Ki44 was
a replacement for the Ki43 Hayabusa “Oscar” in 1941. The design focused on speed
and climb rather than maneuverability resulting in a high landing speed. The
Ki44 had a tip speed of 375 mph and a climb rate of 3,900 feet/minute. It was
armed with 2-7.7 or 12.7mm guns in the nose and 2-12.7mm guns in the wings.
Caseless 40mm cannons were also occasionally used against the B-29s. Initially
it was flown only by pilots with at least 1000 hours of flight time, but later
young pilots adapted to it with no problems. It served throughout the Pacific in
an air defense role. This model subject is a Ki44 of the 47th Sentai Home
Defense unit based at Narimasu airfield in Tokyo in late 1942. This elite
unit later defended against U.S. B-29s. It was replaced late in the war by the
superior Nakajima Ki-84 Hayate “Frank”. After WWII, the Ki44 was used by the
Vietnamese against the French in Indochina. The kit was released in 1995 and has
been re-released many times up to 2024.
The Ki44 was
a replacement for the Ki43 Hayabusa “Oscar” in 1941. The design focused on speed
and climb rather than maneuverability resulting in a high landing speed. The
Ki44 had a tip speed of 375 mph and a climb rate of 3,900 feet/minute. It was
armed with 2-7.7 or 12.7mm guns in the nose and 2-12.7mm guns in the wings.
Caseless 40mm cannons were also occasionally used against the B-29s. Initially
it was flown only by pilots with at least 1000 hours of flight time, but later
young pilots adapted to it with no problems. It served throughout the Pacific in
an air defense role. This model subject is a Ki44 of the 47th Sentai Home
Defense unit based at Narimasu airfield in Tokyo in late 1942. This elite
unit later defended against U.S. B-29s. It was replaced late in the war by the
superior Nakajima Ki-84 Hayate “Frank”. After WWII, the Ki44 was used by the
Vietnamese against the French in Indochina. The kit was released in 1995 and has
been re-released many times up to 2024.
| THE KIT |
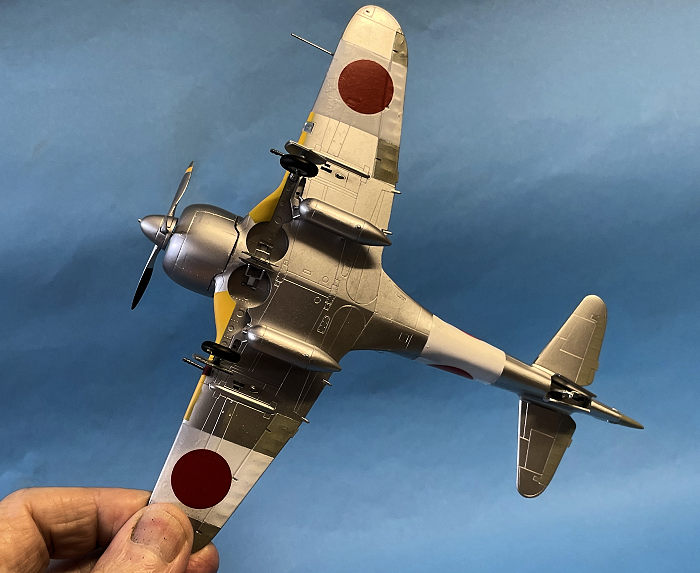 This model,
my most recent build was purchased for $2 at a thrift shop by my library
volunteer colleague Barbara along with 4 other similarly priced Hasegawa and
Tamiya kits. A super shopper!
This model,
my most recent build was purchased for $2 at a thrift shop by my library
volunteer colleague Barbara along with 4 other similarly priced Hasegawa and
Tamiya kits. A super shopper!
The kit is typical of 1990s Hasegawa kits with good detail and panel lines. The 7-page instruction sheet has clear details and color callouts and 3-views for 3 build options.
There were 4 well molded sprues and 1 excellent thinly molded canopy sprue. The cockpit and engine detail were especially well done. Fit was excellent requiring only slight gap filling of the upper wing to fuselage join.
The 30-year-old decals unfortunately cracked when placed in warm water, so replacement decals were sourced from the decal bin.
| CONSTRUCTION |
 Construction
was straight forward with no issues and good color callouts. I started as usual
with the cockpit adding an Eduard photoetch seatbelt.
Construction
was straight forward with no issues and good color callouts. I started as usual
with the cockpit adding an Eduard photoetch seatbelt.
The engine went together well with good detail but when installed in the cowl with the annular oil cooler it was not to be seen again.
The airframe was well engineered and fit was excellent with only 7 parts.
The landing gear was installed and carefully aligned. The drop tanks were installed, and I made sure they were installed left and right to conform with the wing dihedral. The antenna mast was installed and a nylon antenna wire and a lead in were applied.
The wing mounted 12.7 mm gun barrels were painted gunmetal with steel dry brushing and mounted and aligned. The pitot was mounted in the port wing. Nav lights were painted with a fine brush and the model was finally completed.
| COLORS & MARKINGS |
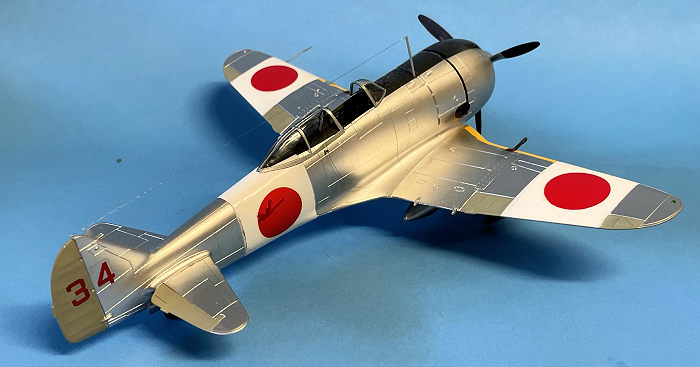
I don’t like using large decals, instead I like to mask and paint these details like the large white wing and fuselage bands and flat black glare panel. I painted all the fabric surfaces Tamiya gray-green and masked them and painted and masked the anti-glare panel and wing walk flat black and masked it when dry.
A major problem of my own
making happened when the white wing and fuselage bands were masked and pained
Tamiya white and when dry (or so I thought) were masked. When the masks were
removed from the white bands there were impressions in the paint of the Tamiya
masking tape adhesive! I was ab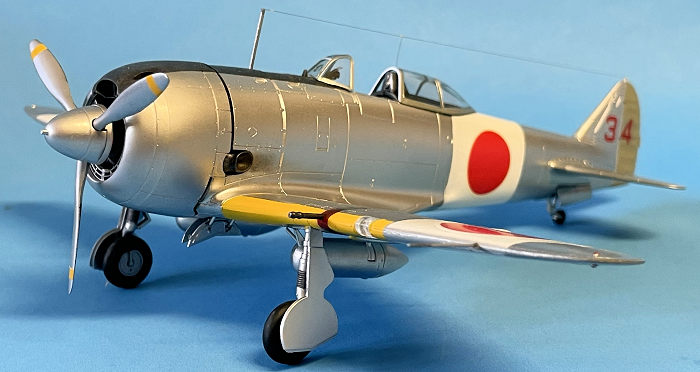 le
to restore the white bands by wet sanding, priming and respraying white. The
bands are a bit thicker than I would like, but I had no other option.
le
to restore the white bands by wet sanding, priming and respraying white. The
bands are a bit thicker than I would like, but I had no other option.
The overall airframe was painted with Tamiya TS30 Silver Leaf replicating the Ki44 NMF.
Note to new users of Tamiya TS acrylics: Allow at least 48 hours before masking or painting over other colors. I am a life member of the discontinued Model Master paint and am still learning the nuances of Tamiya paint that I usually enjoy using. Be patient and give it time to fully dry.
I have had no trouble with the Tamiya XF acrylics, but I now allow all Tamiya paint to fully dry before coating especially with Tamiya TS flat, semi-gloss or gloss final coats.
The model was masked and the yellow IFF on the wing leading edges was airbrushed instead of trying to use the old decals.
The canopy was masked with Eduard masks and painted first with interior green and then Silver Leaf.
As the hinomaru decals were unusable, exact replacements were sourced from the decal bin along with the red number 34 for the tail. Propellor warning stripes were masked and painted with Tamiya Camel Yellow.
| CONCLUSIONS |
The Ki44 was eventually completed over a 3-month, 50+ hour total period. Not one of my most pleasant and relaxing builds, but I’m pleased with the final result. Did I mention to allow Tamiya paint to fully dry?
| REFERENCES |
Nakajima Ki-44 Shoki in Japanese Army Air Force Service, Schiffer Military History Publications, and Internet references
18 May 2026
Copyright ModelingMadness.com. All rights reserved. No reproduction in part or in whole without express permission.
If you would like your product reviewed fairly and fairly quickly, please contact the editor or see other details in the Note to Contributors.