Aviation USK 1/72 Ki-32 'Mary'
| KIT #: | 72-007 |
| PRICE: | $15-40.00 |
| DECALS: | Five options |
| REVIEWER: | Ryan Grosswiler |
| NOTES: | MPM originated tooling |
| HISTORY |
 The
Ki-32 was designed in response to a 1936 tender from the Japanese Army for a
single-engine light bomber with better performance than the Ki-3 biplane then
serving in this role. The Kawasaki design took advantage of the company's
experience with liquid-cooled engines and competed against Mitsubishi's
radial-engine Ki-30. Kawasaki's airplane was found to have better handling, but
the IJAAF preferred the reliability of the radial engine and selected the
Mitsubishi design for production.
The
Ki-32 was designed in response to a 1936 tender from the Japanese Army for a
single-engine light bomber with better performance than the Ki-3 biplane then
serving in this role. The Kawasaki design took advantage of the company's
experience with liquid-cooled engines and competed against Mitsubishi's
radial-engine Ki-30. Kawasaki's airplane was found to have better handling, but
the IJAAF preferred the reliability of the radial engine and selected the
Mitsubishi design for production.
By then, however, the Japanese found themselves in an increasingly costly war in China. Such was the pressing need for combat aircraft in quantity that the Ki-32 was despite the decision ordered into production along with its competitor and sent straight into service over the Asian mainland front. It's worthy to note that although the more fragile powerplant proved more susceptible to battle damage, Japanese crews otherwise preferred the aircraft over its Mitsubishi rival for its better handling and maneuverability. Also, even though it had a fixed undercarriage, the Ki-32 was actually comparable (and slightly faster on less horsepower) than the much larger Fairey Battle, its direct equivalent in Europe.
Problems with the engine were gradually resolved and the Ki-32 reached the front by the end of 1938, seeing service with seven Sentai and ultimately being built in greater numbers than the Ki-30. Still in service in December 1941 with these front-line units, the Western Allies would encounter the type during the Japanese assault on Hong Kong. After the first months of 1942 it was relegated to training units.
That's pretty much all we know about this aircraft. Very little otherwise has been written about it in English and even in Japanese publications you're pretty hard-pressed to find much of a mention.
| THE KIT |
 The
Ki-32‘s been available for decades in vacuform and resin as well, and most
modelers will probably go for the currently available A-Model short-run
injection kit. However, I bet there are quite a few of this particular kit in
modelers' stashes out there. Long-gone Aviation Usk, named for the tiny ‘burg
north of Spokane where the business was located, offered what was in the early
‘90s the unique business of importing model kits from behind what had recently
been the Iron Curtain, and was the pioneering American partner of the Czech
consortium of modelers which became the MPM group.
The
Ki-32‘s been available for decades in vacuform and resin as well, and most
modelers will probably go for the currently available A-Model short-run
injection kit. However, I bet there are quite a few of this particular kit in
modelers' stashes out there. Long-gone Aviation Usk, named for the tiny ‘burg
north of Spokane where the business was located, offered what was in the early
‘90s the unique business of importing model kits from behind what had recently
been the Iron Curtain, and was the pioneering American partner of the Czech
consortium of modelers which became the MPM group.
This is a very early example of their first forays into limited-run injection products, and might have been the very first kit molded in grey rather than that characteristic chocolate color. As part of the 1990s Av-Usk/MPM marketing partnership, it comes packed very tightly in a tiny but garishly-printed little box. While on a solo road trip around the country after graduating college, I picked mine up as a brand-new release directly from Av-Usk’s proprietor. He and I used to get into it over matters of faith and politics.
Within the box there are two sprues of 1993 limited-run plastic featuring finely scribed panel lines, plus a vacuform canopy. Two sheets of some very chatty and informative instructions spell out construction and finishing details, and a little decal sheet printed on continuous carrier film features several options in both Light Green-Grey overall and the later tri-color segmented camouflage.
| CONSTRUCTION |
With any limited-run kit, especially from this early period, it's always wise to triple-check fit on everything. Cut the vac canopy loose and test fit against the fuselage parts before doing anything else. Work out its mounting while you're at it: I usually use fine stretched sprue to form a flange at the joint for strength and alignment later when I'm working with vacuform canopies. All the main parts received some block-sanding on their mating surfaces, the wing trailing edges being sanded as thinly as possible
There's little more than floor, bulkhead, and seats in the cockpits, so I took the time to scratch some basic detail in there following a single drawing I found on the Interweb and photos of other Kawasaki aircraft interiors from the period. The fuselage side windows were found to be three scale feet too far forward, so I filled and sanded them flush, opening up new ones further aft. Missing from the kit is a length of fuselage structure that runs inside between the gunner's sliding canopy all the way to the pilot's station—this was made up from sheet styrene, bent and fitted in place.
 The kit's engineering
has a separate piece making up the top of the engine cowling. The opening it
fills provides excellent access to the nose interior after the fuselage halves
are joined, so I took the opportunity to improve the shape of the radiator
intake and really get this area spiffed up (since it's a focal point on the
finished model) and the prop mounting placed and centered. I also opened up a
new carburetor intake further forward based on the single (grainy) photograph
taken of this airplane from above. After this cowling piece was in place, I cut
the exhaust stacks into individual pieces to mount them all a bit closer
together.
The kit's engineering
has a separate piece making up the top of the engine cowling. The opening it
fills provides excellent access to the nose interior after the fuselage halves
are joined, so I took the opportunity to improve the shape of the radiator
intake and really get this area spiffed up (since it's a focal point on the
finished model) and the prop mounting placed and centered. I also opened up a
new carburetor intake further forward based on the single (grainy) photograph
taken of this airplane from above. After this cowling piece was in place, I cut
the exhaust stacks into individual pieces to mount them all a bit closer
together.
Some modeling skills required! Getting the five parts which make up the wing and lower fuselage correctly in position and in agreement with each other is the biggest challenge of this kit, so I used my usual divide-and-conquer stratagem. I first glued in the lower center section part, emphasizing the 1) fuselage contour lining up fore-aft and 2) the wing being level viewed from the front. When this cured, I next glued in the top wing halves, checking them for correct and equal 'sweep' right to left, then equal dihedral before again leaving the object to cure. This done, the wing lower halves were then sanded and adapted as necessary to find their place on the correctly aligned wing. I sawed open a pair of landing light bays on the leading edge of the wings, glued in some sections of clear sprue, then sanded and polished these to match the surrounding contours.
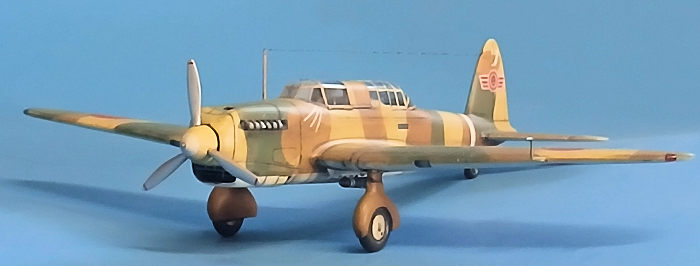
Stabilizers,
landing gear, and other small bits were then glued to the basic wing-fuselage
assembly. However much effort you put into this kit, note that the landing gear
is molded depicting an uncompressed state. The model will sit too tall if this
isn't fixed. Take the time to cut about 3/32" (2mm-ish) off the height of the
gear struts so that the finished model has the correct 'sit'.
| COLORS & MARKINGS |
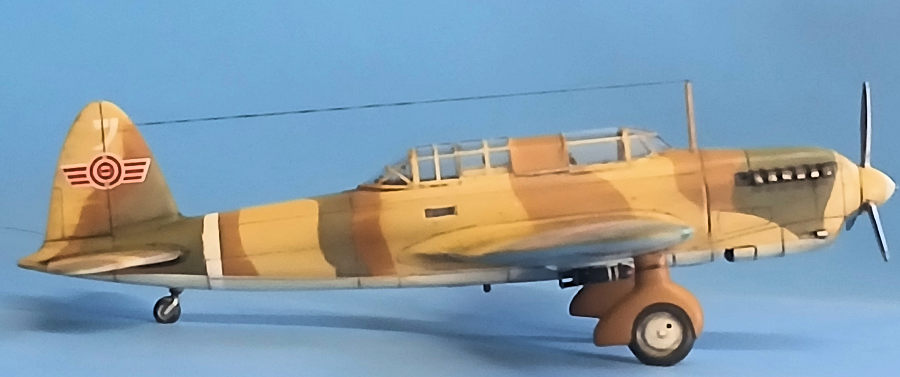
 After
the canopy was masked, painting began with a coat of Tamiya white primer
decanted, outgassed, and cut 50% with Randolph butyrate dope thinner. The four
basic colors were then laid in with ICM's (excellent and marvelously
inexpensive) water-based acrylics, each being masked rather than free-handed.
After a little touch-up, these colors were then protected with a couple coats of
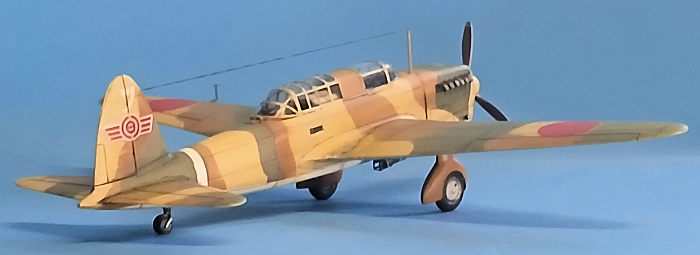
Gunze gloss, and the decals were next. The markings for the 3rd Sentai on the
tail were out of register, requiring some delicate trimming under magnification
to correct, but otherwise performed nicely being quite thin and responsive to
Micro Set and Sol.
After
the canopy was masked, painting began with a coat of Tamiya white primer
decanted, outgassed, and cut 50% with Randolph butyrate dope thinner. The four
basic colors were then laid in with ICM's (excellent and marvelously
inexpensive) water-based acrylics, each being masked rather than free-handed.
After a little touch-up, these colors were then protected with a couple coats of
Gunze gloss, and the decals were next. The markings for the 3rd Sentai on the
tail were out of register, requiring some delicate trimming under magnification
to correct, but otherwise performed nicely being quite thin and responsive to
Micro Set and Sol.
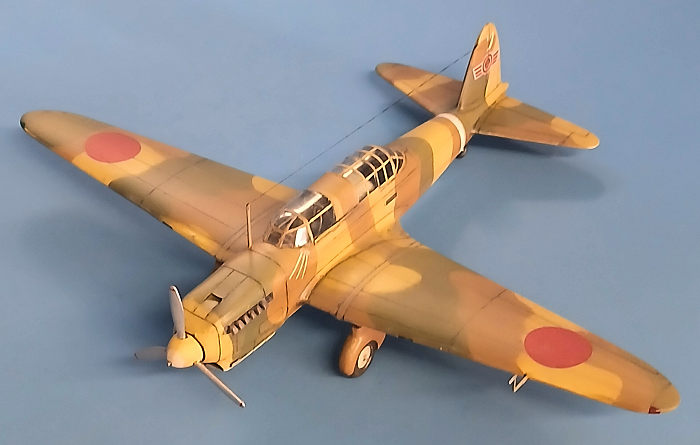
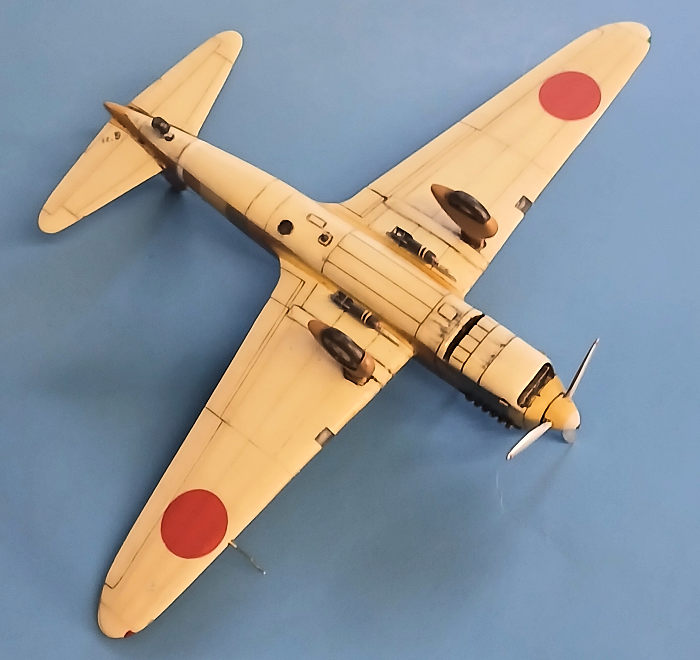
A wash of dark artist's oils was applied, then a day later carefully wiped off. A flat coat was next for the chipping and highlighting, then this was locked under a semi-gloss clear coat. Tires, exhausts, and other details were then painted along with a pair of exhaust streaks. I figured the underside of the engine cowling and immediately aft would be an oily mess, so several layers of such streaking was applied. My final touch was a pair of racks/50kg bombs from the Clear Prop! Ki-51 accessory set. Masks came off, an antenna was added from EZ line, and that was it.
| CONCLUSIONS |
Usk's Ki-32 very much has the character of an early short-run injection product, and as such would be a good introduction to the complexities of such a build for the newer modeler ready to give these types of kits a go. The alignment and fit problems are definitely there—at every step of construction—but none are of the magnitude to totally stump the newbie.
I can't comment on the accuracy of the finished model owing to the aforementioned and near-total lack of objective data on the type. There's a YouTube upload of a Japanese wartime newsreel of the airplane (search: "Ki-32"). It's recorded in frustratingly low resolution, but a couple shots lead me to question things like wing aspect ratio, canopy width, and shape of the horizontal tail in all kits and drawings, but with the model nearly done I merely shrugged off these concerns. Looks good enough for me! In the model goes to my lineup.
| REFERENCES |
Really, there's nothing in either English or Japanese that I'm aware of specifically catering to further information on this type. Other than Rene Francillon's general description pretty much everything out there regarding the Ki-32 is online. Fire up your favorite search engine and go nuts!
Francillon, Rene J. Japanese Aircraft of the Pacific War. Naval Institute Press, 1970. ISBN# 0-87021-313-X
2 May 2025
Copyright ModelingMadness.com. All rights
reserved. No reproduction in part or in whole without express permission from
the editor. If you would like your product reviewed fairly and fairly quickly, please contact the editor
or see other details in the
Note to
Contributors. Back to the Main Page
Back to the Review
Index Page
Back to the Previews Index Page