Special Hobby 1/72 Ki-115 'Tsurugi'
| KIT #: | 72198 |
| PRICE: | $21.95 |
| DECALS: | Three options |
| REVIEWER: | Brian Baker |
| NOTES: | High quality injection molded Kit of an unusual aircraft. |
| HISTORY |
The Japanese realized they were up against the wall in early 1945, and both
services were using suicide tactics to try to stop the American threats to
their mainland. They were running out of standard service aircraft, as well
as experienced pilots, and their leaders felt that the Kamikaze was their
only hope. In January, 1945, the Japanese Army commissioned the Nakajima
company to quickly design a special attack bomber.
 Nakajima gave the
contract to the Nitaka Research Institute and the Ota Manufacturing Company
to develop the aircraft. Requirements included extreme simplicity in design,
and flight characteristics making it possible to be flown by inexperienced
pilots. The resulting prototype, designated Ki-115a, was a small, open
cockpit, radial-engined plane of wood and metal construction, capable of
carrying an 800 kg. (1,764 lb.) bomb under the center section.
Nakajima gave the
contract to the Nitaka Research Institute and the Ota Manufacturing Company
to develop the aircraft. Requirements included extreme simplicity in design,
and flight characteristics making it possible to be flown by inexperienced
pilots. The resulting prototype, designated Ki-115a, was a small, open
cockpit, radial-engined plane of wood and metal construction, capable of
carrying an 800 kg. (1,764 lb.) bomb under the center section.
The prototype first flew in March, 1945, but some redesign was required. The fixed undercarriage was redesigned, and flaps were added behind the trailing edge of the wing. Power was provided by a 1,150 hp. Nakajima Ha-35 radial engine driving a fixed pitch metal propeller. The undercarriage had no shock absorbers, and with a tailskid, it was an extremely difficult airplane to taxi or fly, especially for an inexperienced pilot, the type the plane was intended for. A Navy version was planned, but was never produced.
Production began in March, 1945 at the Nakajima facilities at Iwate and Ota, and by the end of the war, just over 100 Ki-115a’s had been delivered to various Army units. None of these aircraft was ever used on operations, and most were discovered by American occupation forces at various airfields after the events at Hiroshima and Nagasaki convinced the Japanese to surrender.
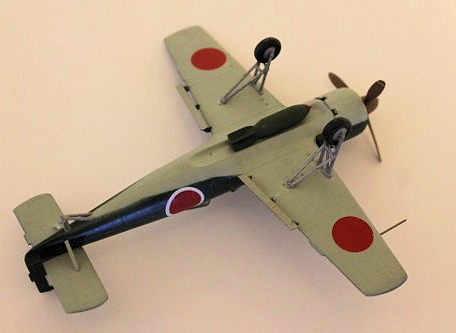
 The Ki-115’s were discovered to be in three paint schemes. Some were
painted in Japanese Army green topsides and Army grey, a greenish color
similar to Luftwaffe 02 Green, underneath. Most were unpainted, with a few
having white surrounds over the hinomarus on top and on the fuselage sides,
while others were overall silver with no white borders. The silver variants
had Army grey tailfeathers and ailerons. All versions had a thin flat black
anti-glare stripe extending from the windshield up to the cowling face. This
information is well covered in the kit instructions.
The Ki-115’s were discovered to be in three paint schemes. Some were
painted in Japanese Army green topsides and Army grey, a greenish color
similar to Luftwaffe 02 Green, underneath. Most were unpainted, with a few
having white surrounds over the hinomarus on top and on the fuselage sides,
while others were overall silver with no white borders. The silver variants
had Army grey tailfeathers and ailerons. All versions had a thin flat black
anti-glare stripe extending from the windshield up to the cowling face. This
information is well covered in the kit instructions.
Since the type was never used in combat, as was not encountered by American planes, it was never issued an Allied Code name.
| THE KIT |
 The kit consists of one large sprue containing all of the basic parts; 2
clear canopy sections; 9 resin parts, including an engine, bomb, flap hinges,
and individual exhaust stacks; and a small photo etch sheet, with more flap
hinges and an instrument panel. There is very little flash.
The kit consists of one large sprue containing all of the basic parts; 2
clear canopy sections; 9 resin parts, including an engine, bomb, flap hinges,
and individual exhaust stacks; and a small photo etch sheet, with more flap
hinges and an instrument panel. There is very little flash.
The instructions are typical Special Hobby, with three sheets of 8 ½ x 11 inch paper, folded into 12 pages. These include a history in English and Czech, a sprue and color diagram, 4 assembly drawings, 3 four-view color drawings showing camouflage and markings, and 3 pages of drawings of other kits the company has available.
| CONSTRUCTION |
Following the instruction guide, and interior should be assembled first. A
complete interior is provided, although there is really nothing to attach the
instrument panel to. After assembly, mine popped out, and there was no way I
could get it back into position as the cockpit opening is very small. . You
can’t see much of it from the outside anyway, so I left it as it was. The
cowling is in two sections, and glued together nicely. Then
 the engine fits in
from behind. I needed to trim the outsides of the cylinders on the engine, as it
was a little too large for the cowling. Following the engine positioning, the
tiny exhaust stacks should be inserted into their positions. This is, of course,
after the airplane has been painted. The cowling will be either silver and
black, or black, green, and grey. The wings, in three parts, are nicely done.
The lower section gives the correct dihedral angle, and the top sections fit
easily into place. The whole unit then fits onto the fuselage. I ended up using
strong clamps to get all of the parts to fit, but I’ve had to do this on many
models, so this was no big deal. Only a little filler was needed. The horizontal
tail units fit into place perfectly, and after the major assembly was complete,
I attached the landing gear. These consisted of main and bracing strut
assemblies, with the wheels snapping into place. The only problem there was that
there was a small knob telling me where the gear legs were to be attached, but
the instructions were somewhat unclear. Tabs and holes would have been better.
The tailskid is a snap to install. The flaps just attached to the trailing edge
of the wing, and they went on fairly well. After major assembly and painting,
there were a few extras to install, including the cockpit canopies, air scoops,
tail braces, pitot tube, bomb sight (yes, the whole airplane is a bomb), and. of
course, the engine and propeller.
the engine fits in
from behind. I needed to trim the outsides of the cylinders on the engine, as it
was a little too large for the cowling. Following the engine positioning, the
tiny exhaust stacks should be inserted into their positions. This is, of course,
after the airplane has been painted. The cowling will be either silver and
black, or black, green, and grey. The wings, in three parts, are nicely done.
The lower section gives the correct dihedral angle, and the top sections fit
easily into place. The whole unit then fits onto the fuselage. I ended up using
strong clamps to get all of the parts to fit, but I’ve had to do this on many
models, so this was no big deal. Only a little filler was needed. The horizontal
tail units fit into place perfectly, and after the major assembly was complete,
I attached the landing gear. These consisted of main and bracing strut
assemblies, with the wheels snapping into place. The only problem there was that
there was a small knob telling me where the gear legs were to be attached, but
the instructions were somewhat unclear. Tabs and holes would have been better.
The tailskid is a snap to install. The flaps just attached to the trailing edge
of the wing, and they went on fairly well. After major assembly and painting,
there were a few extras to install, including the cockpit canopies, air scoops,
tail braces, pitot tube, bomb sight (yes, the whole airplane is a bomb), and. of
course, the engine and propeller.
| COLORS & MARKINGS |
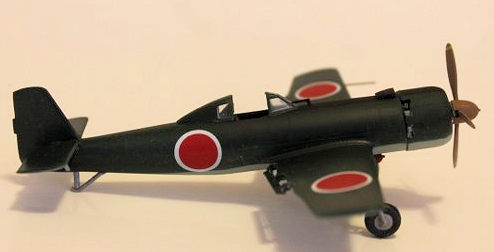
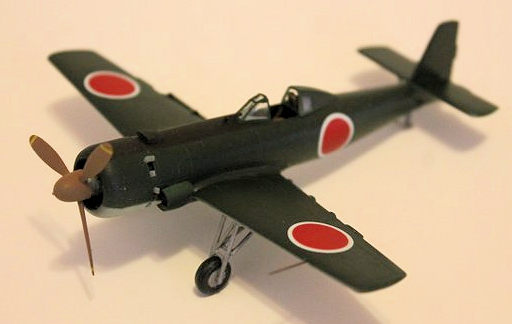
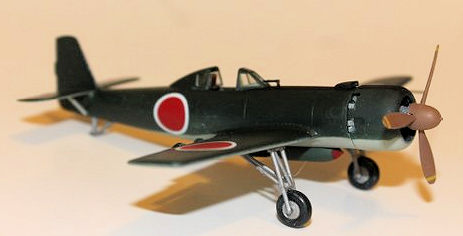
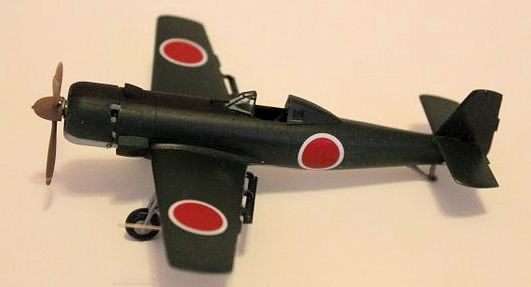
The painting instructions are very clear. I painted mine in the green camouflage color, although most photos I’ve seen show the planes unpainted. The decals are of very high quality, and go on easily, even without decal softening solutions. The instructions show the bomb attached to the underside of the plane, and I attached mine this way, but since the plane probably never flew with the bomb installed, it might be more accurate to place the bomb on a small cart and display it underneath the airplane.
| CONCLUSIONS |
There is only one other 1/72 scale kit of the airplane that I know of, and Scott has reviewed this kit by Aviation Usk. I haven’t seen this kit, but from his description, it is a good kit. All I can say is that this kit was a lot of fun to build, and had few problems to deal with. I would certainly recommend the kit to any modeler with moderate experience.
I picked this kit up at the last Phoenix IPMS Convention a couple of years ago. They are available on line.
Brian Baker
16 November 2020
Copyright ModelingMadness.com
If you would like your product reviewed fairly and fairly quickly, please contact the editor or see other details in the Note to Contributors.
Back to the Main Page Back to the Review Index Page Back to the Previews Index Page