RS Models 1/72 Ki-79b
| KIT #: | 7392 |
| PRICE: | $15-20.00 |
| DECALS: | Two options |
| REVIEWER: | Brian Baker |
| NOTES: | Resin kit |
| HISTORY |
 The Ki-79b was a development of the earlier Nakajima
Ki-27 “Nate” fighter, which was in common use by the Japanese Army Air Force at
the beginning of World War II. As the army received more modern fighters,
notably Ki-43’s and Ki-61’s, Ki-27’s remained in use in china and in other areas
where they would not encounter modern Allied fighters.
The Ki-79b was a development of the earlier Nakajima
Ki-27 “Nate” fighter, which was in common use by the Japanese Army Air Force at
the beginning of World War II. As the army received more modern fighters,
notably Ki-43’s and Ki-61’s, Ki-27’s remained in use in china and in other areas
where they would not encounter modern Allied fighters.
Designated Army Type 2 Advanced Trainer, the Ki-27 was redesigned by Manshu, and was produced in four versions. These were the single seat Ki-79a powered by a 510 hp. Hitachi radial engine, the two seat Ki-79b with the same engine, the single seat Ki-79c Hitachi powered trainer, and the Ki-79d two seater. The Ki-79a and Ki-79b had all metal airframes, while the Ki-79c and Ki-79d were basically of wooden construction.
By the middle of the war, Ki-79 trainers were becoming available in quantity, and they equipped most of the basic flying schools where the JAAF trained their fledgling pilots. In addition, many of the type were sent to China, Singapore, Java, and the Philippines for training purposes. At the end of the war, while the Americans scrapped all of the Japanese aircraft the occupying forces found in Japan, numerous surviving Ki-79’s were taken over by the Russians, Chinese Communists, and Indonesians, and these were operated until they were replaced by more modern aircraft.
| THE KIT |
The RS kit is entirely resin, except for the
vacuformed windshields, and is reasonably well molded in sand colored resin. The
radial engine is a metal blob, which can be painted, and after trimming the
edges to make it fit, can be superglued into the nose of the fuselage. It is
molded in a shiny silver. I painted mine dark grey and then scraped off some of
the of the paint along the fine lines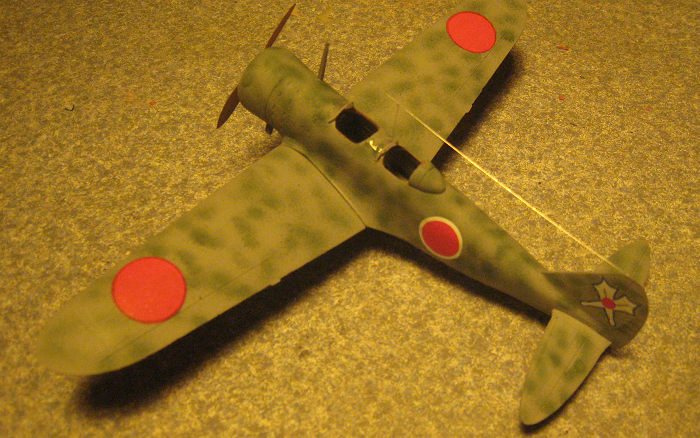 on valve covers on the front of the engine
Although the major components are nicely done, some of the detail parts, such as
landing gear, pitot tubes, cockpit interior parts, are very flimsy, and some
parts are entirely useless. I used one seat, and made another to replace a
useless casting. The landing gear parts were hopeless where the wheels attached,
although the upper sections are molded into the lower portions of the wings. I
replaced the lower parts from the spares box. The wheels, however, are OK. A set
of underwing fuel tanks is provided, and these are shown in one of the drawings,
but they don’t appear on any of the models depicted on the instruction sheet.
Probably, they were intended for a Ki-27 model.
on valve covers on the front of the engine
Although the major components are nicely done, some of the detail parts, such as
landing gear, pitot tubes, cockpit interior parts, are very flimsy, and some
parts are entirely useless. I used one seat, and made another to replace a
useless casting. The landing gear parts were hopeless where the wheels attached,
although the upper sections are molded into the lower portions of the wings. I
replaced the lower parts from the spares box. The wheels, however, are OK. A set
of underwing fuel tanks is provided, and these are shown in one of the drawings,
but they don’t appear on any of the models depicted on the instruction sheet.
Probably, they were intended for a Ki-27 model.
The kit is accompanied by a single set of instructions. One side presents a very useful account of the history of the aircraft, along with a drawing of one of the training versions. The reverse side has a cutaway assembly diagram showing what goes where. The only interior color information says to paint the interior “Japan Blue Green”. Although the kit decals only provided markings for two aircraft, the instruction sheet provides information on two Japanese versions, a Chinese Communist plane, and one operated by the Indonesians against the Dutch in their war for independence. One of the Japanese versions has a black forward fuselage with the rest of the airframe painted their training orange scheme, while the other, which is also illustrated on the box cover, is a Kamikaze model, with a bomb rack and bomb between the landing gear. There is a detailed drawing of the bomb rack and a perspective drawing of two of the Kamikazes in flight. Some color information is given, although there are no decals for the Chinese or Indonesian aircraft.
| CONSTRUCTION |
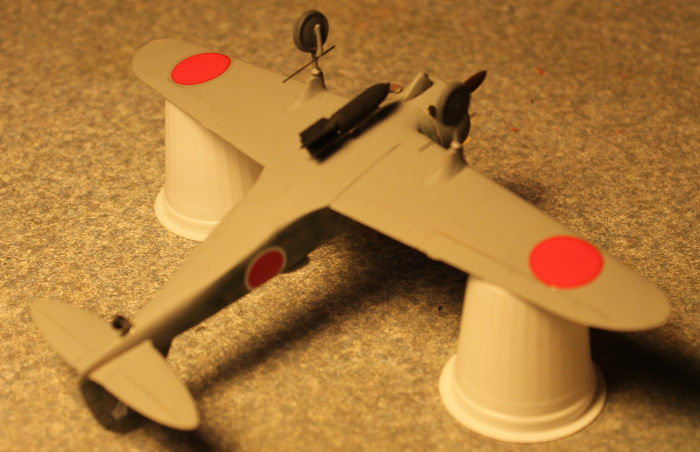 The moldings are reasonably well done for a kit of
this type, and not a lot of trimming is required on the major components.
Actually, the wings fit up against the forward fuselage and sit at the proper
dihedral angle. The rear fuselage section is cast in one solid piece, and it is
supposed to fit up against the rear sections of the forward fuselage,. The
forward fuselage sections require some trimming, and after the interior parts,
floor and seats, etc., almost fit. I used a lot of super glue, and after
clamping them them and letting them set overnight, they stayed together. I used
some filler, as the joints were not all I was hoping for. The rear fuselage
didn’t quite fit against the forward part, and I had to add a thin sheet of
plastic and fill in the gaps to get it to line up properly. It was a lot of
work, but once filled in, it looks pretty good.
The moldings are reasonably well done for a kit of
this type, and not a lot of trimming is required on the major components.
Actually, the wings fit up against the forward fuselage and sit at the proper
dihedral angle. The rear fuselage section is cast in one solid piece, and it is
supposed to fit up against the rear sections of the forward fuselage,. The
forward fuselage sections require some trimming, and after the interior parts,
floor and seats, etc., almost fit. I used a lot of super glue, and after
clamping them them and letting them set overnight, they stayed together. I used
some filler, as the joints were not all I was hoping for. The rear fuselage
didn’t quite fit against the forward part, and I had to add a thin sheet of
plastic and fill in the gaps to get it to line up properly. It was a lot of
work, but once filled in, it looks pretty good.
The cockpit interior provides some interior detail, and this is certainly visible through the open cockpits, but there is no rear instrument panel provided. The front panel is adequate, but a training airplane would have to have had a rear instrument panel. I know I would never have flown a training airplane with a student without access to the basic instruments, especially from the back seat, where forward visibility is minimal. After making an attempt to use the vacform windshields, I just cut a pair from some scrap clear plastic I had, and they worked out OK.
| COLORS & MARKINGS |
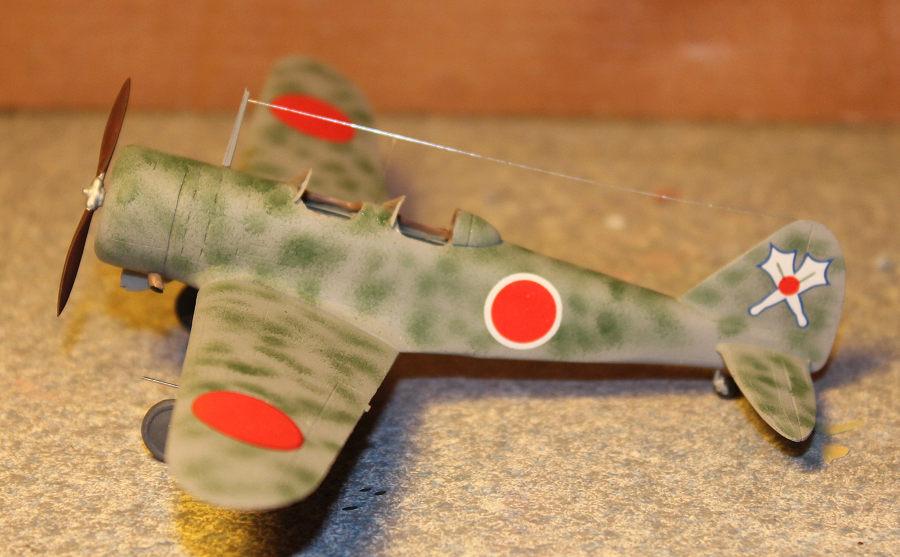
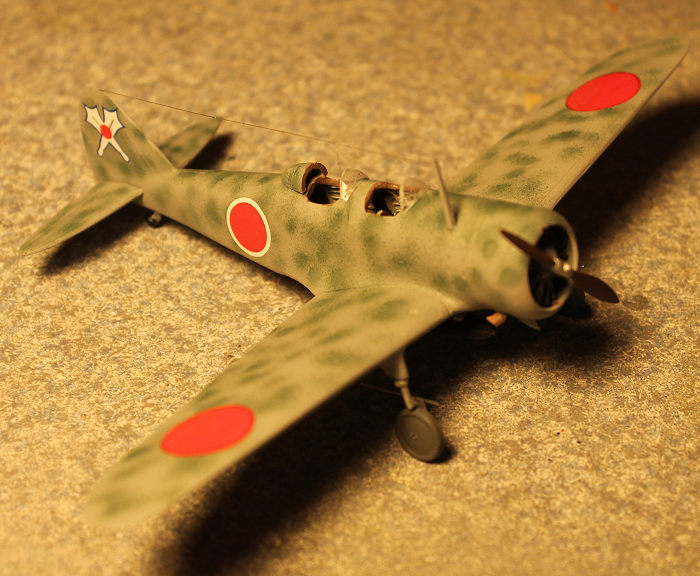
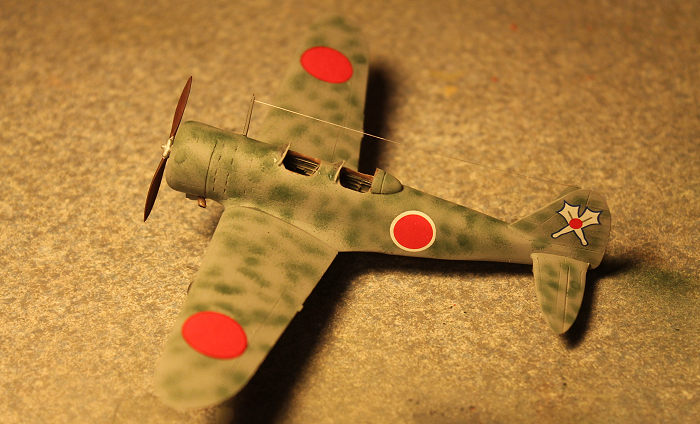 Once the airframe was basically assembled, it was
ready for painting. I selected the kamikaze version, as it was the most
colorful. The drawing shows what appears to be a green spray-on pattern over the
usual Japanese light grey, but the drawings on the instruction sheet shows what
appears to be a pencil type squiggle pattern like I’ve never seen before on a
Japan airplane. I even bought a color pen to see if I could duplicate the
pattern, but ended up using the airbrush to use the usual pattern. I used the
decals from the kit, and trimmed them to the color edges. Afterwards, I gave the
entire plane a coating of Testors’ Dullcote to protect the finish. I added the
bomb on its rack, and also the LF radio antenna mast and wire, and the lower air
intake and engine exhausts. The propeller just glues onto the crankcase of the
engine, and although there is a spinner provided, it doesn’t really fit on the
front of the prop.
Once the airframe was basically assembled, it was
ready for painting. I selected the kamikaze version, as it was the most
colorful. The drawing shows what appears to be a green spray-on pattern over the
usual Japanese light grey, but the drawings on the instruction sheet shows what
appears to be a pencil type squiggle pattern like I’ve never seen before on a
Japan airplane. I even bought a color pen to see if I could duplicate the
pattern, but ended up using the airbrush to use the usual pattern. I used the
decals from the kit, and trimmed them to the color edges. Afterwards, I gave the
entire plane a coating of Testors’ Dullcote to protect the finish. I added the
bomb on its rack, and also the LF radio antenna mast and wire, and the lower air
intake and engine exhausts. The propeller just glues onto the crankcase of the
engine, and although there is a spinner provided, it doesn’t really fit on the
front of the prop.
| CONCLUSIONS |
I have a particular liking for training aircraft, having spent most of my life as a flight instructor. This model fills an important gap, as there aren’t too many Japanese training aircraft produced in 1/72 scale. It certainly isn’t a kit for beginners, but once the basic skills are mastered, any competent modeler should be able to make a decent model out of this one. Moderately recommended. (For those who don't like resin, RS did this kit in injected plastic. See the preview in the archives. Ed)
| REFERENCES |
There are a number of good references available on this aircraft. R.J. Francillion’s book, Japanese Aircraft and the Pacific War, is a good source. Arco’s Aircam 20 deals with the Ki-27 and Ki-79, while The Maru Mechanic covers the Ki-27. Koko-Fan’s Vol. 3 deals with other Japanese military aircraft.
24 July 2023 Copyright ModelingMadness.com. All rights reserved. No
reproduction in part or in whole without express permission. If you would like your product reviewed fairly and fairly quickly, please contact the editor
or see other details in the
Note to
Contributors.