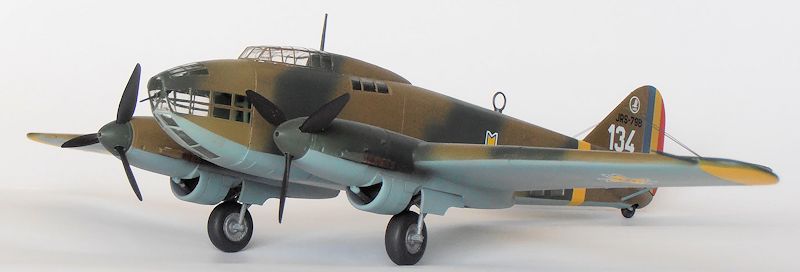
Azur/FRROM 1/72 SM.79B
| KIT #: | FR004 |
| PRICE: | $69.00 SRP |
| DECALS: | Four options |
| REVIEWER: | Mike Kleber |
| NOTES: | Short run with resin bits |
| HISTORY |
The AAR flew the SM.79 against the Soviet Union until September 1944, then against Germany until the end of the war.
| THE KIT |
 The kit
consists of 114 light grey parts, 15 clear parts and 4 resin parts.
There are two nose section options. The surfaces have
recessed panel lines.
The kit
consists of 114 light grey parts, 15 clear parts and 4 resin parts.
There are two nose section options. The surfaces have
recessed panel lines.
A detailed 9 page instruction booklet accompanies
the kit. A
painting of the subject is shown on the box cover.
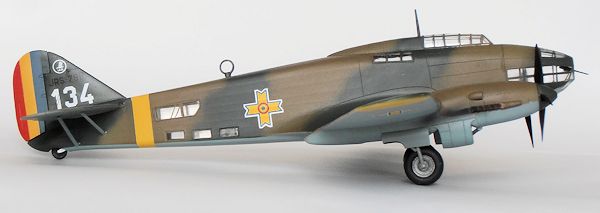
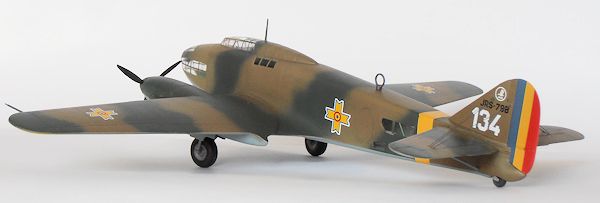
Decals for 4 aircraft of the Aeronautica Regala
Romania are provided.
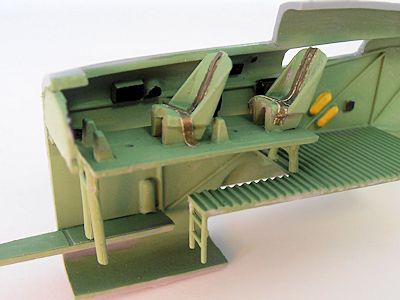
| CONSTRUCTION |
Flight Deck / Fuselage:
Windows:
The windows are installed from outside of the
fuselage.
They are tapered so they don’t push through when installed.
A lot of sanding and fitting was required until they set
flush with the fuselage.
I glued them in place with white glue.
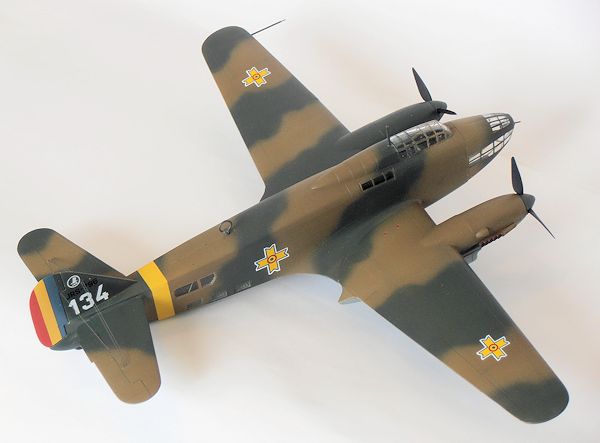
 The
underside of the wing is a single piece tip to tip. The port and starboard upper
surfaces are each 1 piece.
First, the upper surfaces were glued to the lower.
The assembly is then slid up in place on to the
fuselage.
Note: The width of the fuselage was larger than the gap formed at
the top of the wings, causing the wings to angle down when installed.
The wing / fuselage mating points had to be sanded in
order for the wings to be level.
The
underside of the wing is a single piece tip to tip. The port and starboard upper
surfaces are each 1 piece.
First, the upper surfaces were glued to the lower.
The assembly is then slid up in place on to the
fuselage.
Note: The width of the fuselage was larger than the gap formed at
the top of the wings, causing the wings to angle down when installed.
The wing / fuselage mating points had to be sanded in
order for the wings to be level.
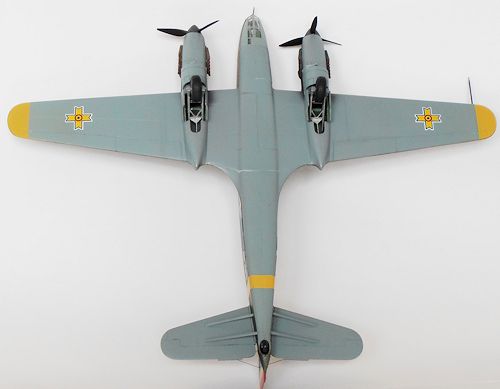
Tail Plane:
Landing gear assembly was a bit tricky. It was not completely clear to me where the drag braces were supposed to attach in the wheel well. Using tube glue gave me the chance to re-position the landing gear parts as needed. I did clip off a bit of the ends of the drag braces to give the landing gear a decent alignment.
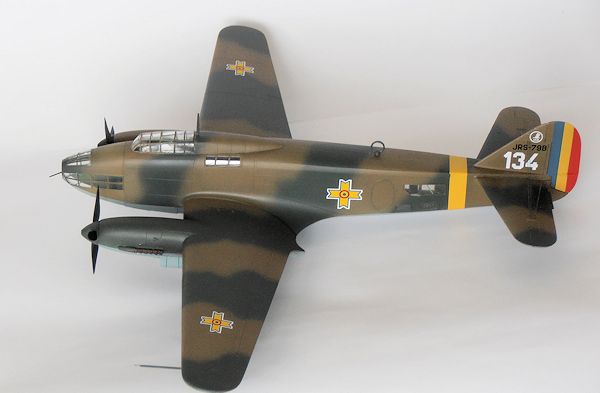
| COLORS & MARKINGS |
Decals provided with the kit were used.
The carrier film extends a very small amount beyond the
color.
The decals have a gloss finish.
One application of solvaset was adequate to set the
decals down into the panel lines.
A coat of clear dull lacquer was applied to the model
after the decals were set.
| CONCLUSIONS |
| REFERENCES |
-Various Internet Photographs
December2013
Copyright ModelingMadness.com. All rights reserved. No reproduction in any form without express permission from the editor. If you would like your product reviewed fairly and fairly quickly, please
contact
the editor or see other details in the
Note to
Contributors.