| KIT #: | 1106 |
| PRICE: | £10.00 |
| DECALS: | Four options |
| REVIEWER: | Peter Chiu |
| NOTES: |
| HISTORY |
(from the instructions
sheet) Developed from a series of twin-engined planes which started with the
Ca.309 “Ghibli”, the Ca.313 first flew in 1940. The first series had a fuselage
with curved nose, but later a new nose was used with step
 windshield. The Ca.313
served in various wings for observation, light bombing and convoy escort: it
operated in Russia, North Africa, the Balkans and in France. It was exported to
France and Sweden. The Ca.314 developed from the Ca.313, with heavier armament
and was also suitable for ground attack.
windshield. The Ca.313
served in various wings for observation, light bombing and convoy escort: it
operated in Russia, North Africa, the Balkans and in France. It was exported to
France and Sweden. The Ca.314 developed from the Ca.313, with heavier armament
and was also suitable for ground attack.
| THE KIT |
The original kit was released by Italaerei in 1972 and has been reboxed several times since then. According to Scalemates my kit was released in 2002. I was looking for more obscure kits to build and purchased this kit up from a seller on a Facebook forum.
Inspecting the parts, the kit is very much of its time with raised panel lines and some degree of flash on the sprues. The kit has parts to build the 313 RPB 2 / 314 C version with a stepped windscreen or the 313 RPB 1 version with the curved windscreen. The decal options are for 2 Regia Aeronautica, 1 French and 1 Swedish example. Paint call outs are for Model Master paints though F.S. references are included as well.
| CONSTRUCTION |
Starting with the cockpit, this consisted of a floor with basic seats for pilot and co-pilot / navigator. There were small parts that made up the flight controls. The interior of the kit is pretty bare with no further detailing provided. Pilot figures were provided but they were more like moulded blobs than humans, so I binned them. I raided the spares box and found 2 pilot figures that were more suitable.
As this kit has fairly
extensive glazing along the fuselage I didn’t want to leave it as devoid of
detail, so I decided to scratch build a floor area behind the cockpit with a
bomb bay and some seating. I don’t think it is historically accurate, but it
makes the interior a bit more interesting. The flooring and bomb bay was made
 from more unused parts and the whole of the interior was painted green. For this
I used Vallejo model air RLM82.
from more unused parts and the whole of the interior was painted green. For this
I used Vallejo model air RLM82.
With the extensive glazing comes the need for extensive masking of the nose and fuselage. I don’t know if makes me slightly masochistic, but I enjoy masking canopies, the more masking the merrier!
Once that was all done the fuselage halves were closed and the wings attached. I filed down the seams o the fuselage as best I could with some new tools I had purchased. These helped give a bit a better finish. Wing fit is not precise so I cut some plastic sheet to act as a shim so the wings had a better connection to the fuselage. After that I filled the gaps with Vallejo plastic putty.
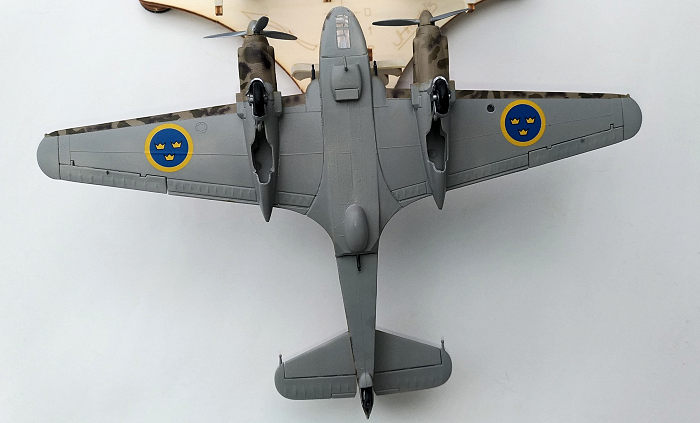
Engine and undercarriage were then assembled, connection points for the undercarriage was a bit vague but I managed to get them fixed together and attached to the engine nacelles. They were pained aluminium as were the propeller blades. The tyres were painted with Model Air tyre black and along with the undercarriage was masked off in preparation for painting. Finally, I added various antennae to the aircraft.
| COLORS & MARKINGS |
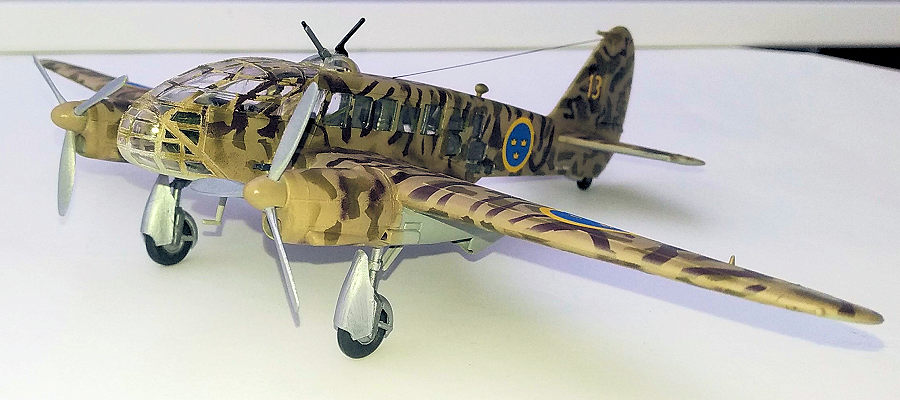
With the kit masked off, I sprayed Vallejo grey primer to give the kit a base for the paints. I use Vallejo model air paints, sprayed from a H&S infinity airbrush. I admit even after 4-5 years of spray painting my technique is not the best and I am still learning. I have chosen the Swedish air force version for this kit. The decals are a bit sparse and the paint guide does not indicate a particular unit for the plane. The instructions indicate a camouflage patten of dark green patches over a light green base. However, the illustration on the box side and internet searches in indicate a three colour mottled effect of light brown / dark brown / dark green.
I sprayed Vallejo sand colour first and left it to dry. I then cut homemade paint masks for the various mottled affects.
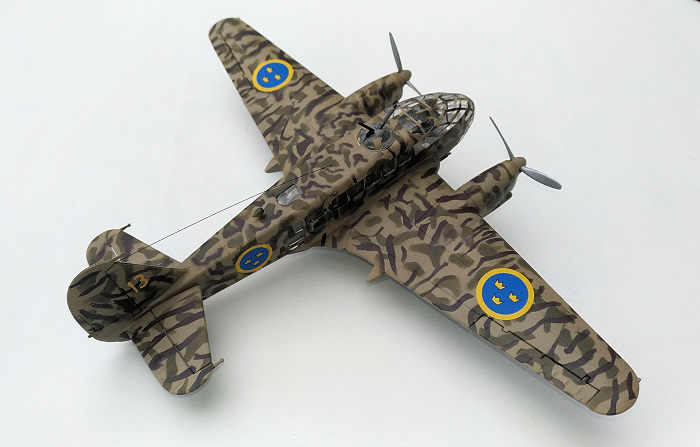 I selected dark sand, dark
earth and US dark green as the three colours. I sprayed dark sand as the base
and then used the masks to apply the remaining 2 colours. The masks worked to a
certain degree but I ended up painting some of the shapes free hand in the end.
I was a bit disappointed in the finished effect, it wasn’t really how I imagined
it would look when I cut the masks.
I selected dark sand, dark
earth and US dark green as the three colours. I sprayed dark sand as the base
and then used the masks to apply the remaining 2 colours. The masks worked to a
certain degree but I ended up painting some of the shapes free hand in the end.
I was a bit disappointed in the finished effect, it wasn’t really how I imagined
it would look when I cut the masks.
Once the paint was dry, I sprayed a gloss coat of Alclad II water based gloss and left it to dry for 24 hours.
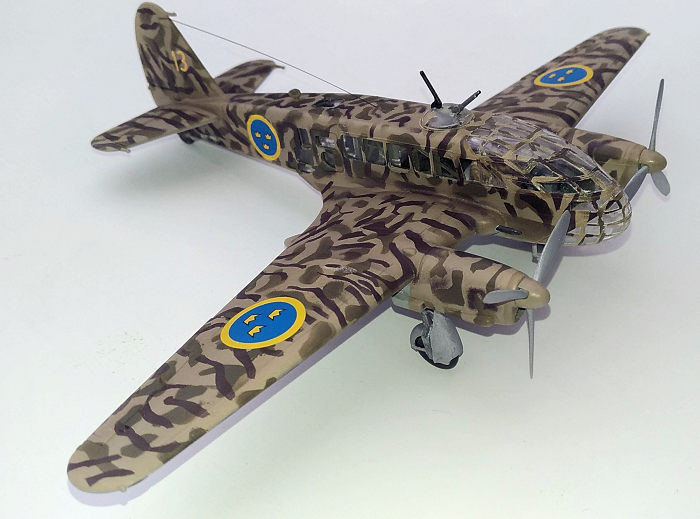
The decals for the Swedish plane did not specify a specific unit and were fairly basic, just roundel marking for the wings and fuselage. I added some extra bits from the spares box. I used Micro Sol / Set to apply them and they went down without any issues. I decided not to apply any weathering to the kit and leave it looking factory fresh.
I allowed the decals to settle overnight and then sprayed a matt finish with Vallejo matt finish. Once the matt layer was dry, I removed the masking for canopy and fuselage windows.
I then applied stretched sprue for the radio antennae to the rudder and elevators to complete the job.
Peter Chiu
23 April 2021. Copyright ModelingMadness.com. All rights reserved. No
reproduction without express permission. If you would like your product reviewed fairly and fairly quickly, please
contact the editor
or see other details in the
Note to
Contributors.