| KIT #: | 72103 |
| PRICE: | $11.60 from www.hobbyshop.cz |
| DECALS: | Two options |
| REVIEWER: | Carmel J Attard |
| NOTES: |
| HISTORY |
 It is surprising how very little is
known about the Saiman 200, a biplane of such a simple and graceful design.
The Saiman was the standard primary trainer operated by the Reggia
Aeronautica during world War Two. The first prototype made its first flight
in November 1938 and since 1940 the production version was used for
elementary training in all Italian flight schools. At the end of the war,
Saiman 200s were used as unit hack but mainly as courier planes. The
biplane had a full-wood frame with plywood covering on all surfaces. The
total production reached 146 Saiman 200. The Luftwaffe captured 31 of these
and a few were captured and used by the allied forces. An Alfa Romeo 115 of
185 HP powered the trainer aircraft, which was also the same type of engine
that powered the Nardi trainer monoplane. With this engine it could attain
a maximum speed of 220Km/Hr.The Saiman 200 had a wingspan of 8.785 M, a
length of 7.47M and a height of 2.5M.Its empty weight was 761 Kg and the
maximum loaded weight was 1056 Kg.
It is surprising how very little is
known about the Saiman 200, a biplane of such a simple and graceful design.
The Saiman was the standard primary trainer operated by the Reggia
Aeronautica during world War Two. The first prototype made its first flight
in November 1938 and since 1940 the production version was used for
elementary training in all Italian flight schools. At the end of the war,
Saiman 200s were used as unit hack but mainly as courier planes. The
biplane had a full-wood frame with plywood covering on all surfaces. The
total production reached 146 Saiman 200. The Luftwaffe captured 31 of these
and a few were captured and used by the allied forces. An Alfa Romeo 115 of
185 HP powered the trainer aircraft, which was also the same type of engine
that powered the Nardi trainer monoplane. With this engine it could attain
a maximum speed of 220Km/Hr.The Saiman 200 had a wingspan of 8.785 M, a
length of 7.47M and a height of 2.5M.Its empty weight was 761 Kg and the
maximum loaded weight was 1056 Kg.
| THE KIT |
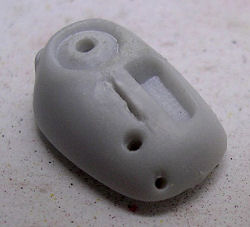
The 1/72 scale model of the Saiman is moulded in light grey plastic. There are 26 clearly moulded parts free from flash or sink marks. See previews pictures of the kit parts by Scott Van Aken Wednesday 23rd Nov 05.. A few ejector pin marks are inside the fuselage but could be easily erased. The interior of the fuselage halves have integrally moulded framework and embossed instruments around the cockpit area. But much of which is obscured once the interior floor section and seats are in place. There are also two instrument panels with nice raised detailing. Two clear plastic windscreens are also provided. These have the correct shape but are somewhat thick in section.
| CONSTRUCTION |
 One
particular aspect of the kit is the correct provision of attachment holes
for the wings and struts. These I have found very helpful during
construction and of which Scott has so correctly observed in his preview of
the kit. There is a two bladed but single piece propeller. The only weak
spot about the kit was the under fuselage air speed indicator and the aft
tail wheel which are integrally moulded but which for sure will get in the
way during the early construction and are easily sheared off as was in my
case.
One
particular aspect of the kit is the correct provision of attachment holes
for the wings and struts. These I have found very helpful during
construction and of which Scott has so correctly observed in his preview of
the kit. There is a two bladed but single piece propeller. The only weak
spot about the kit was the under fuselage air speed indicator and the aft
tail wheel which are integrally moulded but which for sure will get in the
way during the early construction and are easily sheared off as was in my
case.
Building the kit was straightforward and all the parts aligned perfectly
with the least of effort. The instruction hints that six exhaust outlet
stubs are to be fitted at the base of the inline engine and that these
should be
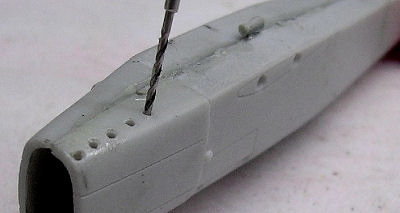 scratch built out of pieces cut from a 1mm dia stretch sprue.
Circles are printed on the plastic at their location. These I have drilled
through each and every hole and instead of inserting a piece of stretch sprue to simulate the exhaust stubs, I fitted lengths of 3mm x 1mm dia
hollow steel tubing cut to sizes from a single piece of surgical needle. The
various small intakes located at the
scratch built out of pieces cut from a 1mm dia stretch sprue.
Circles are printed on the plastic at their location. These I have drilled
through each and every hole and instead of inserting a piece of stretch sprue to simulate the exhaust stubs, I fitted lengths of 3mm x 1mm dia
hollow steel tubing cut to sizes from a single piece of surgical needle. The
various small intakes located at the
 front
engine cowling were refreshed by drilling to a deeper level.
front
engine cowling were refreshed by drilling to a deeper level.
Adding rigging makes the kit all the more authentic. I predrilled 0.4 mm
dia holes at marked points on the wing parts. This was at a stage when the
kit was all in one piece. Unfortunately the correct rigging detail is not
clearly illustrated 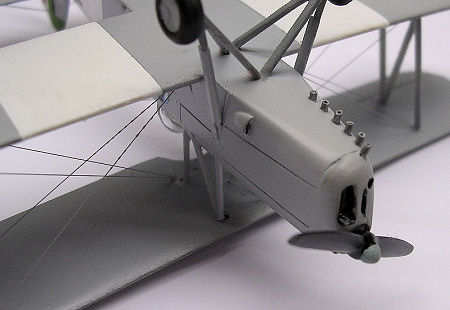 and I had to refer to photos at my disposal to identify
the correct nature of rigging mounted on the Saiman as the artwork was not
as clear as I originally thought and the instructions weren’t helpful
either. For the two cockpit front rigging I drilled holes at their right
location however in order to simplify matters I have left the front engine
cover in the open position since the rigging had to be worked from inside
this area. I have to admit that making is rigging is fun but in the process
I have overlooked adding the parallel set of rigging located at the
trailing edge on each side of the wings. I could not add these at a later
stage since when I found that I left these out it was at a too late a stage
as I did the paintwork of the kit already. Adding more rigging at this
stage would spoil the finish obtained by the airbrush work. The only
exterior areas that were painted before the rigging were the white trainer
bands on the fuselage and lower wings, as it was easier to mask these areas
before the rigging was applied. Seats were painted dark grey and
instruments in black. The rest of the aircraft was painted light grey
overall with the exception of the white trainer bands already mentioned and
also the elevator and rudder areas. In leaving the moving parts white will
allow the decal colours to stand out more in contrast even if these will
tend to be on the thin side as the decals were in fact found to be.
and I had to refer to photos at my disposal to identify
the correct nature of rigging mounted on the Saiman as the artwork was not
as clear as I originally thought and the instructions weren’t helpful
either. For the two cockpit front rigging I drilled holes at their right
location however in order to simplify matters I have left the front engine
cover in the open position since the rigging had to be worked from inside
this area. I have to admit that making is rigging is fun but in the process
I have overlooked adding the parallel set of rigging located at the
trailing edge on each side of the wings. I could not add these at a later
stage since when I found that I left these out it was at a too late a stage
as I did the paintwork of the kit already. Adding more rigging at this
stage would spoil the finish obtained by the airbrush work. The only
exterior areas that were painted before the rigging were the white trainer
bands on the fuselage and lower wings, as it was easier to mask these areas
before the rigging was applied. Seats were painted dark grey and
instruments in black. The rest of the aircraft was painted light grey
overall with the exception of the white trainer bands already mentioned and
also the elevator and rudder areas. In leaving the moving parts white will
allow the decal colours to stand out more in contrast even if these will
tend to be on the thin side as the decals were in fact found to be.
| COLORS & MARKINGS |
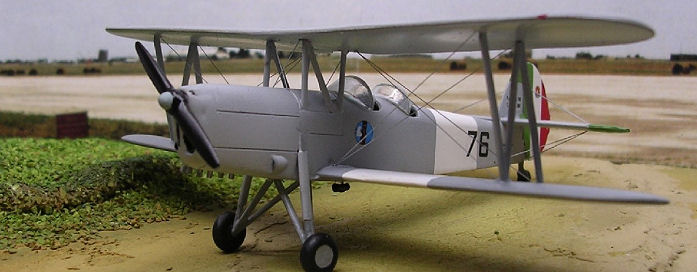
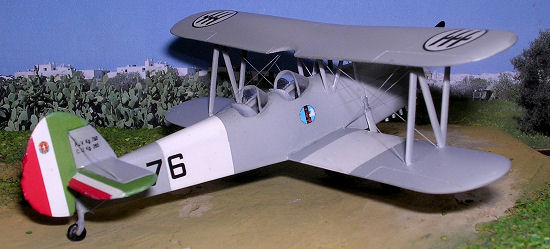
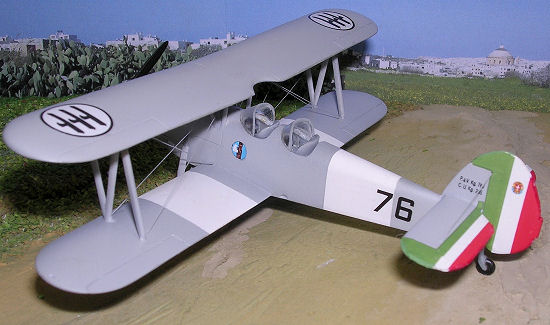
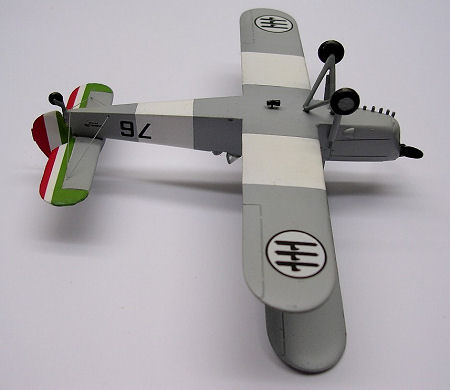 There are markings for two aircraft. I preferred the Italian tricolor
markings hence the colour scheme mentioned earlier. I have however used a
light grey mixed with a few drops of white to get close to the shade on the
box art in preference to the light blue-grey shade of colour suggested by
the instructions. The alternative scheme is to make a captured USAAF
machine, which was in overall black. As for the decals I found that it was
a good idea to trim the transparent edging to each and every item. Leaving
the film on will lapse over the area it is intended to go or remains
handing beyond the elevator and rudder edge, which will be difficult to
trim off afterwards without damaging the decal. Some touching up was
necessary to the edge of the decal areas using red and a mix of green that
matched the decals.
There are markings for two aircraft. I preferred the Italian tricolor
markings hence the colour scheme mentioned earlier. I have however used a
light grey mixed with a few drops of white to get close to the shade on the
box art in preference to the light blue-grey shade of colour suggested by
the instructions. The alternative scheme is to make a captured USAAF
machine, which was in overall black. As for the decals I found that it was
a good idea to trim the transparent edging to each and every item. Leaving
the film on will lapse over the area it is intended to go or remains
handing beyond the elevator and rudder edge, which will be difficult to
trim off afterwards without damaging the decal. Some touching up was
necessary to the edge of the decal areas using red and a mix of green that
matched the decals.
| CONCLUSIONS |
In the end the kit was given a coat of semi matt varnish. Another Reggia Aeronautica aircraft was added to my model collection. Both the Saiman 200 biplane and the Nardi monoplane trainer stood out in big contrast in size and detail when placed near the scale model of the P-108 bomber. Thanks to Scott Van Aken who provided the kit for the review.
January 2006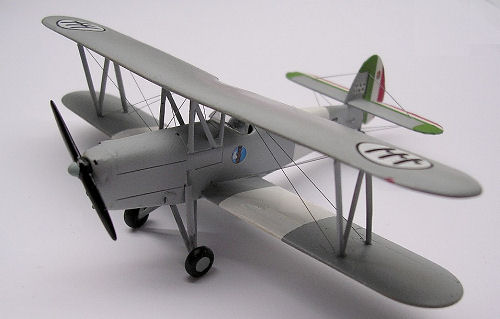
Copyright ModelingMadness.com. All rights reserved. No reproduction in any form without express permission from the editor.
You can find this kit and many others at www.hobbyshop.cz
If you would like your product reviewed fairly and fairly quickly, please contact the editor or see other details in the Note to Contributors.