Hasegawa 1/32 Ju-87D-8 'Night Stuka'
| KIT #: | 08171 |
| PRICE: | 5600 yen at www.hlj.com |
| DECALS: | Two Options |
| REVIEWER: | Tom Cleaver |
| NOTES: | Aftermarket used for interior, prop, canopy and gear legs |
| HISTORY |
Contrary to legend, the Stuka did not run off and hide in the closet after its disastrous introduction to the Battle of Britain, where it demonstrated what every other air force that operated dive bombers had always known: dive bombers cannot operate in an area of enemy air superiority with impunity. Hermann Goering had made a big deal out of the success of the Stuka in the blitzkrieg campaigns in Poland and France, and it was assumed from German propaganda that it was some sort of “super plane,” so the British went out of the their way to trumpet its “defeat” in August 1940, when it came up against a determined air defense and was caught without escort fighters, a recipe for disaster for any dive bomber.
In truth, the Stuka went on to become the greatest Axis threat to British warships in the Mediterranean, and it proved its worth in the dive bombing role in the invasions of the Balkans, the Crete campaign, and the initial operations in the Soviet Union.
 In
1941, the Ju-87B was replaced by the aerodynamically refined Ju-87D series,
which was introduced when the Ju-287 project was delayed. The airplane was due
to be phased out of production in 1942, but was reinstated due to the
unavailability of a successor. By 1943, the Stuka was little-used in the
dive-bombing role, and was increasingly utilized as a low-altitude ground attack
aircraft, or schlachtflugzeug. With the introduction of the Ju-87D-5 in
production, the wing armament was increased to two MG 151 20mm cannon in
reflection of the Stuka’s role in ground attack, and the dive brakes were
removed. When the Ju-87D-7 and D-8 were introduced on the production line in
1943, the Stuka was completely transformed from a dive bomber by the complete
elimination of the dive flap mounts. The Ju-87D-8 was modified specifically for
use as a nachtschlactflugzeug with the addition of exhaust flame dampers
and an RDF guidance system for operation at night. Ju-87D-8s were used on the
Italian Front, the Western European Front and the Eastern Front in the night
interdiction and harassment role.
In
1941, the Ju-87B was replaced by the aerodynamically refined Ju-87D series,
which was introduced when the Ju-287 project was delayed. The airplane was due
to be phased out of production in 1942, but was reinstated due to the
unavailability of a successor. By 1943, the Stuka was little-used in the
dive-bombing role, and was increasingly utilized as a low-altitude ground attack
aircraft, or schlachtflugzeug. With the introduction of the Ju-87D-5 in
production, the wing armament was increased to two MG 151 20mm cannon in
reflection of the Stuka’s role in ground attack, and the dive brakes were
removed. When the Ju-87D-7 and D-8 were introduced on the production line in
1943, the Stuka was completely transformed from a dive bomber by the complete
elimination of the dive flap mounts. The Ju-87D-8 was modified specifically for
use as a nachtschlactflugzeug with the addition of exhaust flame dampers
and an RDF guidance system for operation at night. Ju-87D-8s were used on the
Italian Front, the Western European Front and the Eastern Front in the night
interdiction and harassment role.
While the Ju-87 was finally removed from production in the fall of 1944 to allow maximum effort to be expended on production of defensive fighter aircraft, the Stuka itself flew on in combat to the last days of the war, primarily as a night attack aircraft and in the panzerschrek role as the Ju-87G-2 tank killer. No particularly important missions by Ju-87D-8s were recorded, but its use in the rugged Italian Appenines at night must have taken a particular brand of courage by its crews.
| THE KIT |
 Hasegawa is well known for “stretching the molds” on any of their releases, and
their 1/32 Ju-87D/G series is no exception. The Ju-87D-8 kit is a limited
release of the Ju-87D-1/D-3 kit, with extra sprues providing the flame damper
exhausts, the 20mm cannon barrels and the RDF loop antenna modification to the
standard radio antenna mast. Decals are provided for two Ju-87D-8s operated by
Nacht Schlact Gruppe 9 in Italy.
Hasegawa is well known for “stretching the molds” on any of their releases, and
their 1/32 Ju-87D/G series is no exception. The Ju-87D-8 kit is a limited
release of the Ju-87D-1/D-3 kit, with extra sprues providing the flame damper
exhausts, the 20mm cannon barrels and the RDF loop antenna modification to the
standard radio antenna mast. Decals are provided for two Ju-87D-8s operated by
Nacht Schlact Gruppe 9 in Italy.
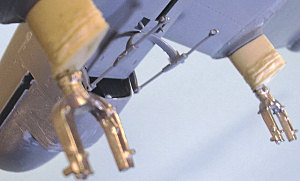
I decided to use the Jerry Rutman wheel conversion set to do the landing gear without the usual “pants”, as well as the corrected resin propeller blades and the vacuformed canopy so as to make it easy to pose the pilot’s canopy in the open position.
| CONSTRUCTION |
 Construction didn’t differ appreciably from the previous Ju-87D-1 kit reviewed
here. Again, I used the Eduard “Big Ed” set for internal detail in the
cockpit. The kit is well-designed and if a modeler takes care with assembly
there is only a need to deal with the centerline seams of the fuselage and
engine cowling.
Construction didn’t differ appreciably from the previous Ju-87D-1 kit reviewed
here. Again, I used the Eduard “Big Ed” set for internal detail in the
cockpit. The kit is well-designed and if a modeler takes care with assembly
there is only a need to deal with the centerline seams of the fuselage and
engine cowling.
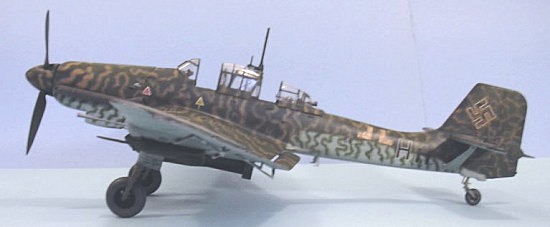
As mentioned above, I replaced the landing gear with Jerry Rutman’s conversion. This provides the gear leg fairing in resin, with the gear leg itself done in white metal, with resin wheels. The conversion presents no difficulty, inasmuch as it directly replaces the kit parts.
The
kit propeller blades are the right shape for a Ju-87B, but are incorrect for the
paddle blades used by the Ju-87D and G series. These resin blades by Jerry Rutman do have some pitting on the
 surface, which is easily taken care of with
an application of Mr. Surfacer 500 and 5 minutes with a sanding stick.
surface, which is easily taken care of with
an application of Mr. Surfacer 500 and 5 minutes with a sanding stick.
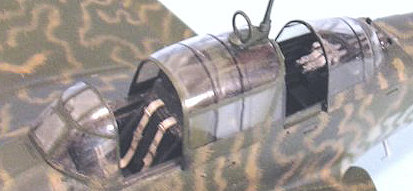
The kit canopy has such a tight fit for the pilot’s sliding section that it is nearly impossible to pose it in the open position without modifying the center section of the canopy to make it smaller in cross section and thereby allow the pilot’s canopy to be placed over it. I used the vacuform canopy from Jerry Rutman’s Stuka conversion set, which slides over the center section of the canopy without difficulty. Rather than use the decals the kit provides for the internal stiffeners in the canopy sections, I painted the insides of these with a 00000 brush, using Gunze-Sangyo “Tire Black”.
| COLORS & MARKINGS |
 I
first gave the model the standard 70/71/65 camouflage finish, using Tamiya
“Light Blue”, “Black Green” and “Deep Green.” I used the paper masks provided
in the kit instructions to get the sharp edges to the upper section camouflage.
When these paints were dry, I gave the model a coat of Future.
I
first gave the model the standard 70/71/65 camouflage finish, using Tamiya
“Light Blue”, “Black Green” and “Deep Green.” I used the paper masks provided
in the kit instructions to get the sharp edges to the upper section camouflage.
When these paints were dry, I gave the model a coat of Future.
The kit decals were applied to do the airplane in the boxart. The new Hasegawa decals are thin and go down without difficulty under a coat of Micro-Sol. When these decals were dry, I washed the model to get rid of setting solution residue, then gave the model a coat of Xtracrylix “Satin” Varnish overall.
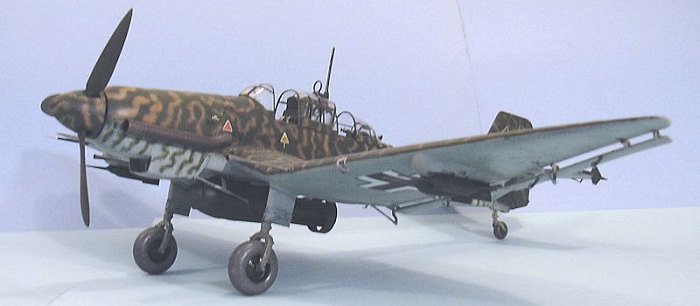
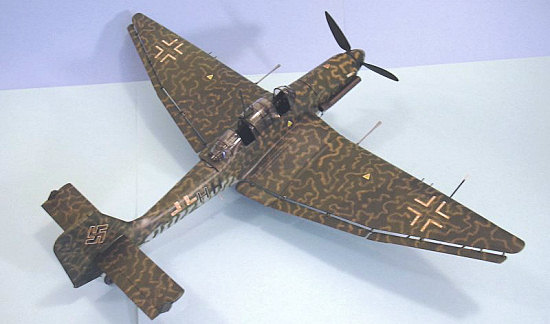
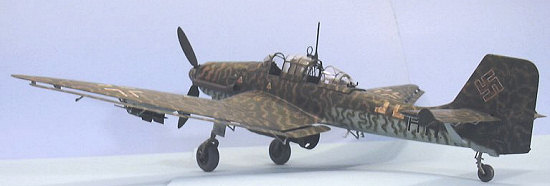
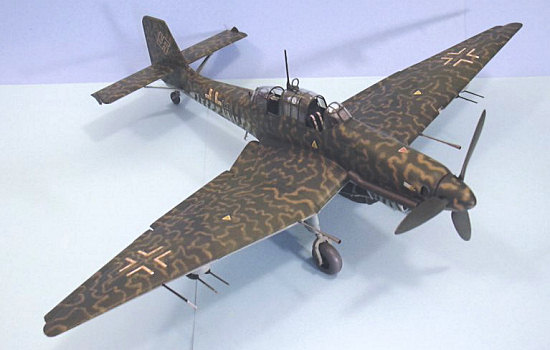
I then applied the “scribble” camouflage, using Gunze-Sangyo RLM79 “Sandy Yellow” for the upper camouflage and Tamiya “Black Green” for the lower scribbles on the fuselage. Close-up photos of Luftwaffe airplanes painted with the “wave mirror” or “scribble” pattern show these were applied roughly in the field, and the application could differ across different sections of the airplane since it was being applied by more than one person. I therefore used the airbrush at different settings over the nose, rear fuselage, each wing and the tail. The white insignias were lightly overpainted as they were shown in photos to have been “dulled down” for night operations.
| FINAL ASSEMBLY |
 I
applied three coats of Xtracrylix “Flat” Varnish with a brushful of Tamiya “Flat
Base” added in to get a really flat and weathered finish. I gave the model
exhaust stains with Tamiya “Smoke.” The ordnance was attached and the sliding
sections of the canopies attached in the open position.
I
applied three coats of Xtracrylix “Flat” Varnish with a brushful of Tamiya “Flat
Base” added in to get a really flat and weathered finish. I gave the model
exhaust stains with Tamiya “Smoke.” The ordnance was attached and the sliding
sections of the canopies attached in the open position.
| CONCLUSIONS |
For the hard-core Stuka fan, the Ju-87D-8 provides the end of the series. The night camouflage, which varied from unit to unit, gives opportunity for a different look from other Stuka models. Hasegawa’s 1/32 Stuka kits look quite nice straight out of the box, and look really nice with the extra added detail of the Eduard photo-etch set. This is an easy kit to build that presents no difficulties and results in a good-looking model. Highly recommended.
Thanks to HobbyLink Japan for the review copy. Get yours at www.hlj.com
Copyright ModelingMadness.com January 2008
If you would like your product reviewed fairly and fairly quickly, please contact the editor or see other details in the Note to Contributors.