Hasegawa 1/32 Ki-44-IIb 'Shoki'
| KIT #: | ST 30 |
| PRICE: |
4,400 Yen at HobbyLink |
| DECALS: | Three options |
| REVIEWER: | Tom Cleaver |
| NOTES: | New molding |
| HISTORY |
 ack
in 1935, but it had been deemed too experimental, not to mention it violated
everything the conservative Japanese Army fighter pilots looked for in a
fighter. The specification
that emerged in late 1939 called for a fighter with a top speed of 373 m.p.h.,
the ability to attain 5,000 meters’ altitude at normal operating weights in less
than five minutes, and an armament of two 7.7mm and two 12.7 mm machine guns.
At the time, this was the most advanced requirement ever issued by the
Koku Hombu.
ack
in 1935, but it had been deemed too experimental, not to mention it violated
everything the conservative Japanese Army fighter pilots looked for in a
fighter. The specification
that emerged in late 1939 called for a fighter with a top speed of 373 m.p.h.,
the ability to attain 5,000 meters’ altitude at normal operating weights in less
than five minutes, and an armament of two 7.7mm and two 12.7 mm machine guns.
At the time, this was the most advanced requirement ever issued by the
Koku Hombu.
 missions.
Even when the American bombers were escorted, the Ki.44s had the climb
and dive performance to make one attack on the bombers, then out-diving the
escorts - the way they had seen the AVG do it over Rangoon in early 1942.
Ki.44s were also sent to
missions.
Even when the American bombers were escorted, the Ki.44s had the climb
and dive performance to make one attack on the bombers, then out-diving the
escorts - the way they had seen the AVG do it over Rangoon in early 1942.
Ki.44s were also sent to
| THE KIT |
Hasegawa created the definitive Ki.44 in 1/48 scale about 15 years ago,
and this new 1/32 kit is essentially that kit scaled up.
The kit includes a really excellent pilot figure with choice of heads -
wearing or not wearing an oxygen mask. 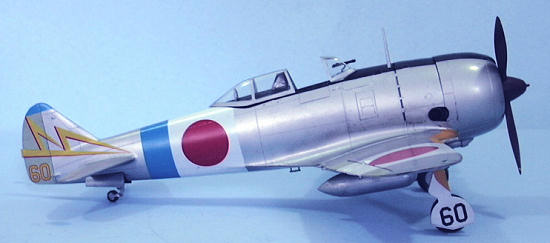
| CONSTRUCTION |
Construction is easy and presented no difficulties any modeler who has
done a couple of models could not deal with.
I found that fit was so good that I only used a very little bit of
cyanoacrylate on the forward fuselage ahead of the cockpit, and the
 fault
there may have been mine in not checking the fit as I glued the seam.
fault
there may have been mine in not checking the fit as I glued the seam.
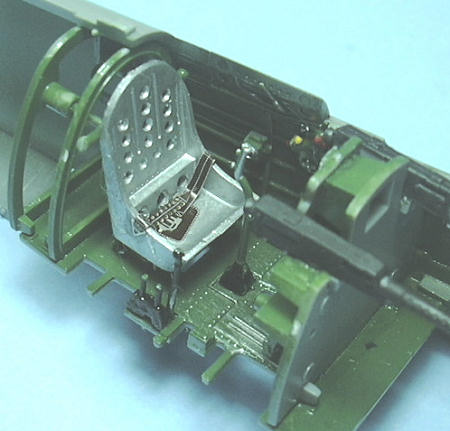
Construction started with the cockpit, which means starting with painting
the cockpit. Hasegawa calls out
either a color mix that is a sort of Khaki-Green, or silver.
Checking in at j-aircraft.com, I found that there is no known
color for the cockpit. It could have been any of several shades of green,
it could have been in blue-green “Aotake,” or it could have been unpainted metal
- or a combination of all of these.
I decided to mix a little Tamiya “Japanese Cockpit Green” (which is basically
“Mitsubishi cockpit green”) with some Tamiya “Park Green” to get a color that
could meet Ed Maloney’s description to me many years ago of the colors found in
the Ki.84 that Planes of Fame restored and flew in the late 1960s - “apple
green.” As one commenter said at
j-aircraft, “Paint it any green you want and dare any detractor to prove you
wrong.”
I did take the time to drill out the holes in the seat, which I painted
aluminum. I also added the Eduard 1/32 JAAF seatbelts, which were the only
aftermarket item the model needed.
I then painted and assembled the engine.
The rest of the model came together without problems, given the excellent
overall fit of the parts.
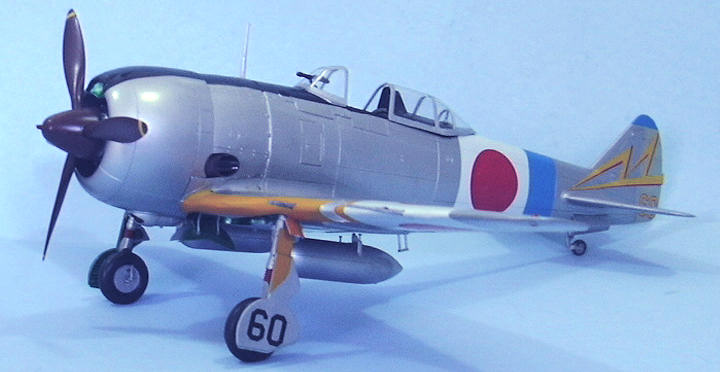
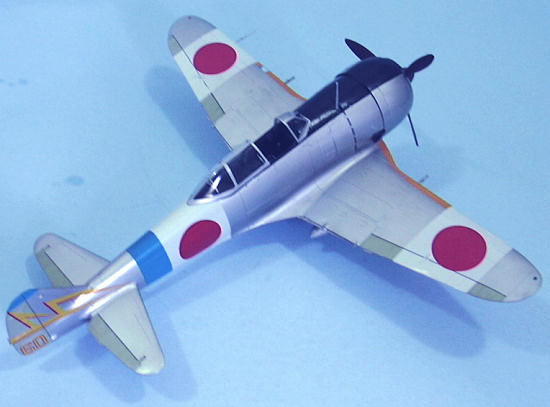
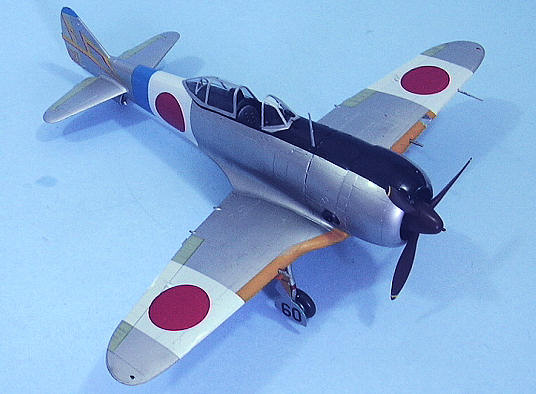
| COLORS & MARKINGS |
I decided I would use the decals, so I painted the fabric control
surfaces with Tamiya “JAAF Grey” and the rest of the model was painted with
Alclad “Aluminum.” I then
hand-painted the wheel wells and interior of the gear doors with Tamiya “Clear
Green,” which looks like weathered “Aotake” when finished.
Decals:
 I discovered right off the bat that the decals are a two-edged sword.
Yes, you get to not have to paint and mask and then paint and mask and
then paint and mask some more, but you are at the mercy then of the decal
designers. Unfortunately, these
decals do not fit exactly where the drawings say they should.
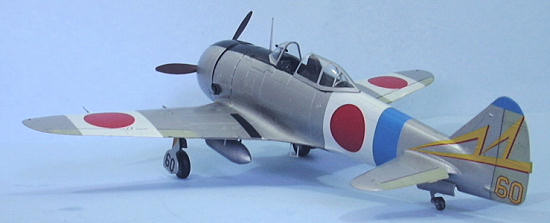
I discovered this the hard way with the decals for the yellow ID stripes,
screwing them up so severely that I decided to go mask off them model and paint
those stripes. I was reminded again
at this point why doing things like this first, then masking them off and
painting larger areas (like the rest of the airplane) is a good idea when I
managed to get a little yellow overspray on the wings.
Usually, when this happens, that can easily be removed with alcohol,
which theoretically would have no thinning effect on Alclad.
Wrong! There were holes worn
in the Alclad, which meant I then had to mask off the yellow stripes and then
repaint the Alclad.
I discovered right off the bat that the decals are a two-edged sword.
Yes, you get to not have to paint and mask and then paint and mask and
then paint and mask some more, but you are at the mercy then of the decal
designers. Unfortunately, these
decals do not fit exactly where the drawings say they should.
I discovered this the hard way with the decals for the yellow ID stripes,
screwing them up so severely that I decided to go mask off them model and paint
those stripes. I was reminded again
at this point why doing things like this first, then masking them off and
painting larger areas (like the rest of the airplane) is a good idea when I
managed to get a little yellow overspray on the wings.
Usually, when this happens, that can easily be removed with alcohol,
which theoretically would have no thinning effect on Alclad.
Wrong! There were holes worn
in the Alclad, which meant I then had to mask off the yellow stripes and then
repaint the Alclad.
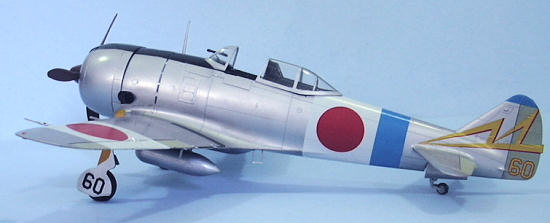
The rest of the decals went on without problems, though the fuselage
strips wouldn’t come together on the centerline until they were moved back about
1/4 inch from where the decal marking instructions say they should be.
The anti-glare panel was also a bit messy, though it finally fit.
From this experience, I would say that there’s a reason why modelers have
learned to paint and mask and then paint and mask and then paint and mask again
- it’s because this way you can get it right with a lot less hassle and no dark
purple clouds over the workbench; as with many so-called
“shortcuts,” this one has you going the long way around to get to the
finish line.
The rest of the decals - the individual aircraft markings - went on
without any problem at all.
| FINAL CONSTRUCTION |
Since all the photos I could find of Ki.44s assigned to the 47th
Sentai show them equipped with telescopic sights rather than the reflector
sights (both types were used depending on availability during the time of
production, I learned), I used the telescopic sight that’s on one sprue, that
the instructions tell you to ignore.
Since the kit comes with both windscreens, this is not a problem.
I attached the prop and the landing gear, and gave the model some
“exhaust stains” with Tamiya “Smoke” and all was complete.
| CONCLUSIONS |
 Very definitely not a hard kit to build.
It’s not a “slammer” but out of the box you can get a darn nice model
without much more than perhaps a month’s worth of weekends (with much of that
spent doing the spray and mask and spray and mask and spray and mask again that
will get it looking right) spent on the project.
In fact, painting the model right will likely be the longest single part
of the project. Hasegawa now
provides nice 1/32 kits for all four of the Nakajima “big three” of the war -
the Ki.43, the Ki.44 and the Ki.84.
If you don’t use the pilot figure for this model, save him and put him in the
Ki.43, which will go a long way towards hiding the lack of detail in that
cockpit. A very nice model for
those who like Japanese subjects.
Very definitely not a hard kit to build.
It’s not a “slammer” but out of the box you can get a darn nice model
without much more than perhaps a month’s worth of weekends (with much of that
spent doing the spray and mask and spray and mask and spray and mask again that
will get it looking right) spent on the project.
In fact, painting the model right will likely be the longest single part
of the project. Hasegawa now
provides nice 1/32 kits for all four of the Nakajima “big three” of the war -
the Ki.43, the Ki.44 and the Ki.84.
If you don’t use the pilot figure for this model, save him and put him in the
Ki.43, which will go a long way towards hiding the lack of detail in that
cockpit. A very nice model for
those who like Japanese subjects.
Kit courtesy of HobbyLink Japan.
If you would like your product reviewed fairly and quickly, please contact the editor or see other details in the Note to Contributors.