
Hasegawa 1/32 Bf-109G-6/AS (Conversion)
| KIT #: | ? |
| PRICE: | $39.95 MSRP |
| DECALS: | Two options |
| REVIEWER: | Tom Cleaver |
| NOTES: | Cutting Edge Resin parts and decals used |
| HISTORY |
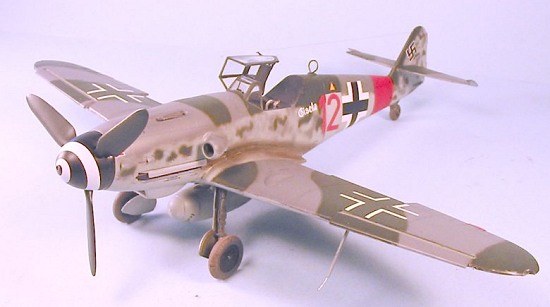
By the summer of 1944, the Bf-109G-6 was getting “long in the tooth.” As there were a large number of airframes available both from new-production and rebuilt/refurbished aircraft salvaged from shot-down airplanes, some were powered with the DB-605AS engine, which provided more horsepower at altitude, where the airplane would fight against U.S. bombers and their escort fighters. The main visual difference with these aircraft and the standard G-6 was that most of them had the taller vertical fin and rudder, and they used the “Type 110" asymmetric cowling which was more aerodynamic that the standard “Beule” cowling and necessary for the larger supercharger the DB-605AS engine used.
 As they were
produced, most of the G-6AS aircraft were assigned to home defense
Jagdgeschwaders, because of their high-altitude performance. JG300
utilized their Bf-109s to provide defense to the heavy Fw-190A-8
“Sturmbocks” which were too heavy to engage in fighter-vs-fighter combat.
As they were
produced, most of the G-6AS aircraft were assigned to home defense
Jagdgeschwaders, because of their high-altitude performance. JG300
utilized their Bf-109s to provide defense to the heavy Fw-190A-8
“Sturmbocks” which were too heavy to engage in fighter-vs-fighter combat.
Unfortunately, by this time the quality of pilots in the Luftwaffe had deteriorated significantly, and quite often when the units were intercepted the “escorts” had enough problems just defending themselves against the aggressive and experienced Americans, so that they were not able to provide adequate defense to the bomber-killer Focke-Wulfs. When the Americans were able to hit one of these Geschwadern while they were assembling for an attack, the usual result was that the Americans went home with a high score of shot-down German fighters to report.
By the fall of 1944, the American campaign against the German synthetic fuel industry that summer had paid off, with the Luftwaffe receiving less than 40% of the fuel it needed. Thus, major interceptions of the bomber units became less and less frequent, particularly as fall gave way to winter and flying conditions deteriorated beyond what the inexperienced German pilots could handle.
Had the Bf-109G-6AS perhaps been available six months earlier, when there were still sufficient numbers of pilots who could have taken advantage of its increased performance, the aircraft might have had an effect during the Battle of Germany, but the outcome of the struggle would have been unchanged.
| THE KIT |
 The Bf-109G-14 was
the second of the Hasegawa “big 109" kits to be released two years ago. It
differs from the first kit by providing the larger tail, and the “Galland
hood” cockpit canopy. Past that, it is the same easy-to-assemble kit that
the others are.
The Bf-109G-14 was
the second of the Hasegawa “big 109" kits to be released two years ago. It
differs from the first kit by providing the larger tail, and the “Galland
hood” cockpit canopy. Past that, it is the same easy-to-assemble kit that
the others are.
Cutting Edge decided to provide the “Type 110" cowling, which differs in small but significant ways from the “Type 100" cowling that Hasegawa provides “out of the box” for their Bf-109G-10 kit.
The decal sheet Cutting Edge provides has one aircraft in the markings of JG300, and notes that it was operational in August 1944. Since no G-10 arrived on operations before December, this aircraft was undoubtedly a Bf-109G-6AS. This type and the G-10 with the “Type 110" cowl are really indistinguishable visually, unless one can find a serial number, so this would have been an easy mistake to make in looking at photos, and should not be taken as any sort of criticism of Cutting Edge.
| CONSTRUCTION |
 The conversion
requires the modeler to cut off in its entirety the Hasegawa kit fuselage
forward of the fuselage firewall. The resin parts provided take care of
the lower nose, the upper cowling, and the different-shaped fairings
forward of the cockpit on the fuselage sides. As with any conversion, you
must test fit and modify the parts to get a good fit. I found that it was a
good idea to assemble the fuselage halves, so that I could fill in gaps in
the resin cowling parts as necessary. Once this was accomplished and the
seams sanded smooth, I covered the seams with Mr. Surfacer 500, sanded that
smooth, then rescribed panel lines as necessary.
The conversion
requires the modeler to cut off in its entirety the Hasegawa kit fuselage
forward of the fuselage firewall. The resin parts provided take care of
the lower nose, the upper cowling, and the different-shaped fairings
forward of the cockpit on the fuselage sides. As with any conversion, you
must test fit and modify the parts to get a good fit. I found that it was a
good idea to assemble the fuselage halves, so that I could fill in gaps in
the resin cowling parts as necessary. Once this was accomplished and the
seams sanded smooth, I covered the seams with Mr. Surfacer 500, sanded that
smooth, then rescribed panel lines as necessary.
I then painted and assembled the resin cockpit by Cutting Edge. I really think these cockpits are an improvement over the kit cockpit sufficiently to justify the extra cost. I used the Bf-109G-6 cockpit, since this was a rebuilt G-6 airframe. The seat had the molded-in seatbelts, which looks really good when painted and then given a light wash with Tamiya “Smoke” to “pop out” the detail.
The rest of the kit came together easily and presented no problems, due to the excellent design of the kit by Hasegawa.
| COLORS & MARKINGS |
 Painting.
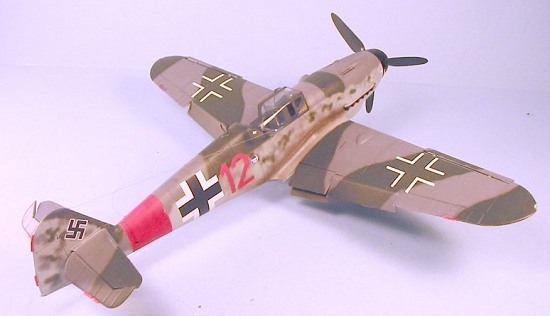
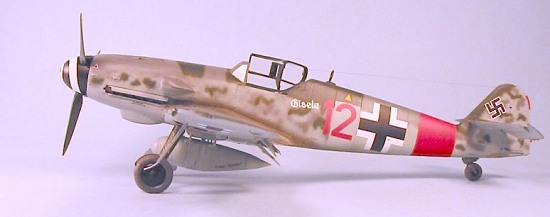
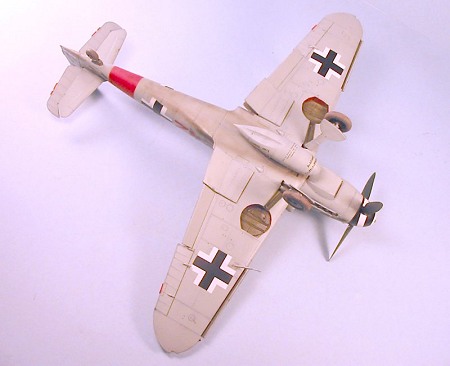
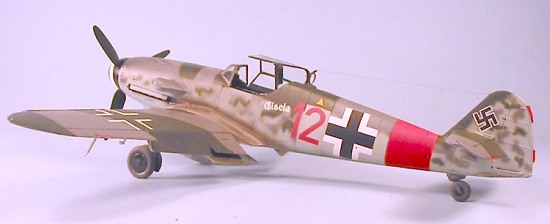
I painted the red JG300 Reichverteidigung stripe with Xtracrylix Rot 23 Red, then masked it off after letting it cure for 24 hours. I then painted the model with Xtracrylix RLM 76, lightened with white, then gave the upper camouflage with Xtracrylix RLM 74 and RLM 75, following the camouflage pattern provided on the Cutting Edge decal sheet. The prop blades were painted Xtracrylix RLM70 and the spinner was painted with Tamiya Semi-gloss Black. The landing gear, inside of the wheel wells and inner surface of the gear door were painted with Xtracrylix RLM02, and then given a wash of thinned Tamiya “Smoke.” When all was dry, I gave the model a coat of Future.
Decals:
The Cutting Edge decals are thin and well-printed, and went down with no difficulty.
| FINAL CONSTRUCTION |
When the decals were fully set, I washed the model and gave it another coat
of Future. When that was
 dry I applied two
coats of Xtracrylix “Flat Varnish.” I like this because it doesn’t go
completely “dead flat,” but leaves a slight sheen, which is the way
airplanes subject to lots of sun-fading look with flat camouflage paint.
Since the airplane had been rebuilt and repainted, and likely not used that
much in the late summer and fall of 1944, I did a minimal bit of “dinging”
with a silver art pencil, then applied exhaust stains with Tamiya “Smoke.”
This is very glossy, so when it was dry I gave it a coat of Xtracrylix
“Satin” varnish, which toned it down while giving it an “oily” look on top
of the flat-finish paint.
dry I applied two
coats of Xtracrylix “Flat Varnish.” I like this because it doesn’t go
completely “dead flat,” but leaves a slight sheen, which is the way
airplanes subject to lots of sun-fading look with flat camouflage paint.
Since the airplane had been rebuilt and repainted, and likely not used that
much in the late summer and fall of 1944, I did a minimal bit of “dinging”
with a silver art pencil, then applied exhaust stains with Tamiya “Smoke.”
This is very glossy, so when it was dry I gave it a coat of Xtracrylix
“Satin” varnish, which toned it down while giving it an “oily” look on top
of the flat-finish paint.
I attached the gear, prop, and canopy after I unmasked it.
| CONCLUSIONS |
There are many schemes for 109s, which is why they are so popular with modelers. This is an interesting-looking 109 from the period when the Luftwaffe had been defeated, but still tried to defend the homeland. Again, I am coming to really like the “large canvas” that 1/32 scale models provide.
May 2005
Kit courtesy of HLJ.
Cowling conversion and resin cockpit and decals courtesy Meteor Productions.
If you would like your product reviewed fairly and fairly quickly, please contact the editor or see other details in the Note to Contributors.