ICM 1/48 Yak-7B
| KIT #: | 48033 |
| PRICE: | $12.95 when new back in the late 1990s |
| DECALS: | One option |
| REVIEWER: | Jonathan Prestidge |
| NOTES: | Easy conversion. Eduard photoetched seatbelts, Squadron vac. canopy, and LaGG 3 prop and spinner used. |
| HISTORY |
The Yak-7 series of aircraft was developed from
the Yak-1 fighter. The first of the Yak-7 line, the Yak-7UTI was developed as a
dual seat trainer based on a stretched Yak-1 airframe. When it was found that
the trainer had better flying characteristics than the fighter, the Soviets
simply armed the trainer,
 removing
the rear seat and placing a plywood cover over the rear canopy. This lash-up
fighter was the Yak-7B. The Yak-7B would be the basis for the more advanced
Yak-7DI and Yak-9 fighters. Many Soviet Aces flew the Yak-7B, including Lt. Col.
A. E. Golubov of the 18th IAP
(Fighter Aviation Regiment).
removing
the rear seat and placing a plywood cover over the rear canopy. This lash-up
fighter was the Yak-7B. The Yak-7B would be the basis for the more advanced
Yak-7DI and Yak-9 fighters. Many Soviet Aces flew the Yak-7B, including Lt. Col.
A. E. Golubov of the 18th IAP
(Fighter Aviation Regiment).
| THE KIT |
| CONSTRUCTION |
 kis
and used it as a cover behind the pilot’s seat. I added a radio box on top of
this cover. The kit-supplied elevators had no hinge scribing on the lower
surfaces, so I scribed the missing detail. The wing root ducts were honed out as
well. I drilled out the exhaust stacks and the small oil cooler inlet just below
and behind the prop spinner. Finally, I drilled out the sight glasses for the
wing tanks. She was ready for construction.
kis
and used it as a cover behind the pilot’s seat. I added a radio box on top of
this cover. The kit-supplied elevators had no hinge scribing on the lower
surfaces, so I scribed the missing detail. The wing root ducts were honed out as
well. I drilled out the exhaust stacks and the small oil cooler inlet just below
and behind the prop spinner. Finally, I drilled out the sight glasses for the
wing tanks. She was ready for construction.
Per the usual, construction began with painting and
detailing the cockpit. RLM 02 was painted throughout. I brush-painted the
cockpit details and gave the interior a thin black wash. Once the wash had
dried, I drybrushed the interior with a slightly lighter shade of gray green. I
added the Eduard photoetched seatbelt for the pilot’s seat. Though there are no
locator pins, there are no real hitches in construction. I did leave out the
engine since it only causes problems. The rest of the airframe built up without
drama. Several sessions of adding putty, Mr. Surfacer and sanding followed.
As the final step in preparation for paint, I added the Squadron vac. canopy. I am not very comfortable with vac. canopies, but the kit canopy is junk! The clear parts were dipped in Future prior to assembly. I used Tamiya tape to mask the clear parts.
| COLORS & MARKINGS |
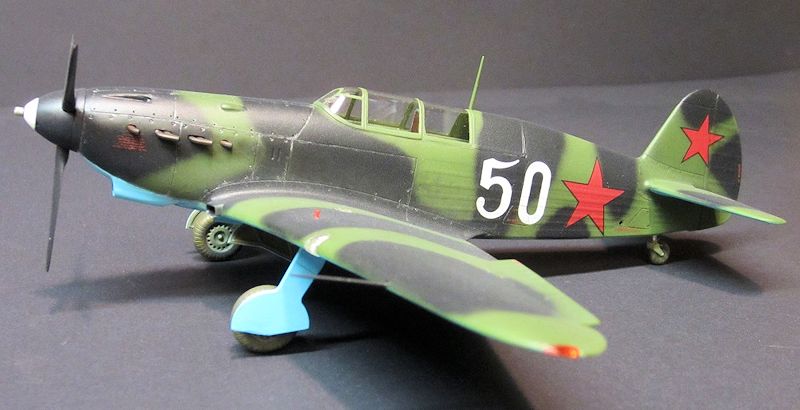
It is extremely difficult to find a good picture of a
Yak-7B with distinctive markings. After lots of searching, I came up with a
great black & white photo of Lt. Col. A. E. Golubov laying on the wing of his
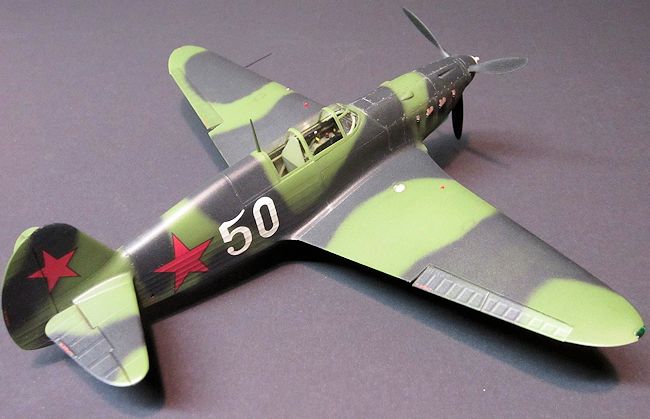
Yak-7B. The photo clearly shows a Yak-7B in standard black/green/blue camouflage
with a white spinner and large white “50” on the fuselage.
 All paints
used in this build were Polly Scale acrylics. RLM 02 was sprayed on the canopy
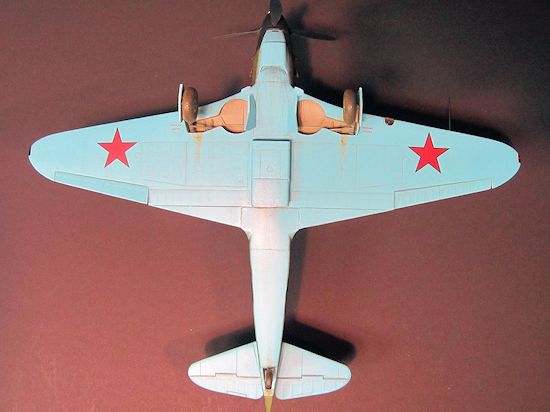
framing, landing gear doors, and landing gear. I painted U.S.S.R. underside blue
on the lower airframe and masked it off. Then I sprayed Aircraft Interior Black,
and U.S. TAC Mid Green (FS34102) freehand in the standard Yak-7B camo pattern.
All paints
used in this build were Polly Scale acrylics. RLM 02 was sprayed on the canopy
framing, landing gear doors, and landing gear. I painted U.S.S.R. underside blue
on the lower airframe and masked it off. Then I sprayed Aircraft Interior Black,
and U.S. TAC Mid Green (FS34102) freehand in the standard Yak-7B camo pattern.
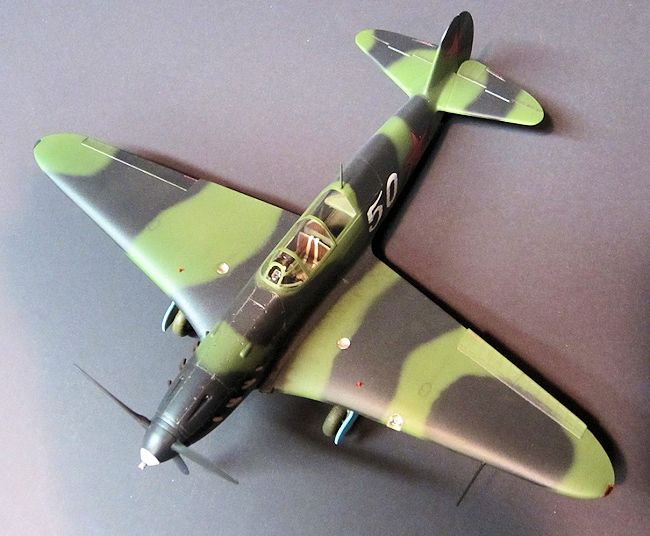
At this point I used pastels to emphasize the panel
lines and dirty the airframe up a bit. Since the wings were covered in plywood,
there is minimal detail on them. I tried to keep things subtle, adding just
enough shade variation to enhance detail. I then sealed everything with a coat
of Future in preparation for decals.
I used a variety of decals for this one, all from the
spares box. After weathering the decals, I gave the plane a final flat clear
coat.
The landing gear, prop from an ICM LaGG 3 (The kit
prop is junk), and other final bits were added at this time. Final detailing was
then completed.
| CONCLUSIONS |
 It was a
fun challenge to see if I could turn this into a real kit – one that I could
display alongside a Bf 109 on the shelf. I’m pleased with the results. The extra
effort made a vast improvement to a basic kit. I now have a nice-looking Yak-7B
on the shelf.
It was a
fun challenge to see if I could turn this into a real kit – one that I could
display alongside a Bf 109 on the shelf. I’m pleased with the results. The extra
effort made a vast improvement to a basic kit. I now have a nice-looking Yak-7B
on the shelf.
I appreciate ICM’s line of Yak fighters. They are at
least a starting point for this great series of fighter aircraft. Until another
manufacturer steps up to the challenge, the ICM Yaks 7 through 9 are the only
game in town.
January 2014
If you would like your product reviewed fairly and fairly quickly, please contact the editor or see other details in the Note to Contributors.