KP 1/72 Polikarpov Po-2
| KIT #: | 30 |
| PRICE: | $a few dollars |
| DECALS: | Four options |
| REVIEWER: | Brian Baker |
| NOTES: | An old kit, but still a goodie |
| HISTORY |
The Polikarpov U-2, later known as the PO-2, was developed about 1928
to replace the U-1 trainers in the Soviet Air Force. The U-1 was essentially a
copy of the Avro 504, and the U-2 was typical of biplane trainers of that era.
After some flight testing and modifications, the U-2 was placed in production,
and it was found that the aircraft had many uses besides that of a primary
trainer. Early versions were used as cro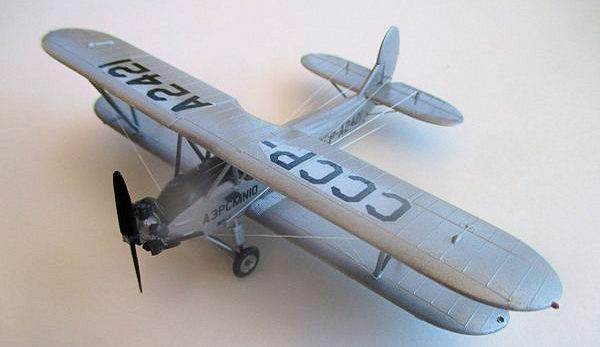 p
dusters, light transports, communications types, and even, after the war began,
light bombers. Various sources list the number actually produced as around
30,000, and the plane continued in production until 1959, although a few were
assembled after that by various maintenance organizations. There are quite a few
still in existence in Europe and the United States, both in museums and as
active warbirds.
p
dusters, light transports, communications types, and even, after the war began,
light bombers. Various sources list the number actually produced as around
30,000, and the plane continued in production until 1959, although a few were
assembled after that by various maintenance organizations. There are quite a few
still in existence in Europe and the United States, both in museums and as
active warbirds.
There were over 30 different versions produced, and many were modified locally for specific duties. Most famous of Soviet PO-2 users was the 588th Night Bomber Regiment, which was made up entirely of women pilots and maintenance personnel. They carried out operations against German forces, keeping them awake at night and reducing their effectiveness.
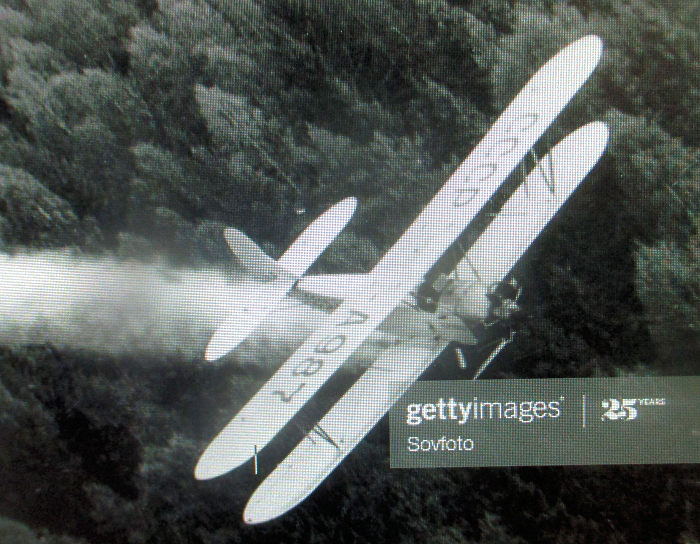
There is a lot of information available on the PO-2 on line, in Wikopedia and some other sources, although most photos show only military aircraft. I discovered one marginal quality photo of a crop duster version, and since I have an intense interest in the subject, decided to build one. I had built several military models of the type, notably KP and ICM kits, but this is the first civilian version I have attempted. Use Google for information on specific aircraft.
| THE KIT |
 This
is a rather old kit, and the first one I built was in 1977. The instructions are
on one large sheet of newsprint, with extensive text in German, a number of line
drawings showing color schemes and markings, a sprue diagram, and several sets
of assembly drawings. They are fairly clear, although additional material is
helpful in adding details.
This
is a rather old kit, and the first one I built was in 1977. The instructions are
on one large sheet of newsprint, with extensive text in German, a number of line
drawings showing color schemes and markings, a sprue diagram, and several sets
of assembly drawings. They are fairly clear, although additional material is
helpful in adding details.
One source of information is a Polish publication by Kagero entitled Polikarpov PO-2 by Grzegorz Szymanowski. This includes numerous photos of the PO-2 in the Polish Aviation Museum, and a set of “free” decals, which I have long ago misplaced. The book has very extensive detail photos of the museum airplane, but only a short historical text, and only a few photos of one Polish civilian aircraft.
The kit consists of 63 white styrene parts, two clear windshields, and a clear display stand. The parts have a certain amount of flash, but are certainly of good quality, although the wing ribbing is a bit overdone.
| CONSTRUCTION |
 The
kit goes together much more easily than I would have expected, although there
isn’t a lot of cockpit detail except for instrument panels, seats, cockpit
floor, rudder pedals, and control sticks. There is no sidewall detail. Once the
fuselage is assembled, the lower wing fits perfectly on the fuselage underside,
and the tail units are easy to install and align. Since I was building a one
color aircraft, I assembled the whole thing before painting, covering the
cockpit detail with foam. Once the wing struts are installed, the structure is
quite robust and easy to handle. That changed after I started adding the wire
rigging and control cables. I would suggest enlarging the mounting holes
slightly for the wing struts, landing gear struts, and engine mounting system.
If the airframe has more than one basic color, it would be best to paint the
parts before attaching the upper wing and other parts.
The
kit goes together much more easily than I would have expected, although there
isn’t a lot of cockpit detail except for instrument panels, seats, cockpit
floor, rudder pedals, and control sticks. There is no sidewall detail. Once the
fuselage is assembled, the lower wing fits perfectly on the fuselage underside,
and the tail units are easy to install and align. Since I was building a one
color aircraft, I assembled the whole thing before painting, covering the
cockpit detail with foam. Once the wing struts are installed, the structure is
quite robust and easy to handle. That changed after I started adding the wire
rigging and control cables. I would suggest enlarging the mounting holes
slightly for the wing struts, landing gear struts, and engine mounting system.
If the airframe has more than one basic color, it would be best to paint the
parts before attaching the upper wing and other parts.
 Once
the basic airplane is assembled, it is time for the details. The kit includes
such things as venturi tubes and control attachments. The kit does include quite
a few control horns for the rudder, elevators, and wings. After these are
attached, it is time to add the rigging wires and control cables. Do the rigging
wires first, and then add the control cables. I found the model fairly easy to
rig. This plane had control cables for the rudder and elevators running
alongside the fuselage, so use some kind of reference to make sure that they are
correctly located. Fortunately, the flying and landing wires between the wings
are single, so you don’t have to worry about parallel wires. There are also
aileron control wires between the upper and lower ailerons, so these need to be
measured and installed. I used electronic wire and white glue, and the results
were good.
Once
the basic airplane is assembled, it is time for the details. The kit includes
such things as venturi tubes and control attachments. The kit does include quite
a few control horns for the rudder, elevators, and wings. After these are
attached, it is time to add the rigging wires and control cables. Do the rigging
wires first, and then add the control cables. I found the model fairly easy to
rig. This plane had control cables for the rudder and elevators running
alongside the fuselage, so use some kind of reference to make sure that they are
correctly located. Fortunately, the flying and landing wires between the wings
are single, so you don’t have to worry about parallel wires. There are also
aileron control wires between the upper and lower ailerons, so these need to be
measured and installed. I used electronic wire and white glue, and the results
were good.
One problem I had was with the engine. It includes a basic crankcase, a rear exhaust system, a front case, and several exhaust stacks. These are confusing to say the least. Good luck on these. The Kagaro book was very useful in determining engine colors and details, including exhaust stack locations. I also constructed a small crop dusting dispenser from plastic card. It was glued to the bottom of the aircraft.
| COLORS & MARKINGS |
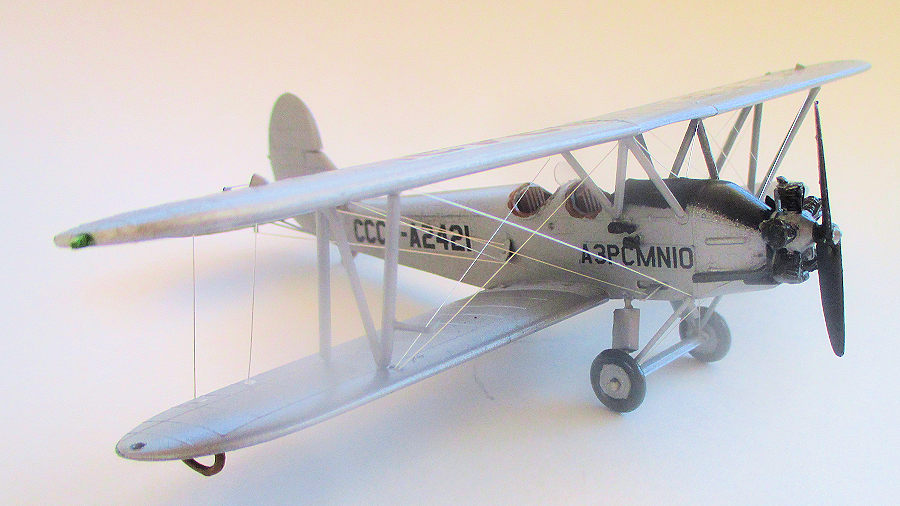
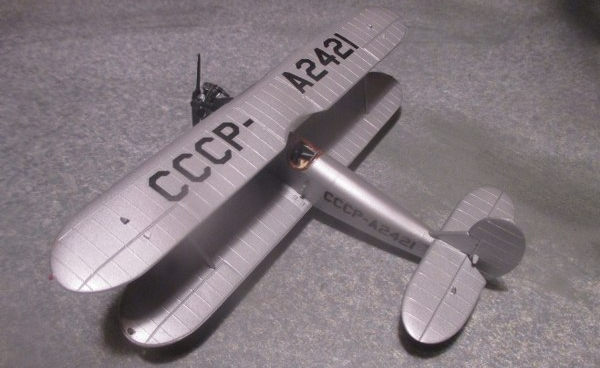
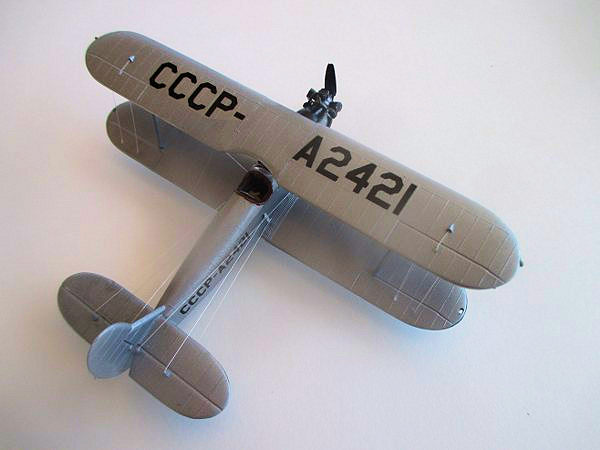
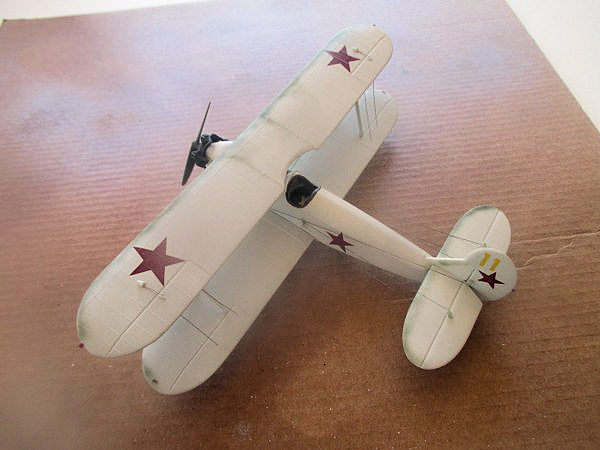 I used the
attached photo to determine colors and markings. The aircraft appears to be
overall silver. The registration letters and nose marking were made using clear
decal sheet and my printer. Although the registration numbers are clear in the
photo, the “Aeroflot” name on the nose is not, and since it is printed in
Russian letters, you just can’t type it out on your computer unless you are an
awful lot better at it than I am. Fortunately, a friend in Eastern Europe came
to my rescue, and sent me the script, and after some effort, I was able to
reduce the size of it so that it would fit on the model. IK have attached the
script in case anyone wants to do this airplane. The other Po-2 photo is one I
made a number of years ago. These are for comparison.
I used the
attached photo to determine colors and markings. The aircraft appears to be
overall silver. The registration letters and nose marking were made using clear
decal sheet and my printer. Although the registration numbers are clear in the
photo, the “Aeroflot” name on the nose is not, and since it is printed in
Russian letters, you just can’t type it out on your computer unless you are an
awful lot better at it than I am. Fortunately, a friend in Eastern Europe came
to my rescue, and sent me the script, and after some effort, I was able to
reduce the size of it so that it would fit on the model. IK have attached the
script in case anyone wants to do this airplane. The other Po-2 photo is one I
made a number of years ago. These are for comparison.
| CONCLUSIONS |
Even though this is an old kit, it is still buildable, and makes into a nice model. The new ICM kit is much better, but these are worth building. Don’t throw them away or trade them off, as they can be built into some very nice models. Recommended.
25 August 2020
Copyright ModelingMadness.com
If you would like your product reviewed fairly and fairly quickly, please contact the editor or see other details in the Note to Contributors.
Back to the Main Page Back to the Review Index Page Back to the Previews Index Page