Accurate Miniatures 1/48 Yak-1b
| KIT #: | 3425 |
| PRICE: | $29.00 |
| DECALS: | One option |
| REVIEWER: | Francisco Santoro |
| NOTES: | Foxbot Decals 48001 |
| HISTORY |
 From the kit instructions: "As the early Yaks progressed through the
ongoing changes that all production aircraft experience, one of the most obvious
needs was for better outward vision. This led to the introduction of the "bubble
top" canopy, a change which also brought about a new model designation- the
series 1b. This aircraft had previously been referred to as 1m, but factory
records indicate that a more proper designation would be 1b. Other improvements
were incorporated as well. These included things like a new aft fuselage,
revised tail surfaces, armament, various scoops and interior items and most
importantly, a significant reduction in weight. The new airplane weighted
5900lbs (2676kg), a saving of 500lbs (227kg) compared to the previous airplane.
This reduction, coupled with a boost in horsepower, made a good plane even
better."
From the kit instructions: "As the early Yaks progressed through the
ongoing changes that all production aircraft experience, one of the most obvious
needs was for better outward vision. This led to the introduction of the "bubble
top" canopy, a change which also brought about a new model designation- the
series 1b. This aircraft had previously been referred to as 1m, but factory
records indicate that a more proper designation would be 1b. Other improvements
were incorporated as well. These included things like a new aft fuselage,
revised tail surfaces, armament, various scoops and interior items and most
importantly, a significant reduction in weight. The new airplane weighted
5900lbs (2676kg), a saving of 500lbs (227kg) compared to the previous airplane.
This reduction, coupled with a boost in horsepower, made a good plane even
better."
| THE KIT |
Accurate Miniature's model comes packed inside a top opening box with a very attractive boxart. The back of the box shows an image of the finished model. There's a single bag with four sprues inside, and a clear sprue separately bagged.
Decals offer one option, and that is Sergey Luganski's White 58.
| CONSTRUCTION |
I began first by reading the instructions, since AM's ones are quite different from those of a, let's say, a Tamiya kit. They offer black and white diagrams for the assembly of the parts, but also give you written instructions that tell you the colours to use on the parts and how to assemble them.
After fully reading the instructions, I began painting the cockpit
parts. These are said to be painted in grey green, and the only grey green I
knew was RLM 02 (Revell 45), so the cockpit parts were painted in
 that colour.
The instrument panel was painted black. The cockpit consists of a base with two
sidewalls, a seat and a control stick.
that colour.
The instrument panel was painted black. The cockpit consists of a base with two
sidewalls, a seat and a control stick.
The next step wasn´t to glue the cockpit to one of the fuselage sides, but to glue the fuselage halves, trapping first the shaft for the propeller, and gluing two sprue pieces to serve as backing plates for the exhausts. Two pieces to also add are the oil cooler outlel door and the engine coolant radiator outlet door.
Step 3 was to glue the horizontal stabilizers and install the cockpit. This is done by pushing the cockpit from below, and the fit is so tight that no glue is needed to have a firm fit.
Step 4 shows you how to install many parts: You have to glue the wingspar to the lower wing and glue the carburator air intake to the base of the lower wing. This step also gives you the option of opening the holes for the fuel tanks and rockets (something I didn't want to add). After gluing the wingspar to the lower wing and letting it dry, I attached the upper wings, and then glued them to the completed fuselage.
With the aircraft fully built, it was time to head to the painting stage.
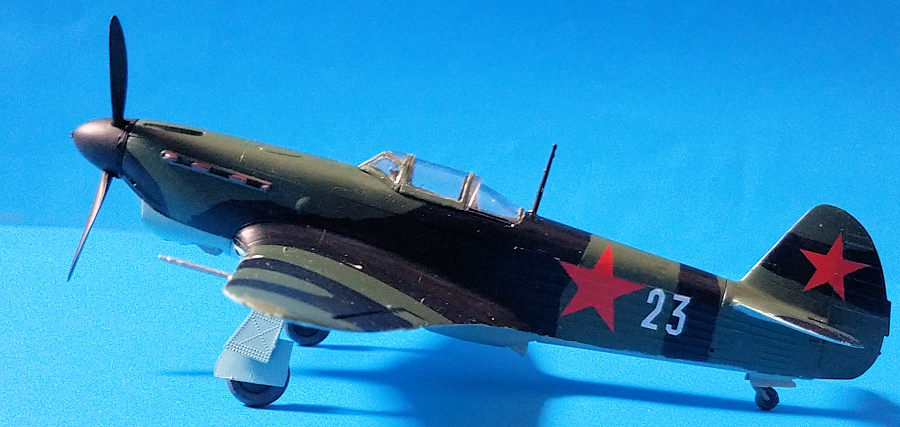
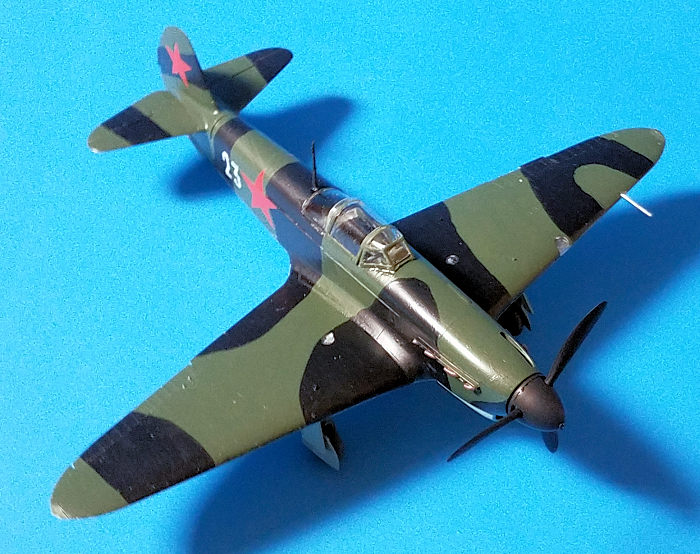
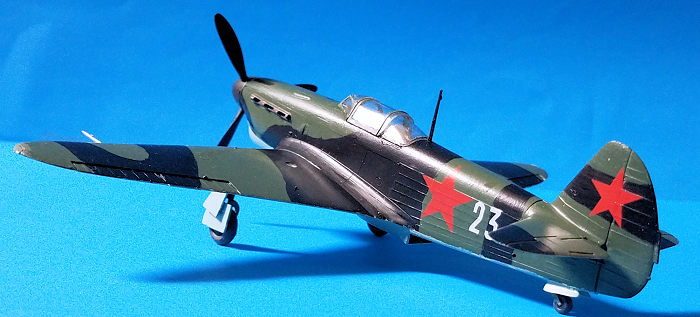
| COLORS & MARKINGS |
I wanted to paint my Yak 1b as Lidya V. Litvyak's aircraft. The only
aftermarket decal sheet for Litvyak's plane is an Aeromaster one that is out of
production, so I bought from Hannants Foxbot's decal sheet 48001, which had many
individual numbers and stars for several planes. I didn´t find any B/W photos of
the aircraft, but I did find several photos of a finished model with useful
profile shots. I first painted the dark
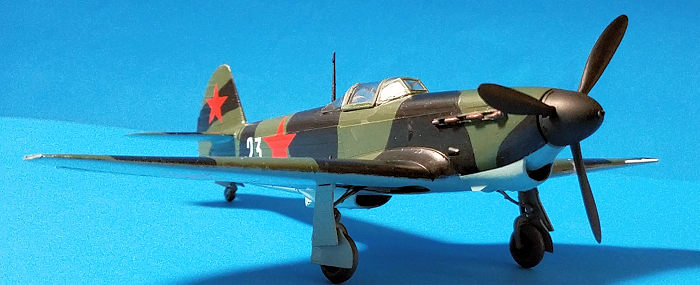 green areas with Revell 39 dark green,
and then I painted the black. When the camouflage was completely painted, I gave
the model two gloss coats of Revell's varnish to prepare the surface for the
decals.
green areas with Revell 39 dark green,
and then I painted the black. When the camouflage was completely painted, I gave
the model two gloss coats of Revell's varnish to prepare the surface for the
decals.
Decalling began by applying the red stars to the tail section, working my way forward. After an hour, I had a fully decalled plane. Foxbot decals are thin, but I didn´t encounter any folding tendencies with them. Once this step was done, I matt coated the entire aircraft with Revell's matt varnish.
This involves attaching the landing gear, exhausts and the propeller. The landing gear was painted RLM 02 with black hubbed wheels and Revell 78 tyres. The propeller was painted in matt black. The landing gear was glued to the wingspar, left to dry, and then had the wheels glued. The propeller was glued to the shaft, and then the aircraft was completed.
| CONCLUSIONS |
Accurate Miniatures's Yak (now Zvezda's Yak), is a relatively easy aircraft to build. It should be noted that the instructions of the original release are a bit confusing, but reading them first should clear things up.
Francisco Santoro
28 June 2021 Copyright ModelingMadness.com. All rights reserved. No
reproduction in part or in whole without express permission. If you would like your product reviewed fairly and fairly quickly, please
contact
the editor or see other details in the
Note to
Contributors.