
Revell of Germany 1/72 P-51B
|
KIT # |
4182 |
|
PRICE: |
€ 4.95 |
|
DECALS: |
Two aircraft |
|
REVIEWER: |
|
|
NOTES: |
|
HISTORY |
What could I say about the Mustang that hasn’t been said before? I will leave it that. (Editor's note, I'm sure that Leon could come up with SOMETHING new to say if he tried! :o) )
|
THE KIT |
 To me finding out this kit was new tooling with engraved panel lines,
together with the fact that stacks of them were on sale at a local non-hobby
shop prompted me to get two of them. I have also built the P-51B Malcolm-hooded
version, but since they’re identical except for the canopy and weapons this
review applies to both kits with one little exception. More about that later.
To me finding out this kit was new tooling with engraved panel lines,
together with the fact that stacks of them were on sale at a local non-hobby
shop prompted me to get two of them. I have also built the P-51B Malcolm-hooded
version, but since they’re identical except for the canopy and weapons this
review applies to both kits with one little exception. More about that later.
Molded in dark green with finely engraved panel lines this kit looks really promising on the sprues. There a separate sprue with rocket launchers for the USAF version. The RAF version has no underwing stores. The cockpit is reasonably detailed with instruments molded in to the instrument panel, a nice seat and a control stick. The gun sight is molded on top of the panel so no clear part is provided. Not too much is visible when the kit is done so what is there will do. Those of you who wish to super-detail: knock yourselves out!.
|
CONSTRUCTION |
A decal is provided for the instrument and that too will probably look nice when used. I opted to dry-brush the instruments. The radio is present behind the seat. The canopy cannot be displayed open. The fuselage halves mate together pretty well and with some care minimal or no filler is required. The fit of the air intake under the fuselage can be classified as extremely good for this scale. Next comes the wing assembly. The lower wing is in one piece and the top halves are glued on top of that before the wing is attached to the fuselage. Cleverly, the wing slides over the air intake and then the front lip slips in to place nearly flush with the front fuselage. A perfect fit! There is virtually no gap between the wing root and fuselage. If care is taken, no filling or sanding is needed here. Same with the scoop under the nose. This too is a separate piece and fits very well. Am I working on a Tamiya scale-down? Did Accurate Miniatures send an advisor to Revell? Was the price tag wrong? No, but increasingly I get a very nice feeling about this little gem.
 Next is the propeller. The spinner assembly consists of two cross-sections of
the spinner itself and four separate prop blades, in my view a lesser desirable
breakdown since it takes some fiddling to align the blades correctly and
perpendicular. Placing it on a flat surface and supporting the blades with a
toothpick will help ease the aligning. Attaching the stabilizers is pretty
straightforward and again fit is good, if not as good as the main wing. At this
point you need to decide which version you want to build. There are two exhaust
stacks available, one for the RAF and one for the USAF.
Next is the propeller. The spinner assembly consists of two cross-sections of
the spinner itself and four separate prop blades, in my view a lesser desirable
breakdown since it takes some fiddling to align the blades correctly and
perpendicular. Placing it on a flat surface and supporting the blades with a
toothpick will help ease the aligning. Attaching the stabilizers is pretty
straightforward and again fit is good, if not as good as the main wing. At this
point you need to decide which version you want to build. There are two exhaust
stacks available, one for the RAF and one for the USAF.
The MLG (Main Landing Gear for you hobby-returnees and beginners) consists of a single strut and main wheel in one piece. The threaded tire looks convincing. On my example a minimal amount of flash had to be removed from the struts. The rest of the kit was totally devoid of flash though. The tail wheel is in one piece and it should be glued in place before the doors are or it will be in the way. The gear doors are molded in one piece as well and need to be severed if you choose to build the Mustang with the gear down. Wait with that until after painting: you can insert the door in to the wheel wells and mask off the wheel wells that way after you have painted them. They fit very well. I put a small blob of blue-tack in the wheel wells and slid the gear doors into place and airbrushed the lower wing and then removed the doors again for severing. The wheel wells themselves have detail molded in to them, and the inner surfaces of the gear doors show intricate detail as well. Lastly the antenna under the wing and rudder-control-cable-thing-contraption-stick-thingy (Hey, I’m Dutch!) behind the canopy are glued in to place and you are ready for the paint job.
|
PAINT & DECALS |
I masked the canopy with Tamiya tape (the greatest modeling help since the
invention of the toothpick). As mentioned before there are decal options for an
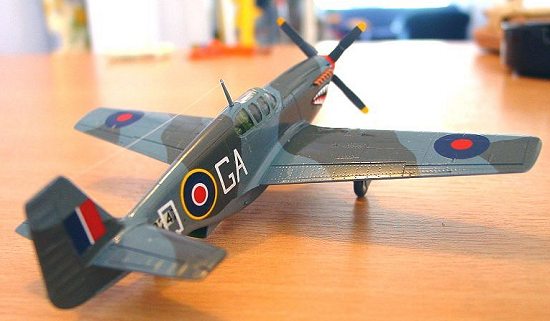
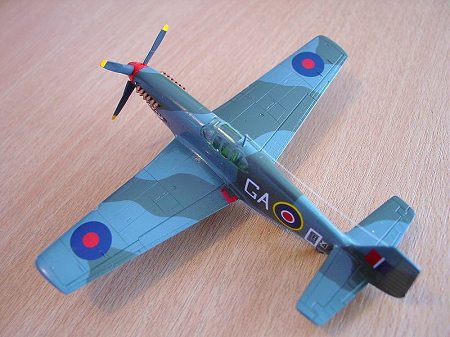
RAF and USAAF P-51B. Both the RAF version and the USAAF version sport a shark
mouth and red spinner and look really cool. I opted for the RAF version and
airbrushed the lower surfaces with Revell 57 and the upper with Model Master RAF
Dark Green and RAF Ocean Gray for the top. Then the Mustang was sealed with
several 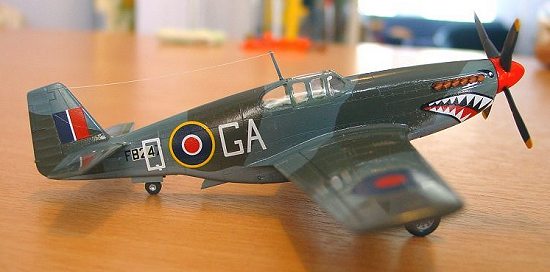 coats of Tamiya Clear Gloss (X22) to provide a smooth base for the
decals. Take car when following the decal instructions because on my example the
RAF lower surfaces drawing wound up on the USAAF page and vice-versa. Of course
it is obvious by looking at the national insignia, but still. The inexperienced
modeler might think it was some Reverse Lend-Lease mix-up and it is supposed to
be like that, but it’s not.
coats of Tamiya Clear Gloss (X22) to provide a smooth base for the
decals. Take car when following the decal instructions because on my example the
RAF lower surfaces drawing wound up on the USAAF page and vice-versa. Of course
it is obvious by looking at the national insignia, but still. The inexperienced
modeler might think it was some Reverse Lend-Lease mix-up and it is supposed to
be like that, but it’s not.
The decals themselves are of the correct color and in perfect register. The red circles for the RAF national insignias are provided separate. The decals respond very well to MicroSet and snuggle down wonderfully. Lastly I sealed the model with a coat of Model Master Semi Gloss.
As mentioned, the RAF Mustang III Malcolm hood version (Revell kit # 04167) is identical apart from the weapons choice. I also found the Malcolm hood fit no where as good as the standard hood on this P-51B.
|
CONCLUSIONS |
In short, I can recommend this kit to anyone. I am certain there are shape issues with it since these days NO kit is considered perfect anymore it seems. Well, this kit, for that price, and the amount of fun it gives you, IS a perfect kit in my street. Buy it. Give it to your cousin, build it, display it. You can’t go wrong.
If you would like your product reviewed fairly and fairly quickly, please contact the editor or see other details in the Note to Contributors.