Revell/Monogram 1/48 PBY-5A Catalina
| KIT #: | 04507 |
| PRICE: | £34-99 |
| DECALS: | Two options |
| REVIEWER: | Frank Reynolds |
| NOTES: |
A straight from the box exercise |
| HISTORY |
There is so much to the legend that is the Consolidated PBY Catalina. It was
designed to the requirement of one specific customer, the United States Navy and
when it entered service in September 1936, the PBY-1 formed a batch of just 60
aircraft for a Navy that was operating under peacetime conditions and financial
stringency. Nine years later, history would record the PBY design as the most
successful flying boat ever, with 3,272 aircraft built. It was not the best
flying boat of World War2, but it was the best available in quantity. It would
patrol the vast trackless expanses of the Pacific and Atlantic Oceans, achieve
fame in convoy protection and the suppression of submarines. It was to feature
in critical parts of two legendary naval actions of World War in the discovery
of the Japanese Fleet before the Battle of Midway and the Royal Navy’s hunt for
the battleship Bismarck. Until Britain entered World
 War 2, it
might have been assumed that a flying boat designed in 1934 was nearing the end
of its production life, but in September 1939 an order for 106 aircraft for the
Royal Air Force was followed just weeks later for 200 aircraft for the US Navy,
bringing the PBY programme back to life. These orders were for the PBY-5
variant that featured very distinctive
large blisters for the waist gunners. Over
the next six years of World conflict the PBY would be built at four plants in
the USA, two in Canada and at least one in the USSR.
War 2, it
might have been assumed that a flying boat designed in 1934 was nearing the end
of its production life, but in September 1939 an order for 106 aircraft for the
Royal Air Force was followed just weeks later for 200 aircraft for the US Navy,
bringing the PBY programme back to life. These orders were for the PBY-5
variant that featured very distinctive
large blisters for the waist gunners. Over
the next six years of World conflict the PBY would be built at four plants in
the USA, two in Canada and at least one in the USSR.
There was one major variation of the PBY design that would ensure its longevity
and its legendary status – the provision of a fully amphibious undercarriage in
the PBY-5A. This was a matter of engineering genius, to provide a long range
patrol bomber that was perfect to support the island-hopping campaign in the
Pacific and provide an aircraft that could operate from rivers, estuaries,
sheltered lagoons, island airstrips or full scale military bases. When
production ended in September 1945, 1418 amphibians had been delivered. Among
this total were 230 aircraft built to an order for the United States Air Force
by Canadian Vickers Ltd., of Montreal for a Search and Rescue aircraft,
designated OA-10A.
The coming of peace saw the PBYs swiftly removed from US and British military
service and many war surplus aircraft became available to the civilian market.
This saw the beginning of a remarkable story,
 for an
obsolescent military aircraft that had seen six years of war entered a phase
that would see it serve a breathtaking five decades in the cause of peace and
environmental protection.
for an
obsolescent military aircraft that had seen six years of war entered a phase
that would see it serve a breathtaking five decades in the cause of peace and
environmental protection.
The PBY had many positive features for its peacetime role. It was available at
relatively cheap war-surplus prices, it was simple, rugged and dependable, many
personnel had been trained by the military to operate and maintain them. It was
ideal for specific operations in undeveloped areas such as the forest and lakes
of the North American continent. The bubbles on the rear fuselage made
generous-sized freight doors and the type’s long range meant that it could go
long distances without needing a fuel supply at every remote base.
Yet it was the civilian operators who adapted the PBYs as water bombers who
would ensure the type’s long and honourable service, in ever dwindling numbers,
decade by decade, until the beginnings of the 21st century. Today
there are possibly less than 20 PBYs still flying , preserved as warbirds. The
type fully deserves its accolade as a legendary type.
| THE KIT |
This kit, of an American legend, originated from another American legend –
Monogram.
 Although the
some of the parts are embossed with the words “Revell 1999”, this kit clearly
originates from Monogram with its big, yet carefully moulded parts and some
seemingly complex structures moulded in one piece, where other manufacturers
would have provided built up structures. By 21st Century standards
the level of internal detailing is simple, more like that of a 1:72 scale kit,
but it is adequate. The external detailing is impressive, a product of Monogram
at its confident best, with subtle etched panel lines and beautiful sculpting
around the fixed control surfaces. Most impressive was the fact that while some
flash was present, no sinkage could be detected on any of the mouldings.
Although the
some of the parts are embossed with the words “Revell 1999”, this kit clearly
originates from Monogram with its big, yet carefully moulded parts and some
seemingly complex structures moulded in one piece, where other manufacturers
would have provided built up structures. By 21st Century standards
the level of internal detailing is simple, more like that of a 1:72 scale kit,
but it is adequate. The external detailing is impressive, a product of Monogram
at its confident best, with subtle etched panel lines and beautiful sculpting
around the fixed control surfaces. Most impressive was the fact that while some
flash was present, no sinkage could be detected on any of the mouldings.
The kit is presented in a large tray-type box and consists of four large parts
frames in medium grey plastic and one of clear. A large and colourful decal
sheet by Cartograf gives a choice of two aircraft an OV-10A of the USAF at Goose
Bay, Labrador, 1948 and a US Navy version of VP-3 1948, location unspecified.
Being post war, both aircraft are unarmed.
Instructions are provided in a 16-page A4 booklet in greyscale and 31 stages of construction. This booklet seems to be a modified version from an earlier boxing of the kit since some of the construction stages, for the armament and the radar, show parts assembly in separate exploded views, yet with the whole section being marked up as “not for use” with either of the decal options offered.
| CONSTRUCTION |
This is a departure from normal and a step outside of my comfort zone. There are
a number of things that I never do with plastic aircraft kits – build them with
the gear retracted; and hang them from the ceiling – until now.
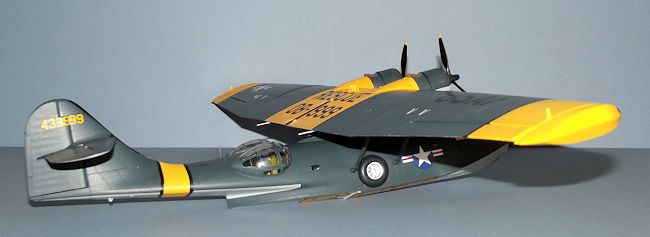
At 660mm wingspan, I had nowhere to
display a completed PBY, yet I had always wanted to make this big legend. It was
agreed that it would go on display at my LHS, where they like to do things the
good old fashioned way and hang a few aircraft from the ceiling. So it seemed
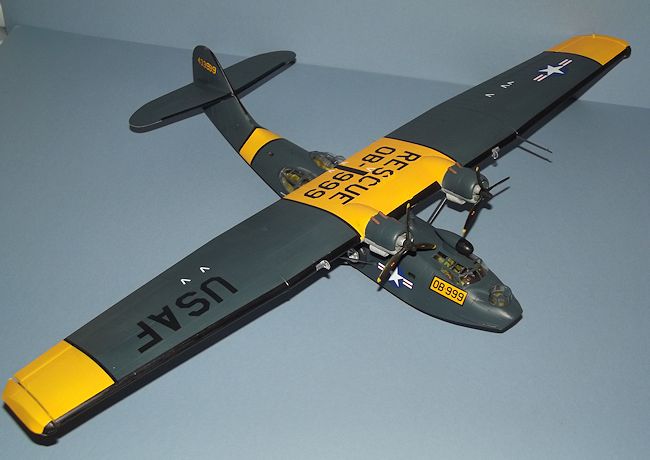
appropriate to finish it “in flight”, with everything tucked away, landing gear
and wing floats. It also had to be done “as
kit” with an in-box finish and the only aftermarket I allowed myself was
an Eduard mask to ease painting of the transparencies. The USAF version was
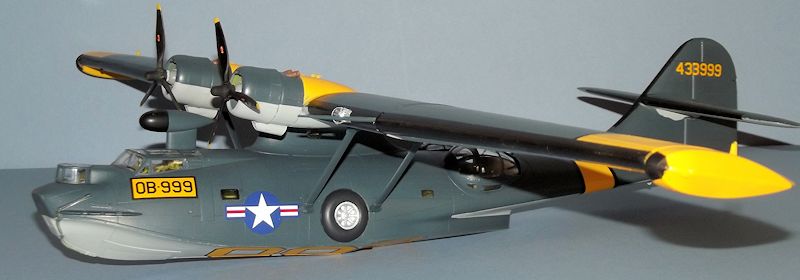
chosen for its spectacular colour scheme.
I began the build by removing from the parts frames all of the components that I
would not need, keeping them in small plastic bags so that I could access them
if my decision making was wrong.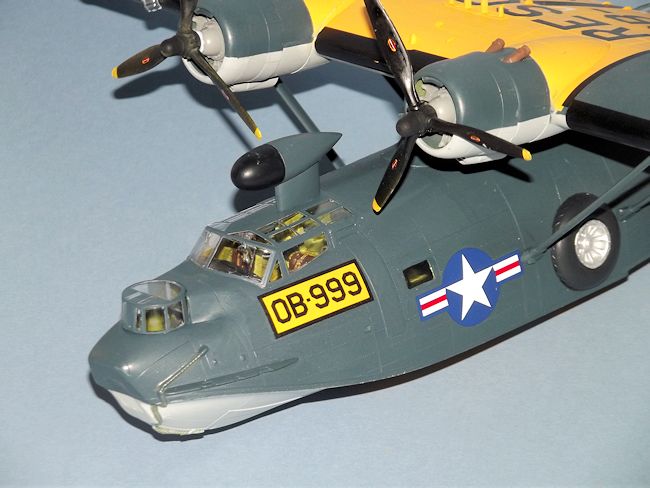 decided to
build in two large sub-assemblies, the wing and then the combined fuselage and
tail, which would be finished, painted, decalled and varnished before
they were joined together.
decided to
build in two large sub-assemblies, the wing and then the combined fuselage and
tail, which would be finished, painted, decalled and varnished before
they were joined together.
Construction begins with the flight deck and a pair of four-part pilots’ seats
that incorporate a support frame and rudder pedals. The pair of seats are
secured to a floor box that also serves as the nose wheel bay and a rear
bulkhead is attached. The majority of the fuselage interior was painted in a
home brew of lurid green to replicate Zinc Chromate. The seat cushions were
painted dark brown and the moulded in seat belts olive drab. A small bulkhead is
added to define the bow compartment and the nose turret floor glued in place.
The cockpit is completed with the distinctive control yoke in an inverted
U-shape and a pair of control wheels. The whole flight deck section fits neatly
into the nose area. The instructions next proceed to the installation of the
small fuselage windows, which I omitted since I prefer to add glazing form Micro
Kristal Klear at the finishing stage. The landing gear construction was much
simplified since the kit provides a gear up option consisting of a half wheel
and small door for the fuselage sides and a closed box for the nose wheel bay,
engineered for a neat fit.
Attention now moves to the rear of the fuselage and the waist gunners’
compartment. This area does have some shape issues which may or may not be a
problem according to your modelling philosophy. When the same mouldings were
reviewed by Tom Cleaver on MM in October 2005 he pointed out that there is a
problem with the rear fuselage in that the flared area between the tail fin and
fuselage tunnel is too flat, with the result that the leading edge of the tail
fin is noticeably too wide. In addition the large observation blisters are too
close together along the fuselage spine, suggesting that they, too, have
excessive width. Now rebuilding a section of fuselage about 50mm long and
reshaping those massive blisters is way beyond my level of modelling ability, so
I chose to live with it. The rear compartment interior says everything about
Monogram’s tooling skills, when they created a one-piece unit that consists of a
central walkway, raised side platforms for the gunners together with the gun
pedestals, an ammunition box and chemical toilet. A unit like this is
unremarkable when cast as a state of the art resin
 component,
but rendered in injection moulded plastic it is just brilliant. Front and rear
bulkheads are added to provide a self-contained compartment that fits neatly
into the right hand fuselage half.
component,
but rendered in injection moulded plastic it is just brilliant. Front and rear
bulkheads are added to provide a self-contained compartment that fits neatly
into the right hand fuselage half.
It was now time to join the fuselage halves and I was relieved that it would not
be necessary to add nose weight to my “ceiling flyer” since the recommended 50
grams of weight would have severely depleted my stock of lead shot. The two
halves were joined with slow setting tube cement, taped together and left for a
couple of days to settle. The tail surfaces consist of simple top and bottom
sections joined with interlocking tongues that provide a strong square joint.
 Attention
now turns to the plank-like wing. The lower surface consists of left and right
halves joined along the centre line. The upper surfaces are in three pieces,
consisting of a centre section and two outer panels. This ensures that the
overlapping parts of the wing assembly have a strong joint. The control surfaces
are moulded integrally with the wing panels, so this five-part unit forms nearly
all of the wing structure. Two small ribs are inserted to close off the wing
tips. The parts were joined with slow setting tube cement, tightly taped, and
left to set hard over two days.
Attention
now turns to the plank-like wing. The lower surface consists of left and right
halves joined along the centre line. The upper surfaces are in three pieces,
consisting of a centre section and two outer panels. This ensures that the
overlapping parts of the wing assembly have a strong joint. The control surfaces
are moulded integrally with the wing panels, so this five-part unit forms nearly
all of the wing structure. Two small ribs are inserted to close off the wing
tips. The parts were joined with slow setting tube cement, tightly taped, and
left to set hard over two days.
Next the two part wing tip floats were assembled and glued into the large recesses in the wing tips, in the retracted configuration. In typical Monogram style the engines and cowlings each consist of just three parts, being the nacelle, an engine moulded integral with the firewall and the circular cowling. Each engine front was painted medium grey and the units went together without fuss.
| COLORS & MARKINGS |
Untaped, cleaned and degreased, I now
had two large structures which were first painted with grey auto primer from a
rattle can, which revealed the need for some filler along the main joint lines..
Quick setting Squadron Green Putty was used and rubbed down with medium sanding
sticks. The primer was retouched where necessary. Next an undercoat was applied
to the areas that were to be painted Yellow using Tamiya White fine surface
primer. I airbrushed the white areas with a coat of Tamiya XF-3 Flat
 Yellow,
topped off with a coat of Xtracrylix XA1213 Luftwaffe Gelb 04 which provided the
rich golden yellow that I had in my mind. The Yellow areas were then carefully
masked off while the undersides were painted.
Yellow,
topped off with a coat of Xtracrylix XA1213 Luftwaffe Gelb 04 which provided the
rich golden yellow that I had in my mind. The Yellow areas were then carefully
masked off while the undersides were painted.
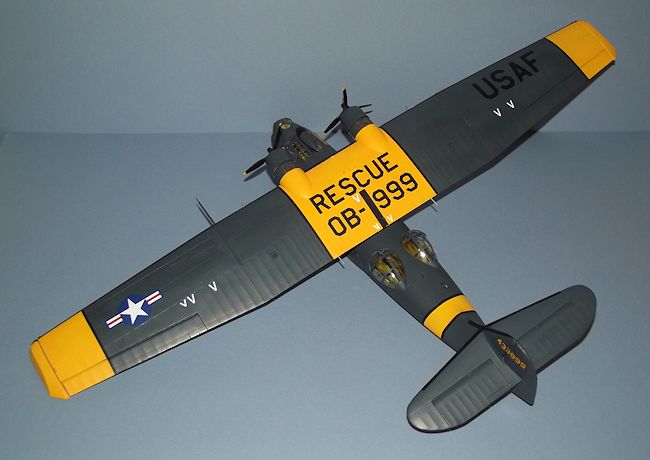
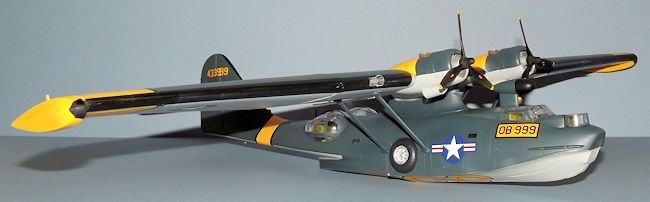
Now since the idea was to provide a demonstrator for shop display it was decided
to paint the boat in a scheme that
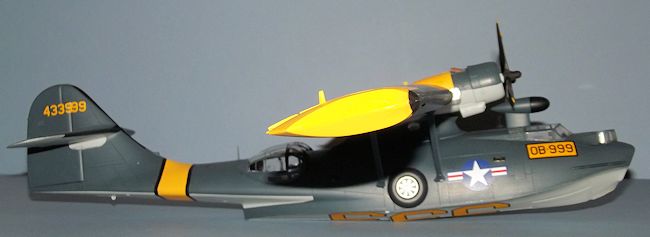
replicated the box art, so the undersides were airbrushed in Tamiya XF-29 Medium
Grey, applied with my Iwata HP-C airbrush. With the undersides masked off with
Tamiya tape, the upper surfaces were finished in Tamiya XF-20 Field Blue. The
mass of masking was stripped away and the paintwork retouched in small areas
where the paint had bled. Some localised masking was then applied and the Black
de-icing boots to the leading edges of the wings, tail and fin were sprayed. The
two structures were then sealed with two brushed coats of Future/Klear floor
polish as a gloss undercoat for the decals.
The decals went on with minimum fuss assisted with Micro Sol and Micro Set and
they included neat black edging strips for the yellow identification
bands. Finally they were sealed with two
misted airbrushed coats of Xtracrylix Flat varnish. I realised with some
surprise that the yellow areas of the airframe had one coat of grey primer, one
coat of white, two coats of yellow, two of Klear
and two of 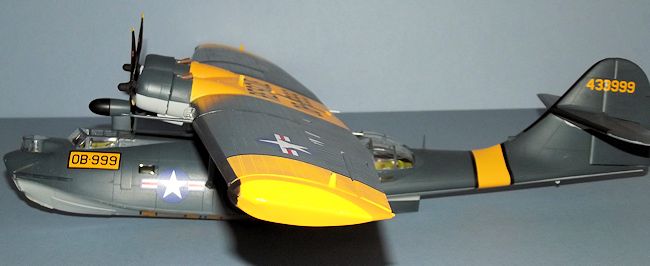 matt
varnish. The canopy masking was removed and the waist blisters and nose turret
glazing secured with Clearfix. The small fuselage windows were added from Micro
Kristal Kleer, applied with a wooden tooth pick.
matt
varnish. The canopy masking was removed and the waist blisters and nose turret
glazing secured with Clearfix. The small fuselage windows were added from Micro
Kristal Kleer, applied with a wooden tooth pick.
It was now time to join the hull and wing, aligned by previously painted under
wing struts and a positive socket between the central pylon and the wing. These
components were secured with tube cement and the whole airframe was carefully
propped upside down and left overnight to set.
| CONCLUSIONS |
This kit is
not complicated, it is well engineered and the parts have a positive fit. The
price is not unreasonable, but it seemed relatively costly to build in terms of
the amount of paint and masking tape that it consumed. The shape issues around
the rear fuselage are certainly a disappointment but the resulting model is
impressive and unmistakably a Cat. It looks good sailing serenely over the
retail area of my LHS. I enjoyed the build, not especially taxing but it was
time consuming. It requires a lot of space, both on the workbench and for
display. If you want a big Cat in 1:48 it is still the only game in town. I
enjoyed it as a change of routine.
| REFERENCES |
PBY Catalina
in Action by W.E. Scarborough and Don Greer, Squadron/Signal Publications 1983.
Warplanes of
the Second World War, Volume Five, Flying Boats, by William Green. Macdonald,
1962
Consolidated
PBY Catalina, by David Legg. Airlife Publishing 2002
If you would like your product reviewed fairly and fairly quickly, please contact the editor or see other details in the Note to Contributors.
Back to the Review Index Page 2024