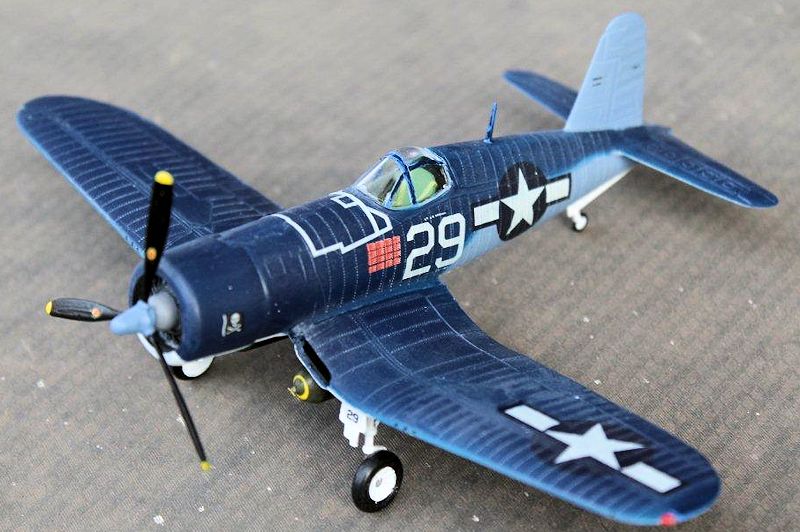
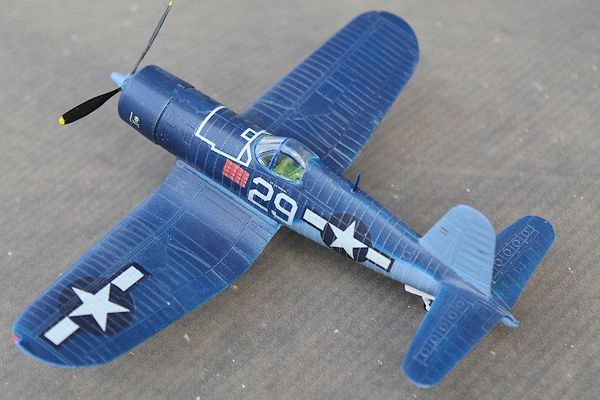
Airfix 1/72 F4U Corsair
| KIT #: | 02090 |
| PRICE: | AUD $10.00 |
| DECALS: | One option |
| REVIEWER: | George Oh |
| NOTES: |
Old kit built only for a specific display. |
| HISTORY |
The Chance Vought F4U Corsair was a
carrier-capable
fighter aircraft that saw service primarily in
World War II and the
Korean War.
Its
performance allowed it to dominate all other piston-engined opponents.
In February 1938 the U.S. Navy Bureau of Aeronautics published a request for a
single-engined fighter for the Navy.
It requested a fast aircraft with a stalling speed not higher than
110km/70 miles per hour, a range of 1600km/1,000 miles and it had to carry four
guns AND be able to carry anti-aircraft bombs.
Powered by
 an XR-2800-4 prototype of the
Pratt & Whitney Double Wasp twin-row, 18-cylinder 1346kW/1,805 hp
radial engine
that turned a
large 4MR/13’-diameter propeller, it became the first single-engine U.S. fighter
to fly faster than 640km/400 mph.
an XR-2800-4 prototype of the
Pratt & Whitney Double Wasp twin-row, 18-cylinder 1346kW/1,805 hp
radial engine
that turned a
large 4MR/13’-diameter propeller, it became the first single-engine U.S. fighter
to fly faster than 640km/400 mph.
| THE KIT |
I remember building this vintage
Airfix kit (moulded in dark blue plastic) when I was about 8 years old.
This one was unchanged, save that it was moulded in light grey plastic
and it was one of the ‘WWII Aircraft of the Aces’ Airfix series.
The parts had surprisingly little flash and showed virtually no mould
slippage.
| CONSTRUCTION |
 Reasoning that I could insert the seat later, I trapped the tailhook as I closed
fuselage – and it promptly broke off.
Because I was disdaining filler, I elected to have a near-perfect spine
at the expense of a less-than-perfect belly seam, but as it’ll be standing on
its wheels, the belly seam will be less noticeable.
Only the nose received a little filler (no-frills – fail!!) to fix a
small step.
While the tail planes
were a great fit, the fit of the one-piece lower wing to the fuselage was poor,
so I backed the contact points with large blobs of Milliput inside the fuselage.
Some sanding of the cowling allowed me to fit it snugly in place, then I
added the tops of the wings.
Here,
the fit was superb – except at the wing roots where the gaps measured up to 1mm.
A flood of Krystal Kleer (then wipe off the excess) sealed the gaps but
without strength.
Reasoning that I could insert the seat later, I trapped the tailhook as I closed
fuselage – and it promptly broke off.
Because I was disdaining filler, I elected to have a near-perfect spine
at the expense of a less-than-perfect belly seam, but as it’ll be standing on
its wheels, the belly seam will be less noticeable.
Only the nose received a little filler (no-frills – fail!!) to fix a
small step.
While the tail planes
were a great fit, the fit of the one-piece lower wing to the fuselage was poor,
so I backed the contact points with large blobs of Milliput inside the fuselage.
Some sanding of the cowling allowed me to fit it snugly in place, then I
added the tops of the wings.
Here,
the fit was superb – except at the wing roots where the gaps measured up to 1mm.
A flood of Krystal Kleer (then wipe off the excess) sealed the gaps but
without strength.
| COLORS & MARKINGS |
 gasping).
My attack plan was to spray
upwards from the belly, over the Blutack, then up & over the spine of the model.
This absolutely minimised the amount of spray that I’d be directing
downwards towards where the Blutack overhung the sides of the fuselage.
It seemed to work, and this was confirmed when I stripped-off the masks.
It wasn’t perfect – more practice is required.
While the blue was glossy, the grey and the white were flat, so Future
was needed as a foundation for the decals.
gasping).
My attack plan was to spray
upwards from the belly, over the Blutack, then up & over the spine of the model.
This absolutely minimised the amount of spray that I’d be directing
downwards towards where the Blutack overhung the sides of the fuselage.
It seemed to work, and this was confirmed when I stripped-off the masks.
It wasn’t perfect – more practice is required.
While the blue was glossy, the grey and the white were flat, so Future
was needed as a foundation for the decals.
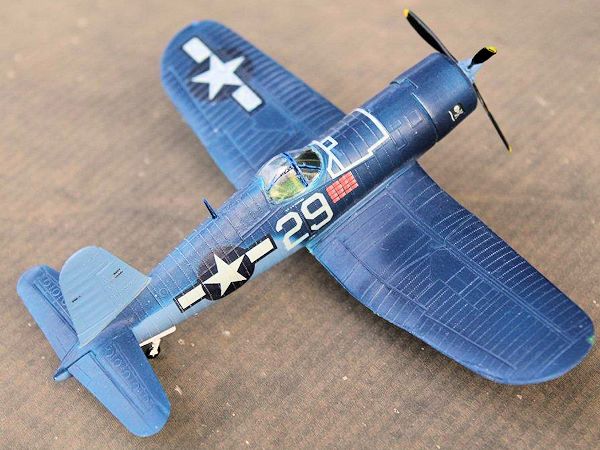
Only the kit decals were used. They went on between the usual liquid sandwich of Microset & Microsol, and they conformed beautifully. I especially liked the way that the white stripes over the nose conformed to the panel lines of the kit. On the real aircraft, the stripes were lengths of tape used to quickly seal the gaps between panels (our panel lines). The only down side was that one decal had a white line extending from an edge. Touching-up painting took care of it.
| FINAL CONSTRUCTION |
When I brush-painted the propeller blades black (and the hub IM blue - not
chrome steel?), I also painted the engine front.
Some black landed on the Royal blue, but as it was still glossy, I could
wipe it off if I acted immediately.
By misting-on a coat of Gunze H 20, I gave her a semi-gloss clear coat, which
nicely held the (CM mithril) silver with-which I dry-brushed her in order to
highlight all of those rivets, and the engine front.
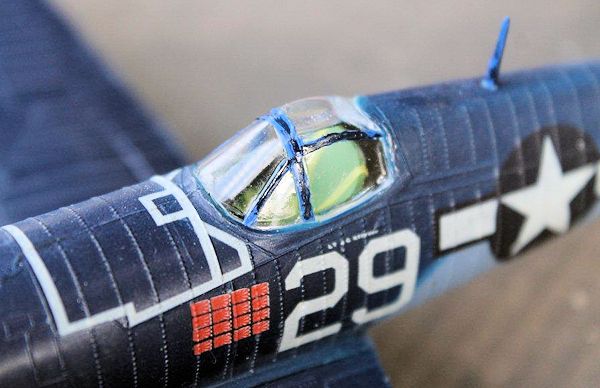
After attaching a few bits and paint to the seat (OOB – fail!!), I was
able to drop it in.
The legs,
wheels and doors were all scraped-down to remove the mould seams and to
thin-down the overly-thick edges, then they were attached.
| CONCLUSIONS |
The only things that I didn’t like about this build were the self-inflicted.
I failed to scrap-back the edges of the wheel wells (Rats!!) and there
was that painting blooper.
Still, I
enjoyed the build because I declined to use filler so as to preserve all of
those rivets for the display.
In
that aspect, the model was a success.
Working on and off (I have to work full time and I have a young family) I
did this in 8 days – Warp 9 for me.
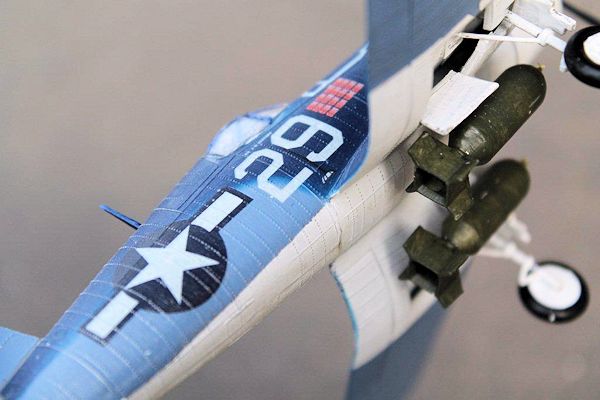
It is funny how I automatically do things – like the seat, the bombs and the
lights.
OK - there are other and better F4Us out there – with better-shaped propellers –
for the serious modeller.
But if
you discount the poor wing-root fit, then this is still a great little model for
a junior or beginner.
And, it’ll
keep rivet-counters occupied for ages.
PS – I realise now, that I’ve yet to add a brass wire to replace the fragile kit
pitot tube at the wingtip.
June 2013
Thanks to for the review kit. You can find this one at your favorite hobby shop or on-line retailer.
If you would like your product reviewed fairly and fairly quickly, please contact the editor or see other details in the Note to Contributors.