| KIT #: | 940 |
| PRICE: | $ |
| DECALS: | One option |
| REVIEWER: | Chris Mikesh |
| NOTES: | Print Scale (72-122) and Yellow-Wings (72-015) decals |
| HISTORY |
 How can a
cheap kit become such an expensive and complex problem child? (Because I’m
stubborn!) This was the most expensive, cheapest model I have ever built.
How can a
cheap kit become such an expensive and complex problem child? (Because I’m
stubborn!) This was the most expensive, cheapest model I have ever built.
I did a preview of the model which contains the history so I won’t duplicate it here. Please refer to my preview.
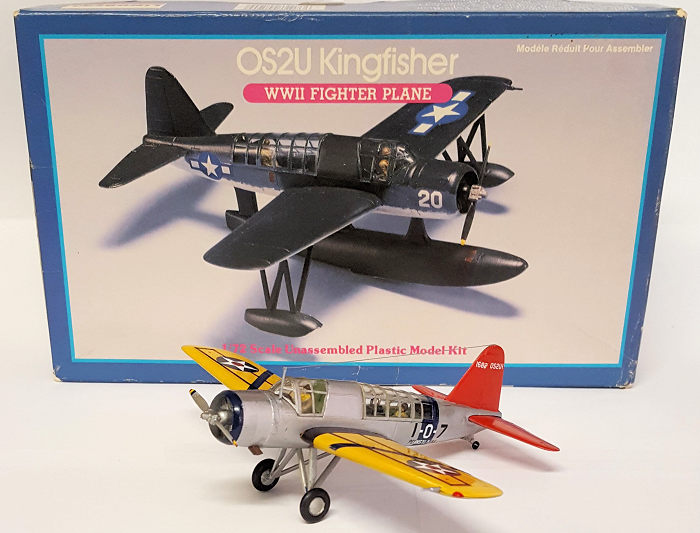
I originally dredged this kit from my attic that was missing the clear parts. But I came across my old model that I built back in the 60s which had clear parts attached to the model. Now I had a complete kit (plus scrap plastic) and all I need are decals.
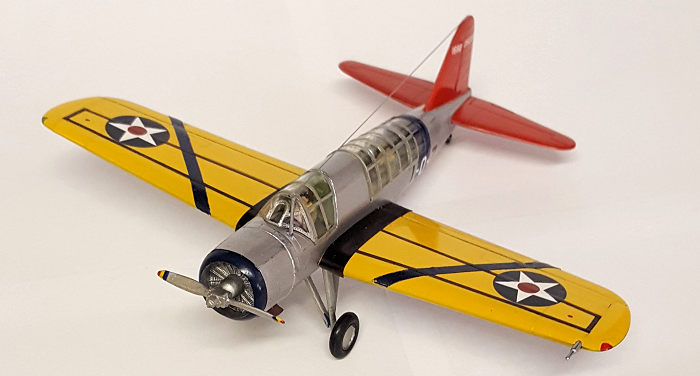
To Float or not to Float? As I already have an Airfix model of the Kingfisher with floats, Print Scale offered markings to use Landing Gear. I chose the VO-1 Pre-War option, so now I know what option I can build.
| CONSTRUCTION |
Putting the model together was not a real problem, as it is a very easy beginner kit. The two wing halves go together with no issue, as well as the fuselage since there is no cockpit. The instructions recommend that you slide the wing in to the fuselage. There were no problems with the stabilizer in the same fashion. Everything had a nice fit as I remembered.
Clear Parts: After
successfully removing the clear parts from my old model, I needed to remove the
hand painted blue paint on the canopy (1960’s Testors Dark Blue). Testors makes
what they call “ELO”, which is “Easy Lift Off for paint and decals” and “safe on
MOST
plastics”. I discovered MOST
did not include clear parts. So, my old canopy became
 translucent/cloudy,
and the old paint was still there. Groan!
translucent/cloudy,
and the old paint was still there. Groan!
With the canopy parts now effectively ruined, I thought I would continue by using enamel thinner with a Q-tip to lift the paint and figure out some way to make them clear again. The moment I touched the enamel thinner to the clear plastic it totally self-destructed into six pieces. Overnight it just became clear plastic gravel, and there was no hope of restoring it. So, now I have 2 kits with no canopies.
Replacement Kit: Back to the Internet! I could only find one Kingfisher on a website for $20 out of Canada. In the back of my mind was the thought that I should trash this whole thing and give it up. But I'm an old stubborn modeler, and I used part of my allowance to buy another one exactly like the first ones. So now I have a scrap yard of three Lindbergh Kingfisher kits. What a mess!
After repairing the propeller, painting, and basic assembly, it was time to put the crew into place. Both crewmen were painted and glued into their seat then glued into their position according to the instruction sheet.
But now the Radioman’s canopy does not fit! Pushing harder provided no change. Not only was the rear gunner in the wrong position, (according to the instructions) but he was seated too high. This is simply an engineering flaw in the Lindbergh kit. (Why didn’t someone say anything about it in the last 60 years?)
After apologizing to the rear gunner for the headache, I had to break him out of the fuselage, cut off the bottom of his legs, and glue him in lower so that his head clears the canopy. He is still losing blood and screaming in agony.
| COLORS & MARKINGS |
 Decal
Problems: Most of the plane is assembled now and looking fair. Turning to
the decals from Print Scale, I discovered something that I didn't pay
attention to earlier. The National Insignias are in black and white, not
blue. I ordered some Yellow Wing decals to replace the ones that are the
replacement decals to the kit.
Decal
Problems: Most of the plane is assembled now and looking fair. Turning to
the decals from Print Scale, I discovered something that I didn't pay
attention to earlier. The National Insignias are in black and white, not
blue. I ordered some Yellow Wing decals to replace the ones that are the
replacement decals to the kit.
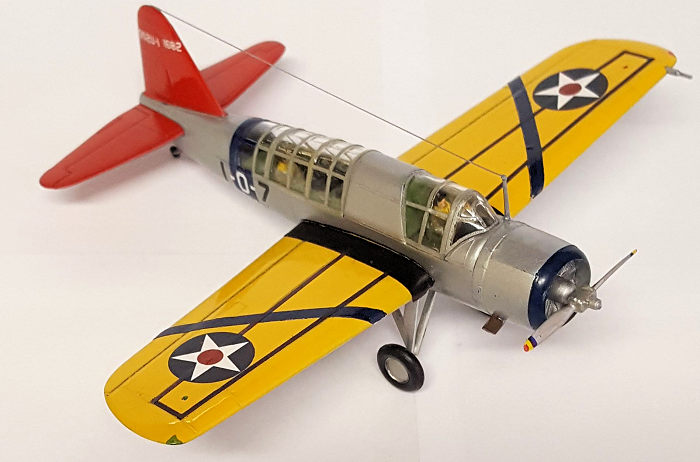
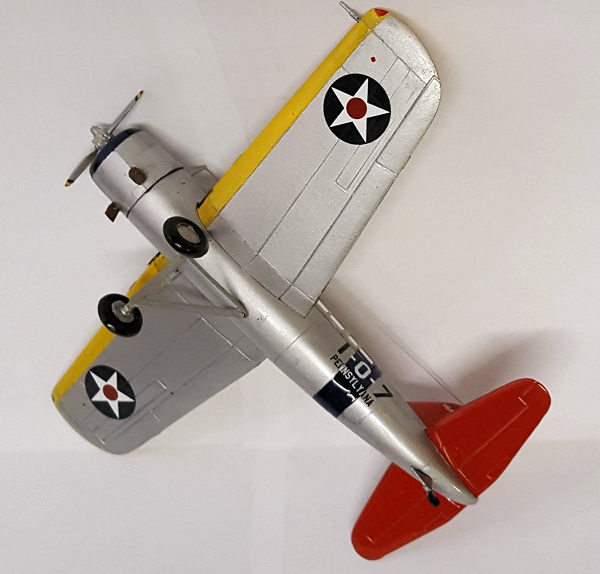
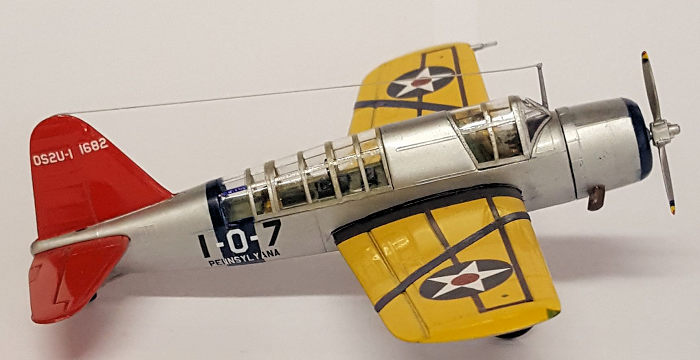
Looking at the Print Scale Decals yet again and sizing up the blue band on the fuselage, I discovered “Pennsylvania” is spelled incorrectly (with 2 Ys). At this point I have more dreams of tail-spinning this Kingfisher at high velocity in the direction of a brick wall. But it’s almost done! The wing lines are also not provided on the decal sheet. You will need to find decals or masking to create those details.
The Yellow Wings U.S. Pre-War National Insignias laid down beautifully with no need for a Decal softener, but they are thin, and the black walkway lines did show through. Turning back to the Print Scale decals, the Serial Number slid off the paper but turned into a ball. It took about 20 minutes to unroll it the best I could. Decal Saver is a MUST with these decals. After applying and drying, the decals were better behaved.
All the “break-off” parts were added including antennae, pitot tube, wheels, and a quick coat of Future to seal in all the extra work. I realized there were no exhausts for the engine and made them from sprue. Stretched sprue is the radio wire.
| CONCLUSIONS |
 Learn when
to give up. This fiasco cost me about $60 for a no cost model. OK, I can use the
decal sheets on later models. There are other Kingfishers out there. Unless you
are a Classic Kit fan, I suggest looking at AZ or Pavla offerings. I was
disappointed in the Print-Scale Decals because they were difficult to use and
not correct. Yellow-Wings is still a 5-Star product.
Learn when
to give up. This fiasco cost me about $60 for a no cost model. OK, I can use the
decal sheets on later models. There are other Kingfishers out there. Unless you
are a Classic Kit fan, I suggest looking at AZ or Pavla offerings. I was
disappointed in the Print-Scale Decals because they were difficult to use and
not correct. Yellow-Wings is still a 5-Star product.
If I were to do this model again, fake an interior. It is not worth buying a resin interior if one is made. I recommend an undercoat Primer as the blue plastic will show through the yellow paint. If you have one in your stash – it’s a fun kit to build, but don’t waste any more money on it unless you already have markings you want to use up. The kit is not that great but serves well if you are a Classic Builder.
Now… what to do with 3 Kingfisher floats??? Hmmm.. What if…Floats on a Navy F-105?
14 August 2023
Copyright ModelingMadness.com. All rights reserved. No reproduction in part or in whole without express permission from the editor.
If you would like your product reviewed fairly and fairly quickly, please contact the editor or see other details in the Note to Contributors.