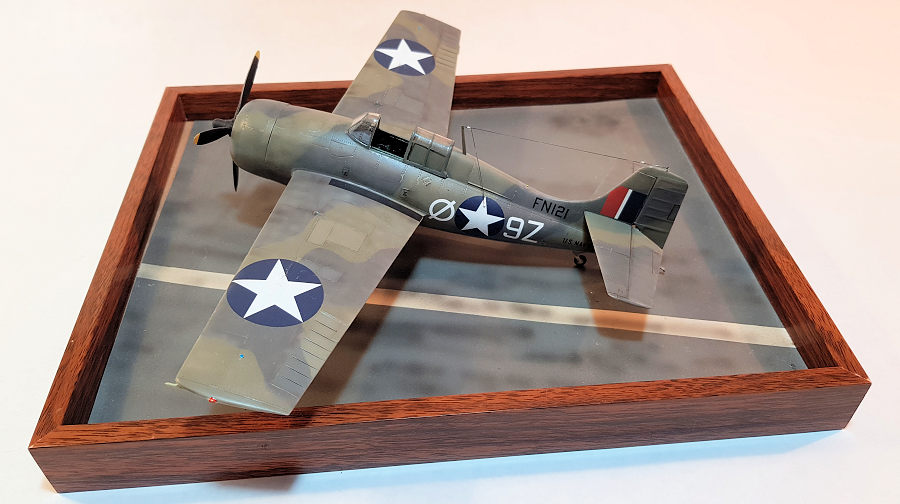
Hobby Boss 1/48 Martlet IV
| KIT #: | 80328 |
| PRICE: | $13.00 when new |
| DECALS: | One option |
| REVIEWER: | Fernando Rolandelli |
| NOTES: | Aeromaster decals. Conversion. |
| HISTORY |
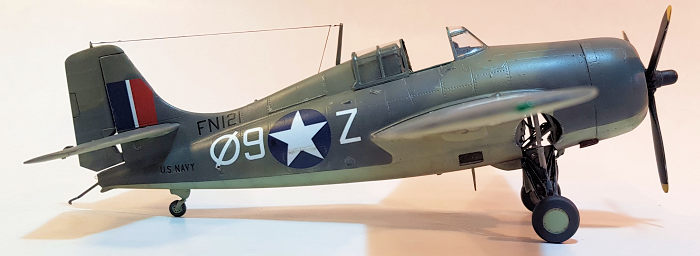 Grumman made
this model of the Wildcat especially for the British; I have seen it sometimes
designated F4F-4B, and it is said that some were used in the US as trainers. The
main particularity of this version was the replacement of the P&W 1830 engine
for a Wright 1820 Cyclone. The length of the fuselage was the same as in
1830-powered Wildcats, but the cowling was shorter owing to the single row
engine, so the front fuselage was proportionally longer. The cowling had no
carburetor intake, and there were no intercoolers. Magnetos were in the rear of
the engine. Propeller was a Hamilton Standard. It had folding wings, with three
MGs each. All in all, it makes for an interesting conversion for a different
looking Wildcat.
| THE KIT |
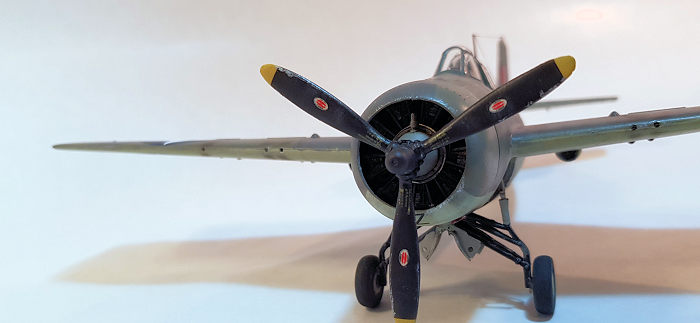 I selected a
Hobbyboss F4F-4 for the conversion, I did not want to spoil a Tamiya one (though
it would have been feasible) I like the HB Wildcats, they are honest kits that
can be built as accurate models, and even have some detail corrections over the
older Tamiya. The conversion was centered around the shorter, wider cowling;
there are a few ways to do this, but I sourced a resin cowling from somewhere I
cannot trace. You can make it cutting the cowling of the standard Tamiya at
flaps line; the mouth will be just a bit smaller, but nothing anyone but an
expert will notice. I also had the cowling of a Hobbyboss FM-2 (on which I had
used the Vector conversion –to itself!) so I had both a ring to extend the
fuselage and a workable Cyclone. An Aeroclub metal propeller stood for the
Hamilton.; Eduard PE were used for the cockpit and a Squadron vac for the hood.
| CONSTRUCTION |
The HB kit
has a complete and accurate cockpit with no floor. Instrument panel was made
out of PE, as well as the side consoles, which have to be a repositioned a
little lower. Electrical boxes and wiring were added from scratch, as were
the MGs arming handles. The early gunsight was also scratchbuilt; no good
example seems to be available in any form. Seat was replaced by the one in
an Eduard F4F; the kit’s was unusable (but no worse than Tamiya’s) and the
PE was not suitable for a RN Sutton harness, which was sourced from a
generic Eduard PE set. Cockpit was painted in Dark Dull Green using an old
WEMM paint. Pre-painted ED etched parts were Interior Green; they were
c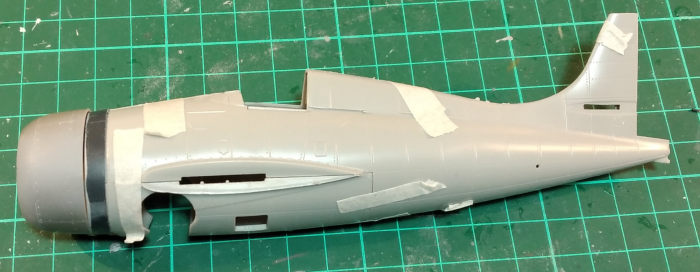 arefully repainted in a more appropriate color. Engine bay was detailed
with a better oil tank and several containers, tubes, boxes and cables, but
the main pieces and bearers are there. Magnetos were added to the back of
the engine, and a carburetor box to the top (it was glued to the rear of the
bulkhead), while a better looking plug connector ring was added from solder
wire. Engine/wheel bay was painted Revell Light Grey, a good mimick for
“Grumman Grey”, as was the lower fuselage under the cockpit. The belly
windows were added before closing the fuselage belly, to have some maneuver
ability.
The main work of the conversion was not that difficult. A ring was cut from the HB FM-2 cowling and added to the front fuselage. Then, the measure was taken (up to the cowling flaps hinge line) and sanded. The cowling was a little bit longer and was also sanded to keep the overall fuselage length identical to a standard F4F-4. To ensure the wings would have the same dihedral, the U/C legs, to which oleo tubes had been previously added, were glued to the wheel bay. The wings naturally adopt a slightly flat attitude, so bringing them to a correct dihedral was a chore (aye, how I missed the one piece Tamiya wing) The wheel covers are slightly misshaped and you have to trim them to assume the right stance. Generally speaking, F4F undercarriage is complex and demands a lot of care.
| COLORS & MARKINGS |
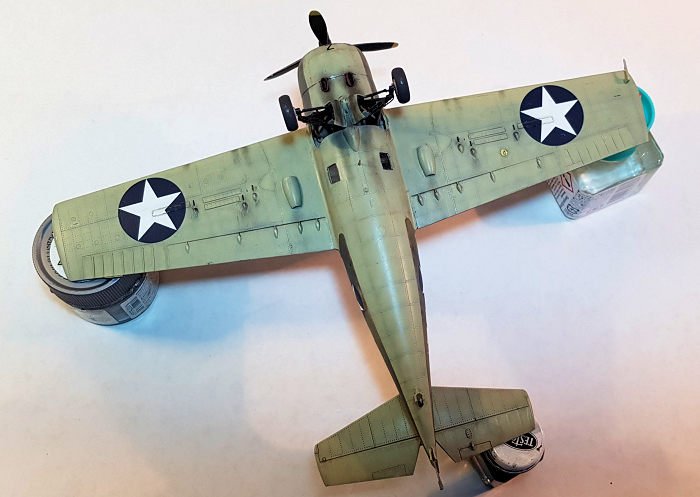 Few schemes
more amiable than RN FAA Temperate Sea. The colors are fantastic, and can be
altered easily to look faded and weathered. I used old WEMM paints. I airbrushed
a Grey primer and then a dark and White marble preshade; then airbrushed the
colors “in mottle fashion”, with a Blue Tack masking in the upper surfaces. Then
made a weathering with lightened colours. I used Eduard’s masks, an absolute
must in any build; I discovered that the ones for the belly windows covered the
whole transparent piece, instead of just the window shape… the ones for the
Tamiya kit seem to have the appropriate shape, though.
Eagle Strike Decals 48-016 "Grumman Martlets 1941-44, Part 1" were used, providing markings for a Martlet IV flown by 893 Squadron aboard HMS "Formidable," with US insignia painted over the British national markings for “Operation Torch”, the North African invasion, so as not to offend French sensibilities –and not to be shot by the Americans, I surmise. They are a bit bigger than should be, a common occurrence. Worst, they were badly affected by Micro Sol (I later guessed the fluid was ruined) and virtually folded on themselves. I managed to rescue them with liberal use of Daco Green fluid and some strategic cuts.
| CONCLUSIONS |
I am fond of Hobbyboss F4Fs, giving excellent result for the money (though nowadays old Tamiya is almost as cheap –not the new FM-1 boxing). Nothing out of the extraordinary but a solid looking model. The thing about getting the correct dihedral put me a bit off in this one. The model is very different from a normal F4F and certainly is the most accurate Martlet IV you’ll see for some time!
Fernando Rolandelli
5 November 2026 Copyright ModelingMadness.com. All rights reserved. No
reproduction in part or in whole without express permission from the editor.
If you would like your product reviewed fairly and fairly quickly, please
contact
the editor or see other details in the
Note to
Contributors.