Hobby Boss 1/48 F4F-3 Wildcat
| KIT #: | 80329 |
| PRICE: | $18.00 |
| DECALS: | Two options |
| REVIEWER: | Fernando Rolanelli |
| NOTES: | KMC Conversion set and Yellow Wings decals. |
| HISTORY |
On 28th November, 1941, eleven F4F-3 from VMF-211 were onboard USS Enterprise, CV-6, en route from Hawaii to Wake Island. This was considered of strategic importance, with an airbase and gun batteries and MG positions constructed. Unfortunately, every effort to make Wake Island worthy made an attack more probable. The garrison included a thin Marine battalion and one fighter squadron (from two, plus half a dive bomber and half a torpedo bomber planned), and was eventually reinforced by workers and civilians.
 In spite of receiving ample
warning of the attack to Pearl Harbour, the defenses were surprised on 8th
December at midday, by a strong air attack that destroyed eight of the F4Fs.
The rest were however rather miraculously kept flying and took part in the
heroic stand of the garrison, which has been called a kind of El Alamo in
the Pacific. Especially “F-11”, having survived the initial onslaught, and
flown by Cpt. Elrod, sank a destroyer with 100 kg bombs. Another was sunk by
the 5-in batteries, giving credit to the naval saying that goes “never
attack a fort with a ship”. After that, the IJN turned serious, committed
the 2nd
Carrier Division (Soryu and Hiryu) and pounded the island until its
surrender on 23rd
December, after a relief force was called back.
In spite of receiving ample
warning of the attack to Pearl Harbour, the defenses were surprised on 8th
December at midday, by a strong air attack that destroyed eight of the F4Fs.
The rest were however rather miraculously kept flying and took part in the
heroic stand of the garrison, which has been called a kind of El Alamo in
the Pacific. Especially “F-11”, having survived the initial onslaught, and
flown by Cpt. Elrod, sank a destroyer with 100 kg bombs. Another was sunk by
the 5-in batteries, giving credit to the naval saying that goes “never
attack a fort with a ship”. After that, the IJN turned serious, committed
the 2nd
Carrier Division (Soryu and Hiryu) and pounded the island until its
surrender on 23rd
December, after a relief force was called back.
Cpt. Elrod went on to shoot down two bombers, but he did not survive the battle, being posthumously awarded the Medal of Honor. The Navy also instituted the “Wake Island Device”, a clasp awarded to any Marine/Navy personnel on duty on the island between 7th and 22nd December.
| THE KIT |
For some unfathomable reason, I was in the possession of a Hobbyboss FM-1 minus its wings, plus an antique KMC resin set for conversion of t the Tamiya -4 into an -3. This must have been groundbreaking in its day, having accurate information on the F4F-3 batches with Bu.Ae. numbers included. I established I could build a late batch -3 with a minimum of fuss, my initial intention had been building a British F4F-3A. Luckily I had a Yellow Wings decal set for VMF-211 at Wake Island, which was equipped with these machines. I added an Eduard PE set (for Tamiya) for completeness.
| CONSTRUCTION |
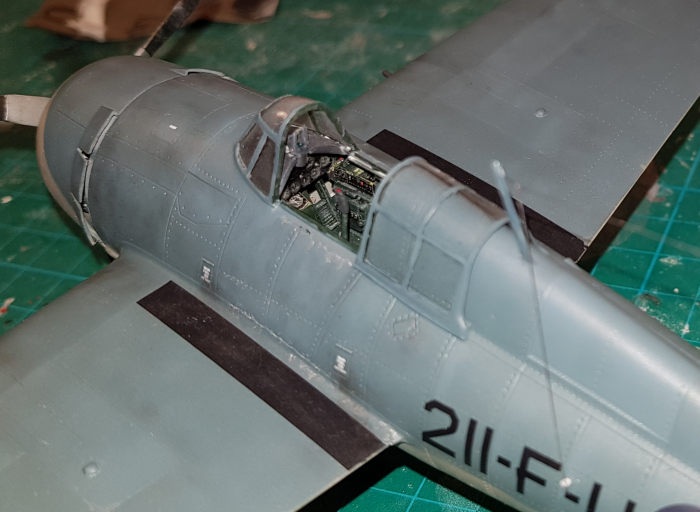 As always, I began with the
cockpit. The consoles must be adjusted in height; for that, see the
instructions for Eduard set for the HB kit. I replaced the seat for the
metal one in the PE, a win-win situation, and used only the lap belt. I
decided to scratchbuild the gunsight, as the kit comes with a fair
representation of the later Mk.8 piece; the early model (N-3?) is very badly
represented everywhere, even in the new Eduard kit. Everything (even the
pre-painted PE pieces as appropriate) was painted in WEMM’s Dull Dark Green,
but any dark bluish Green will do (as RLM70 or Tamiya IJN Dark Green, for
instance)
As always, I began with the
cockpit. The consoles must be adjusted in height; for that, see the
instructions for Eduard set for the HB kit. I replaced the seat for the
metal one in the PE, a win-win situation, and used only the lap belt. I
decided to scratchbuild the gunsight, as the kit comes with a fair
representation of the later Mk.8 piece; the early model (N-3?) is very badly
represented everywhere, even in the new Eduard kit. Everything (even the
pre-painted PE pieces as appropriate) was painted in WEMM’s Dull Dark Green,
but any dark bluish Green will do (as RLM70 or Tamiya IJN Dark Green, for
instance)
The Wheel well was given some attention due to its being a vast empty expanse. It was detailed in scratch with some fittings in the firewall and some cables along the provided struts.
The engine was modified into the
correct P&W version, a crankcase with no magnetos (the KMC set provides such a
piece), including them in the accessory rear (it is there, but you cannot see it
through the Wheel well). The cowling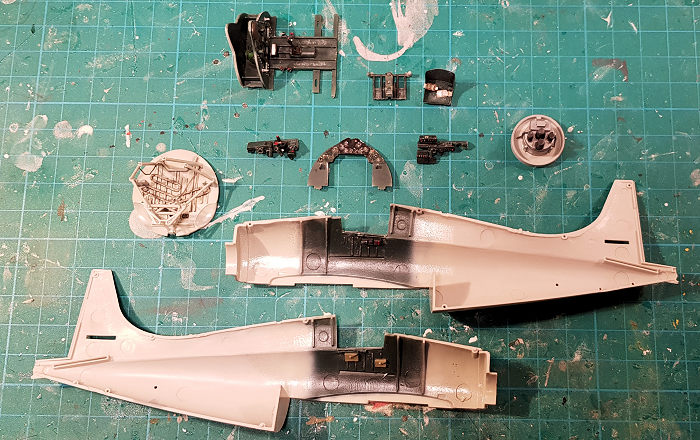 was also modified, erasing the upper
carburetor intake (easier done than said, it was just a lump of plastic which
left no sink on the lip) and adding a mimicry for the internal intake (just a
small plastic sheet)
was also modified, erasing the upper
carburetor intake (easier done than said, it was just a lump of plastic which
left no sink on the lip) and adding a mimicry for the internal intake (just a
small plastic sheet)
From the start my main worry was the fit of the resin wings (not to say that they weighed a ton). My concerns were the lack of attachment points and of any means of gauging the resulting dihedral. For the first, I drilled some holes on the butts and inserted plastic rods. For the second… I built the entire fuselage with undercarriage fitted so that I would be able to measure the dihedral. The undercarriage is quite complex as it is and errors mount to make it even worse. The airfoil of the resin wings is not exactly like the base in the fuselage and I had to sand it a bit, resulting in a slightly inaccurate shape (it is a sharp fit, and in the model looks like there is a very slight fairing) I added some bulges which were either scratch built or robbed from discarded pieces of wings. Sanding the resin wings was problematical, due to marks left on the surface or rivets erased, as they were very fragile. I chose to scratchbuild the bomb carriers, as they were very significative on Wake Island Wildcats; I used some PE parts from a Buffalo set as models. Quickboost resin 0.5 barrels were used for the protruding inboard MGs; drilled rod for the outboard ones. The pitot tube was scratchbuilt.
| COLORS & MARKINGS |
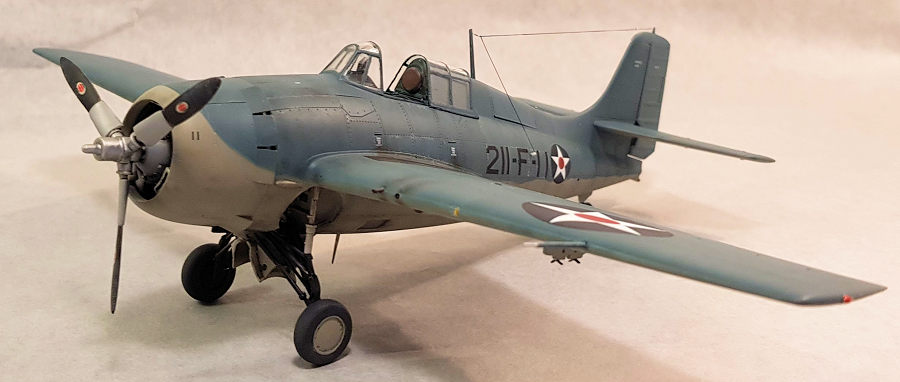
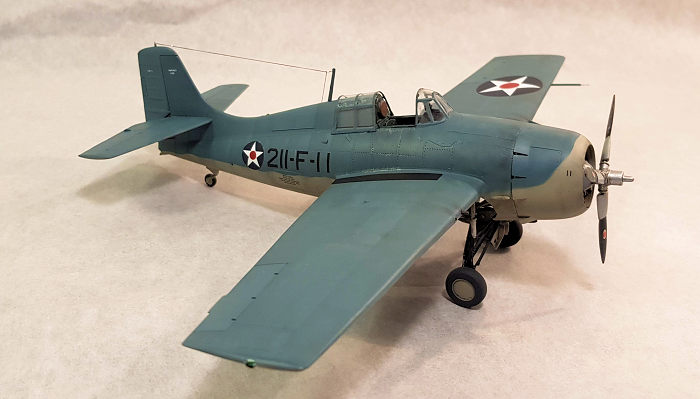
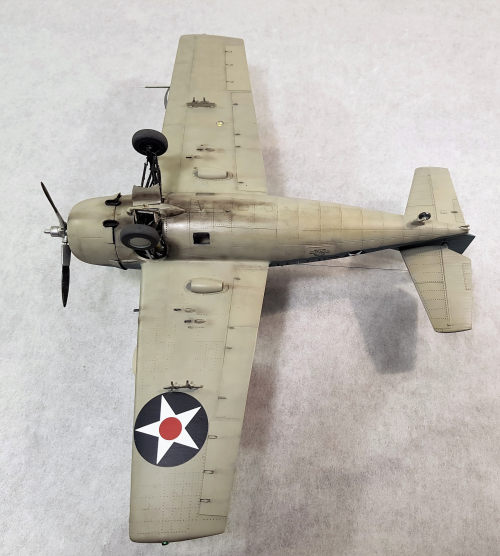 The camo is simplicity itself: NS
Blue-Gray M-485 over NS Light Grey. The non-standard nose demarcation is thought
to have originated in their hasty repainting on the Enterprise; apparently, some
cloth was used to cover the cowling opening to prevent paint going to the
engine. The propeller blade tips were left in Black, as the picture of 211-F-11
suggest they were so painted (were the Yellow or Tri-colour tips overpainted as
a camouflage measure? Don’t know…) A dark pre-shade was shot over the primer and
then the colours were painted mottle-fashion panel by panel. Flying surfaces
were painted in a lighter shade, as the most relevant panels; finally, some
mottling was made. The extra frame on the windscreen side panels were made by
painting. After the decals were applied, I further weathered the model with
pastels. It must be considered that these machines only flew operationally for a
few days.
The camo is simplicity itself: NS
Blue-Gray M-485 over NS Light Grey. The non-standard nose demarcation is thought
to have originated in their hasty repainting on the Enterprise; apparently, some
cloth was used to cover the cowling opening to prevent paint going to the
engine. The propeller blade tips were left in Black, as the picture of 211-F-11
suggest they were so painted (were the Yellow or Tri-colour tips overpainted as
a camouflage measure? Don’t know…) A dark pre-shade was shot over the primer and
then the colours were painted mottle-fashion panel by panel. Flying surfaces
were painted in a lighter shade, as the most relevant panels; finally, some
mottling was made. The extra frame on the windscreen side panels were made by
painting. After the decals were applied, I further weathered the model with
pastels. It must be considered that these machines only flew operationally for a
few days.
Yellow Wing decals were superb in colours and in their application. Unfortunately, it is my impression that the fuselage roundels are a bit smallish. I completed the decals with a few stencils left over from a Eduard Hellcat sheet. The walkways I made with Black decal strip (the resin wings did not hold the paint that well and I was wary of masking)
| CONCLUSIONS |
A nice project. Of course, an Eduard kit would look better, but this one was especially satisfying as it was about recovering an old kit. Not exactly relaxing, but giving the chance of updating and scratchbuilding the kit.
| REFERENCES |
“The Battle of Wake Island”, Gregory J.W. Urwin, The National WWII New Orleans Museum (https://www.nationalww2museum.org/war/articles/battle-of-wake-island-1941)
“Modelling the F4F Wildcat”, Mark Glidden, Osprey Publishing
“The F4F Wildcat in Detail and Scale”, Bert Kinzey, Squadron Signaal Publications
“F4F Wildcat Walkaround”, Bert Kinzey, Squadron Signaal Publications;
3 March 2023
Back to the Previews Index Page
Back to the Previews Index Page