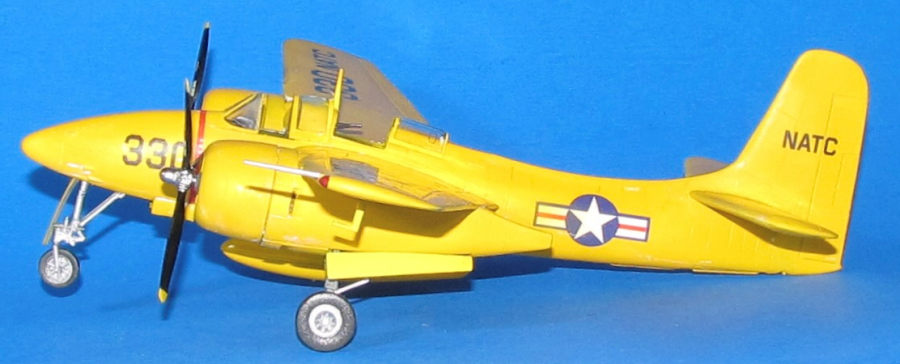
Fly Model 1/72 F7F-2N
| KIT #: | 72065 |
| PRICE: | 31.50 Euros |
| DECALS: | Three options |
| REVIEWER: | Dan Lee |
| NOTES: | Same sprues for all kit variants |
| HISTORY |
The Twin engine Tigercat was a departure from the single engine fighter aircraft Grumman usually designed as it was supposed to be a convoy escort fighter and originally named Tomcat. However, thanks to the name offending certain segments of the America public at the time, the F7F prototype was renamed to the less offensive Tigercat.
 t was a one
or two crewed fighter depending on the variant armed with four 20mm cannons in
the inner wings and equipped with an air to air radar set or an additional four
.50 caliber machine guns in the nose.
t was a one
or two crewed fighter depending on the variant armed with four 20mm cannons in
the inner wings and equipped with an air to air radar set or an additional four
.50 caliber machine guns in the nose.
The Tigercat arrived almost too late for WW2, only serving in a land based Marine photo recon squadron and not seeing much combat. Part of that was due to the fact that the Tigercat was designed to fly off the new Midway class carriers as well as the fact that it didn’t pass carrier qualification due to some very suspect flying characteristics landing on one engine and issues with the arrestor hook.
It did see service with mostly land based squadrons mostly including a short stint with VMF(N)-513 during the Korean War (including the downing of 2 Po-2 biplanes.)
The F7F-4 with a bigger tail would be the only version that passed carrier qualifications but by then the jet age arrived and the Tigercat would soon be a relic of the prop age.
Info from Wikipedia
| THE KIT |
FLY Model designed the sprues to be the same sprues for all versions of the Tigercat kit so there is a lot of stuff that you don’t need or have to cut off and replace includes all the various parts needed for the different versions including noses, cockpit coamings, canopies, tails and even a pair of 1/72 drones for the drone controller version.
The kit is made up for
four grey sprues and one clear sprue. This is a short run kit so there is some
flash on the parts and they do require a bit of clean up (but not as bad as it
could be.) The surface detail is okay but rough in places, with moderate sized
panel lines but with some raised details (especially the fabric tail and
ailerons) so it looks like some surface priming is needed to smooth the surface
out. The sprue gate attachment points aren’t big or require careful cutting, but
the sprue nubs have to be
 completely
sanded down to get a clean join. The small parts are a bit clunky and require
some careful clean up although they have some decent surface detail. However,
the spindly thin landing gear looks like they might need to be replaced with
metal ones especially if one jams a lot of weight in its nose. Also one should
be careful of removing the thin parts from the sprues as they look very fragile.
The clear parts are okay, but are touch thick for the scale.
completely
sanded down to get a clean join. The small parts are a bit clunky and require
some careful clean up although they have some decent surface detail. However,
the spindly thin landing gear looks like they might need to be replaced with
metal ones especially if one jams a lot of weight in its nose. Also one should
be careful of removing the thin parts from the sprues as they look very fragile.
The clear parts are okay, but are touch thick for the scale.
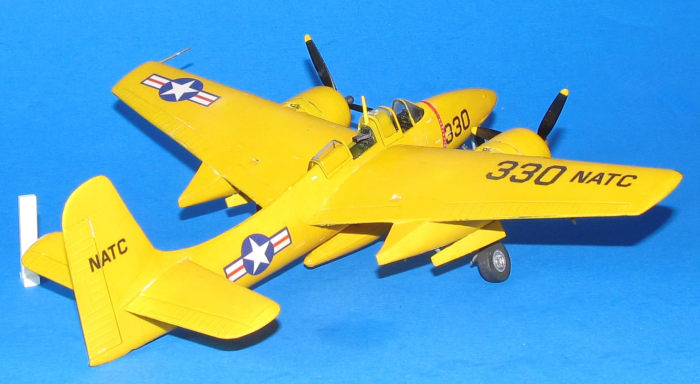
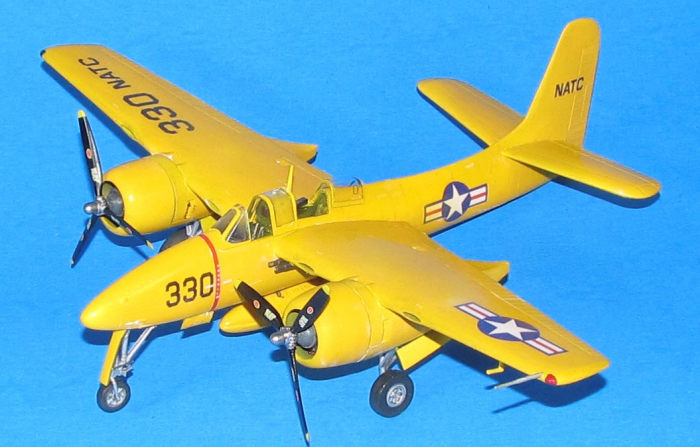
Finally, the decals look well done for 1/72 scale. Not sure who printed them but they look decent enough. Included are a set of decal seatbelts for both cockpits. There are three sets of markings of planes: one -2N in gloss yellow used by the NATC plus two in glossy sea blue. The first GSB marking is a -2 evaluated by the Royal Navy in trials and the other a -2N used by VF(N)-52 flying off the USS Antiem. The paint schemes are on the back of the box so don’t throw it out or recycle it till you’re done with the kit!
The instruction booklet shows all the assembly steps for any of the F7F models including the stencil placement. One has to identify what is needed for the version you want to build.
| CONSTRUCTION |
I first cleaned the parts with dish soap to remove any mold release agent (more common issue with short run kits.) Like many short run kits, the parts required a bit of clean up with removing excess flash and large sprue gates.
There are a number of long slender parts that broke when removing from the sprue gate. In particular the four (cannon) tubes in the nose landing gear well. I ended up replacing the four cannon tubes with cut equivalent lengths of steel wire glued in with super glue. I also had to drill out the insertion holes more as they were too narrow even for steel wire. Next I glued the nose gear well assembly snuggly to the nose section. I had to adjust the fit accordingly. Same went for the tail hook section in the back.
 At
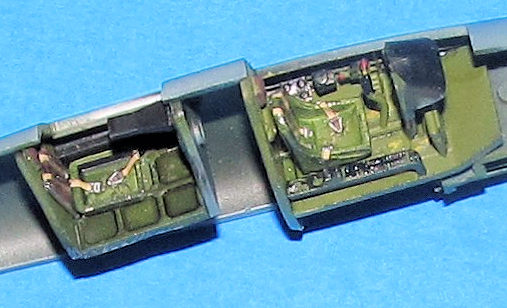
this point, I cut out the opening for the RIO cockpit on both sides of the
fuselage and added the various small bits onto the cockpit walls. The cockpit
areas and parts on both sides of the fuselage were first sprayed with black
acrylic primer and once it was dry then sprayed with Mission Models Interior
Green. The various black parts were then brush painted with Gunze gloss/flat
black. When the paint was fully cured, I added the decal seat belts to the
seats. When the decals were dry I painted all the various details using a fine
tipped brush to dry brush the buttons and dials with silver or red and finally I
dry brushed the interior with silver and yellow paint to show scuffs and wear
before using Tamiya panel line black wash everywhere to pop out the details.
Next I painted the head rests red brown. I used Tamiya panel line highlighter to
pop out the detail.,
At
this point, I cut out the opening for the RIO cockpit on both sides of the
fuselage and added the various small bits onto the cockpit walls. The cockpit
areas and parts on both sides of the fuselage were first sprayed with black
acrylic primer and once it was dry then sprayed with Mission Models Interior
Green. The various black parts were then brush painted with Gunze gloss/flat
black. When the paint was fully cured, I added the decal seat belts to the
seats. When the decals were dry I painted all the various details using a fine
tipped brush to dry brush the buttons and dials with silver or red and finally I
dry brushed the interior with silver and yellow paint to show scuffs and wear
before using Tamiya panel line black wash everywhere to pop out the details.
Next I painted the head rests red brown. I used Tamiya panel line highlighter to
pop out the detail.,
Next I put in a number of lead fishweights (at least ¾ of an ounce total of various sizes including pellets) to keep the Tigercat nose down when the landing gear is installed. (It wasn’t till later I realized I made a goof. I used the centerline spar as the pivot point when the Center of gravity pivot would have been where the landing gear is located way forward of that. It turns out I can’t jam enough lead weights to make the Tigercat sit nose down.) All that extra weight meant I needed to reinforce/heavily mod the landing gear so that it doesn’t bend as the FLY plastic is soft.
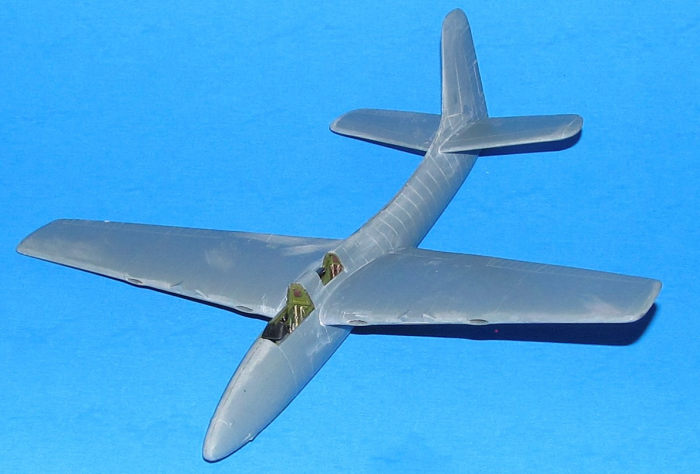 The weights
were secured with dabs of CA glue and the two fuselage halves were glued
together also using CA glue. The seams were cleaned up using various grits of
wet/dry sandpaper.
The weights
were secured with dabs of CA glue and the two fuselage halves were glued
together also using CA glue. The seams were cleaned up using various grits of
wet/dry sandpaper.
I glued the wings and ailerons together using CA glue and then sanding/polishing with various grades of wet/dry sandpaper to eliminate seams.
The next thing I did was build the port and starboard engine nacelles. I used Tamiya Extra thin cement everywhere except the exterior seams (medium gap filling CA glue was used instead.) The parts required a lot of trimming and clean up. One thing I had to do was apply the extra thin cement to open up the areas where the exhausts stick out as they were flashed in. The extra thin cement softens up the plastic so I can carve the openings open easily with a knife. Also does a good job of cleaning up the small debris. Also drilled out the prop hubs so the props could fit in. I made my own mix for Chromate Green using interior green and regular green to spray into the various areas of the Tigercat including the wheel wells, tail hook well and the engine nacelles.
Finally, I glued the wings and ailerons together using CA glue and then sanding/polishing with various grades of wet/dry sandpaper to eliminate seams. I also painted the areas underneath the wings where the engine nacelles were with my chromate green mix. The various oil tanks were painted and glued in place. I then added the carefully cleaned, primed and painted main landing gear before I added the nacelles to the wing (the landing gear openings are too narrow for the landing gear so it has to be done this way.) I filled the various gaps with Vallejo plastic putty (excess removed with damp Q-tips.) I masked off the landing gear to keep them from getting yellow paint. I also added the masked windscreen to the Tigercat and glued it in place with Tamiya extra thin cement.
| COLORS & MARKINGS |
I first masked off the
various orifices with cut packing sponges before spraying on the first primer
coat which was Kaliedo Black. When the primer was cured (roughly 24 hours), I
sprayed on a mottled coat of Mission Model Pink Primer. I tried this for the
first time as I was told a pink primer coat helps ease painting white, red or
yellow (it does work and requires fewer coats.) After a couple of days, I
sprayed on thinned Tamiya Flat yellow. It covered reasonably well, but it left
as per usual a grainy surface. I polished most of the grainy surface using
Tamiya 2000 grit sanding sponge then wiped the model down to remove the paint
dust. The next day I sprayed on Mission Models Yellow
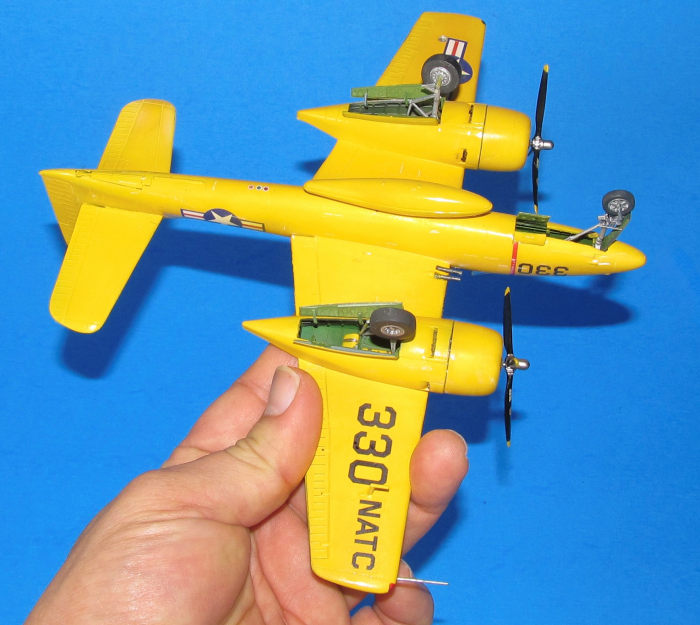 for a
smoother coat. I let it dry for a couple of days before I sprayed on the Vallejo
Acrylic Gloss Coat in preparation for the decals. If you’re wondering why I gave
so much time for each coat was that I found that if I don’t then the paint will
peel. And if you’re wondering why I used Tamiya flat yellow and then Mission
Models is that despite the primer, Tamiya gives pretty good coverage for light
colors but doesn’t always leave a smooth surface while Mission Models paint is a
bit runny and needs something extra to grab onto, but leaves a smooth surface.
In the past I wouldn’t have cared because I’m lazy, but I discovered that the
little extra effort makes a big difference.
for a
smoother coat. I let it dry for a couple of days before I sprayed on the Vallejo
Acrylic Gloss Coat in preparation for the decals. If you’re wondering why I gave
so much time for each coat was that I found that if I don’t then the paint will
peel. And if you’re wondering why I used Tamiya flat yellow and then Mission
Models is that despite the primer, Tamiya gives pretty good coverage for light
colors but doesn’t always leave a smooth surface while Mission Models paint is a
bit runny and needs something extra to grab onto, but leaves a smooth surface.
In the past I wouldn’t have cared because I’m lazy, but I discovered that the
little extra effort makes a big difference.
The masked canopies and the various small bits were painted at the same time.
Once the gloss coat was dry, I added the decals. They went on without too much issue. I even used the white stencils as they did show up against the yellow paint (I was surprised too.) I mostly used Tamiya Mark Fit decal solution to soften the decals and allow them to snuggle to the gloss coat and details. Once the decals were dry, I wiped down the model.
As this plane was used as a test bed in real life, I opted to not weather it.
I sprayed on what I thought would be the last gloss coat and it was the usual rough surface. As I was building a model car for my friend at the same time I got the brainwave to use Tamiya polishing compound to improve the finish. In the past I would use various grades of polishing grit to smooth the gloss coat down, but I was still disappointed with it not being mirror smooth and shiny. For years I would spray on a final gloss coat and I would be disappointed.
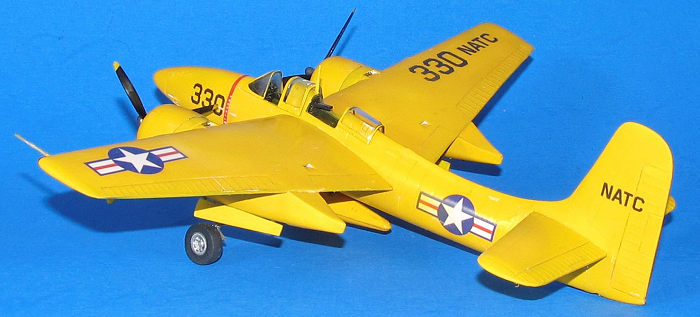 I spent
part of this summer watching several Youtube videos on how to give a model car
that mirror finish and noticed the one thing I kept missing working on glossy
aircraft was the use of any sort of polishing compound which got rid of those
fine scratches to make the surface glass smooth and shine.
I spent
part of this summer watching several Youtube videos on how to give a model car
that mirror finish and noticed the one thing I kept missing working on glossy
aircraft was the use of any sort of polishing compound which got rid of those
fine scratches to make the surface glass smooth and shine.
After using various grades of microgrit sandpaper and sponges to smooth the gloss coat down to a near smooth surface (on the top and sides of the fuselage as well as the cowlings, I opted not to do this as much with the bottom in this experiment of sorts), I took a dab of one of Tamiya Coarse Polishing compound and began to rub it in with a Q-tip in a circular motion for almost 20 minutes till the surface appearance being shinier. I wiped down the model and repeated with Fine (and did the same with Finish.)
At this point I wanted to slap myself for not seeing the obvious and suddenly why my gloss models turned out the way they did started making more sense.
It’s still a lot of work to do, but I realize that every model is a learning experience no matter how many one’s built over the years.
| FINAL CONSTRUCTION |
The engines were primed and painted aluminum. Then I cut various lengths of thin black wire to simulate the ignition wires that were CA glued to the engine cylinders. I used Tamiya black panel line highlighter to pop out the detail. Meanwhile the hubs were painted engine grey aka glossy gunship grey, dry brushed with silver paint to show some details. Then glued in place along with the cowlings. I previously drilled out the hubs so that the props could fit in properly. The painted, decaled props were simply put in place.
Next I added the painted wheels to the paints. I used the provided masks to cover the silver hubs while I sprayed on German Grey for the tire rubber.
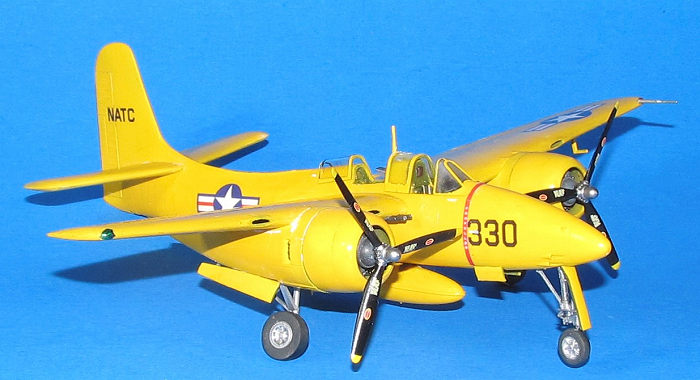 For the nose
landing gear, I cut off the main spar and replaced it with aluminum tubing
reinforced with steel wire to improve the strength. I glued back on the plastic
pieces I had cut off previously. Next I added steel wire braces to the main
support arm and drilled out a hole in the nose wheel tire and the underside of
the nose support. I used CA glue to attach a cut length of steel wire (barely
noticeable) to the now painted nose landing gear. I then glued the nose wheel to
the support and the cut length of wire to the hole in the wheel. I added the
already painted nose wheel door to the nose landing gear. The kit comes with two
delicate plastic rods to represent the door actuators. I replaced them with
similar sized steel wire and glued them in place with CA glue.
For the nose
landing gear, I cut off the main spar and replaced it with aluminum tubing
reinforced with steel wire to improve the strength. I glued back on the plastic
pieces I had cut off previously. Next I added steel wire braces to the main
support arm and drilled out a hole in the nose wheel tire and the underside of
the nose support. I used CA glue to attach a cut length of steel wire (barely
noticeable) to the now painted nose landing gear. I then glued the nose wheel to
the support and the cut length of wire to the hole in the wheel. I added the
already painted nose wheel door to the nose landing gear. The kit comes with two
delicate plastic rods to represent the door actuators. I replaced them with
similar sized steel wire and glued them in place with CA glue.
The various painted canopy antennas, cannon barrels and probes were glued in place. Previously, the cannons were drilled out using a knife and drill with 0.5 mm drill bits to give the appearance of a hollow tube (don’t know where my microtubing went to as half my modeling supplies are currently boxed up.)
Next I drilled out holes for the fuel tank shackles (location based on the updated instructions) and glued the shackles in place. When the glue was cured I added the painted fuel tank.
Lastly, I added the various painted landing gear doors using Revell Contacta glue (despite my initial misgivings) I really recommend it for where you need the glue to be a combination of the melting capillary action of Tamiya extra thin and the physical form of old orange tube model glue.
| CONCLUSIONS |
The Fly Model Tigercat is a decent short run kit for the experienced builder (it’s not a kit for those who never built a short run kit before.) If you take care of the assembly, you will get a very nice model of a twin engined naval fighter plane that despite its performance was outdated by the incoming jet age.
I certainly enjoyed building this kit despite the amount of extra work I put into it as well as learned a few things about dealing with gloss coats.
9 October 2026
Copyright ModelingMadness.com. All rights reserved. No reproduction in part or in whole without express permission.
If you would like your product reviewed fairly and fairly quickly, please contact the editor or see other details in the Note to Contributors.