| HISTORY |
Eduard 1/48 F6F-5 Hellcat
| KIT #: | 8434 |
| PRICE: | $24.95 SRP) |
| DECALS: | One option |
| REVIEWER: | Dan Lee |
| NOTES: | Weekend Edition. Ultracast seat & wheels. Master gun barrels. |
| HISTORY |
The Plane (brief)
The F6F-5 Hellcat was one of the premiere naval fighter aircraft of WW2. It fought through from 1943 to 1945, but so rapid was aircraft development during World War 2 that it was outclassed by the more powerful and capable Vought Corsair and the soon-to-be-deployed successor Grumman Bearcat at the end of the war. It shot down more Japanese aircraft than any other naval fighter and has the best kill to loss ratio of any plane of World War 2. Most of the Hellcats were sent to the reserves or scrapped post War.
The Squadron
 VF-20
The Jokers was established in Oct 1943 as part of Carrier Group 20. The
squadron served on board the USS Enterprise for most of 1944 and
participated in campaigns ranging from raids on the Bonin Islands, Yap,
Peleiu, Okinawa, Iwo and the Philippines. It won the Presidential Unit
Citation for its actions during that time as it helped destroy a number of
ships including the battleship Musashi, a large number of aircraft on the
ground and in the air. In Dec 1944, VF-20 was sent to the USS Lexington
where it served until relieved in January of 1945.
VF-20
The Jokers was established in Oct 1943 as part of Carrier Group 20. The
squadron served on board the USS Enterprise for most of 1944 and
participated in campaigns ranging from raids on the Bonin Islands, Yap,
Peleiu, Okinawa, Iwo and the Philippines. It won the Presidential Unit
Citation for its actions during that time as it helped destroy a number of
ships including the battleship Musashi, a large number of aircraft on the
ground and in the air. In Dec 1944, VF-20 was sent to the USS Lexington
where it served until relieved in January of 1945.
Post war the Jokers were designed VF-9A, VF-91 and finally VF-34 from 1948 to 1950. It was finally designated VA-34 in 1955 and assigned to fly the Panther, Banshee, Cutlass and finally the A-4 Skyhawk in 1962. Renamed the Blue Blasters, VA-34 was part of the Cuban Missile Crisis naval force and later served in Vietnam before being disestablished in 1969.
| THE KIT |
See Scott's preview.
| CONSTRUCTION |
 It all
began with the wings. Fairly straight forward except the wheel wells. If I
had put some thought into it before hand I would have saved myself some
grief with the wheel wells. It turns out that you need something to
brace/support the top of the wheel well pieces to the wing so they don't pop
off if you put the model down a bit too hard. Otherwise you're in for a half
hours worth of yelling and gluing carefully so as not to ruin the nice paint
job you did which is what I would do a couple of weeks later when that
happened.
It all
began with the wings. Fairly straight forward except the wheel wells. If I
had put some thought into it before hand I would have saved myself some
grief with the wheel wells. It turns out that you need something to
brace/support the top of the wheel well pieces to the wing so they don't pop
off if you put the model down a bit too hard. Otherwise you're in for a half
hours worth of yelling and gluing carefully so as not to ruin the nice paint
job you did which is what I would do a couple of weeks later when that
happened.
I did not add the plastic gun inserts as I had a Master gun barrel set for the the Hellcat to replace them. It makes for an easier time to fill sand the wings as you don't have to spend a lot of time carefully sanding in between delicate plastic barrels. Some folks love to do this kind of work. I'm not that guy as I prefer to trade money for time if the task is a tedious pain in the rear. One might call it a difference in building philosophy or just being lazy. Anyway, I used CA glue for the visible seams and Tamiya Extra Thin for those locations where the dreaded phantom seam wouldn't matter.
The rest of the wings including the landing gear went together without too much problem except for the tiny detail parts like the tow hooks and landing gear indicators. Those plastic parts flew out of my tweezers with regularity. If I was lucky enough to find one then it was a pain in the rear to glue as the parts didn't want to fit snugly.
Next was the cockpit.
As this was the weekend edition, there were no PE (photo etch) parts to deal
with so after laying down the base colors (Xtracrylix Interior Green and
Tamiya Flat black) I brush painted the
 details
best I could using flat white and red paint. I had an Ultracast resin seat
with seatbelts and used it instead of the kit seat. The restraints were
brush painted as well while paint chips were laid down using the dry brush
technique. I then used Tamiya enamel black wash to pop out the details in
the cockpit and seat. The cockpit assembly was glued into place on the
starboard side and then the Eduard fuselage was glued together with CA glue
for the visible seams. Once the CA glue was dry, I sanded the seams away
with 400/600 grit wet dry sandpaper and the bigger scratches polished out
with polishing cloths.
details
best I could using flat white and red paint. I had an Ultracast resin seat
with seatbelts and used it instead of the kit seat. The restraints were
brush painted as well while paint chips were laid down using the dry brush
technique. I then used Tamiya enamel black wash to pop out the details in
the cockpit and seat. The cockpit assembly was glued into place on the
starboard side and then the Eduard fuselage was glued together with CA glue
for the visible seams. Once the CA glue was dry, I sanded the seams away
with 400/600 grit wet dry sandpaper and the bigger scratches polished out
with polishing cloths.
The stabs and wings were glued in place with Tamiya Extra thin. The stabs required some cleanup sanding on the edges thanks to the prominent mold markings. I used some Vallejo plastic putty to fill in the small but obvious gaps around the wing/fuselage and stab/rudder joins.
At this point, the cowling was glued together. I used CA glue for the centerline seam at the top of the cowling. The interior of the cowling was sprayed Tamiya XF-19 Sky Grey. Meanwhile the engine and prop were painted black primer with the engine getting some dry brushed steel and the prop tips were masked then painted flat white then yellow. The spinner was brush painted Xtracrylix Glossy Sea Blue.
Lastly the canopy parts were masked off and interior green was sprayed on in two light coats. Once dry they were glued in place with white glue for painting.
| COLORS & MARKINGS |
I sprayed on a coat of
Badger's excellent Stynylrez black primer all over. It dries quick and
relatively flat. I did this to provide a relatively uniform coat of color
for both the canopy and fuselage. Once it was dry for a couple of
 days, I
polished the main areas of the model including all the flat surfaces using
polishing pads of varying grit from 1800 to 6000 grit. The model was then
wiped down with a damp cloth to remove the paint dust.
days, I
polished the main areas of the model including all the flat surfaces using
polishing pads of varying grit from 1800 to 6000 grit. The model was then
wiped down with a damp cloth to remove the paint dust.
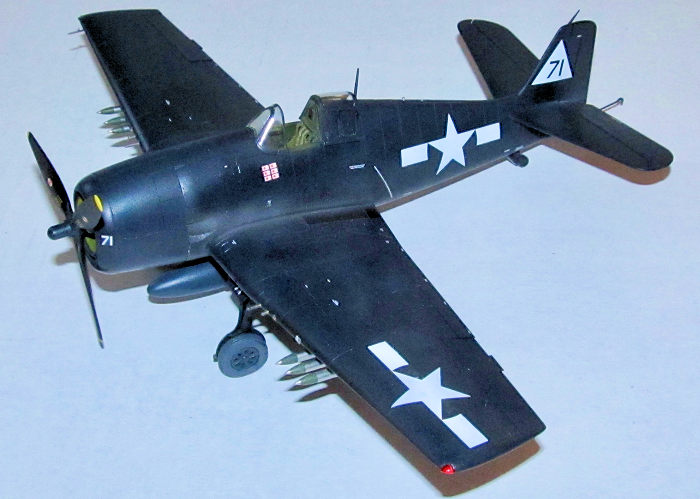
Next I sprayed on Xtracrylix Glossy Sea Blue. I ended up doing this a couple of times as the coverage wasn't as good as I hoped it would be as I thinned it a bit too much. I used the lull in between coats to polish the model surface a couple of times using 3200-4000 grit cloths. Lastly I sprayed on Xtracrylix gloss coat as the surface coat for the decals.
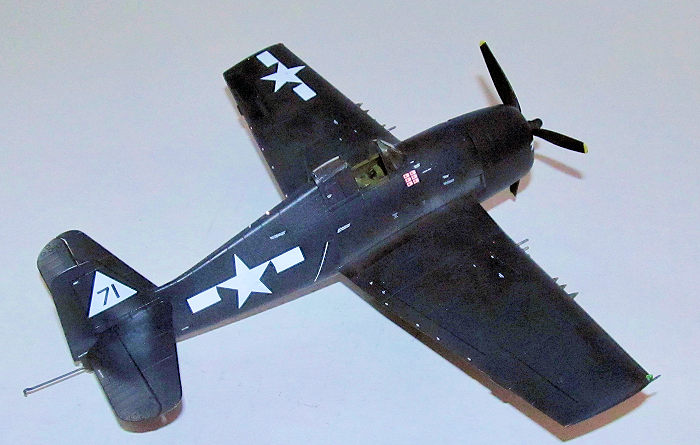
The kit option was okay with me. I didn't have a problem with this weekender set of decals, but Scott did mention some issues with his. The decals went on without too much issue. I used Micro Sol/Set solution to help the decals set into the detail. Once they were dry I wiped the model with a wet cloth to remove the dried up decal solution.
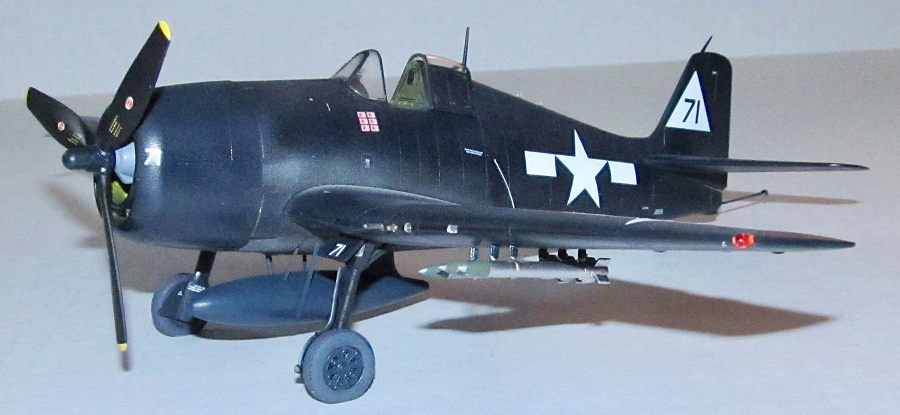
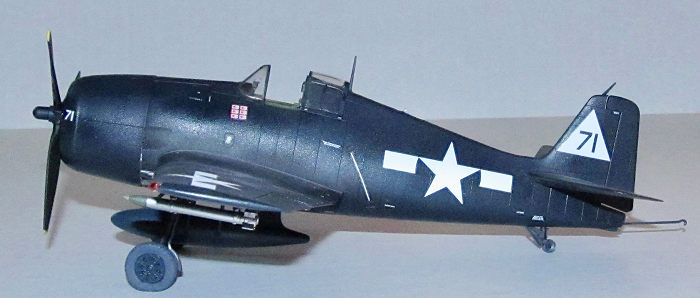
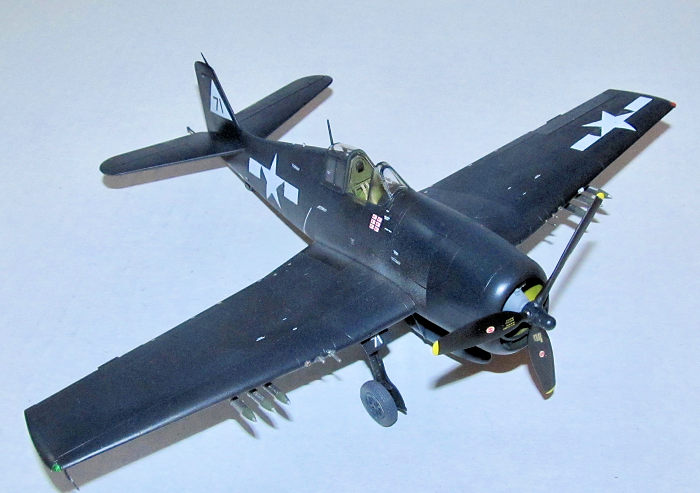
An all Glossy Sea Blue plane doesn't require much weathering in the traditional oils/pastels/watercolor sense. What I did was spray on clear gloss, clear satin and clear flat in random patterns to show wear on the GSB paint. I then sprayed on thinned dark grey, NATO black and light grey to emulate exhaust patterns.
| FINAL CONSTRUCTION |
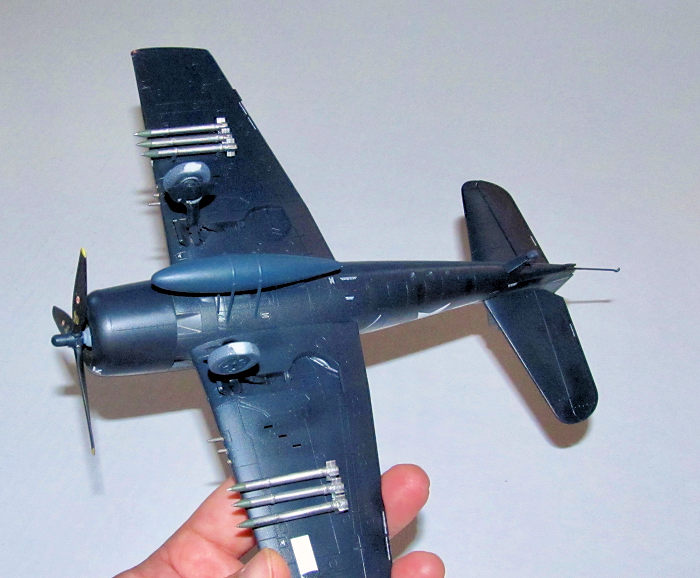
The fuel tank and rockets were assembled during the build, but not painted till after the model was done. I added some plastic card strip to the fuel tank to emulate the PE tie downs not supplied with the kit to add some detail. The 5 inch US Navy rockets were a bit more fiddly (the kit comes with British 60lb rockets as well.) They required some careful sanding to remove the prominent mold markings and then glued together.
The fuel tank was
filled, sanded, polished and then painted using GSB before being glued in
place. Next the rockets were primed with Stynylrez black primer and painted
using Va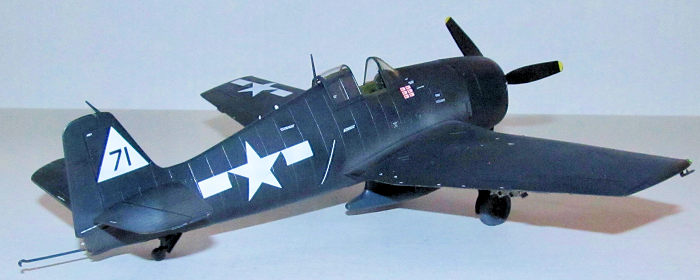 llejo
flat aluminum with the warheads brush painted olive drab and the fuses brush
painted silver.
llejo
flat aluminum with the warheads brush painted olive drab and the fuses brush
painted silver.
The final small bits were added including the tailhook, pitot tubes and antennas. I used an old set of resin wheels that were primed, painted, holes drilled out and glued in place. I added the sliding portion of the canopy to the fuselage with some smears of white glue.
Lastly, I added the Master gun barrels which proved to be a touch more difficult because I had to drill out the holes (carefully so as not to crack the leading edge seams) and then insert the brass barrels into the holes. They were secured using a dab of CA glue. The barrels were brush painted using Vallejo gunmetal.
| CONCLUSIONS |
 The
Eduard Weekend edition Hellcat is a simple straight forward kit that
provides the base for a good model. Throw in some aftermarket extras
and/or buy the Profipack version and it can become an excellent model.
The
Eduard Weekend edition Hellcat is a simple straight forward kit that
provides the base for a good model. Throw in some aftermarket extras
and/or buy the Profipack version and it can become an excellent model.
I had fun building it and recommend it for modelers of almost any skill level.
17 February 2020
Copyright ModelingMadness.com
If you would like your product reviewed fairly and fairly quickly, please contact the editor or see other details in the Note to Contributors.
Back to the Main Page Back to the Previews Index Page Back to the Review Index Page