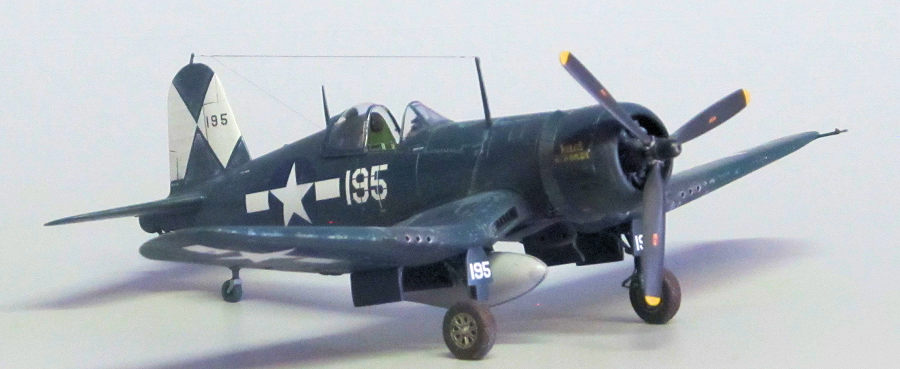
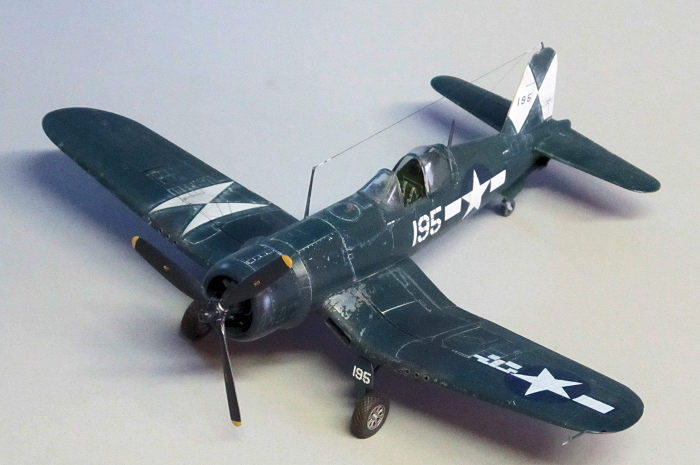
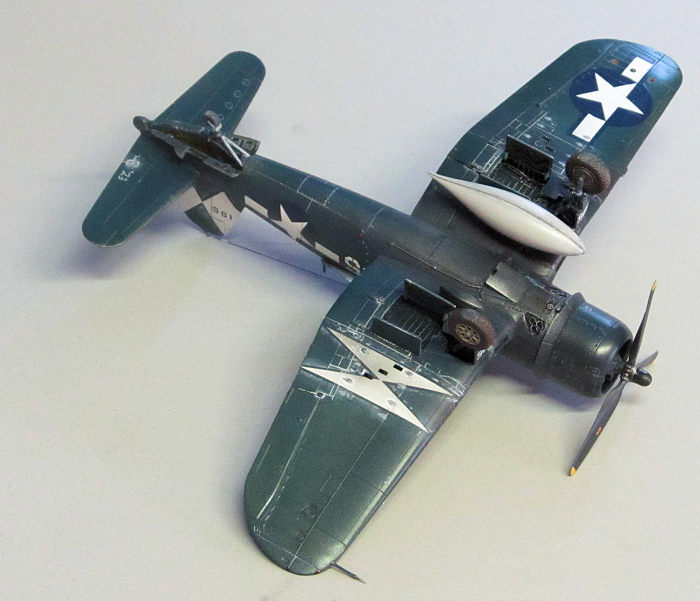
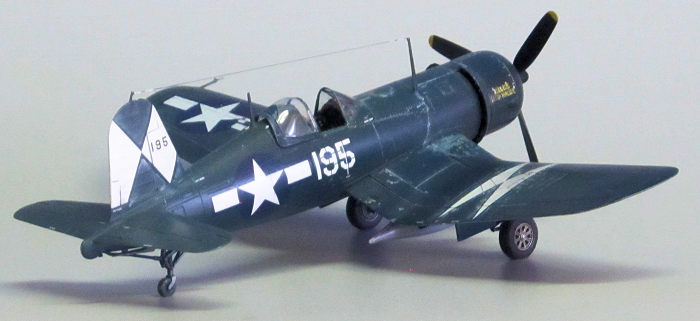
Tamiya 1/72 F4U-1D Corsair
| KIT #: | 60752 |
| PRICE: | $20 |
| DECALS: | Three options |
| REVIEWER: | Ryan Grosswiler |
| NOTES: | Eduard cockpit, Rob Taurus canopy, Fundekals "Whistling Death!" markings |
| HISTORY |
 One of the
big ones is the notion of, "The Corsair was rejected by the Navy because it was
so much of a Hot Ship that time was needed to break in a generation of green
pilots on the more forgiving Hellcat before the Corsair could be allowed on
carrier decks." The truth is more mundane: The Navy test teams actually really
liked the Corsair (while noting its inferior cockpit visibility and tendency to
bounce on landing), but because the Hellcat had beat it into service in large
numbers, the Grumman product crowded all the available carrier decks and lines
of logistics. That was until enough carriers had been launched that the
higher-performance Corsair could finally be accommodated on board. The raised
pilot's seat and bulged canopy which by then had completed the look of the
Corsair certainly helped. So, the Hellcat dominated the air war in the
Pacific like it did not so much for its superior 'user-friendliness' to the
Corsair, but because it beat its stablemate into service by so many months.
One of the
big ones is the notion of, "The Corsair was rejected by the Navy because it was
so much of a Hot Ship that time was needed to break in a generation of green
pilots on the more forgiving Hellcat before the Corsair could be allowed on
carrier decks." The truth is more mundane: The Navy test teams actually really
liked the Corsair (while noting its inferior cockpit visibility and tendency to
bounce on landing), but because the Hellcat had beat it into service in large
numbers, the Grumman product crowded all the available carrier decks and lines
of logistics. That was until enough carriers had been launched that the
higher-performance Corsair could finally be accommodated on board. The raised
pilot's seat and bulged canopy which by then had completed the look of the
Corsair certainly helped. So, the Hellcat dominated the air war in the
Pacific like it did not so much for its superior 'user-friendliness' to the
Corsair, but because it beat its stablemate into service by so many months.
I don't have much to talk about on a personal level regarding the Corsair. Except this: one fine July morning at my old R/C airfield in Montana when we were having a show, by prearrangement a local tycoon 'buzzed' our flightline with his no-kidding for-real F4U-5. Montana being arguably the most libertarian (not conservative, libertarian — there's a difference) state in the Union, the usual guidelines of airspeed limitation and crowd separation were, um...'flexed'. He came down at us full-throttle in a shallow dive from about 1000', lined up with our pit area, and rolled into clean knife-edge as he leveled out just over the ground. I was spellbound, straddling my 1/4-scale Tipsy Nipper, and as he roared overhead, I think that lower wingtip was about twenty feet above my forehead. The vortices whooshed around and violently displaced several of our parked models. Dangerous and foolish? Very much so, by any yardstick of aviation safety. But memorable? I will let you imagine.
| THE KIT |
 As long as
there has been injection-molded plastic the Corsair has always been well served
in all the common modelling scales. In the wake of their highly-successful
1/48th F4U kit of the late 1990s, Tamiya's 1/72 pantograph came out in the very
early 'aughts, along with a couple Spitfires and Bf-109s in what was supposed to
be a new line in the One True Scale: a development of their (still) successful
He-219 was announced as the next installment. These were great kits, but
unfortunately Tamiya had to learn the hard way that photographic box art in
unflattering light is really bad for kit sales. Additionally, this presentation
made actual Tamiya molds indistinguishable from Italeri kits released through
them for the Japanese market. The company must have smarted from the experience,
because that was the end of 1/72 for Tamiya for the next couple decades.
Subsequent releases of this mold (and more recent kits, such as their
outstanding Ki-61—stay tuned!) as the -1 and -1A feature nice paintings up
front.
As long as
there has been injection-molded plastic the Corsair has always been well served
in all the common modelling scales. In the wake of their highly-successful
1/48th F4U kit of the late 1990s, Tamiya's 1/72 pantograph came out in the very
early 'aughts, along with a couple Spitfires and Bf-109s in what was supposed to
be a new line in the One True Scale: a development of their (still) successful
He-219 was announced as the next installment. These were great kits, but
unfortunately Tamiya had to learn the hard way that photographic box art in
unflattering light is really bad for kit sales. Additionally, this presentation
made actual Tamiya molds indistinguishable from Italeri kits released through
them for the Japanese market. The company must have smarted from the experience,
because that was the end of 1/72 for Tamiya for the next couple decades.
Subsequent releases of this mold (and more recent kits, such as their
outstanding Ki-61—stay tuned!) as the -1 and -1A feature nice paintings up
front.
Back to what we have here: inside that forgettable box there are the predictably clean moldings and innovative, thoughtful engineering typical of the company. Sub-types are catered to with separate parts for the fuselage decking aft of the cockpit to accommodate the early "birdcage" canopy, plus an extra sprue for the underslung armament and fuel tanks of the later versions. These encouraging contents are slightly marred by some optical distortion in the canopy and an engine crankcase that's a little bulky. Attempts to stretch the common mold as far as possible resulted in some minor sub-type discrepancies, but nothing to get upset about. After years of modelling obscure stuff, I thought I'd pay the Corsair a visit!
| CONSTRUCTION |
I started by fixing the seat
placement in the cockpit; this requires a little surgery to the aft bulkhead
(Part XX) to reduce the overly-think armor plate representation. Search for Don
Fenton's review on your favorite search engine for more detail on this simple
procedure. Your reward for this five-minute surgery is a seat moved more
realistically aft, noticeable even under a closed canopy. I ended up also adding
Eduard's stunning cockpit photoetch and ditching the kit canopy in favor of a
Rob Taurus vac-formed part to show it slid back. This in turn required filling
in the recess for the closed kit canopy i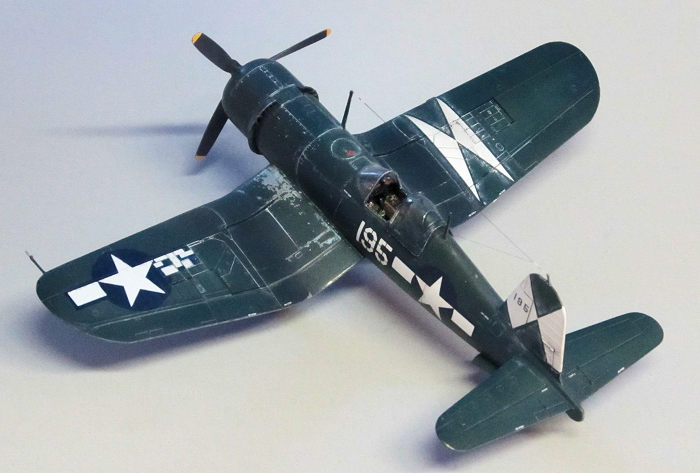 n
the fuselage immediately aft of the cockpit.
n
the fuselage immediately aft of the cockpit.
More involved, and probably not worth the effort for most modelers: the kit engine's crankcase is a little clunky/bulky. This issue used to be easily fixed with a Quickboost resin bit, but this has become hard to find. I ended up fishing out a better R-2800 from the spares box, adapting it, and casting it in resin.
These two detours behind, the rest of the build was totally straightforward, with a little pause here and there for minor improvements. I filled in the pilot's step on the flap as it wasn't open as standard until long after the war. I refined the detail on the tailwheel assembly following photographs in Dana Bell's books. A little detail was added to the wheel well sidewalls following more photographs in the same reference. The landing light was installed in the lower left wing to be painted over later, but to be accurate, note that by this stage of production the provision for it had been deleted entirely.
Guidance on the outstanding Fundekals instructions informs the modeler that, during the late spring 1945 time period depicted, the Corsairs of VBF-83 were relieved of their rocket stubs as a weight-saving measure. Following provided photographs, I sprayed their mounting area silver and made 16 tiny little masks to depict the little ovals that remained once the final color went on later. We are also informed that the drop tanks specific to the P-38 were procured and carried on the right-hand rack only. To depict this last, a tank from Dragon's P-38 was adapted as a press-fit into the Tamiya rack, then cast in resin. If you're interested in a copy let me know.
The final touch was a pair of Barracudacast wheels. The kit's wheels are good, but these resin aftermarket depictions are rather mind-blowing once painted, washed, and dry-brushed.
| COLORS & MARKINGS |
Photographs show that carrierborne US Navy aircraft of the late-war Gloss Blue period were much more weathered than one would think, so I used the opportunity to try my hand at the Hairspray Technique. An overall coat of Tamiya aluminum lacquer was applied, then the hairspray, then a coat of Chromate Yellow. This was immediately brushed off with a little water around the highest wear areas, another hairspray coat applied, then Gunze Gloss Blue went on, which was then in turn immediately brushed/scraped away with a little water over more of those high-wear areas revealed by photographs (especially that big, beautiful color one on the back of Corsair Pictorial Vol. 2).
 My reward
were patches of aluminum with a little trace of the yellow primer also peeking
through here and there. The Gunze paint was too grey, however, so I sprayed a
little Tamiya Clear Blue to correct the hue.
My reward
were patches of aluminum with a little trace of the yellow primer also peeking
through here and there. The Gunze paint was too grey, however, so I sprayed a
little Tamiya Clear Blue to correct the hue.
The final challenge was the overspray very visible around the masking areas of the unit markings. It's very difficult to make this effect look correct. I applied the decals, and after they dried applied 1/32" strips of kabuki tape on their outlines. This was followed by teeny dots of white oil paint which I then carefully swabbed mostly away with a cotton bud barely dampened with odorless thinner. The result was as desired: faint traces of white 'clouding' around these markings once the masking was removed.
You may also notice something strange going on around the right bar of the US national marking of the upper wing. The ammo boxes of the Corsair were interchangeable by this point in the war, and in the heat of combat prep/turnaround were not always replaced in the correct order. Fundekals offers a dedicated sheet and extensive instructions to depict this other little bit of peculiar chaos.
A clear coat, wash, highlighting with a little bit of Aluminum from my last (sniff) bottle of Model Master Metalizer, locked in with a semigloss clear coat, closed things up. Aerials were added with EZ Line and Uschi van der Rosten products and she was done.
| CONCLUSIONS |
This is a great kit in that it's good right out of the box or you can use it to try a variety of new techniques to expand your modelling horizons. A quarter century on, Tamiya's are still the best Corsairs in any scale.
| REFERENCES |
Dana Bell, Aircraft Pictorial 7 & 8: F4U-1 Corsair Classic Warships Publishing Vol. 1 (2014) ISBN 978-0-9857149-7-0, Vol. 2 (2015) ISBN 978-0-9857149-9-4
14 September 2023
Copyright ModelingMadness.com. All rights reserved.
No reproduction in part or in whole without express permission. If you would like your product reviewed fairly and fairly quickly, please
contact
the editor
or see other details in the
Note to
Contributors.