Monogram 1/48 F4U Corsair
| KIT #: | 6833 |
| PRICE: | $8.00 'used' |
| DECALS: | One option |
| REVIEWER: | H Davis Gandees |
| NOTES: | 1984 release |

| THE KIT |
 This kit originally released in 1963 is one I built
back then and several others since. Monogram/Revell founder, Lewis H. Glaser
demanded toylike features like retractable landing gear and foldable wings that
were must haves in the day.
The kit today is just as it was 61 years ago. It is simple and easy for a child or beginning modeler to build with well-engineered features and good quality even when compared to new model kits. It lacks cockpit details other than an instrument panel decal and a pilot figure and has raise panel lines. It cannot be put together incorrectly because of clever keying of parts and simple but clear instructions.
| CONSTRUCTION |
So, why would an experienced modeler build such a basic 61-year-old kit? Well, this was the last of this kit in my stash and I was looking for a model I could experiment with weathering. I normally may include exhaust and gun smoke staining, but thatís it.
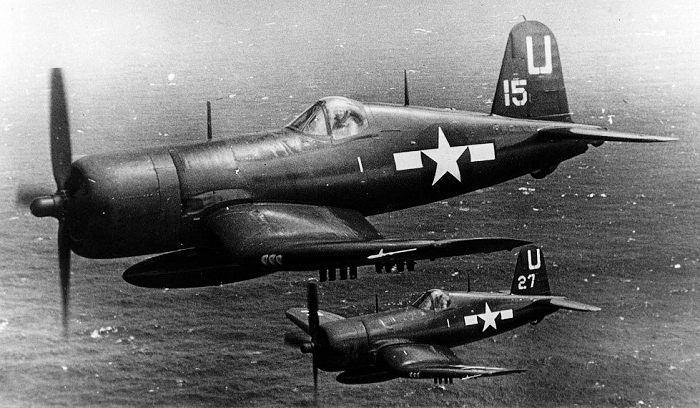
 My best friend recently sent me a B&W photo of 2 WWII
Corsairs returning from a mission and they are clearly well-worn examples of
late war Corsairs that I decided to try and replicate in 3D. So, this was an
experiment in weathering with no plan to ever enter it in a contest.
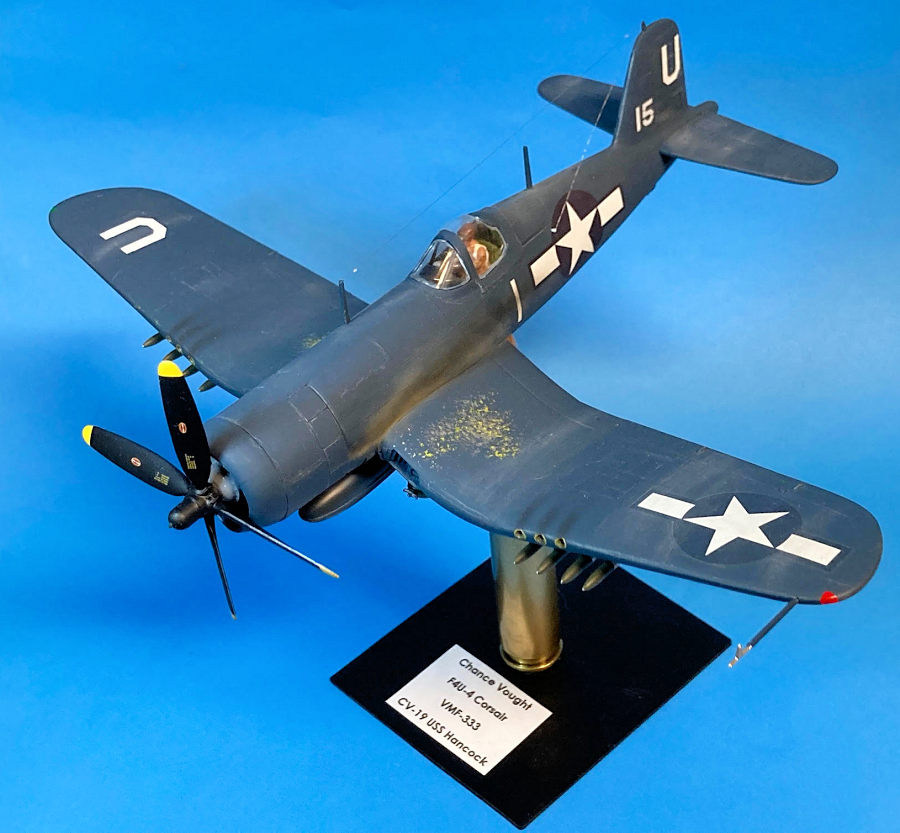
I procured several inert .50 cal rounds years ago and with just one left I planned to mount the Corsair on it. So, the landing gear doors were closed, and the tailwheel retracted. Also, the wings were permanently extended. I put tape behind the closed gear doors to hold them in place while drying. As the kit is an F4U-4B with 4-20mm cannons, I had to convert it to .50 cal. guns by cutting off the cannon barrels and drilling 6 flush gun ports. There are only 13 assembly steps, 5 involving the movable features that I deleted. The wing and fuselage halves fit well, and the joints required minor scraping with a razor blade and sanding to remove seams. The only difficult step was mounting the outer wings to the center section with proper dihedral alignment that required considerable putty and sanding. The canopy assembly is the only part that does not fit well.
I considered cutting away the kit canopy structure and replacing the thick clear parts, but this was just a learning experiment, so I installed the kit clear parts after painting. The windscreen fit perfectly but the rear canopy part needed trimming and eventually considerable white glue to fill gaps.
| COLORS & MARKINGS |
Before putting the fuselage halves together, the cockpit was painted interior green and the instrument panel, side consoles and glare shield flat black and everything was lightly dry brushed with aluminum. The headrest was painted brown, and the gunsight reflector painted silver. The pilot was painted and installed in the seat, and everything closed up.
The molded in place engine was painted with aluminum cylinders and gray crankcase and given a black wash. When dry it was masked with tape as was the cockpit and pilot.
 The model was cleaned with alcohol and a lint free
cloth and allowed to dry and then 2 coats of Tamiya AS-8, US Navy Blue (rattle
can) were applied resulting in a semi-gloss finish when dry. I let it dry
overnight, and the next day applied the decals from the scrap bin to replicate
the markings in the B&W photo. After allowing everything to dry overnight, a
final coat of Tamiya Flat Clear was applied to seal the decals in. The aircraft
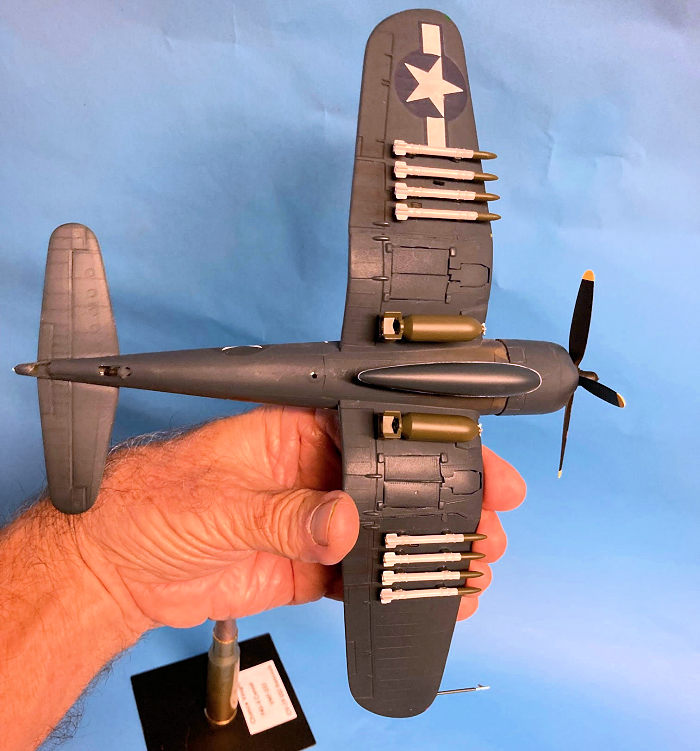
underside and outer upper wing panels were left semi-gloss as they were shaded
from the sun when the wings were folded on the carrier deck. The lower outer
wing panels were painted flat as they receive sunlight when the wings are
folded.
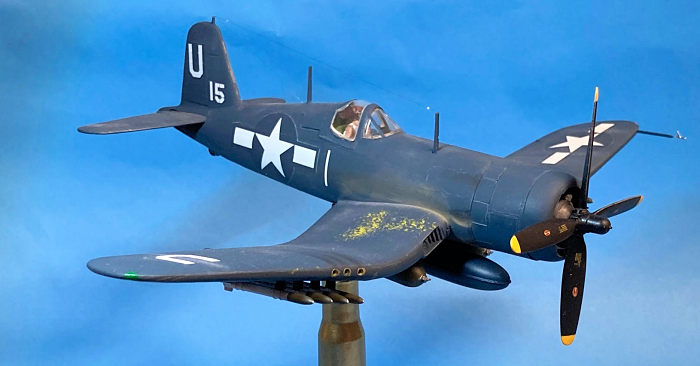
Now the anticipated weathering experiment began! The obvious wear on the wing from ground crew activity was replicated by a jabbing, stippling action with Testors aluminum and chromate yellow with a stiff brush. The paint around the gun ports in the photo was warn away from the gun blasts, so I again used the aluminum and chromate yellow.
Highlighting was accomplished with a silver artist pencil around areas of heavy usage and leading edges. Exhaust stains were applied with powdered gray, black and orange pastels with a soft brush beginning with the lightest to the darkest colors. The gun smoke stains were applied the same way with black pastel and all the pastels blended with another soft brush. Black pastel was also used for subtle oil leaks from the cowling. An overall application of blue pastel chalk dust was applied in the direction of airflow over the entire airframe and blended.
The prop was painted gloss black, decaled, and given a flat final coat. The rockets, bombs and centerline fuel tank were painted and installed.
The finishing touches included painting the red, green, and white nav lights with a fine brush and the installation of a nylon thread antenna between the masts and a white sprue insulator on the left rear fuselage. Insulators were added to the antenna wire using white glue.
| CONCLUSIONS |
The experiment taught me new skills Iíll use in the future and the old Monogram Corsair looks like #15 in the B&W photo. I hope you like it! If you have one of these old kits in your stash, pull it out and build it with a child who just might catch the hobby!
| REFERENCES |
References: The Squadron Signal F4U Corsair book and the B&W photo of the VMF-333 Corsairs from the USS Hancock were my references for this model.
6 January 2025
Copyright ModelingMadness.com. All rights reserved.
No reproduction in part or in whole without express permission. If you would like your product reviewed fairly and fairly quickly, please
contact
the editor
or see other details in the
Note to
Contributors.