Tamiya 1/48 F4U-1 Corsair “Birdcage”
| KIT #: | 61046 |
| PRICE: | $32.00 SRP |
| DECALS: | Three options |
| REVIEWER: | Dave Cummings |
| NOTES: | Aftermarket bits: Eagle Cals Birdcage Corsairs Part 1 EC-150. Montex Mask MM48074 |
| HISTORY |
When war came to America at Pearl Harbor we were still not ready. Our Army in the Philippines, outnumbered and using obsolete WWI era equipment would be defeated. In the air we were dependent on pilot quality, initiative, and innovative tactics to compete against a well-trained enemy whose aircraft were equal to, and usually outnumbered, the aircraft equipping our forces. It was a hard slog holding the line in those early days until the vast amounts of men and modern material that would eventually win the war could be fielded. Vought’s F4U was one of the first of the “new” generation fighters to take the field. It was the first carrier fighter design to equal or exceed the performance of its land based counterparts and the first fighter ever to exceed 400 mph in level flight.
 First
flown in 1940, it went through the teething problems inherent in most new
technology. Due to shifting requirements the original armament configuration
with two cowl mounted guns were changed to the definitive norm of “six
fifties” in the wings. The redesign meant moving wing fuel storage to a
fuselage tank placed in front of the cockpit which necessitated moving the
cockpit rearward. The obstructed forward vision of “old hog nose” would be
one of several issues preventing the design initially from being cleared for
carrier operations. So the Navy adopted the slightly lower performing, but
more docile, Hellcat for its carriers and cast the Corsair off to the
Marines for land based operations. This proved an enormous boon for the USMC
that was used to getting the hand-me-downs from the Navy as it acquired
better stuff. Operating from primitive island bases the Marine Corsairs
alongside their Army counterpart, the P-38, would sweep the skies of enemy
opposition and complete the destruction of Japanese air power begun at
Midway.
First
flown in 1940, it went through the teething problems inherent in most new
technology. Due to shifting requirements the original armament configuration
with two cowl mounted guns were changed to the definitive norm of “six
fifties” in the wings. The redesign meant moving wing fuel storage to a
fuselage tank placed in front of the cockpit which necessitated moving the
cockpit rearward. The obstructed forward vision of “old hog nose” would be
one of several issues preventing the design initially from being cleared for
carrier operations. So the Navy adopted the slightly lower performing, but
more docile, Hellcat for its carriers and cast the Corsair off to the
Marines for land based operations. This proved an enormous boon for the USMC
that was used to getting the hand-me-downs from the Navy as it acquired
better stuff. Operating from primitive island bases the Marine Corsairs
alongside their Army counterpart, the P-38, would sweep the skies of enemy
opposition and complete the destruction of Japanese air power begun at
Midway.
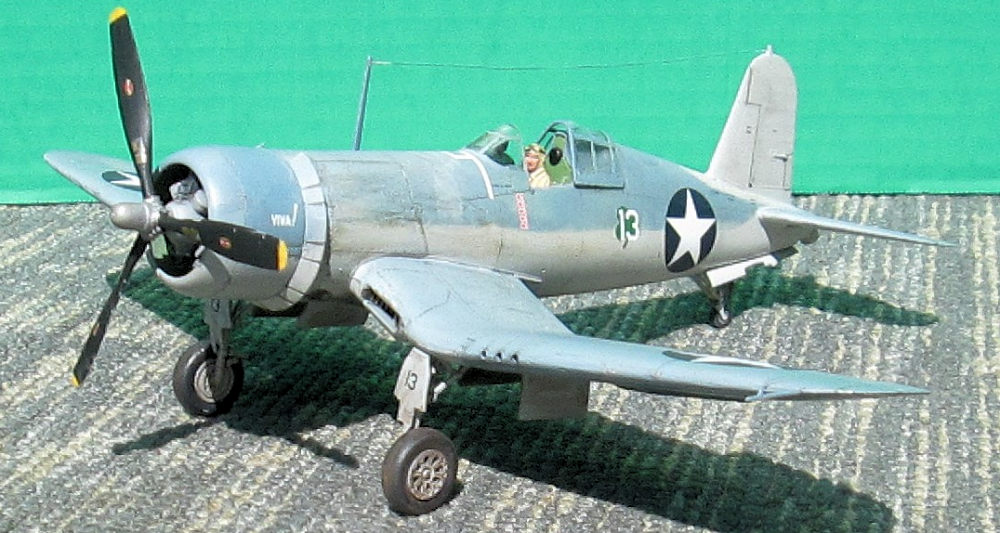
VMF-213 was the first unit to take the Corsair into combat. They arrived at Guadalcanal in February 1943 at the height of the desperate fighting for the Solomon Islands. So VMF-213 literally “wrote the book” on how to fight the new weapon against the Japanese. Lt Kenneth Walsh is noted as the first to achieve “ace” status with the Corsair. Pilots were assigned an airplane, but these were desperate times and the norm was you flew whatever ship was available. There is an old superstition denoting the number 13 as unlucky so, not surprisingly, most pilots tried to avoid # 13. Displaying those qualities inherent in good leaders, Walsh chose to fly the aircraft himself. Thus white 13 became known as Walsh’s plane, cemented into lore by the press coverage of Walsh setting in the plane adorned with five Japanese flags to be lauded as America’s newest “Ace.” Kenneth Walsh would be awarded the Medal of Honor and finish the war with 21 confirmed kills to become the fourth highest scoring Marine Aviator in WWII. The “lucky” four leaf clover painted under the fuselage number also enshrined him into legend as the Marine’s “Fighting Irishman.” Walsh retired from the Marines as a Lt. Colonel after flying transports in Korea.
| THE KIT |
 Released in
the mid-90s, the Tamiya Corsairs remain the best-designed, most out of the box
accurate Corsair kits on the market in my opinion. It is well-engineered with
124 parts in light grey plastic with lightly recessed panel lines. Parts fit is
good to excellent. Good cockpit detail. Options include two varieties of canopy
that can be built open or closed. Wings can be folded or extended. There are
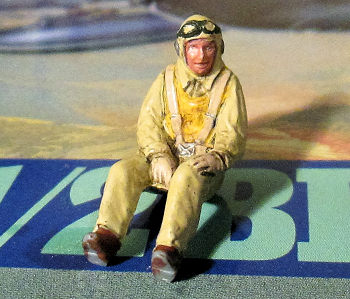
open or closed cowl flap options. A pilot figure is provided should you want
him. A nice drop tank is included and decal options for three aircraft. About
the only things one can find criticism for are the flaps. They can only be
assembled in the down position and there is that step cutout on them that should
not be there.
Released in
the mid-90s, the Tamiya Corsairs remain the best-designed, most out of the box
accurate Corsair kits on the market in my opinion. It is well-engineered with
124 parts in light grey plastic with lightly recessed panel lines. Parts fit is
good to excellent. Good cockpit detail. Options include two varieties of canopy
that can be built open or closed. Wings can be folded or extended. There are
open or closed cowl flap options. A pilot figure is provided should you want
him. A nice drop tank is included and decal options for three aircraft. About
the only things one can find criticism for are the flaps. They can only be
assembled in the down position and there is that step cutout on them that should
not be there.
| CONSTRUCTION |
Not much to write about here. If one follows the instructions and controls the glue flow even a novice should have a nice build. Just a tiny bit of filler used at the belly to wing joins. I assembled the cockpit and painted all that interior green. Various details were hand painted and there is a decal for the instrument panel. Something out of the norm for me (since I’m not very good at it), I decided to do the nice pilot figure. The basic airframe was assembled with no fuss. I filled the step cutout on that flap part and sanded smooth. The fuselage seam needed only a bit of Mr. Surfacer. I chose open cowl flaps and Tamiya does a nice representation of all the exhaust plumbing one can just make out through that opening. Most of the plumbing was molded on the firewall insert making for a painless experience. I can only imagine how such as Eduard would have treated the subject. The piping was painted gun metal and coated with a thinned rust color. The engine case was painted gray and the cylinders Testor’s steel then given a black acrylic wash. The pushrod tubes and other details were picked out in black. I like that little nylon bushing that allows one to just push the prop into place when finished. I painted the gear wells interior green, though that is a subject of much debate.
 I masked the
clear parts for painting with the Montex set. I must say I was disappointed in
them. The pre-cut vinyl worked well on those areas that are flat. But where
there are curves they did not want to stick. On that little bubble at the canopy
top used to place a periscope for looking over the nose, the mask would not work
at all and I wound up using good ol’ Tamiya tape for that and other curvy areas.
I masked the
clear parts for painting with the Montex set. I must say I was disappointed in
them. The pre-cut vinyl worked well on those areas that are flat. But where
there are curves they did not want to stick. On that little bubble at the canopy
top used to place a periscope for looking over the nose, the mask would not work
at all and I wound up using good ol’ Tamiya tape for that and other curvy areas.
There is a flat armored glass panel that is installed behind the windshield. This is the only tricky part of the build. After the windshield was glued in place I applied a small drop of thick cryo to the top and bottom of this panel, stuck the bottom in place and used a toothpick to push the top up against the windshield. The gunsight was painted and glued in place. The glass over the rear fuselage cutouts was next then the sliding hood was tacked in place in the closed position with a dab of clear parts cement to hold in place for painting. Good fit all around. All the openings were packed with wet toilet paper for masking and allowed to dry.
| COLORS & MARKINGS |
These early Corsairs were painted in the blue-gray over light
gray scheme. The Eagle Cals color profile paint guide, backed up by B&W photos
turned up in my research, show that white 13 was painted in a non-standard
pattern, and may be the only ship in the squadron painted this way. I have found
no explanation as to why. A possibility is some paint was splashed on the old
warhorse to spruce it up for its starring role in those media sessions. But
that’s just a guess. These planes operated from primitive facilities at a high
operations tempo in tropical weather. Contemporary photos show extensive wear
and weathering so looks was obviously far down the list of maintenance
priorities. 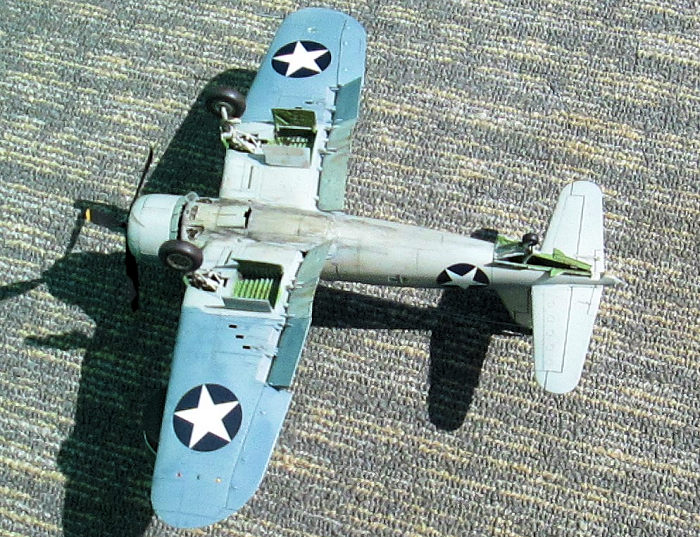
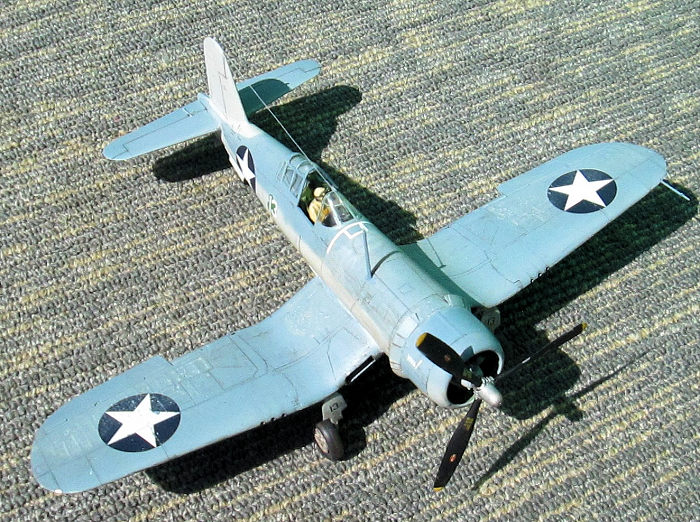
First I airbrushed areas on the wings and cowl I wished to do some paint chipping with Model Master Aluminum. Then I pre-shaded panel lines flat black. The undersides and entire fuselage was painted Model Master light gray acrylic. When dry the lower outer wing panels were masked and sprayed Model Master US Navy blue-gray enamel. Topside I masked the tail area and made some cardboard masks for the fuselage sides to stop any overspray and basically free handed the blue-gray which I lightened a little bit with some of the light gray. I still use my old Aztec 7778 with the screw on nozzles. The paint was thinned to about 25% thinner which in retrospect may have been too thick because much of my pre-shading disappeared. Next I mixed an even lighter shade of 6 parts blue, 4 parts light gray, and 40% thinner. I sprayed a light coat over the top side to lighten it. Finally I misted some highly thinned straight light gray over selected areas. The intent was to depict sun faded paint that was not monotone, you kind of look through the layers. The upper cowling panel does not conform to the demarcation line and appears darker than surrounding surfaces indicating this panel may have been a replacement. I masked and painted this panel straight blue-gray. I think a modeling norm is to contrast fabric covered control surfaces in a slightly lighter shade. But one photo of white 13 clearly shows the fabric covered elevators as darker than the metal stabilizers. Photos also show discoloration on the fuselage sides beneath the fuel tank area, no doubt due to fuel spillage. I spot painted some highly thinned 75% gray 25% blue over that area. Next I used a fine 00 brush to run a tiny line of RLM light blue down each rib of all the fabric covered areas including the wing panels. It’s subtle and can barely be seen in good light, but I think it gives some contrast.
After the paint had set but
not fully cured I used a toothpick and medium sandpaper to chip some areas down
to the aluminum paint. Once the paint had cured for several days I applied a
black acrylic wash to all panel lines. Next I used a red brown pastel lightly
smeared on with a finger behind the cowl to depict some oil staining. Then I
used a black pastel to replicate heavy exhaust stains then a very light touch
around the machinegun ports and shell ejector chutes with a brush. South Pacific
based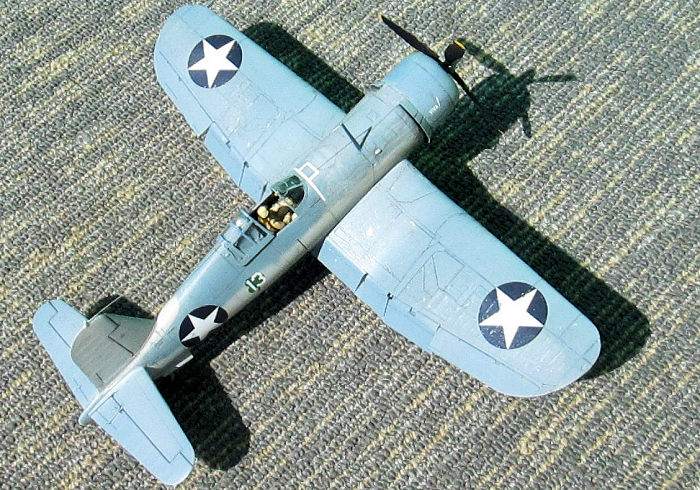 aircraft will really test your weathering skills and are a great modeling
experience, I had fun with mine. The weathering on my Guadalcanal based Corsair
is really a bit understated compared to the real thing, but you have to stop
somewhere. I’m good with it. Lastly I gave it a coat of AV Clear Gloss Acrylic
to seal it all up and prep for decals.
aircraft will really test your weathering skills and are a great modeling
experience, I had fun with mine. The weathering on my Guadalcanal based Corsair
is really a bit understated compared to the real thing, but you have to stop
somewhere. I’m good with it. Lastly I gave it a coat of AV Clear Gloss Acrylic
to seal it all up and prep for decals.
The Eagle Cals are of excellent quality and pretty easy to work with. Don’t soak them too long, just a few seconds in water and they are ready to slide. Thin yet quite opaque, they look good. This sheet offers three options: Walsh’s Lucky 13 (Viva!), CPT James Cupp white 15 (Daphne), and white 18 (Bubbles). No stencils are provided so you will have to use the kit ones. There are also some inaccuracies to be corrected. Most glaring is that Eagle Cals gives you a smaller diameter national insignia for the fuselage of white 13 than those given on the other offerings on the sheet. Why I don’t know. Of course an aircraft’s paint and markings may change with the times, but the photos I have clearly show the fuselage star on white 13 to be standard size. No problem, use the stars from one of the other offerings. No white seam tape for the fuel tank area is provided on the sheet. Now this was something added later due to problems with fuel fumes leaking into the cockpit. Photos of early Corsairs show most without it. But my photos of white 13 (Viva!) show seam tape on the rear portions of the tank area. The kit decals have this and I simply cut it to use the back half. Also missing are the five kill markings prominent in that press photo of Walsh. I wanted that and some are provided on the white 15 offering. I used Micro-Sol on the stars to settle them into the panel lines and they reacted well to it. When dry I did some light sanding with fine sanding film on the wing stars to scratch them up a bit. Next I added a few drops of light gray acrylic in the paint cup with AV gloss. I sprayed this to seal everything up and give a little bit of fading to the decals. When dry I gave it two coats of AV clear flat acrylic.
| FINAL CONSTRUCTION |
 All
masking was removed. Had to scrape a little bleed under off the canopy, not
bad, scraped it off with a toothpick. I painted the wingtip light lenses
silver. With a toothpick I applied a small drop of red, green, and yellow to
the respective ID light lenses under the wing. Assembled the landing gear,
great engineering on that. Looks right and makes for a strong assembly. Gear
legs painted underside color, dirtied up a bit, and black wash applied.
Painted the tires a dark German gray and dirtied up with brown pastels. The
arrestor hook was cut off the tail wheel strut. The prop was painted
aluminum first, when dried it was painted flat black. Prop tips were brush
painted yellow enamel. Then I did some chipping with a toothpick and medium
sandpaper wrapped round a pencil. I glued on the pitot and antenna mast.
When set I added a monofilament antenna wire from fin to mast. The wire is
supposed to V from the fin into the fuselage behind the canopy, but I didn’t
want to fool with that part of it. I pried off the canopy and set in the
open position then dropped in the pilot figure. Push the prop into place and
she was done.
All
masking was removed. Had to scrape a little bleed under off the canopy, not
bad, scraped it off with a toothpick. I painted the wingtip light lenses
silver. With a toothpick I applied a small drop of red, green, and yellow to
the respective ID light lenses under the wing. Assembled the landing gear,
great engineering on that. Looks right and makes for a strong assembly. Gear
legs painted underside color, dirtied up a bit, and black wash applied.
Painted the tires a dark German gray and dirtied up with brown pastels. The
arrestor hook was cut off the tail wheel strut. The prop was painted
aluminum first, when dried it was painted flat black. Prop tips were brush
painted yellow enamel. Then I did some chipping with a toothpick and medium
sandpaper wrapped round a pencil. I glued on the pitot and antenna mast.
When set I added a monofilament antenna wire from fin to mast. The wire is
supposed to V from the fin into the fuselage behind the canopy, but I didn’t
want to fool with that part of it. I pried off the canopy and set in the
open position then dropped in the pilot figure. Push the prop into place and
she was done.
| CONCLUSIONS |
Done right out of the box the Tamiya Corsairs make into an accurate and detailed piece. No glitches or mods needed in construction. It was a welcome break from some of the more challenging offering from Eastern Europe and such. Recommended to all.
| REFERENCES |
References - Internet surfing. Corsair Aces, Musciano, ARCO Publishing 1979. Great Book of WWII Airplanes, Crescent Books 1996.
26 June 2018
Copyright ModelingMadness.comIf you would like your product reviewed fairly and fairly quickly, please contact the editor or see other details in the
Note to
Contributors.
Back to the Main Page
Back to the Review
Index Page
Back to the Previews Index Page