| KIT #: | 5259 |
| PRICE: | $15.00 (X2) |
| DECALS: | Two options |
| REVIEWER: | Dave Cummings |
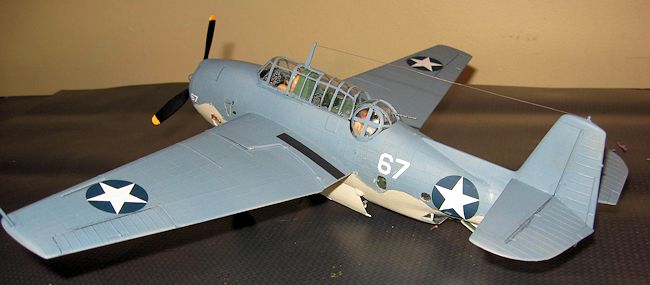
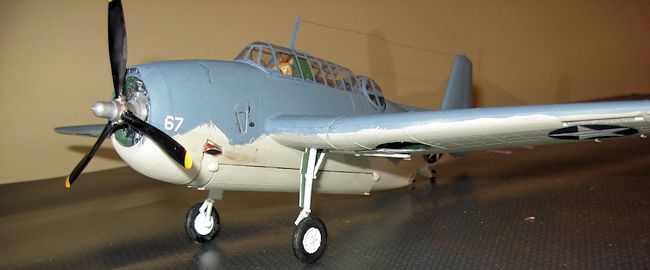
| NOTES: | Model can be posed in flight or parked with bay doors open or closed and wings extended or folded (one benefit of those operating features). |
| HISTORY |
As he circled the carrier awaiting his turn to land, Lt. Ace Cody replayed the
mission in his head. He was proud
that his torpedo drop had been spot on, perfect altitude and speed.
His radio man, looking aft from his ventral position, reported a solid
hit amidships on the Jap battleship.
He was also amazed they had survived the intense anti-aircraft fire.
He remembered vividly the faces of Japanese gunners looking up at him as
he flashed over the ship firing his single machinegun in hopes of making some of
them duck
 then jinking hard right and left to make the TBF a harder target.
He preferred going over his target rather than turning away and showing
his belly to gunners who already had him in their sights.
His turret gunner picked up where he left off; blasting away at those AA
positions as he slammed the throttle to the wall in the desperate attempt to get
them out of range. The sound of
hail hitting a tin roof told him they were not getting away unscathed as
shrapnel from the storm of bursting AA pierced the Avenger’s wings.
But they made it.
then jinking hard right and left to make the TBF a harder target.
He preferred going over his target rather than turning away and showing
his belly to gunners who already had him in their sights.
His turret gunner picked up where he left off; blasting away at those AA
positions as he slammed the throttle to the wall in the desperate attempt to get
them out of range. The sound of
hail hitting a tin roof told him they were not getting away unscathed as
shrapnel from the storm of bursting AA pierced the Avenger’s wings.
But they made it.
Finally, Ace was cleared to land. Landing gear and tail hook down, the radio man reported everything looked good, down and locked. Ace focused on his landing spot on the pitching deck of the dining room table while also keeping the Landing Signal Officer in his vision. The LSO gave him the cut sign and the hook caught the number three wire as the big torpedo bomber slammed to a stop. Ace taxied up behind an SBD, folded the Avenger’s wings, and cut the engine. The sudden silence seemed eerie. Climbing out of the cockpit, he walked over to retrieve his torpedo from the living room carpet. It lay in line with and pointed straight at the shoe box target. He smiled, yep, it was a perfect drop. “Come get your planes honey, I have to set the table.” “OK mom.”
| THE KIT |
I was escorting the wife through the Hobby Lobby feigning an interest in
artificial flowers. When I saw she
was properly absorbed I begged my leave and walked over to the model aisle.
I wasn’t looking to buy anything, but looking at the action of the ships,
planes, and tanks on the kit boxes was much preferable to which color of silk
roses was best.
My gaze settled on a Revell TBF which is the old Monogram kit.
Man, do they still make that? They have even updated it with new markings
for the George Bush TBF. Why?
No serious modeler built that old kit anymore, did they?
I looked at the side panel pronouncing the features of folding wings and
retractable landing gear and was hit with a sudden wave of nostalgia for
innocent carefree days of childhood and home.
I began building model airplanes in the late 50s.
The most affordable at that time were old Aurora
 kits with the pilots
head molded to the fuselage halves.
The Monogram 1/48 series were the wonder kits of their day when they came on the
scene. Realistic and, the biggest
thrill of all, they did stuff. The
Revell-Monogram TBF was one of the earliest of these super kits, copyright 1958.
They were beyond my 8 year old modeling skills and price range at the
time. So it was a few years later
when I could mow lawns and do chores to earn my own money that I purchased my
first Monogram kit, the F4F. But
soon I had my own Monogram carrier air group including the TBF.
Retracting landing gear and droppable bombs meant some serious pretend
combat missions. Deck crew figures
busily carried out their duties. I
built many of those kits in my youth.
The operational wear and tear of innumerable fantasy missions on those
movable plastic parts meant frequent replacement was needed as the old worn out
model was relegated to demolition by firecracker.
kits with the pilots
head molded to the fuselage halves.
The Monogram 1/48 series were the wonder kits of their day when they came on the
scene. Realistic and, the biggest
thrill of all, they did stuff. The
Revell-Monogram TBF was one of the earliest of these super kits, copyright 1958.
They were beyond my 8 year old modeling skills and price range at the
time. So it was a few years later
when I could mow lawns and do chores to earn my own money that I purchased my
first Monogram kit, the F4F. But
soon I had my own Monogram carrier air group including the TBF.
Retracting landing gear and droppable bombs meant some serious pretend
combat missions. Deck crew figures
busily carried out their duties. I
built many of those kits in my youth.
The operational wear and tear of innumerable fantasy missions on those
movable plastic parts meant frequent replacement was needed as the old worn out
model was relegated to demolition by firecracker.
My reverie was interrupted by the wife, “I’m ready to go dear, are you going to
get that?” “What, no, I was just
looking, I mean, I doubt I would build this old thing,” but for some reason I
couldn’t part with it. What the
heck, it doesn’t cost much. I’ll get the
old kit just for nostalgias sake.
Then I remembered that I had better buy two of them.
As soon as I got the chance I eagerly sat down to have a look see.
The box had certainly changed, not the big sturdy box of old but a rather
flimsy one in both English and foreign translations.
Opening the lid was like meeting an old friend you hadn’t seen in a long
time. I had certainly changed over
the years, had he changed? Do you
still have anything in common? I
was immediately taken aback at seeing the kit was no longer in the dark blue
plastic that I remembered. That
blue had meant a realistic Navy plane without having to buy expensive paint.
The kit is now molded in the de rigueur light gray plastic.
Also the plastic seems lighter and more brittle than I remember.
With misalignment from worn molds and
cheaper plastic the movable parts won’t
last very long. The decals
are a definite improvement over the original which were generic markings not of
an actual aircraft. But those did
leave the imagination free to base your Avenger anywhere you desired, like that
mysterious island where dinosaurs still roamed.
The 12 page instruction booklet has 10 well drawn steps, more than adequate for
so simple a kit (except for one glaring omission).
The kit is molded in the USA but the printing is done in China.
The airplane’s history loses something in the translation but the
construction steps seemed familiar enough and are well drawn.
Paint colors are generic with FS numbers
for the two camouflage schemes. Decals
are for two
 aircraft. One is in the standard tri-color scheme from VT-51, USS
San Jacinto, Pilot: Lt (jg) George HW Bush.
The other is from USS Mission Bay in the Dark Gull Grey / Light Gull Grey
Atlantic Anti-Submarine scheme and has the 1943 red surround stars and bars
insignia. Unfortunately President
Bush’s aircraft was a TBF-1C with the wing guns and this kit is a TBF-1.
aircraft. One is in the standard tri-color scheme from VT-51, USS
San Jacinto, Pilot: Lt (jg) George HW Bush.
The other is from USS Mission Bay in the Dark Gull Grey / Light Gull Grey
Atlantic Anti-Submarine scheme and has the 1943 red surround stars and bars
insignia. Unfortunately President
Bush’s aircraft was a TBF-1C with the wing guns and this kit is a TBF-1.
The clear parts are a little hazy with shallow relief framing, which, except for
the turret, bear only a slight resemblance to the actual glazing on TBFs.
The canopy framing depicts a one-piece sliding hood over the pilot,
wrong. The turret assembly looks
the part and I remember was adequate for getting that .50 trained on the Zero my
little brother would sweep in for a deflection shot.
The incorrect ventral window lacks the
.30 stinger. It all could benefit
greatly with a dip in some Future. I
delighted in the familiar and seeing some old acquaintances, the pilot (molded
with his seat), the gunner, that LSO still signaling away with his paddles, and
the radio man running towards the plane.
Time has not been kind to these fellows however.
In this kit they all suffer mold seams, ejector pin marks, and sink
holes.
The old Monogram molds are showing their age with quite a bit of flash, major
ejector pin marks, and sink holes.
There is very little in the way of interior detail.
Experience with the later released P-40B
kit has taught me Revell has some serious quality control issues with this old
series. One box may be OK while the
one next to it on the shelf may be unbuildable due to severely warped parts.
Despite the release of a couple modern mold P-40Bs the old Monogram kit
is still the most accurate in terms of overall shape and dimension so I continue
to build them. But I have learned
to buy two at a time. Hopefully one
of them is buildable and if one does have a bad part then odds are that part in
the other kit is OK.
Taking stock of the TBF parts the
surface detail still looks pretty crisp, raised panel lines, golf ball size
rivets, and all. However this
first kit was unbuildable. The left
fuselage half and wing center section were too badly warped to be usable and
there were numerous nasty sink holes in smaller bits.
You can try using boiling water and work it into shape if you want or
write to Revell for replacements. I
just opened the other kit and it was night and day, this one looked much better
and everything was straight. The
biggest problem with this kit was the propeller which had one blade short shot
and, less serious, the
 LSO’s paddles were short shot also.
So there you go.
If you want one you have to buy two (and hope).
Most everything requires removing flash and sanding rough edges and
ejector pin marks and a few sinkholes will need filling.
All that done fit of the parts is OK.
LSO’s paddles were short shot also.
So there you go.
If you want one you have to buy two (and hope).
Most everything requires removing flash and sanding rough edges and
ejector pin marks and a few sinkholes will need filling.
All that done fit of the parts is OK.
So, I had remade my acquaintance and found we had both changed. It ain’t Accurate Miniatures, but I knew that. If you are looking for an accurate detailed replica, look elsewhere. The purpose of this kit is to have fun, always has been. To that end I decided to build it 1962 stock as a trip down memory lane. Maybe I can find a place to put it, certainly not in the display case. Parked next to my Accurate Miniatures TBF the old pilot molded in his seat would certainly suffer from inferiority complex.
| CONSTRUCTION |
It was as a youth building these kits that I learned one of the basic truths of
model airplanes: construction begins with the cockpit.
The kit has a basic floor and bulkhead with a slot to cement the pilot
to. The cockpit has no sidewalls.
The Pilot is molded with his seat and is holding a joy stick (I assume it
is a joy stick he is holding).
There is an instrument panel decal (no resemblance to actual TBF instruments).
This was called cockpit detail in 58.
So, unless one wishes to create a detailed cockpit out of empty
nothingness the pilot must be used to fill that space.
The completed floor is then cemented to the top wing center section. Next
is assembly of one of the absolute marvels of plastic model engineering, the
operable tail hook/tail wheel assembly.
The tail wheel is lowered and locked by pulling out the tail hook.
Once you have landed you can push the hook back in leaving the tail wheel
down and locked, amazing. Glue the
small radio room side windows in and there you have it boys and girls, a
completed interior. OK, I confess.
I added a forward bulkhead and some radio boxes to the radio compartment.
I couldn’t resist.
With the pilot painted and everything else interior green you now glue the
fuselage halves together trapping the wing center section between.
With a few rubber bands holding it together fit was just OK, needing some
gap filling super glue as filler in places. I
held the trapped wing section against the top of the slot and applied Tenax and
it set up with no wing-to-fuselage gap.
 Step 4 is the turret consisting of a mechanism/gun mount, .50 cal, gunner
figure, and clear turret. At this point
I tackled the most arduous part of the build, masking the turret and the big
greenhouse canopy with Tamiya tape and a surgical blade.
I added the missing frame line over the pilot then airbrushed the
framing. I brush painted the
interior parts and the gunner figure.
Taking pity on the poor Gunner sitting there staring at a blank piece of
metal, I added a tiny square of acetate as a reflector gunsight.
When dry it all assembled easily but I remembered the trouble I had as a
ham fisted youth attaching these parts to the clear turret by squirting tube
glue all over everything. Many of
my gunners had to scan for Zeroes through frosted glass. The turret is really
quite convincing given its simplicity.
I painted the .50 steel with some black details including dotting the
barrel to represent cooling holes. The
instructions have you attach the turret to the fuselage at this point but I left
it off until all painting was complete. It
can be dropped in later. The
instructions have you put the instrument panel decal in place by cutting it out
and gluing, not using it as a decal.
The TBF-1 had dual controls and another seat behind the pilot.
The kit presents only a vague rendering of a seat back there.
I used the instrument panel decal from the other kit and added a control
stick. It’s not much but it’s
something.
Step 4 is the turret consisting of a mechanism/gun mount, .50 cal, gunner
figure, and clear turret. At this point
I tackled the most arduous part of the build, masking the turret and the big
greenhouse canopy with Tamiya tape and a surgical blade.
I added the missing frame line over the pilot then airbrushed the
framing. I brush painted the
interior parts and the gunner figure.
Taking pity on the poor Gunner sitting there staring at a blank piece of
metal, I added a tiny square of acetate as a reflector gunsight.
When dry it all assembled easily but I remembered the trouble I had as a
ham fisted youth attaching these parts to the clear turret by squirting tube
glue all over everything. Many of
my gunners had to scan for Zeroes through frosted glass. The turret is really
quite convincing given its simplicity.
I painted the .50 steel with some black details including dotting the
barrel to represent cooling holes. The
instructions have you attach the turret to the fuselage at this point but I left
it off until all painting was complete. It
can be dropped in later. The
instructions have you put the instrument panel decal in place by cutting it out
and gluing, not using it as a decal.
The TBF-1 had dual controls and another seat behind the pilot.
The kit presents only a vague rendering of a seat back there.
I used the instrument panel decal from the other kit and added a control
stick. It’s not much but it’s
something.
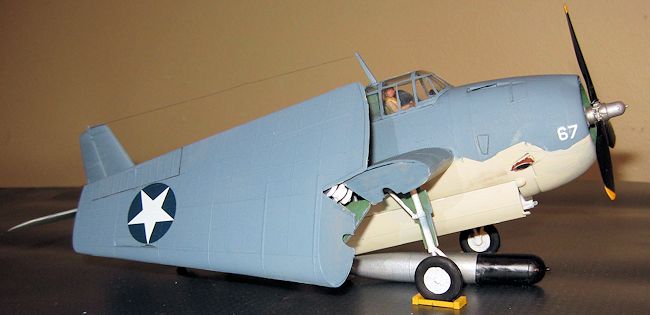
Step 5 is to paint (white struts) and assemble the main landing gear.
The instructions imply the wheels are glued to their axles.
No mention of flaring the axle ends with
a hot screwdriver so the wheels will roll.
This would complicate take-offs and landings so I flared mine like you
are supposed to. The landing gear
doors and triangular access covers all had large ejector pin holes not on the
inside, which would have been OK, but on the outside in front of God and
everybody. These had to be filled
and sanded. The torpedo halves were
cemented together (good fit) and seams scraped and primed.
It was then sprayed Flat Aluminum with a Black warhead.
The bay doors are then attached to their receptacles.
While the instructions caution you not to get glue on the operating
landing gear the bay door instructions seem to imply an option of either doors
open or doors closed. No mention of
an operating door. No instructions on
how to use that lever jutting out at the rear of the right door as a trigger,
operable by the right index finger when the model is held properly in the left
hand, to drop your torpedo. In fact
I think Revell is trying to present some serious scale modeling here by ignoring
the toy feature. But hey, that’s
half the fun. And why bother,
real TBF bay doors are bi-fold so they are wrong anyway.
 There is no separate engine and no cowling per se. There is an engine face
molded in a nose piece. The front
row of cylinders is not bad but there is no indication of a rear cylinder row.
Quite a bit of sanding was required to get a flush fit of the nose to the
fuselage. That done the nose is wedged on tightly by virtue of two large pins
and will stay during painting.
That way I could pull it off after painting to attach the prop shaft and
propeller so it will spin before permanently gluing it.
Hey, I want it all.
There is no separate engine and no cowling per se. There is an engine face
molded in a nose piece. The front
row of cylinders is not bad but there is no indication of a rear cylinder row.
Quite a bit of sanding was required to get a flush fit of the nose to the
fuselage. That done the nose is wedged on tightly by virtue of two large pins
and will stay during painting.
That way I could pull it off after painting to attach the prop shaft and
propeller so it will spin before permanently gluing it.
Hey, I want it all.
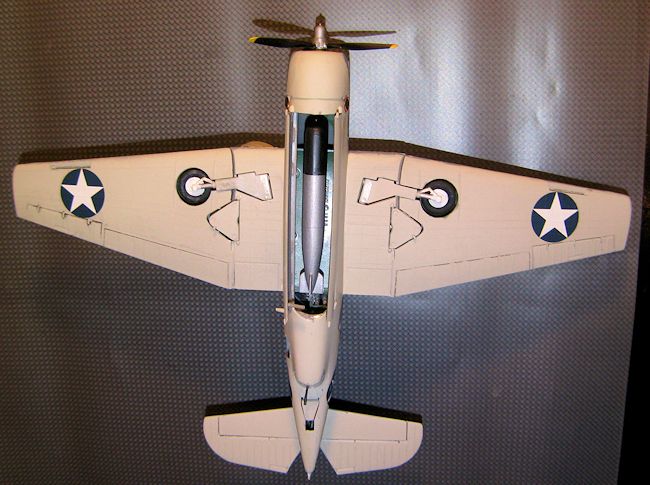
Next is assembling the wing center section bottoms, trapping the landing gear
legs and those triangular access panels and…..wait, something is missing here.
There is no mention of the folding wing hinges in the instructions.
In fact the instructions would have you just glue the wings in the
extended position. What is Revell trying
to do, are they ashamed of the operating features and trying to pass this kit
off as a serious replica? Are they
trying to hide that big wing fold gap?
Or do they realize this operating feature just won’t hold up anymore?
Frantically I searched for those wing hinge parts.
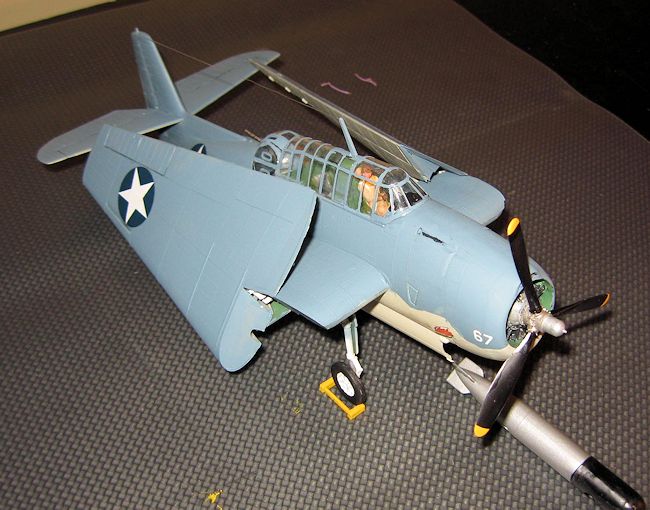
They are there, but apparently Revell is hoping you won’t notice.
With no instructions I was forced to rely on my steadily fading memory of
how to assemble the only really complicated part of the kit.
After much fiddling and experimenting with the parts from that unused kit
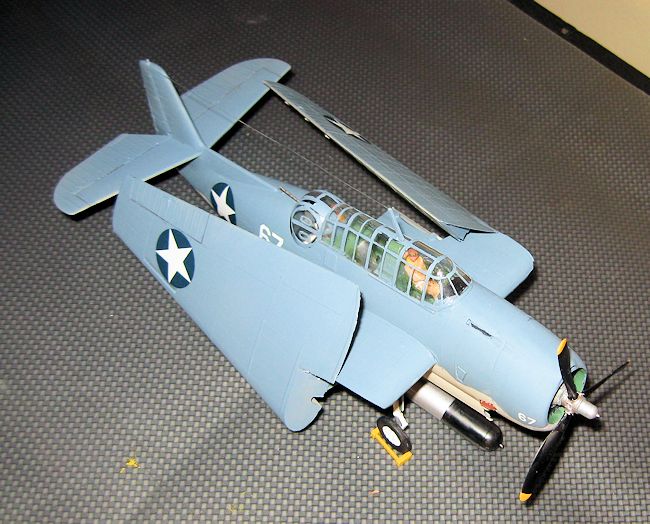
I finally figure it out and achieve the much coveted operating folding wings.
Of course this means keeping those round tabs molded on the wing that
lock them in the extended position and erases any pretense of an accurate
replica. This doesn’t bother me
any, I am having more fun building this model than I have had in a long time.
Monogram made compromises in design to accommodate working features.
There are no main gear retraction struts which would be in the way of the
model’s retractable gear. The bay
doors are designed to release your
torpedo not for realism. These
working features need some clearance to operate and the gaps around these parts
amount to a couple of scale feet when closed.
Though there is no wing/fuselage gap on the top there are huge ones on
the underside. I caulked these with
white glue smoothed with a wet finger.
The horizontal stabs are next. The tops were pretty clean but the undersides are fraught with ejector pin marks. One cleaned up OK by sanding but the marks on the other were pretty deep. I replaced it with the one from the spare kit which also cleaned up with some sanding. There is a Revell copyright statement that needs to be sanded off as well. I attached them to the fuselage and filled some gaps here also. This completes the airframe.
| COLORS & MARKINGS |
 Though the landing gear cannot be attached later after painting it is self
masking by simply retracting it.
This leaves the cockpit, exposed portion of wheels, ventral opening and little
side windows to mask. I filled,
scraped, sanded, and primed any remaining glue seams.
I resisted the urge to tone down the rivets by sanding.
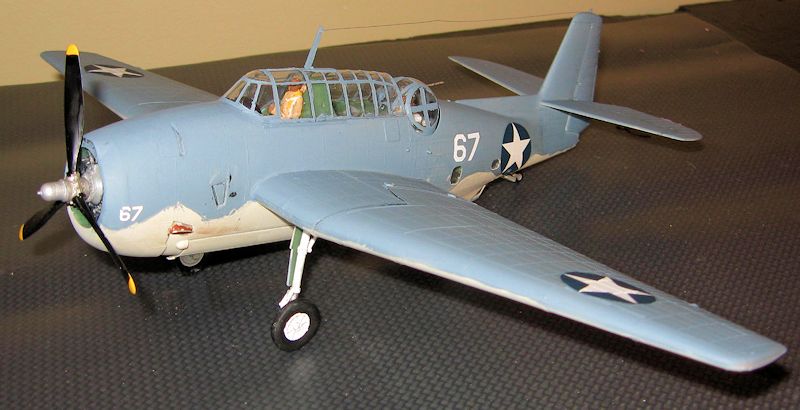
The George Bush plane was out and I had
no information on the other decal option so I decided on a TBF-1 in the early
Blue-Gray scheme (mainly due to paint supply on hand).
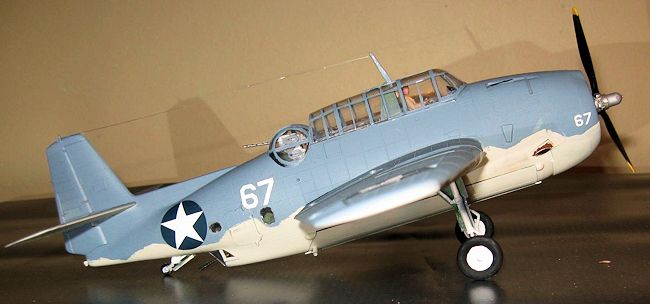
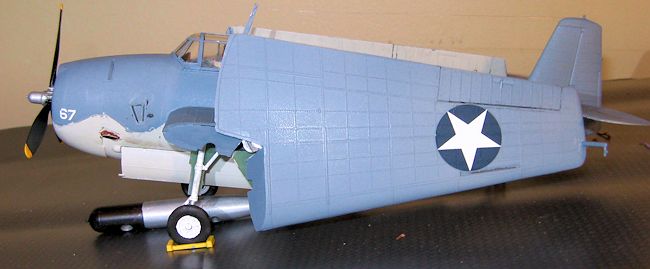
The undersides were sprayed Light Grey.
When dry I coated with Testor’s Clear Gloss before masking the wavy paint
demarcation line with appropriately cut low tack blue painter’s tape.
I airbrushed the uppers Testor’s Acrylic US Navy Blue-Grey.
I now painted the engine to save having to mask.
I painted the background flat black and
the cylinders Steel. There are is no rear cylinder row relief so I hinted at one
with some Steel. When dry I dabbed
on a black wash to bring out the cooling fins.
The crankcase is Grey and semi-gloss Black push rod covers.
I painted the molded depictions of exhausts and cowl gun.
Though the landing gear cannot be attached later after painting it is self
masking by simply retracting it.
This leaves the cockpit, exposed portion of wheels, ventral opening and little
side windows to mask. I filled,
scraped, sanded, and primed any remaining glue seams.
I resisted the urge to tone down the rivets by sanding.
The George Bush plane was out and I had
no information on the other decal option so I decided on a TBF-1 in the early
Blue-Gray scheme (mainly due to paint supply on hand).
The undersides were sprayed Light Grey.
When dry I coated with Testor’s Clear Gloss before masking the wavy paint
demarcation line with appropriately cut low tack blue painter’s tape.
I airbrushed the uppers Testor’s Acrylic US Navy Blue-Grey.
I now painted the engine to save having to mask.
I painted the background flat black and
the cylinders Steel. There are is no rear cylinder row relief so I hinted at one
with some Steel. When dry I dabbed
on a black wash to bring out the cooling fins.
The crankcase is Grey and semi-gloss Black push rod covers.
I painted the molded depictions of exhausts and cowl gun.
I scrounged through the spare decals box
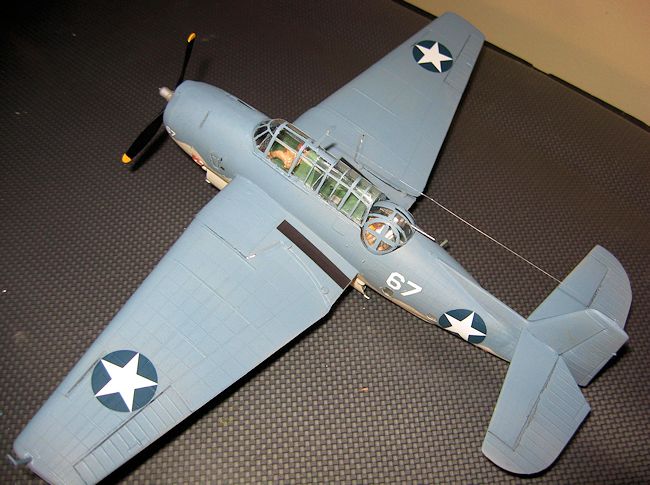
for national insignia and to see what kind of numbers I could come up with.
I found some white numbers that makes the plane look like it belongs
somewhere, maybe that mysterious island.
A coat of Testor’s Gloss was applied and it was time for decals.
The national insignia came from the old
Tamiya F4F kit and are notoriously thick.
It took numerous coats of Micro-Sol to settle them over those rivets.
After wiping the model down I airbrushed a final coat of Testor’s Acrylic
Flat. I made no attempt at
weathering (well, a little exhaust stain, you know).
FINAL CONSTRUCTION
Painting done I removed all masking and attached the turret assembly and then
the canopy with clear parts cement (you have to do it in that order).
Fit was not good causing me to resort to
my dwindling supply of white glue to caulk the gaps.
I drilled a hole in the ventral window, gave it a .30 cal from the spares
box, and cemented it in place. Fit
here also required some white glue filler and paint touch up.
Next I pried off the nose piece to assemble the propeller.
Having one short shot blade I looked to replace
 the prop with the one
from the other kit. Unfortunately,
that prop had the same problem. I
sawed off the bad blade and replaced it with one of the good ones from the other
prop. At this point I felt
like an AVG mechanic trying to assemble one good bird by cannibalizing salvaged
wrecks. The prop was painted, the
nose glued on, and the paint touched up (the prop windmills with ease).
Then the small bits; pitot, antenna mast (the mast on TBF-1s is canted
backwards a bit), and some monofilament antenna wire.
I sanded off those tabs sticking out
from the radio compartment door and for the first time in my life assembled the
door open. Any ragged places were
touched up and she was done.
the prop with the one
from the other kit. Unfortunately,
that prop had the same problem. I
sawed off the bad blade and replaced it with one of the good ones from the other
prop. At this point I felt
like an AVG mechanic trying to assemble one good bird by cannibalizing salvaged
wrecks. The prop was painted, the
nose glued on, and the paint touched up (the prop windmills with ease).
Then the small bits; pitot, antenna mast (the mast on TBF-1s is canted
backwards a bit), and some monofilament antenna wire.
I sanded off those tabs sticking out
from the radio compartment door and for the first time in my life assembled the
door open. Any ragged places were
touched up and she was done.
| CONCLUSIONS |
 Doubling the cost by buying two kits is both necessary and very annoying.
With the new packaging and markings I think Revell is trying to pass off
the re-release of this old Monogram kit as something new.
Given the combination of worn molds and shoddy quality control this once
proud kit is a sad reflection of its former self.
In the course of posing the kit for pictures the wings were operated
about a dozen times when the left wing hinges snapped.
Revell’s answer I’m sure would be I did
not follow the instructions. Newer
generations of modelers that never experienced the glory days of Monogram could
grow to resent this new offering as a cheap rip-off when they get hold of one of
the badly produced kits. In my opinion
Revell should retire these old molds while they still retain some dignity among
us older crowd.
Doubling the cost by buying two kits is both necessary and very annoying.
With the new packaging and markings I think Revell is trying to pass off
the re-release of this old Monogram kit as something new.
Given the combination of worn molds and shoddy quality control this once
proud kit is a sad reflection of its former self.
In the course of posing the kit for pictures the wings were operated
about a dozen times when the left wing hinges snapped.
Revell’s answer I’m sure would be I did
not follow the instructions. Newer
generations of modelers that never experienced the glory days of Monogram could
grow to resent this new offering as a cheap rip-off when they get hold of one of
the badly produced kits. In my opinion
Revell should retire these old molds while they still retain some dignity among
us older crowd.
That said; fixing the many problems was not that difficult.
Not being under any pressure to achieve the realism that a modern,
quality (and expensive) kit deserves, this was a fun build.
It is a hybrid, somewhere between scale replica and toy.
But there is no doubt it is a TBF and looks somewhat respectable after
all the work put into it. I decided
to place it in the display case after all.
With wings folded it won’t take up much room, and those folded wings hide
a multitude of sins. And should
anyone ever want a closer look at it I could use the occasion to relate “those
thrilling days of yesteryear.” So I
carried it from my hobby room to the display case located in the family room
downstairs. Wings locked, gear up,
it is her maiden flight after all.
As I exited the stairway into the family room I noticed a shoe lying over near
the couch. It looked like…..yes, it
is!
Ace Cody nervously jammed the intercom button, “pilot to crew, this is it, here
we go.” As he leveled out just over
the pitching waves the Jap Cruiser filled his windscreen.
From long years of training his right index finger automatically sought
the torpedo release lever, located at the right rear of the bay doors.
| REFERENCES |
Only many, many fond memories.
February 2014 If you would like your product reviewed fairly and
fairly quickly, please
contact
the editor or see other details in the
Note to
Contributors.