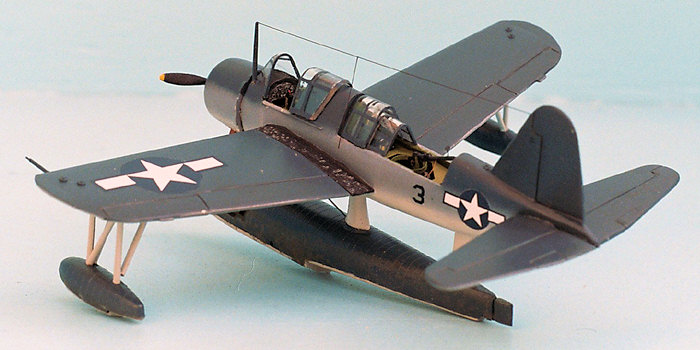
| KIT: | MPC/Airfix 1/72 OS2U-3 Kingfisher |
| KIT #: | ? |
| PRICE: | $10.00 for a mint condition kit at a swap meet. |
| DECALS: | Yes |
| REVIEWER: | Tim Cromartie |
| NOTES: |

| HISTORY |
This kit is my second MPC Kingfisher. I built the first one in 1977, and it was no prize-winner, missing a few non-essential parts like the propeller and one of the pontoons.
Looking back on that incomplete kit, it was a luxury to find an old Kingfisher sealed and mint in the box, for just $10.00.
The Chance Vought Kingfisher fulfilled a U.S. Navy Bureau of Aeronautics requirement in the late 1930’s for an observation scout seaplane (hence the “OS” in “OS2U-3”) capable of land- or water-based operations. Its pontoons could be removed and replaced with fixed landing gear. The land-based version took its maiden flight in March 1, 1938. Fitted with pontoons, it first flew as a seaplane on May 19. The prototype Kingfisher, designated XOS2U-1, was subsequently delivered to the U.S. Navy in July 1938.
 The
XOS2U-1 featured a number of design innovations: it was the first aircraft to
be spot welded, and the fuselage was of all-aluminum alloy monocoque
construction. Only the rear components of the wing and the movable control
surfaces were fabric-covered. The powerplant was a Pratt & Whitney air-cooled
radial Wasp of 450 h.p., giving the Kingfisher a top speed of 171 mph at 5,000
feet. Weight was 3,213 pounds; wingspan 35 ft. 11 in.; length 33 ft. 7 in. It
entered service in 1940 as the OS2U-1. Two other versions followed, the OS2U-2
and OS2U-3, the latter entering service with the British Royal Navy as the
Kingfisher I.
The OS2U-3 was the most numerous variant of the Kingfisher with over 970 examples built, and the only version of the Kingfisher to be exported. The OS2U-3 entered U.S. Navy service on May 23, 1941 (the time of the Royal Navy’s frantic hunt for the German battleship Bismarck, in part with observation aircraft; Bismarck sank HMS Hood just two days later on May 25th, and was itself sunk on May 27th). The OS2U-3 was externally identical to the -1 and -2, but had additional armor, bringing its empty weight up to 4,560 lbs. Performance remained unchanged with a top speed of 171 mph, and a cruising speed of 152 mph. Its rate of climb was 800 feet per minute, its range 908 miles, allowing it to remain aloft for six hours.
Its service record of observation, coastal patrol, dive bombing and rescue operations proved the Kingfisher to be rugged and reliable, the lines of its basic airframe vaguely reminiscent of its cousin, Chance Vought’s F4U Corsair. The most famous Kingfisher mission was the rescue of Captain Eddie Rickenbacker (of World War I fame) and others on November 13, 1942 after 24 days at sea. Their B-17 had been forced to ditch in the vicinity of the island of Samoa in the South Pacific, and the Army Air Force had nearly given them up for dead after searching unsuccessfully for two weeks. Rickenbacker, by 1942 a civilian airline executive, had been on a mission for the War Department to get a secret message to General MacArthur. Rickenbacker and his party were located by a Kingfisher and hauled aboard, but the plane was too overloaded to take off. The Kingfisher taxied through 40 miles of heavy seas to safety, allowing Rickenbacker to deliver his message.
In addition to the United States and Great Britain, Kingfishers were flown during WWII by the Soviet Union, Australia, Chile and Uruguay, in each case fulfilling the observation and anti-submarine patrol roles. Total production of the Kingfisher numbered about 1800, and had ended by 1946.
| THE KIT |
 You get your standard early
1970’s MPC polystyrene with raised panel lines, no great amount of detail but
few construction headaches. The cockpit is predictably Spartan -- a pilot glued
to a seat and no instrument panel. The kit features a choice of pontoons or
fixed conventional landing gear, a pair of 100-lb. bombs, and a surprisingly
detailed .30 caliber machine gun for the radio man/rear observer’s position.
MPC also included optional chrome parts and decals with garish customizing
options, typical of their kits in the early 1970’s. Given the age of the kit,
the decals were shot and I set them aside.
Aftermarket Updates
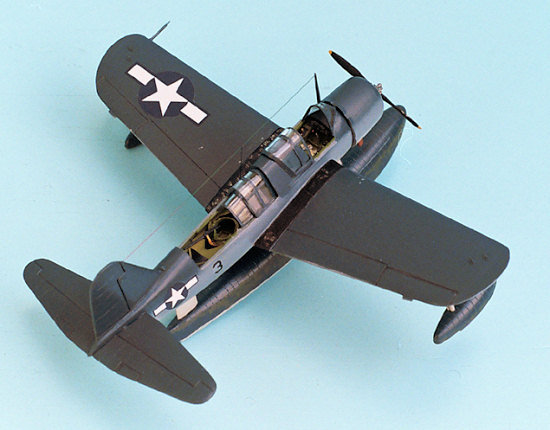
I updated the kit with an assortment of 1/72 scale extras: a photo-etched cockpit detail set from White Ensign Models, a resin .30 caliber machine gun with brass ammo belt from Extra Tech for the rear observer’s position, an Eduard gunsight, Aeromaster decals (Kingfishers Part I), resin 100-lb. bombs from True Details, and a white metal Hamilton Standard two-bladed propeller (the 9-foot version used on the real Kingfisher), by Aeroclub.
| CONSTRUCTION |
I began
by cutting and sanding down the cockpit bulkheads to make way for the White
Ensign photo-etched cockpit. This detail set provides a complete cockpit and
rear gunner/radio man’s position, complete with a hanging bucket seat, straps
and a mounting ring for the rear machine gun. The White Ensign set challenges
the modeler to push the envelope a bit, as you have to scratch-build a radio
from sheet styrene (the photo-etch set contains the radio face only). I
airbrushed most of the cockpit components with Polly S Interior Green before ass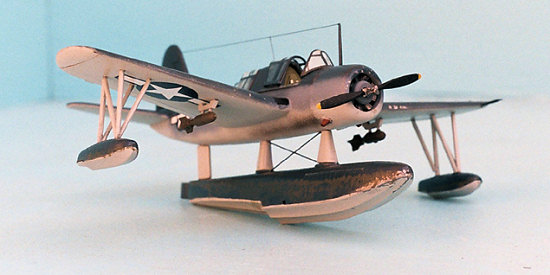 embly,
but didn’t paint the seat straps until I’d glued them down with cyanoacrylate
glue. White Ensign’s detail set is great and well worth the ten bucks, a
quantum leap over the kit interior.
The wings and tail planes attach simply enough but it takes effort to get them to align properly. I repeatedly referred to a head-on schematic in Squadron’s book on the Kingfisher to get the alignment right, and had to remove the port wing, file down the slot for its spar and re-attach it before I was satisfied. Even after the c.a. glue had dried, there was a little too much play in the wing. I filled the join seams between the wings and the fuselage with Milliput putty, which when set, not only filled the gap but strengthened the airframe.
Next I turned to the engine assembly, painting the kit engine and cowling interior. The shaft of the metal Aeroclub propeller had too small a diameter, so I cut it off, filed down the stub, and replaced it with the kit’s plastic propeller shaft, gluing it to the metal prop blade with JB Weld two-part epoxy.
Before airbrushing the plane itself I glued on the cowling (minus the engine and propeller) and canopies for the cockpit and rear gunner’s position with Elmer’s Glue and taped them up. There were still a few gaps around the edges, so I covered them with thin rolled strips of Blue Tack.
After airbrushing the camouflage job, I let it dry overnight, then sealed it with Microscale Micro Gloss. Then I removed the tape on the canopies, did touch-up painting, removed the canopies, and did clean-up and painting on them. I wanted the cockpit canopy open to reveal the detail, and had to use 5-10 second cyanoacrylate glue to get it to stay in place. The remaining canopies I glued on with Elmer’s. Only then did I turn to the pontoons.
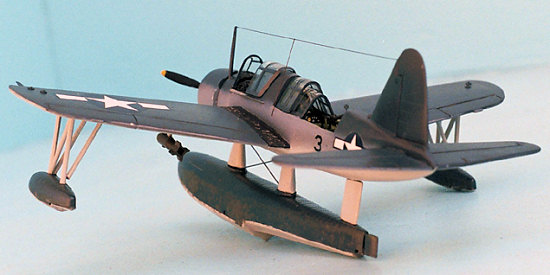
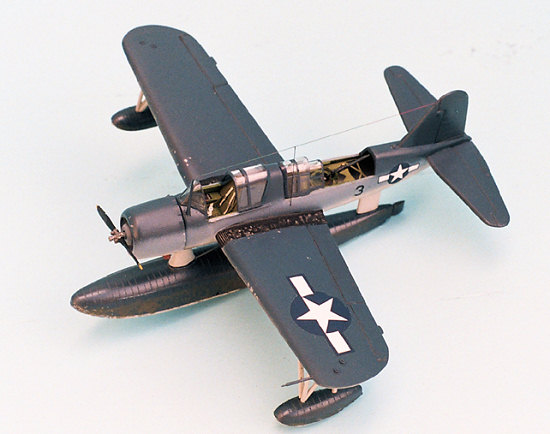 Mounting the pontoons was the
only major construction challenge. Before gluing the fuselage halves together,
I did not check to make sure I had cut out the slots for the main pontoon
mounts, assuming that the defects in the plastic I’d spotted along the
centerline were where the holes should be. This wasn’t so, partly because I’d
done such a fine job of hiding the centerline join seam with Milliput. I wound
up having to make cuts with an Xacto blade and a pin vise drill to create the
proper holes – not a pleasant thing when you have already painted and sealed the
fuselage. Once the touch-up was done to hide the damage done to the paint job,
the main pontoon did not want to align properly, and it took a bit of fiddling
to get it to settle down.
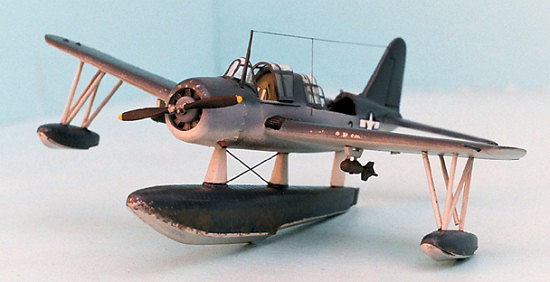
The “outrigger” wing pontoons being much smaller, I expected no problems with them. Be warned if you build this kit - although their main struts are fine, their support struts are all simply too long. After some cutting and sanding, I got them to an appropriate length and with effort got them lined up and glued on, actually touching the main support struts and looking a bit more accurate. The inboard holes in the pontoons where the support struts should have fit then had to be puttied, sanded and painted over.
| COLORS & MARKINGS |
Painting
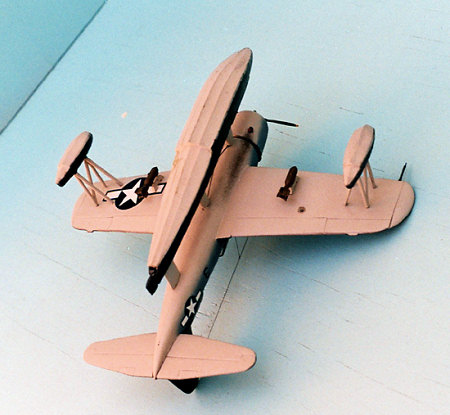 First I gave the Kingfisher a coat
of Rustoleum grey primer. The Kingfisher is painted entirely with acrylics in
the Navy’s mid-late WWII three-tone camouflage scheme. I used Gunze Sangyo
semi-gloss Navy Blue (H53) over the lighter Model Master U.S. Navy Blue Gray for
the upper surfaces. The underside of both the Kingfisher and its pontoons is
Gunze Sangyo gloss U.S. Navy Light Gull Grey (H51). The canopy frames and the
upper surfaces of the pontoons are Gunze Sangyo Navy Blue. The engine exhaust
pipes are Model Master Rust, and the exhaust streaks are a mix of two Polly S
acrylics, Imperial Japanese Army Brown and Scale Black, at a ratio of 3:1. The
machine gun is done in Model Master enamels, Flat Black beneath a wash of
Gunmetal as a top finish.
Decals
Aeromaster decals are some of the best in the business, and their Kingfisher offerings are no exception. There are relatively few markings on the version I chose, an OS2U-3 operating off the battleship USS Baltimore in February 1944. Aside from the national insignia, there is only the number “3” toward the rear fuselage, and a pair of small tail markings. Ironically, they are nearly identical to the original kit decals, right down to the number “3” on the fuselage. The only difference is that the national insignia on the kit decals had a red border.
| CONCLUSIONS |
The MPC Kingfisher is a detailer’s dream. I highly recommend it if you are up for a fun project using aftermarket add-ons. My only criticism other than the pontoon struts is that the canopies don’t fit all that well, and for accuracy’s sake an aftermarket periscope sight is needed for the pilot’s position. Someday I hope to see Squadron or some other supplier out there introduce a 1/72 Kingfisher canopy…
| REFERENCES |
 OS2U Kingfisher in Action,
Squadron/Signal Publications, 1991;
Jane’s Fighting Aircraft of World War II, Random House Group Limited, 2001;
Wikipedia.org;
MPC Kingfisher instructions.
September 2007
If you would like your product reviewed fairly and quickly by a site that has 400,000 visitors a month, please contact me or see other details in the Note to Contributors.