Classic Airframes 1/48 Curtiss SBC-4 Helldiver
| KIT #: | 411 |
| PRICE: | $28 Euros |
| DECALS: | Two options |
| REVIEWER: | Spirios Pendedekas |
| NOTES: | Multimedia short run kit |
| HISTORY |
The Curtiss SBC Helldiver was a two-seat scout bomber and dive bomber built by the Curtiss-Wright Corporation. It was the last military biplane procured by the United States Navy. Delivered in 1937, it became obsolete even before World War II and was kept well away from combat with Axis fighters.
 The SBC was an all-metal, two-seat scout-bomber biplane with “I”-type
interplane struts. It was the last combat biplane the Navy purchased and the
last combat biplane manufactured in the United States. The two crewmen, pilot
and radio operator/gunner, were housed in tandem cockpits enclosed by a sliding
canopy and the turtledeck behind the rear cockpit could be folded down to allow
the gunner to use his machine gun. The wings, rudder, elevators and flaps were
fabric covered. The main landing gear retracted into wheel wells in the fuselage
just forward of the lower wing and the tail wheel retracted into the fuselage.
The SBC was an all-metal, two-seat scout-bomber biplane with “I”-type
interplane struts. It was the last combat biplane the Navy purchased and the
last combat biplane manufactured in the United States. The two crewmen, pilot
and radio operator/gunner, were housed in tandem cockpits enclosed by a sliding
canopy and the turtledeck behind the rear cockpit could be folded down to allow
the gunner to use his machine gun. The wings, rudder, elevators and flaps were
fabric covered. The main landing gear retracted into wheel wells in the fuselage
just forward of the lower wing and the tail wheel retracted into the fuselage.
Production variants were the SBC-3 and SBC-4, their main difference being a more powerful engine at the -4,and, as consequence, heavier armament and increased payload.
In total, 257 SBCs were built, their primary users being the US Navy and Marine Corps, Royal Air Force and French Navy.
| THE KIT |
According to Scalemates, this kit was released in 1997 as SBC-4, followed by the almost identical SBC-3 version soon after, and has never been re-released by anyone since then. You can read a nice inbox review for the almost identical Classic Airframes SBC-3 “sister” kit by Kelly Jamison here).
The kit comes in a typical (for the time) Classic Airframes box with a
nice box art. Inside you can find your typical limited run multimedia contents,
consisting of low pressure injected, resin and PE parts.
The injected parts sport recessed panel lines, and include the two
fuselage parts (split in half), two piece top wing, one piece lower wing, four
piece horizontal stabilizers, one piece three blade propeller, two piece (split
in half) c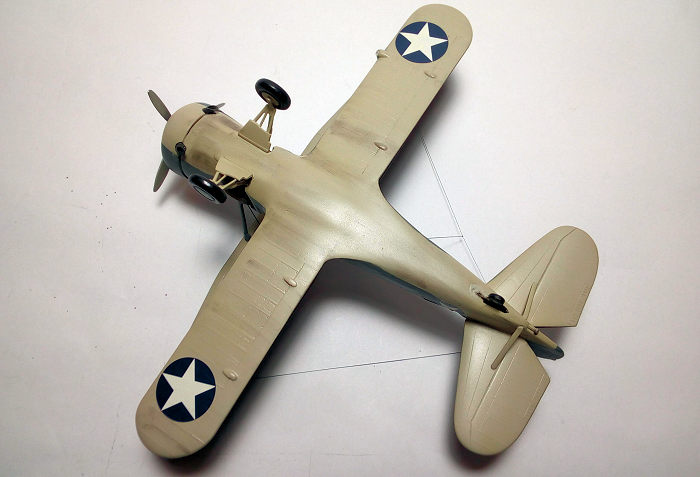 owling, wing ang landing gear struts, main wheels (split in half),
main gear doors , gunsight, hook, bomb support and an optional wing mounted
camera. Due to those years low pressure molding technology, details are a bit on
the soft side.
owling, wing ang landing gear struts, main wheels (split in half),
main gear doors , gunsight, hook, bomb support and an optional wing mounted
camera. Due to those years low pressure molding technology, details are a bit on
the soft side.
Resin parts are nice and include the cockpit floor, seats, cockpit details, engine crankcase with separate cylinders, exhausts, the tailwheel, two beautiful bulkheads to form the characteristic and very prominent MLG wheel well, a nicely cast two piece bomb, a gun and a few other bits.
The PE fret is equally impressive and includes two internal cockpit framings, instrument panel, rear gunners surrounding plate and gun mount, seat belts and other small bits and levers mainly for cockpit detailing. There are two acetate films with printed dials to install them under the PE dials. I seldom use this feature, but they are there for you, if you want to. The canopy is a nice clear vacform piece, with two provided, just in case of a mishap.
Instructions are very good, with a detailed history at the front,
followed by a parts breakdown and 15 clear and consisting steps for building,
rigging, antenna wire positioning and painting/marking.
Excellent looking decals are provided to finish an VMO-151 plane
at Samoa, 1942, or a French Aeronavale, based in Martinique in 1940.
The overall impression of the kit is definitely that of an old school limited run kit, but very well executed in all aspects. I saw this kit at an Athens hobby shop in 2004, forgotten on a shelf, at a nice price of 28 Euros. Not often seing built, it just sparkled my temptation towards less common subjects; I just grabbed it and immediately started building it. The finished model held on well through the years, as were my memories of all construction, painting and weathering details. Due to the rarity of the subject, I decided to dust it off, take a few pics and write a review to be published at my beloved site here.
| CONSTRUCTION |
Starting with the cockpit, I glued the PE inner framings. I then
assembled and glued in their respective positions (floor or sides) the
following: instrument panel, front foot pedals, throttle and other levers, radio
boxes, rear console, front and rear seats and control sticks. Basic cockpit
colour is interior green (Hu226) with
 a black wash to bring out the details.
Instrument panels, console fases, lever switches and radio boxes were painted
black, their details picked up in white/red/yellow. Gunner's cushion was painted
Olive Drab. The beautiful PE seatbelts were added, painted a custom made “linen”
colour with silver buckles. The cockpit floor and
the two bulkheads were attached to the right side of the fuselage. The wells
area was painted Hu11Silver, also with a black wash, to replicate the “aluminum”
shade that it was painted.
a black wash to bring out the details.
Instrument panels, console fases, lever switches and radio boxes were painted
black, their details picked up in white/red/yellow. Gunner's cushion was painted
Olive Drab. The beautiful PE seatbelts were added, painted a custom made “linen”
colour with silver buckles. The cockpit floor and
the two bulkheads were attached to the right side of the fuselage. The wells
area was painted Hu11Silver, also with a black wash, to replicate the “aluminum”
shade that it was painted.
Then the left fuselage half was dry-fitted. As expected, fit was not good, needing trial and error sanding/fitting loops. When the fit was satisfactory, I glued the fuselage halves together. I then proceeded to the resin engine, fitting the 9 cylinders to the crankcase. Crankcase was finished in Hu140 grey (heavily silver drybrushed), with the cylinders Hu11, heavily blackwashed.I assembled the two piece cowling and painted the insides Hu11. The propeller was cleaned, painted Testors Steel, with tips blue/yellow/red by using the kit supplied decals.
I then glued the bottom wing and the two piece horizontal stabilizers to the fuselage. It took some quality time to align them, but all went well. The beautiful PE gunner' s top fillet was installed too. The two piece top wing was assembled as well.
I then proceeded to fill and sand all gaps and imperfections and I also
cleaned all struts from flash, as I wanted to have everything sanded and smooth
prior to attaching the top wing. I also studied the rigging diagram and drilled
micoholes at the corresponding positions, as it can be hard or ev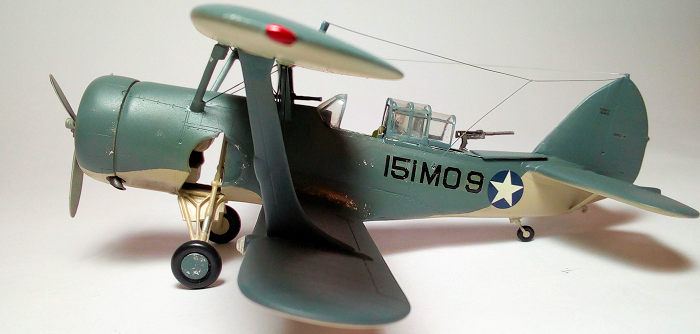 en impossible
to perform such a task with the top wing attached.
en impossible
to perform such a task with the top wing attached.
It was time to attach the top wing! This is a delicate procedure, so you must take your super quality time here. The exact process might depend on each modeler's preference. Here's what I did: I glued all 6 struts at the top wing, trying to set them at the correct angles. Upon drying, I attached the whole structure to the model. There are positive cuts for the outer big struts that help setup the wings a lot, so they were glued in place. Then, as there are no positive inserts on the fuselage top, I “played” a bit with the four small fuselage attaching struts, moving them around, as to obtain a positive and correct dry fit. When satisfied, I glued them on the fuselage with liquid glue, using as much capillary action as I could. Again, use your best aligning qualities here, micromoving the struts if needed, before the glue sets.
I let the structure drying and went on to assemble the two main wheels. The one piece main landing gear legs and the resin rear wheel/strut were cleaned at this time too, to be ready for painting. The two piece resin rear gun with its nice PE base was assembled and painted gun metal. The next day, I inspected my SBC and was happy with the alignment. Having already everything filled and sanded, I masked the cockpit, engine and the distinctive wheel welI areas, and headed to the paint shop.
| COLORS & MARKINGS |
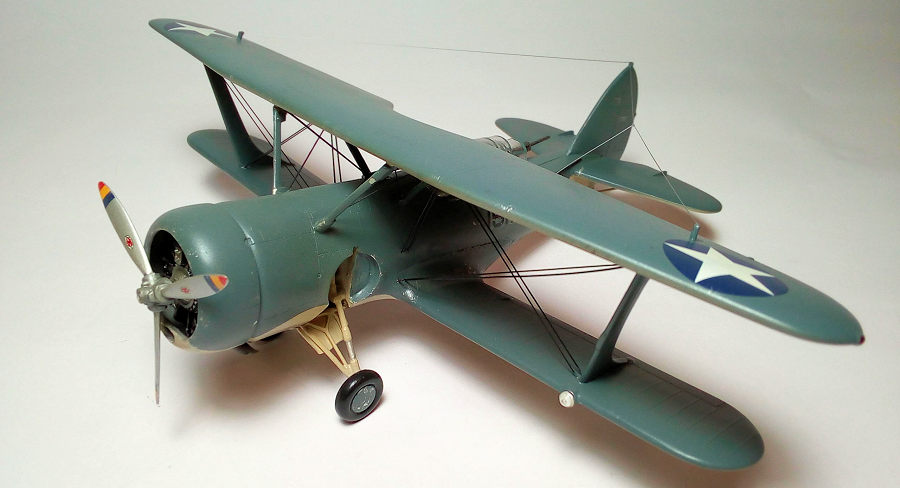
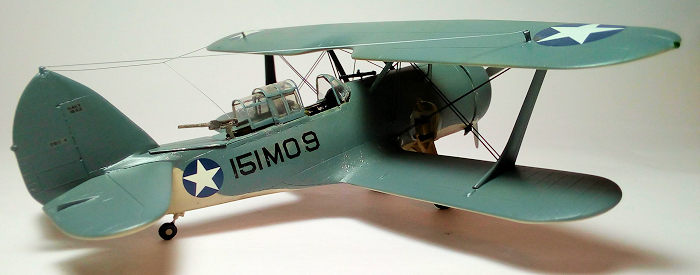
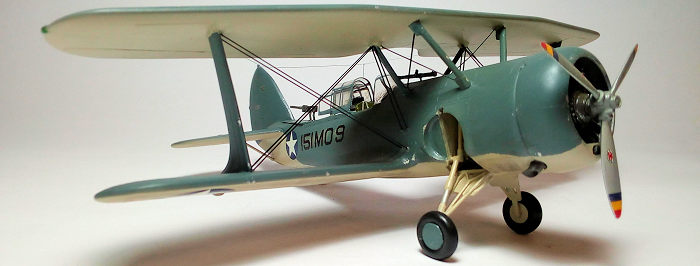
Having decided to represent a1942 VMO-151 bird, based in Samoa island, I painted the undersides, together with the MLG legs, Hu196 (for USN Light Gray). After some masking (which was a bit demanding around the struts), I gave the topsides (plus the lower wing topside) a coat of Hu144 for USN Blue Gray).
Upon drying, I gave the whole model a coat of Future and went on with the decals. I chose the later type insignia without the red circles, as I thought they would look cool. The decals behaved well. I experienced some silvering at the fuselage ID numbers, but It might be my fault of not well prepared surfaces. After decalling, a coat of future sealed everything in.
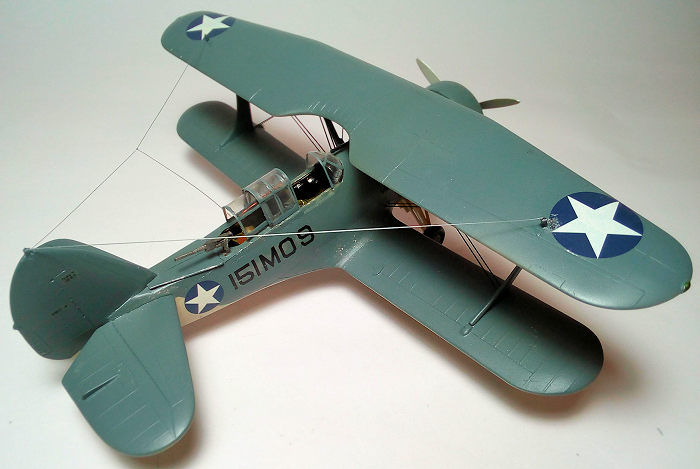
 The rigging was performed using black stretched sprue. Having the holes
already drilled, it was only a matter of positioning the stretched sprue pieces
in, with a smear of cyano securing them in place. I then installed the main
landing gear struts and attached the wheels, their hubs painted intermediate
blue, as per instructions, and tyres painted black.
The two exhausts were painted Testors Burnt Metal and attached to their
corresponding recesses.
The rigging was performed using black stretched sprue. Having the holes
already drilled, it was only a matter of positioning the stretched sprue pieces
in, with a smear of cyano securing them in place. I then installed the main
landing gear struts and attached the wheels, their hubs painted intermediate
blue, as per instructions, and tyres painted black.
The two exhausts were painted Testors Burnt Metal and attached to their
corresponding recesses.
The model was given a mild weathering, consisting of light silver drybrushed paint chipping, exhaust stains, dirt and grim at places they were expected to be found, using my pastel chalks. After feeling that the weathering was adequate, I gave the whole model an uneven coat of satin finish (70% Hu 35 and 30% Hu Matt Cote).
Upon drying, the port wing front light transparency was affixed, its base highlighted in silver. The two navilights were replicated by putting a drop of clear paint onto the already dried silver painted spot (with my Pilot Extrafine silver pen). The vacformed canopy was detached in its components and carefully hand painted. When dry, the pieces were attached in “open” position (with white glue), so the nice cockpit details could be seen. At this time the gunsight was added, painted black.
The distinctive antenna wires were fabricated with silver stretched sprue, attached to their corresponding positions with cyanoacrylate and tightened by heating with my wife's hairdryer. I then called this baby done!
| CONCLUSIONS |
 This is by all definitions an old school short run multimedia kit: the
low pressure styrene parts require a lot of work, so a decent fit can be
achieved. The same goes for the very nice, but very labor demanding resin parts,
not to mention the PE stuff, that need their particular attention too. With the
addition of rigging requirements and the quite complicated masking, it can
clearly be stated that this kit is not for the novice, but for the modeler who
will have built a couple of “simpler” short run multimedia kits.
This is by all definitions an old school short run multimedia kit: the
low pressure styrene parts require a lot of work, so a decent fit can be
achieved. The same goes for the very nice, but very labor demanding resin parts,
not to mention the PE stuff, that need their particular attention too. With the
addition of rigging requirements and the quite complicated masking, it can
clearly be stated that this kit is not for the novice, but for the modeler who
will have built a couple of “simpler” short run multimedia kits.
The finished model looks very nice and imposing, not so often seen bult, thus raising some interest. The French Aeronavale grey/green over light blue scheme is also very nice, not to mention the flamboyant yellow wing schemes of the SBC-3 “sister” Classic Airframes kit.
Should you have some previous experience and be interested in the subject, you can consider building one! The only problem is to find one, as it has never been re-released and not many are around for sale.
Happy modeling!
| REFERENCES |
Wikipedia (for the historical section)
The net (for pics, drawings and any other helpful info)
23 February 2021
Copyright ModelingMadness.com. All rights reserved.
If you would like your product reviewed fairly and fairly quickly, please contact the editor or see other details in the Note to Contributors.
Back to the Main Page Back to the Review Index Page Back to the Previews Index Page