Academy/Minicraft 1/72 PV-1 Ventura
| KIT #: | 1678 |
| PRICE: | AUD$5.00 |
| DECALS: | One option |
| REVIEWER: | George Oh |
| NOTES: | A typical older kit without rivets. |
| HISTORY |
The Lockheed Corporation was formed in 1926. In 1934, it produced the portly, low-wing, twin-engined, twin-tailed Lockheed Electra with a two-man crew and able to accommodate ten passengers. Lockheed stayed with the format, but developed and enlarged it to produce the Super Electra in 1937, the Hudson bomber (with a mid-upper gun turret) in 1938, the Loadstar in 1939, the Ventura in 1941 and the Harpoon in 1943.
 The Ventura
was a bomber with twin guns mounted in a turret in the middle of its spine, and
in a station under its tail (a tail stinger), and high in the nose (fired by the
pilot). It was accepted into the RAF in 1941 and started operations in 1942. But
they lasted only a year in service before being replaced by the Mosquito. It saw
service with the RAAF, RCAF, SAAF, RNZAF, USAAF and the USN. The US Navy
received navalised versions in Dec 1942, and named it the PV-1 Ventura. They
commenced operations as anti-submarine patrol bombers in Feb 1942 and entered
combat in Apr 1943 in the Aleutian Islands against the Japanese. Their other
areas of operations was over US coastal waters and in the South West Pacific
region.
The Ventura
was a bomber with twin guns mounted in a turret in the middle of its spine, and
in a station under its tail (a tail stinger), and high in the nose (fired by the
pilot). It was accepted into the RAF in 1941 and started operations in 1942. But
they lasted only a year in service before being replaced by the Mosquito. It saw
service with the RAAF, RCAF, SAAF, RNZAF, USAAF and the USN. The US Navy
received navalised versions in Dec 1942, and named it the PV-1 Ventura. They
commenced operations as anti-submarine patrol bombers in Feb 1942 and entered
combat in Apr 1943 in the Aleutian Islands against the Japanese. Their other
areas of operations was over US coastal waters and in the South West Pacific
region.
The first PV-1s had a radar in the nose, and a bombardier's station behind it. This version can be identified by eight windows on the sides of the nose and a clear flat panel underneath. This station was soon replaced with a chin pack of three 50-calibre heavy machineguns to create the PV-1 Ventura gunship. The PV-1 could also be armed with eight underwing rockets. They were supplemented by PV-2 Harpoons in 1944. At the end of the War, the US Navy declared all PV-1s obsolete, and scrapped them.
| THE KIT |
 This is the 'Acadmy/Minicraft'
kit of the PV-1 Ventura gunship. The brand name identifies this as a very
elderly kit. The lid-and-tray box holds four sprues of 59 light blue/grey parts,
a clear sprue of 10 parts, and a small decal sheet of 8 decals, including a
6-armed octopus (a hexapus? There's no such beast). The instruction sheet refers
to 1 or 2 decals per propeller blade, but they 'aint on the decal sheet. I would
surmise that this PV-1 gunship kit has several sprues in-common with the PV-1
patrol bomber. External detail is very finely recessed, but cast detail of the
cockpit and the guns, is quite basic, and the detail in the wheel wells is
non-existent. It seems unnecessary, but the fuselage halves have a cut-out
because the bomb doors are provided as a single separate piece. The piece cannot
be divided for an open bomb bay because each door is a bifold-type and, besides,
the modeller would have to scratch-build a bomb bay. Is there an after-market
one? And open doors?
This is the 'Acadmy/Minicraft'
kit of the PV-1 Ventura gunship. The brand name identifies this as a very
elderly kit. The lid-and-tray box holds four sprues of 59 light blue/grey parts,
a clear sprue of 10 parts, and a small decal sheet of 8 decals, including a
6-armed octopus (a hexapus? There's no such beast). The instruction sheet refers
to 1 or 2 decals per propeller blade, but they 'aint on the decal sheet. I would
surmise that this PV-1 gunship kit has several sprues in-common with the PV-1
patrol bomber. External detail is very finely recessed, but cast detail of the
cockpit and the guns, is quite basic, and the detail in the wheel wells is
non-existent. It seems unnecessary, but the fuselage halves have a cut-out
because the bomb doors are provided as a single separate piece. The piece cannot
be divided for an open bomb bay because each door is a bifold-type and, besides,
the modeller would have to scratch-build a bomb bay. Is there an after-market
one? And open doors?
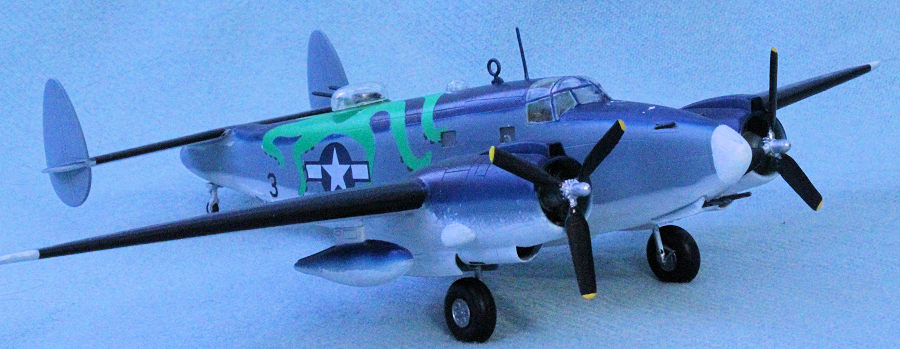
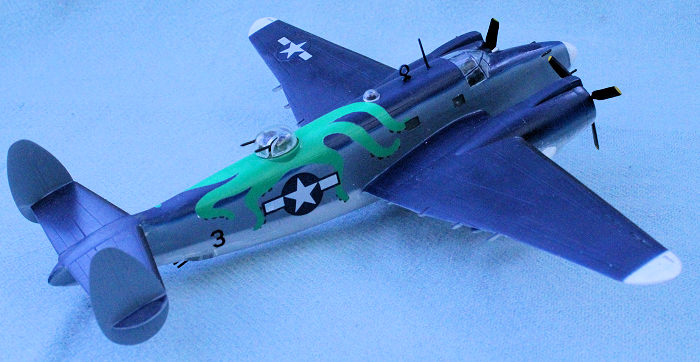
I bought this kit at a Swap
n Sell because the octopus paint scheme around the turret tickled my fancy, and
because it was cheap. I started building it as an OOB build because of that
octopus decal. Only when I opened the box did I discover that the kit's decal
was a hexapus. So, I resolved to replace it with an octopus.
| CONSTRUCTION |
Like many of you, I started by assembling sub-assemblies - in this case it was the wings (& exhaust pipes), the elevators & rudders, the droptanks, and the cockpit. Fit was really good. The only modification I did was to remove the door in the rear cockpit bulkhead, and replaced it with a curtain.
At the same time, I brush-painted a lot of parts with Citadel Miniatures (CM) chaos black, namely, the guns, the propeller blades and the four banks of cylinder. The blade tips were dipped in CM sunburst yellow, and the cylinders were dry-brushed with CM runefang silver to highlight the details. While I had those paints out, the fuselage was painted black inside, and the undercarriage legs got silvered. With CM loren forest standing-in for an interior green, I painted only the inside bits that would be visible - the cockpit, the gun turret insides, the ventral gun station and the wheel wells. For the heck of it, I drilled-out areas in the roof of the wheel wells so that it looks like there is somewhere for the wheels to go.
 With paint
and tape, I added some details into the cockpit. The seats were rather plain, so
I carved their bases so that they didn't look like thrones welded to the floor.
The instrument panel was supposed to be painted black, then covered with a
decal. I painted it white instead.
With paint
and tape, I added some details into the cockpit. The seats were rather plain, so
I carved their bases so that they didn't look like thrones welded to the floor.
The instrument panel was supposed to be painted black, then covered with a
decal. I painted it white instead.
There were two points that would concern me when the fuselage was to be closed. Firstly, the gun turret had to be trapped between them. Then the tail stinger transparency containing its two guns had to be attached. Both of these would create problems when it came to the painting stage. Secondly, the cockpit canopy was about half a mm too narrow for the fuselage.
The fix for the gun turret was available in the turret base part. The base had two horns that would position inside the fuselage and allow the turret to rotate. So, it was a simple matter to cut a couple of slots into the fuselage halves that would fit the horns. When the model was nearly complete, the turret could be dropped into place, then rotated to lock it into position (and still turn). Unfortunately, the gap between the turret base and the horns was smaller than the thickness of the fuselage. My knee-jerk fix was enlarge the gap by sanding which, as I expected) would thin and weaken the horns. So, before using the file, I took the precaution of gluing a strip under (and between) the horns to reinforce them.
The fix for the tail stinger position was to temporarily attach the transparency (without guns) with white glue. Again, when the model was nearly complete, the transparency was popped-off, the guns attached, then the part was re-attached. Yes, the seams has to be filled then painted-over, but it was a relatively-painless task.
My fix for the narrow canopy was to divide it in to left & right halves be razor-sawing it along the centre-line frame. Fit of each half was terrific. Again, at the end of the build, the halves were rejoined with white glue mixed with paint to re-create the (slightly too wide) centre-line frame. (Falcon make a corrected replacement. Ed.)
 The
construction allows the propellers and main UC wheels to turn, but to do so
requires that they be attached before the painting is done, and that would
complicate the issue a lot. Because I like spinning propellers, I inserted the
tapered prop-shafts through the engine banks and trapped them there with a piece
of thin card at the back. The props would be one of the last items to be
attached. The turning wheels was to be accomplished by carefully pinning the
inner wheel halves to the UC legs, then to attach the outer halves to the inner
halves.
The
construction allows the propellers and main UC wheels to turn, but to do so
requires that they be attached before the painting is done, and that would
complicate the issue a lot. Because I like spinning propellers, I inserted the
tapered prop-shafts through the engine banks and trapped them there with a piece
of thin card at the back. The props would be one of the last items to be
attached. The turning wheels was to be accomplished by carefully pinning the
inner wheel halves to the UC legs, then to attach the outer halves to the inner
halves.
The only assembly that really needed careful attention, was aligning the horizontal tails, ensuring at the same time, that the fins were both parallel and vertical. To achieve this, I clamped them (lightly) between the jaws of a mini-sashclamp to ensure they were right. The rest of the build was pretty routine, though a little filler was needed everywhere. I used 'Perfect Pasic Putty' because it is easily smoothed, and the excess is easily removed, with a wet finger or cotton bud/Q-tip.
My preferred method of masking the clear bits is to lay strips of thin yellow Tamiya tape over the frames (to make them more visible), then to cover the panels with cheap blue tape - often overlapping pieces, but burnishing them down very thoroughly. Fill the other windows with Krystal Kleer, strip-off the yellow tape, and she was ready for painting.
| COLORS & MARKINGS |
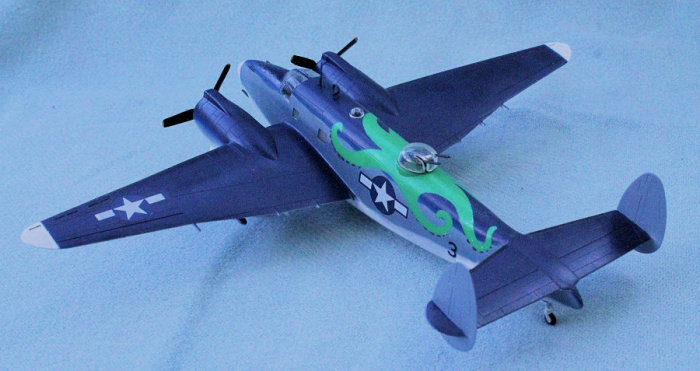
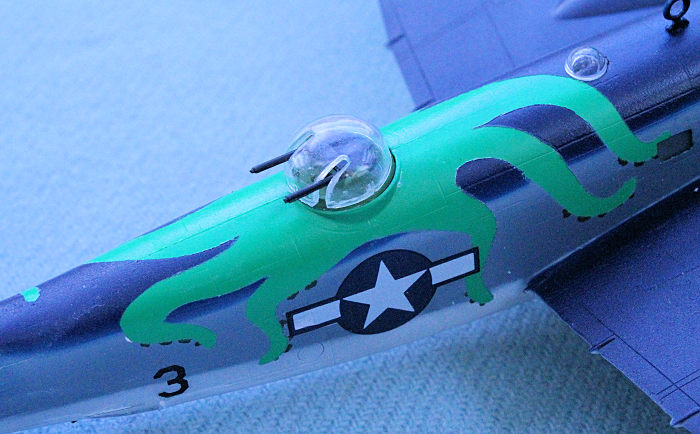
First, I sprayed the area of the fuselage around the turret with the (horrible) bright light Tamiya X-28 park green. After searching the Internet for drawings of an octopus (and there are scores of them), I selected a suitable one. This I sized in a photocopier to the about same dimensions as the kit hexapus decal, then I used it to create a mask from Tamiya tape which was applied centrally over the turret and draped down over the fuselage.
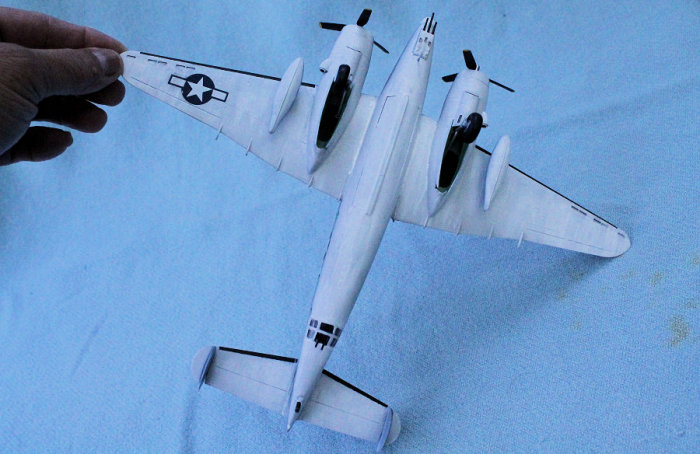
 white
from a spray can. I even remembered the undercarriage (UC) doors and the
droptanks. This was masked with Tamiya tapes and the edges lined with thin
'sausages' of Blutack so that I could spray the sides with a Tamiya XF-66 light
grey (which is a medium shade of grey) and get a feathered edge (where
required). More masking (in the same style) followed, and I could spray the
horizontal surfaces with Tamiya X-3 royal blue. More masking (without Blutack)
let me brush-paint the de-icing boots using CM chaos black. With CM catachan
green and various diameters of toothpick, I dotted-on the suckers beneath the
tentacles of my octopus. Strip-off all of the masking, and the finish-line was
in-sight.
white
from a spray can. I even remembered the undercarriage (UC) doors and the
droptanks. This was masked with Tamiya tapes and the edges lined with thin
'sausages' of Blutack so that I could spray the sides with a Tamiya XF-66 light
grey (which is a medium shade of grey) and get a feathered edge (where
required). More masking (in the same style) followed, and I could spray the
horizontal surfaces with Tamiya X-3 royal blue. More masking (without Blutack)
let me brush-paint the de-icing boots using CM chaos black. With CM catachan
green and various diameters of toothpick, I dotted-on the suckers beneath the
tentacles of my octopus. Strip-off all of the masking, and the finish-line was
in-sight.
The kit hexapus decal covered half of the decal sheet. The other half held all of the aircraft's official markings - the four 'stars-and-bars' and the two aircraft number decals. The instructions refer to two decals for each propeller blade, but they weren't on the decal sheet.
| FINAL CONSTRUCTION |
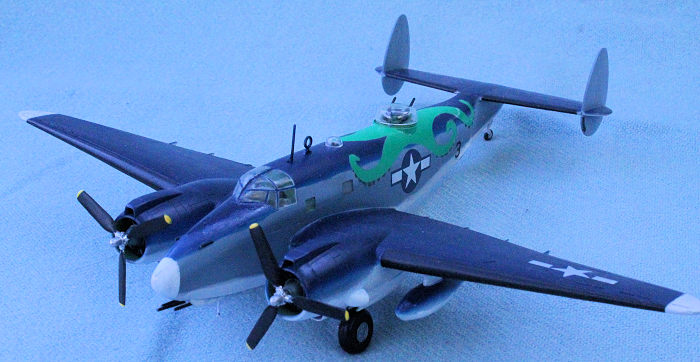
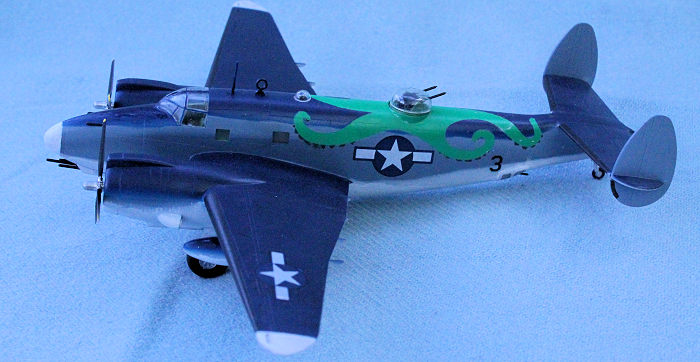 I
brush-painted CM onto the wingtips and the tip of the nose because it gives me a
more-brilliant white than the spraycan. Some was also used to 'weather' the
undersides. The main UC legs were glued-on, and I used a touch of Molotow Liquid
Chrome to replicate the oleos. There was only just enough space to glue the leg
retraction strut beside where I had cut the holes for the tires inside the UC
well. My fixes for the cockpit canopy, the gun turret and the tail stinger, all
worked as planned.
I
brush-painted CM onto the wingtips and the tip of the nose because it gives me a
more-brilliant white than the spraycan. Some was also used to 'weather' the
undersides. The main UC legs were glued-on, and I used a touch of Molotow Liquid
Chrome to replicate the oleos. There was only just enough space to glue the leg
retraction strut beside where I had cut the holes for the tires inside the UC
well. My fixes for the cockpit canopy, the gun turret and the tail stinger, all
worked as planned.
A pet hate of mine is the need to cut the main UC doors apart when an open bay is built. I did it anyway, then thinned the edges ('cos I like it that way) and attached them with liquid cement then superglue. I declined to replace the five fixed gun barrels with finer turned-brass barrels from Masters, because they would look different beside the plain stick/barrels of the turret and tail stinger guns. All last bits were attached. The only pieces that needed a bit more care, was the attachment of the three chin gun barrels, because they had to be level and parallel with each other.
| CONCLUSIONS |
Well, I wanted a model of the plane with the octopus making, and now I have it. It took a little innovation to complete it, but isn't THAT what modelling is all about? Other modellers might want to add more detail (in the wheel wells?). Other modellers might come-up with different 'fix' solutions (a Falcon vac-formed canopy?) than mine, but isn't THAT what modelling is all about? Because of the need to correct the flaws I've identified, I can only recommend this kit to average or experienced builders.
March 2015
Copyright ModelingMadness.com. All rights reserved. No reproduction in part or in whole without express permission.
If you would like your product reviewed fairly and fairly quickly, please contact the editor or see other details in the Note to Contributors.