Revell 1/72 PB4Y-2 Privateer
| KIT #: | 04292 |
| PRICE: | $20.00 |
| DECALS: | Three options |
| REVIEWER: | H.Davis Gandees |
| NOTES: | Used decals from the scrap box |
| HISTORY |
 The PB4Y-2 Privateer was the final version of the B-24 Liberator
with a single tall tail and lengthened forward fuselage. After WWII,
Privateers continued to serve the Navy until 1954 and US Coast Guard until
1958. The PBY-2M was a specially modified Privateer as a hurricane hunter
but it retained its armament for patrol duty. In 1952 better radar was added
for ASW duty and redesignated PB4Y-2S until the more capable ASW P2V
Neptunes were available.
The PB4Y-2 Privateer was the final version of the B-24 Liberator
with a single tall tail and lengthened forward fuselage. After WWII,
Privateers continued to serve the Navy until 1954 and US Coast Guard until
1958. The PBY-2M was a specially modified Privateer as a hurricane hunter
but it retained its armament for patrol duty. In 1952 better radar was added
for ASW duty and redesignated PB4Y-2S until the more capable ASW P2V
Neptunes were available.
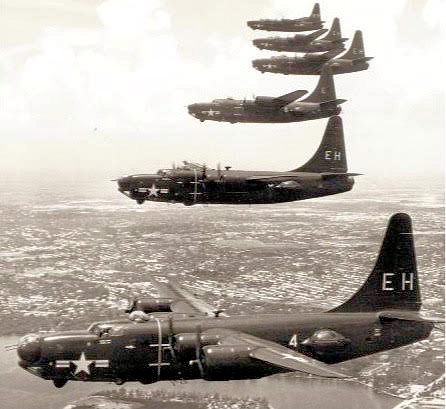
During the very active 1949 hurricane season, VP-23 flew 33 missions into the hurricane eyes, a record at that time.
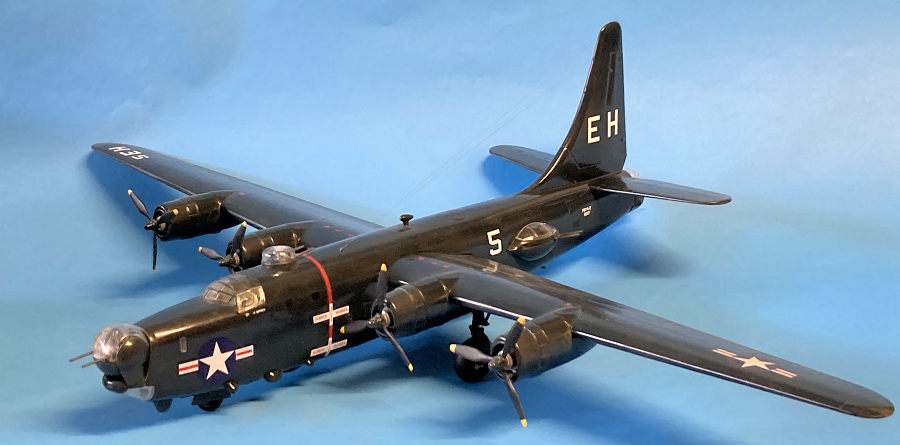
This model represents a PB4Y-2M that served as a hurricane/submarine hunter with VP-23 based at NAS Miami-Master Field from 1948-1952. I lived a mile east of the base and remember seeing them fly over and at times all 9 of them lined up on the ramp as we drove by the base. I remember one time when my dad took me to the base to visit a friend we walked through a hanger where one was being worked on. It was huge and with its tall tail and lumps and bumps of radar and antennas it reminded me, a young boy of an ominous flying dragon!| THE KIT |
 The kit was originally released in 1980 by Matchbox and by Revell
in 2009. It is the only Privateer kit in 1:72 scale and the Koster vacuform
kit in 1:48.
The kit was originally released in 1980 by Matchbox and by Revell
in 2009. It is the only Privateer kit in 1:72 scale and the Koster vacuform
kit in 1:48.
The kit consists of 5 sprues of well molded parts. There was a 12- page instruction manual with excellent illustrations and 4-view drawings for the option of 3 aircraft. There was a fuselage plug I used to delete the rear dorsal turret as per VP-23 Privateers. There are 5 crew figures that I did not use. There were excellent color callouts, unbelievably in 9 languages!
There are many parts for a 1:72 model and care should be taken to use the
correct parts for the version to be built.
| CONSTRUCTION |
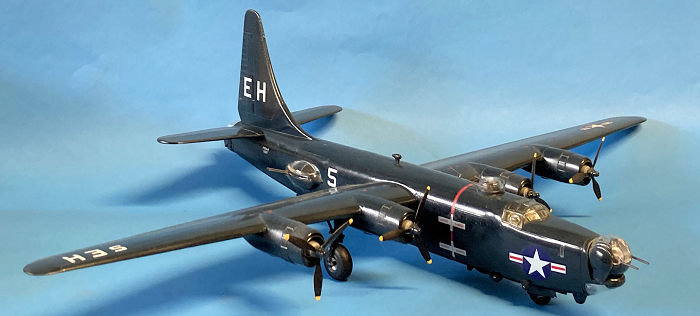 I began by filling the RCAF version fuselage windows with the
clear parts, putty and lots of sanding to blend them in. The 5 gun turrets
were assembled and the barrels drilled out. When the fuselage halves were
joined, I remembered to install the recommended 40 grams (1.5 ounces) of
weight as instructed behind the cockpit bulkhead to avoid a tail sitter.
I began by filling the RCAF version fuselage windows with the
clear parts, putty and lots of sanding to blend them in. The 5 gun turrets
were assembled and the barrels drilled out. When the fuselage halves were
joined, I remembered to install the recommended 40 grams (1.5 ounces) of
weight as instructed behind the cockpit bulkhead to avoid a tail sitter.
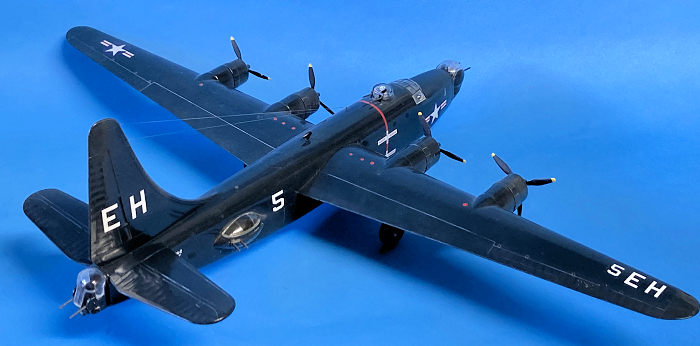
The prop blades were sanded less pointed and thinner. The canopy was carefully masked with Tamiya tape and installed with white glue.
The fit of parts was very good for such an old kit and very little putty was needed. Two nylon thread antenna wires were installed from the tail to mid-upper fuselage as per instructions.
| COLORS & MARKINGS |
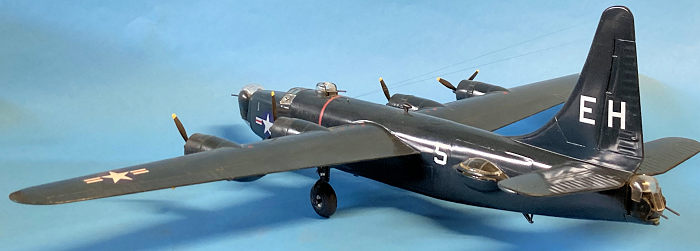 The entire cockpit and visible turret areas
were painted interior green. The model was cleaned and then airbrushed with
Model Master FS 15042 Gloss Sea Blue. The kit decals were used, and I
applied the red stripe 1947 era national insignias from the decal scrap box.
The tail EH modex and #5s also came from the decal bin. Eight fuel tank caps
were cut from red decal material with a punch and die.
The entire cockpit and visible turret areas
were painted interior green. The model was cleaned and then airbrushed with
Model Master FS 15042 Gloss Sea Blue. The kit decals were used, and I
applied the red stripe 1947 era national insignias from the decal scrap box.
The tail EH modex and #5s also came from the decal bin. Eight fuel tank caps
were cut from red decal material with a punch and die.
| CONCLUSIONS |
I enjoyed building a Privateer from my boyhood that looks like the ones I remember. It was a simple build of 25 hours, and I recommend it to any modeler.
| REFERENCES |
Squadron Signal B-24 Liberator in Action #80 and December 1950 issue of the Naval Aviation Magazine.
31 October 2025 Copyright ModelingMadness.com. All rights reserved. No
reproduction in part or in whole without express permission from the editor. If you would like your product reviewed fairly and fairly quickly, please contact the editor or see other details in the
Note to
Contributors.