| KIT #: | 05031 |
| PRICE: | 20 Euros |
| DECALS: | options |
| REVIEWER: | Spiros Pendedekas |
| NOTES: | Afterburner Decals |
| HISTORY |
The Douglas C-47 Skytrain or Dakota (RAF, RAAF,
The C-47 differed from the civilian DC-3 in numerous modifications, including being fitted with a cargo door, hoist attachment, and strengthened floor, along with a shortened tail cone for glider-towing shackles, and an astrodome in the cabin roof. 10,174 were built.
In the
Hellenic Air Force, the
first C-47’s were received as military assistance through
the RAF. Later on, several examples were delivered directly from the USAF.
Serving with the 13th Squadron, they took part in the Korean War. In their long
service time they were painted with different variations, like olive drab, dark
green-gray “NATO”, “Vietnam” etc. The first years of their use they were painted
in aluminum color. In addition to their transport mission, they were used for
navigation training, reco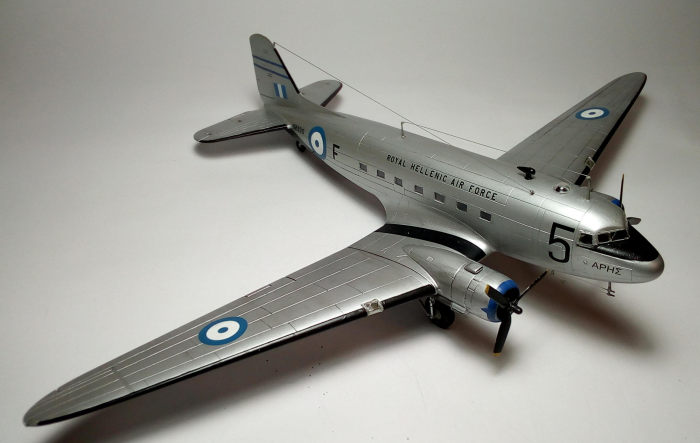 nnaissance,
target towing, crop dusting, VIP flights and search and rescue missions. The
last examples were retired in 2008.
nnaissance,
target towing, crop dusting, VIP flights and search and rescue missions. The
last examples were retired in 2008.
The Hellenic C-47s in Korea
The Greek Expeditionary Force (Εκστρατευτικόν Σώμα Ελλάδος - ΕΚΣΕ) in Korea was formed in response to the United Nations appeal for assistance in the Korean War. It comprised a reinforced Hellenic Army infantry battalion and a Royal Hellenic Air Force (RHAF) flight of seven transport planes. Greece was the fifth largest troop contributor to U.N. Forces in Korea.
The seven C-47s of 13th Flight, with 67 Air Force officers and personnel, departed from Elefsis air base at 0830 on November 11, 1950. They belonged to the 355 Transport Squadron, known for its participation in the recent civil war. The majority of the officers and NCOs of this first mission were experienced airmen, being veterans of the Mediterranean and Middle East Theatre of World War II and the Greek Civil War.
On December 3, 1950, the first Greek aircraft landed on Korean soil. The Greek flight was immediately attached to the 21st Troop Carrier Sqn. (later renamed 6461 TC Sqn.) of the 374th Wing, United States Air Force, based initially at Daegu. From May 14, 1951, the flight was based at Kimpo air base where it remained until May 23, 1955. During its time in Korea, the Greek Flight carried out 2,916 missions, comprising air evacuations, transport of personnel and prisoners, drops of supplies and ammunition, replenishment of allied bases and collection of operational information. In total, its planes carried 70,568 passengers, including 9,243 wounded. It logged 13,777 flight hours. Losses included 12 officers and NCOs and two C-47s.
| THE KIT |
 According
to Scalemates, this is the 2001 Airfix reboxing of the venerable 1979 Italeri
(then “Italaerei”) kit. This kit has been reissued many times since then, both
as a C-47 and as a DC-3, the only difference (apart from the fact that at about
1981 some new parts were added, possibly to cover different versions) being
decals and boxing.
According
to Scalemates, this is the 2001 Airfix reboxing of the venerable 1979 Italeri
(then “Italaerei”) kit. This kit has been reissued many times since then, both
as a C-47 and as a DC-3, the only difference (apart from the fact that at about
1981 some new parts were added, possibly to cover different versions) being
decals and boxing.
You can read Scott’s thorough inbox review of the DC-3 2013 reissue here.
My copy sports the usual top opening Airfix box. Inside you can find two sprues in white styrene, together with a small clear parts fret, all loosely thrown in, without any protective bagging, meaning potential scratches to deal with.
The styrene parts are quite crisp, featuring engraved panel lines (just a tad on the heavy side) and virtually flash free. The clear fret is also nicely molded and crystal clear.
Cockpit detail is not that much, but, frankly, almost nothing can be seen through the small windscreen.
Cargo/passenger interior is very basic, just a “floor” with molded on
“boxes”, to resemble some kind of
 seats, so,
if you decide to open that cargo door, you will have to spend a good amount of
time improving things in there. I took my usual lazy road of leaving the
interior empty, hoping that nothing can be seen from the small passenger
windows.
seats, so,
if you decide to open that cargo door, you will have to spend a good amount of
time improving things in there. I took my usual lazy road of leaving the
interior empty, hoping that nothing can be seen from the small passenger
windows.
Instructions are nice: clear and consistent. One very good thing is that all parts to cover the different versions are included, even if they are not mentioned at the instructions. They include the side door, engine air intakes, astrodome, antennas, fin top light and others, allowing the modeler to build practically any version, provided he will have done his research and obtain suitable decals.
Speaking of decals, my impressions are not the best. Having built the same Airfix kit three times, I can state that the first two kits decals were passable. The ones provided with this kit were really bad: colors and geometry off. Thank goodness I did another scheme and required none of them. It is also fair to state that current Airfix decals are great.
| CONSTRUCTION |
I started by attaching all small window panes from the inside of the fuselage, by carefully and sparingly applying very thin liquid glue, using capillary action. Then I assembled the cockpit, which consists of an instrument panel with molded in details, two adequate seats and a rear bulkhead. These are glued on the floor provided. Cockpit basic color was Hu226 Interior Green. The instrument panel and control wheels were painted black and drybrushed with silver. The seat cushions were painted Leather and seat belts were added, made form masking tape. I did no more detailing and called the cockpit finished, since not a lot can be seen through the small windscreen.
The same goes for the cargo area: should you decide to have the cargo door closed, practically nothing can be seen through the small windows. So, I did nothing there.
I glued the cockpit at one of the fuselage halves. Then I attached the
two piece affair cargo door in place. Be
 careful as
to attach the correct door for the version you are building (two are provided).
careful as
to attach the correct door for the version you are building (two are provided).
The cargo door fit to the fuselage is flimsy and weak. To reinforce it I applied some liquefied styrene to the joint from the inside, resulting in a nice and strong bond.
I then glued the two fuselage halves together. Fit was very nice! In order to strengthen the joint (as to avoid horror sessions of fuselage splitting apart after painting and decaling….), I reinforced the joints by gluing styrene pieces from the inside. The central bottom wing part was then glued underneath.
To avoid the irritating wing/fuselage gaps, I glued the top wing halves at the fuselage mating surfaces first and then at the bottom central wing part. Similarly the bottom left and right wing halves were attached to the central part mating surfaces and then glued together with the top halves: this way, with the aid of the very nicely behaving white Airfix styrene, no gaps were witnessed!
The engines are quite well represented, consisting of two rows of nicely cast cylinders, two-piece cowlings with a mesh looking oil cooler inlet (but plain empty space at the outlet…), a rear firewall and two simple looking non-hollowed exhausts.
The engine area is quite prominent at the C-47, so a little improvising wouldn’t hurt! So, I started by hollowing the exhausts with my mini drill. At each exhaust I added a small piece of stretched sprue that protrudes from the exhaust base towards the front, possibly being a pipe, supplying fresh air to the exhaust. The whole assy was painted Testors Burned Metal.
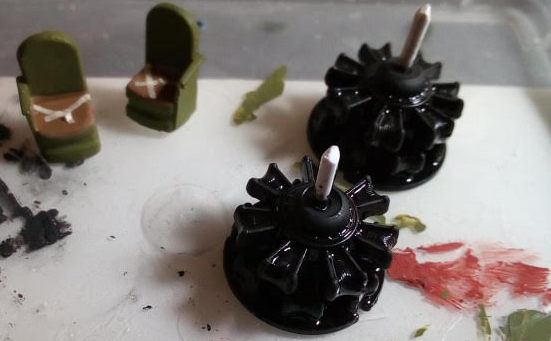 The
engines were painted black, heavily drybrushed in silver, with the cabane medium
grey. They were trapped inside their two piece cowlings, with the firewall at
the back (all innards painted Hu226 “Interior Green”). The oil cooler outlets
were empty holes, so I glued tow small circular styrene plates and superglued
two mesh pieces on top of them. They look ok now.
The
engines were painted black, heavily drybrushed in silver, with the cabane medium
grey. They were trapped inside their two piece cowlings, with the firewall at
the back (all innards painted Hu226 “Interior Green”). The oil cooler outlets
were empty holes, so I glued tow small circular styrene plates and superglued
two mesh pieces on top of them. They look ok now.
The whole engine assemblies were glued onto the wings engine attachment points. Fit was again good. Three different top cowling air intakes are provided (short, medium and long), so the modeler has to justify the right ones for the specific bird he builds. I used the smaller ones. Their front lip is supposed to have a quite evident clearance from the cowling, but this is not represented at the kit provided ones. To remedy it, I filed the front lip underside upwards by about 2mm (.08 inch) and glued a very thin styrene piece, as a mini floor. After sanding, it looked closer to the real thing.
The main wheel wells were missing surrounding walls, the most glaring omission being the lack of front wall (the engine firewall is too far in). To make things more presentable, I cut two circular pieces from my sons’ kept ice cream plastic holders and glued them at the end of the wheel wells. They look less empty now! Wells were painted Hu226 as well.
I attached the two piece horizontal stabilizers in place. Again fit was very good.
Propellers, exhausts, various antennas, landing gear, astrodome and wing mounted approach lights were all left off, to be installed after painting.
It was then filling and sanding session, with only small amounts of filler used at the wing/fuselage and cowling joints, as fit was generally good to very good.
After an 800 (progressing to 1500) grit sanding, I found the result satisfactory and headed to the paint shop
| COLORS & MARKINGS |
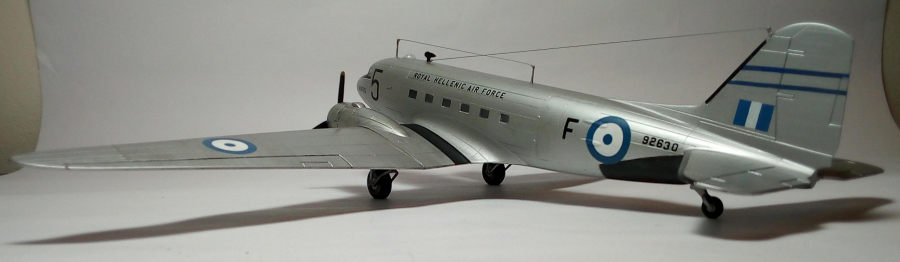
Hellenic Air Force C-47 that took part in the Korean War were NMF’d. At the start they sported only the typical Greek insignias. As war progressed, they started (to our modelers joy!) to gradually exhibit some “non-standard” scheme additions (Olympian Gods names, blue fin stripes, blue cowling lips, partially black undersides and so on). Also, a large specific one digit number at the front sides and an individual letter at the rear fuselage sides was carried, seemingly UN requirement. Even the standard roundels were not the same at each one aircraft. This resulted to a nice for a modeler (and a pain for researcher) variety of the basic scheme. Also, antennas and engine top air intakes were varied at Hellenic C-47s, but more of this to the “Final construction” chapter below).
Obviously, a modeler should get the maximum amount of (mainly pictorial) info for the specific plane on the specific time he is modeling, which is very exciting!
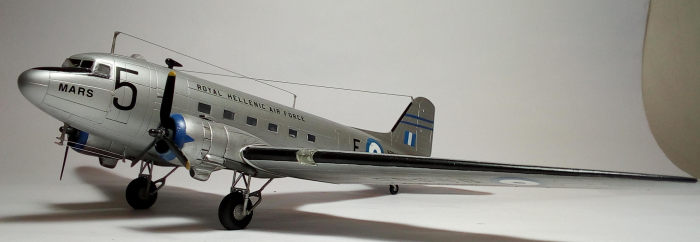
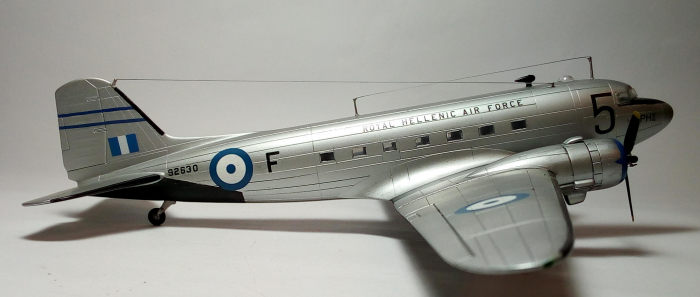
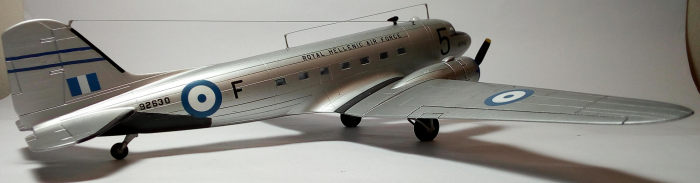
I
wanted to depict s/n 92630, named “ΑΡΗΣ”
– “MARS” (the mythical Greek God of war), as it wore its finalized camo. Besides
the above names painted at the front, one at each side, it sported two large
“5”s an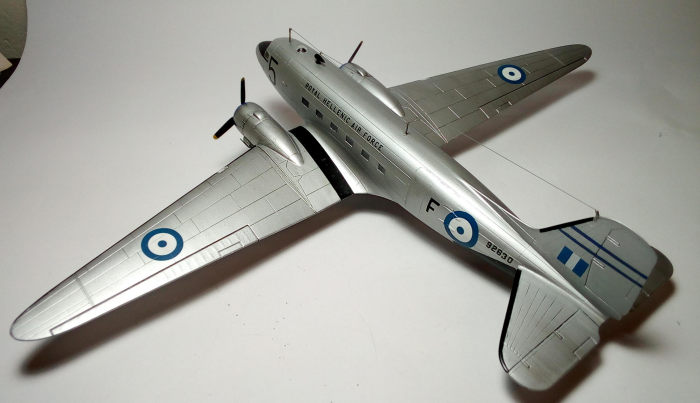 d
“F”s at front and rear fuselage either sides respectively, blue cowling lips
with small decorative triangles at their middles, two blue fin stripes, and
black undersides only at the rear fuselage part. Seemed very interesting indeed.
d
“F”s at front and rear fuselage either sides respectively, blue cowling lips
with small decorative triangles at their middles, two blue fin stripes, and
black undersides only at the rear fuselage part. Seemed very interesting indeed.
So, after masking all glued transparencies with masking tape, I gave the model an overall coat of “Silver” (Hu11 enamel). Upon curing, a coat of Future was applied, providing not only protection of the sensitive silver, but also deepening the shine, making it resembling the original finish.
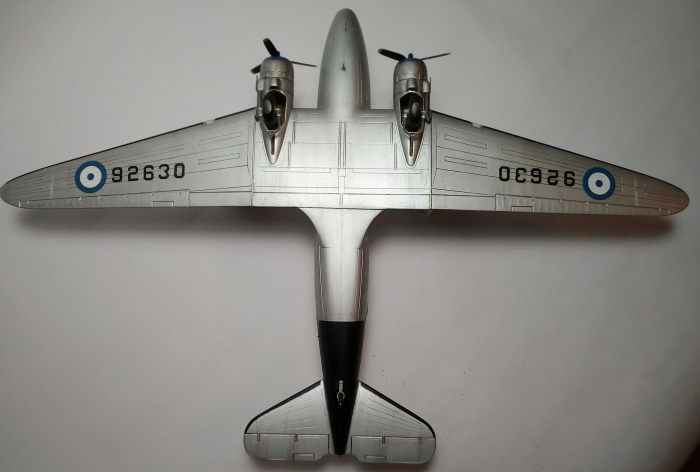
I then masked and painted black the front antiglare panel, the under-fuselage rear part and the wings, elevators and fin anticing portions.
French Blue (Hu14) was used to paint the cowling lips and the fin stripes, after the required masking, as per reference pics. It was then decaling time.
My main source of decals was the amazing “Afterburner” decal sheet “HAF Exotic Schemes” (sadly no longer in business), that contains some very interesting schemes of Hellenic Air Force planes, very well researched, printed by Cartograf, meaning excellent quality. They went on like a dream to the already shiny surface, with the help of Mr Mark Softer, in order to conform wherever needed (eg on cargo door hatches).
For the plane’s serial number (small digits at fin and large underwing), I used decals from a generic decal sheet made by Plastimodellismo Greek hobby shop, which worked equally well.
Finally, for the black antislip wing root walkways, I used leftover black stripe decals from the decal dungeon, cut at the appropriate size.
A coat of Future sealed all decals, followed by a black panel wash, in order to bring up all engraved details.
I applied some paint chipping (drybrushed silver) on the propeller leading edges, cowling blue forefront lip area and black wing walkways. Then, after attaching the landing gear and exhausts, I used subtly dry black and brown pastels to simulate engine staining and general dirtying.
A final uneven custom mix satin coat (50/50 Hu 35/Hu matt clear) sealed everything in and gave the C-47 that characteristic “used” look.
| FINAL CONSTRUCTION |
The wing leading edge landing lights housings were painted Hu226, with a silver dot in the middle, to simulate the lens. Then, the small windscreen, the astrodome and landing lights transparencies were attached with white glue, their framings carefully hand painted silver. The side windows maskings were removed and all transparencies were lightly brush painted with Future for extra shine. It was at this point that I spotted a tiny crack on the starboard side of the windscreen, no idea when it happened…oh well….
 It
was then antenna time! As C-47 sported numerous variations on antenna locations,
that even varied with years passing, I tried to secure as many pics from
different angles, regarding my specific subject at the specific time.
It
was then antenna time! As C-47 sported numerous variations on antenna locations,
that even varied with years passing, I tried to secure as many pics from
different angles, regarding my specific subject at the specific time.
The kit provided most of the pieces I wanted, minus two musts, that were fabricated out of stretched sprue. Thin silver stretched sprue was used for the five in total antenna wires, hot-air tightened by my wife’s hairdryer.
The wingtip lights were represented by a drop of red and green Humbrol clear paint respectively.
I finally fitted the propellers, gave a “walkaround” to check for any small blemishes and called this lady done!
| CONCLUSIONS |
 This
was a very enjoyable build of a scheme not often seen.
This
was a very enjoyable build of a scheme not often seen.
The kit, although old, stands up pretty well to modern standards: it has good fit and exterior detail. All parts for alternate versions are provided too, which is very nice, considering the variations spotted on C-47.
It can be nicely built OOB with a beautiful result, or can be beefed up with some scratchbuilding, as in my case.
Of course, a minus side is the simplistic cargo/passenger interior. Should someone decide to open the cargo door, a lot of work will be ahead of him. A quick look at Scalemates did not reveal any cargo enhancements, but do not take this for granted.
The new tool (2014) Airfix kit is a much more advanced kit (Editor’s thorough preview here), especially in terms of nice provided cargo interior. However, this old Italeri kit is by no means obsolete, especially if you do not want to display the cargo compartment. Its price is lower too, so you have your options!
If you already have this kit, go and build it! There are a bazillion marking options available, only adding to the joy of putting it together.
Happy modeling!
| REFERENCES |
Wikipedia
Various internet sites (pics, info and models built)
30 April 2021
Copyright ModelingMadness.com. All rights reserved. No reproduction without express consent.
If you would like your product reviewed fairly and fairly quickly, please contact the editor or see other details in the Note to Contributors.