Revell 1/48 C-45F
Expeditor
| KIT #: | |
| PRICE: | |
| DECALS: | Two options |
| REVIEWER: | Michael Rohde |
| NOTES: |
| HISTORY |
The first civil Beech Model 18 flew on 15th January 1937. The key to the type's eventual success ( over 9000 built in 32 years of production ending 1969) was the Model 18 D of 1939, which introduced 330 hp Jacobs L6 radial engines.
The Model 18 was considered ideal by the US Forces as a utility transport, and the first USAAC order for 11 aircraft( designation C 45)was placed in 1940. A further C 45 A , to be used as utility transports and another batch of C 45 B's followed soon after. Some of these aircraft were supplied to the UK under Lend/ Lease, being designated Expeditor 1 in RAF service.
 In 1942 the
Beech 18 was developed into the Beech AT -7 Navigator and used for Navigator
training. This version had positions for 3 trainees and a dorsal astrodome. Some
577 of this variant were built , followed by 6 AT-7's with floats and a ventral
fin. Further production consisted of 9 winterized AT 7 B's and 549 aircraft with
different engines. Another 1941 arrival was the AT -11 Kansan bombing/gunnery
trainer equipped with a small bomb bay and a glazed nose bombardier position.
Armament consisted of 2 x 7.62 mm machine guns placed in the nose and the dorsal
turret.
In 1942 the
Beech 18 was developed into the Beech AT -7 Navigator and used for Navigator
training. This version had positions for 3 trainees and a dorsal astrodome. Some
577 of this variant were built , followed by 6 AT-7's with floats and a ventral
fin. Further production consisted of 9 winterized AT 7 B's and 549 aircraft with
different engines. Another 1941 arrival was the AT -11 Kansan bombing/gunnery
trainer equipped with a small bomb bay and a glazed nose bombardier position.
Armament consisted of 2 x 7.62 mm machine guns placed in the nose and the dorsal
turret.
Total production of this type was 1582 aircraft. Last of the USAAF's wartime variant was the photo reconnaissance F 2 carrying 4 cameras and further upgrades allowed extra cameras mounted in the fuselage sides. US Navy and US Marine Corps procurement consisted of over 1500 aircraft. Among these were variants employed as air ambulances and electronic counter measure trainers.
During 1951/51 all surviving C 45, AT 7 and AT 11 aircraft were remanufactured to zero time condition as C 45 G's with the P/W R-985 AN-3 engines and an autopilot or as C 45 H's with P/W R -985 AN 14 B's and no autopilot.
US Navy aircraft were remade as SNB-5's and 5 P's. In 1962 the remaining SNB aircraft became TC 45 J training and RC 45 photographic aircraft.
| THE KIT |
 The kit
contains 84 parts of light grey plastic on 5 frames and one frame with 11 clear
parts. Surface detail is crisp , although some areas – esp around the engine
nacelles were quite rough and had to be sanded and polished. The decal sheet
offers 2 options:
The kit
contains 84 parts of light grey plastic on 5 frames and one frame with 11 clear
parts. Surface detail is crisp , although some areas – esp around the engine
nacelles were quite rough and had to be sanded and polished. The decal sheet
offers 2 options:
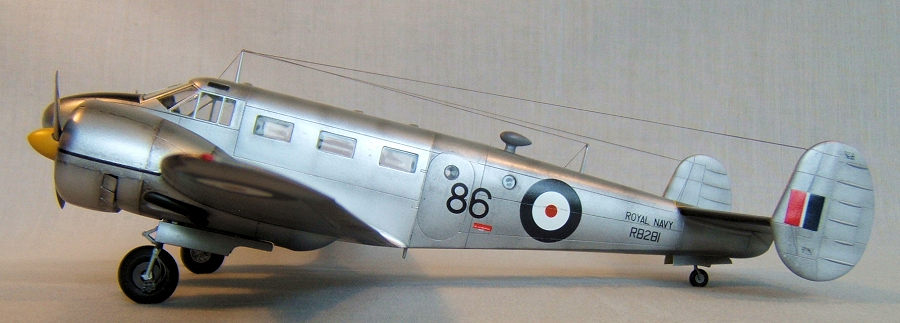
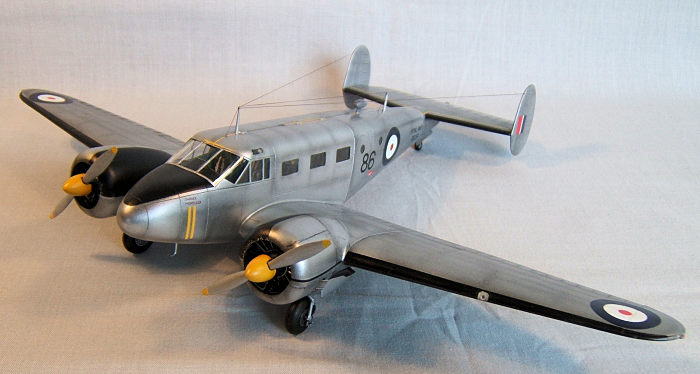
2nd Electronics Squadron USAF Olmsted Field PA 1948 or No 728 Naval Air Squadron Hal Far Malta 1949
The quality of the decals was- despite looking good and registering well- disappointing. Very stiff and brittle and did not want to settle down despite copious amounts of Microsol.
| CONSTRUCTION |
As per plan I started with building the interior. Overall a straightforward affair apart from the 7 seats , which consist of 4 resp 5 pieces each and took some time not only to prepare but to assemble. Instrument panel and console was easy and after painting all interior components I used the Eduard C 45 interior photo etch set to spruce things up a little. Since the clear parts translucency is actually quite good , these additions can be detected after the fuselage has been closed up.
 The fuselage
will be closed up with the fore and aft bulkheads ,the complete instrument panel
and console , passenger and cockpit side windows and one seat aft next to the
entry door in place. The other six seats are actually attached to the floor on
the wing center before the entire wing is glued to the fuselage.
The fuselage
will be closed up with the fore and aft bulkheads ,the complete instrument panel
and console , passenger and cockpit side windows and one seat aft next to the
entry door in place. The other six seats are actually attached to the floor on
the wing center before the entire wing is glued to the fuselage.
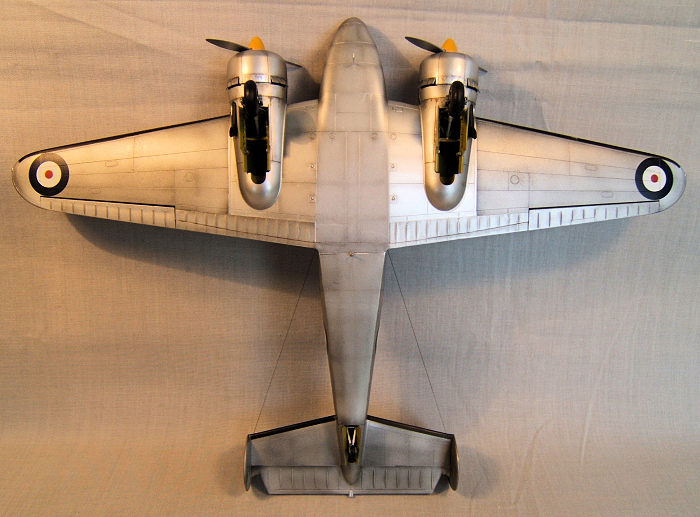
Moving on-- The wings and tail plane assembly: The way the kit is designed , I had to prep and assemble the set of landing gear components , the fire walls with the engine mounts attached to the front main spar and the rear spars. The landing gear provided is missing the brake calipers which are actually a quite visible part of the design( as can be well seen on many period photos). So I decided to scratch build these details and added the brake lines for good measure.
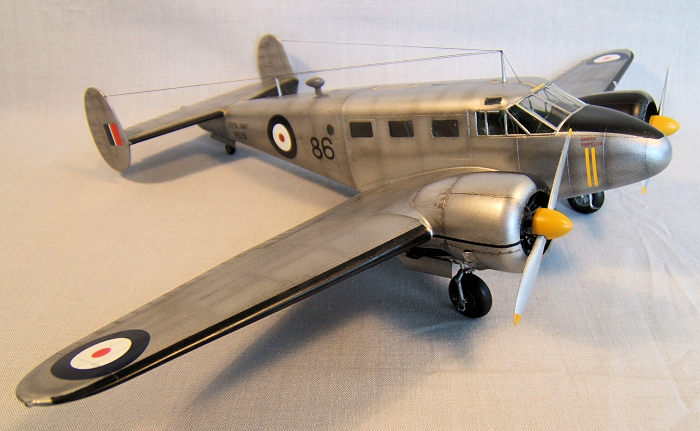
The nacelle interiors , fire walls , engine mounts and all spars were painted zinc chromate . The landing gear received a coat of flat aluminium with a gloss clear coat on top and some highlighting with Tamiya panel liner. The radials come as a one piece block and are quite plain in appearance. To make these look a bit more realistic I scratch built two sets of distributor rings and attached ignition leads made out of stretched sprue. Having all the parts glued into place and the ailerons installed, I then moved on to mating the upper and lower wing halfes.
That did not go as easy as I first thought and I had no other choice but to glue these bits together in stages and use clamps to secure these until the glue had set. The reason was some warping in the wing. What made this whole affair a bit more difficult is the fact that engine nacelles and wing are all one piece and the warping carried through the nacelles as well.
 Another
small modification was the scratch building of the cooling fins ( made of
Evergreen polystyrene sheeting) The kit parts are solid pieces and look rather
bulky. The tail plane and vertical stabilizers were a breeze in comparison to
the main wing.
Another
small modification was the scratch building of the cooling fins ( made of
Evergreen polystyrene sheeting) The kit parts are solid pieces and look rather
bulky. The tail plane and vertical stabilizers were a breeze in comparison to
the main wing.
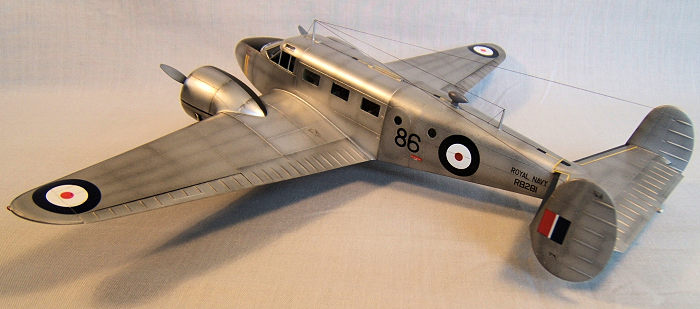
Now it starts to look like an aeroplane: After removing all the clamps and sanding and finishing the leading and trailing edges on the main wing and tail plane assembly, the time had come to glue these major components into place on the fuselage. Prior to this I did some test fitting and was happy with the overall fit . Small amounts of Tamiya putty were needed to fill small gaps here and there and there was no further holdup.
At his stage I added the windshield and removed the front and aft antenna . I did this to make it easier during the masking and painting stage. To assure proper relocation of the antenna masts I drilled small holes prior to painting. The windshield did need some minor adjustments and slotted easily into place. In fact so well that I did not need any glue at all!
| COLORS & MARKINGS |
The first stage was to mask
and paint the anti glare surfaces on the nacelles and the fuselage nose. Second
was to mask and paint the wing and horizontal stabilizer leading edges. Third
was to mask the abo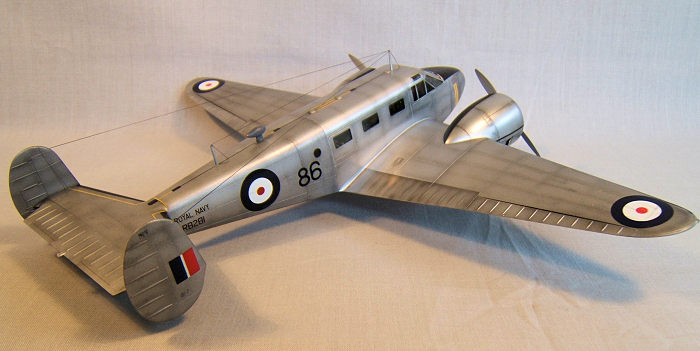 ve
and do a overall pre shading using Tamiya flat black. Fourth was to airbrush the
aircraft using different bare metal paints. Tamiya X 11 chrome silver , XF 16
flat aluminium and Humbrol 11 chrome.
ve
and do a overall pre shading using Tamiya flat black. Fourth was to airbrush the
aircraft using different bare metal paints. Tamiya X 11 chrome silver , XF 16
flat aluminium and Humbrol 11 chrome.
The pattern I applied is based on what I could detect on a period photo .
Unfortunately I could not use the decals supplied in the kit . These were stiff and brittle and refused to settle despite copious amounts of Microsol. I decided to cobble up an alternative set out of my decals stash instead. After sealing the decals with a overall coat of Tamiya gloss clear I used Tamiya Accent panel liner black and brown to highlight some weathering esp around the nacelles.
| CONCLUSIONS |
I overall nice kit to build apart from the issues mentioned. I am pleased with the result and can recommend this kit to all the modellers out there who have a soft spot for twin engined 1930's utility aircraft.
If you would like your product reviewed fairly and fairly quickly, please contact the editor or see other details in the Note to Contributors.
Back to the Main Page Back to the Review Index Page Back to the Previews Index Page