Hobby Boss 1/72 T-6G Texan
| KIT #: | 80233 |
| PRICE: | $7.00 |
| DECALS: | Two options |
| REVIEWER: | Spiros Pendedekas |
| NOTES: | Easy Assembly kit |
| HISTORY |
The origins of the T-6 can be traced as far back as 1935, where North American Aviation introduced their first trainer aircraft. Designated NA-16, it became the forerunner of a variety of single-engine, low-wing monoplanes with tandem seating. Of them, the BC-1, which featured retractable landing gear, can, in many respects, be regarded as the true forebear of the Texan.
 A classic,
straightforward design, the T-6, which was produced in numerous variants,
served in a great many air forces around the world in the mid to late 20th
century. While mainly used for training, it was also repurposed into combat
roles. As a trainer, it was generally not regarded as “easy”, but more like as
“positively demanding”, to the point that it would produce good pilots out of
the students who flew it. A common sight in air shows and museums as warbird
nowadays, this fine machine was built in no less than 15,495 examples.
A classic,
straightforward design, the T-6, which was produced in numerous variants,
served in a great many air forces around the world in the mid to late 20th
century. While mainly used for training, it was also repurposed into combat
roles. As a trainer, it was generally not regarded as “easy”, but more like as
“positively demanding”, to the point that it would produce good pilots out of
the students who flew it. A common sight in air shows and museums as warbird
nowadays, this fine machine was built in no less than 15,495 examples.
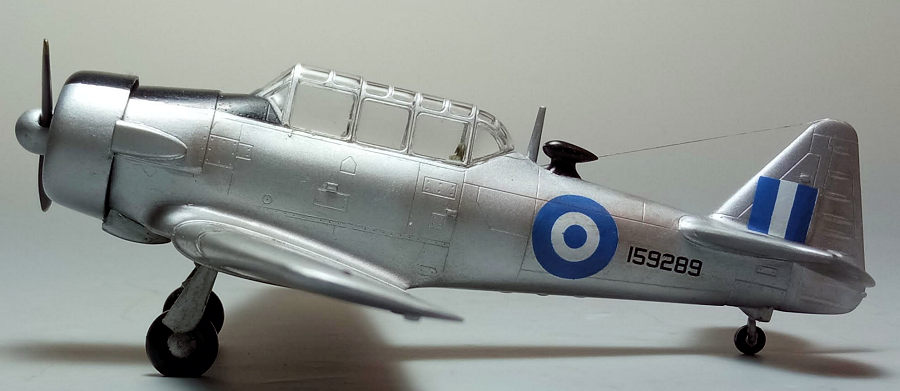
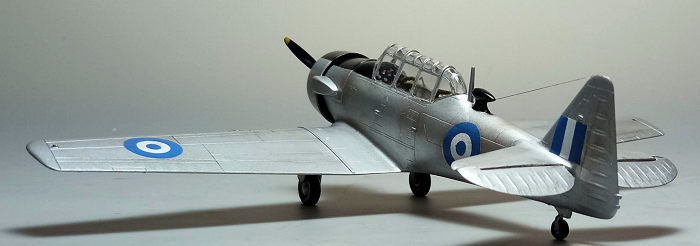
The Royal Hellenic Air Force became well acquainted with the type, using quite a few variants. At first, Greek pilots were trained in British Harvard Mk.Is at Rhodesian schools during WWII. After 1946, a respectable number of British Harvard Mk.II A/Bs, Mk.IIIs as well as American T-6D/Gs were assigned to Greece.
During the Greek Civil War (1946-49) they became the first aircraft of this type to be used in Counter Insurgency (COIN) missions and as “advanced air controllers'', either pinpointing enemy positions for their bigger armed aircraft or themselves striking ground targets when conditions permitted. Since those missions were typically flown at dawn, those T-6s were nicknamed “The Milkmen”. The type was retired from Greek service by 1969, being the Hellenic Air Force Academy’s main trainer till then.
| THE KIT |
 This is yet
another nice “Easy Assembly” kit from Hobby Boss. As such, it might lack the
amount of detail possibly found on other non-Easy Assembly kits, but it is
nicely done in its own right and offered at really bargain prices. For an
in-depth view of this fine kit’s contents, you may look no further than our
Editor’s thorough preview,
found at the ever growing MM archives.
This is yet
another nice “Easy Assembly” kit from Hobby Boss. As such, it might lack the
amount of detail possibly found on other non-Easy Assembly kits, but it is
nicely done in its own right and offered at really bargain prices. For an
in-depth view of this fine kit’s contents, you may look no further than our
Editor’s thorough preview,
found at the ever growing MM archives.
| CONSTRUCTION |
 I started by
trapping the cockpit tub between the one-piece fuselage and equally one-piece
wing, followed by the lower nose part, the two air intake ducts (port and lower)
and the tailplanes. The correct for the subtype DF loop antenna was attached at
this time, as well. Opting for some dynamic looks, I separated the elevators
from the tailplanes by carefully running the back side of my hobby knife through
the hinge lines, in order to pose them “drooped”.
I started by
trapping the cockpit tub between the one-piece fuselage and equally one-piece
wing, followed by the lower nose part, the two air intake ducts (port and lower)
and the tailplanes. The correct for the subtype DF loop antenna was attached at
this time, as well. Opting for some dynamic looks, I separated the elevators
from the tailplanes by carefully running the back side of my hobby knife through
the hinge lines, in order to pose them “drooped”.
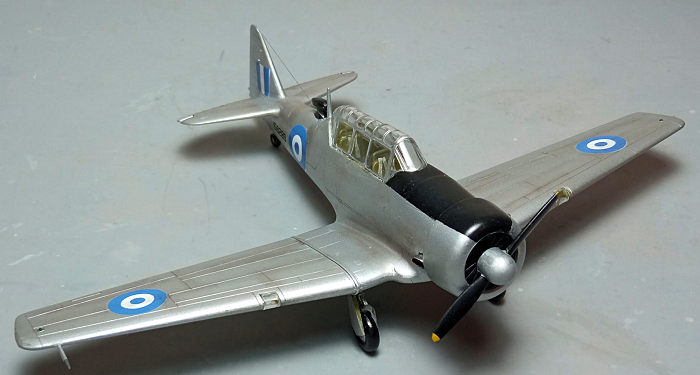
Basic cockpit color was Hu226 Interior Green. The instrument panel (or, at least, what this inclined area was supposed to be) was painted black and had some white, red and yellow paint “pinned” on, in order to somehow represent some sort of instrumentation. The seats had belts done from masking tape. Since the total emptiness between the two seats would be too evident through the clear canopy, I somehow blanked it with a flat piece of styrene, painted black.
This, as surprising as it may sound, concluded basic assembly! Overall fit was good for a snap-fit kit (though I elected to cement everything), with the tiny gaps first treated with liquefied styrene and then with “normal” filler. After blanking the cockpit with some means of wet tissue, I happily rushed the bird to the paint shop!
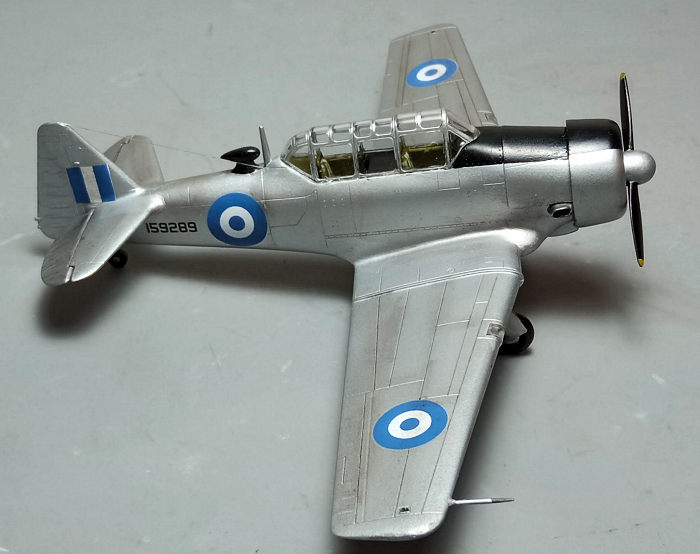
| COLORS & MARKINGS |
 I wanted to
represent an overall “silver” Greek bird during its early days, before receiving
colorful identification decorations. For this, I first painted the front
anti-glare area black, then masked it off and gave the complete model a coat of
my trusty Hu11 Silver. Upon drying (and though by specification non-buffable), I
buffed the silver with a soft cloth that gave the model a deep, shiny look. It
was then time for decaling.
I wanted to
represent an overall “silver” Greek bird during its early days, before receiving
colorful identification decorations. For this, I first painted the front
anti-glare area black, then masked it off and gave the complete model a coat of
my trusty Hu11 Silver. Upon drying (and though by specification non-buffable), I
buffed the silver with a soft cloth that gave the model a deep, shiny look. It
was then time for decaling.
For the insignia I used suitable sized ones from the “Plastimodellismo” Hellenic Air Force Early Insignia sheet (long OOP), while the serial number was taken from a 1/48 Hasegawa A-7 decal sheet. A coat of Future sealed the decals.
| FINAL CONSTRUCTION |
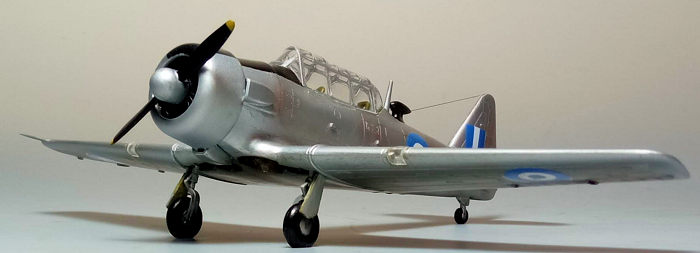
The landing gear was attached in position, with the legs and doors snap-fitting nicely into the corresponding cutouts. Legs and wheel rims were painted silver, tires were black, while bays and door innards were painted Hu226 Interior green. The main tires were tad filed to look weighted, while pieces of stretched sprue were attached to the main bays plain upper walls, to simulate some “ribbing”.
 The decent
(if not tad toy-ish) looking engine was painted black, then heavily dry brushed
with silver and attached in position, followed by the cowling which had its
innards painted the same Hu226 Interior Green. The DF loop was carefully painted
black at this time, as well.
The decent
(if not tad toy-ish) looking engine was painted black, then heavily dry brushed
with silver and attached in position, followed by the cowling which had its
innards painted the same Hu226 Interior Green. The DF loop was carefully painted
black at this time, as well.
The prop had its spinner painted silver, its blades painted black, its tips
yellow and affixed in position. As a note, the majority of Greek T-6s featured
spinnerless props, however the kit supplied prop hub looked toy-ish, so I
decided to go with the spinner attached.
I decided to apply some weathering, consisting of a black wash to accentuate all engraved external details and offer the landing gear area a used, oily look, followed by application of dark brown/black pastels to simulate dirt, grime, engine staining and so on. A satin coat gave the bird its final hue.
The canopy had its well defined frames hand painted and attached in position, as were the leading edge landing lights. Fit was quite nice, with the tiny gaps treated with white glue. The top antenna mast was attached, while thin stretched sprue was run from the fin to the mast’s root, as was observed in reality. Blobs of red, green and yellow clear paint represented the wingtip and underside formation lights, before calling the “advanced trainer” done!
| CONCLUSIONS |
While there are more detailed 1/72 T-6 kits on the market, it is really hard not to appreciate this kit for what it stands for: solid, well molded with correct general shape, easy to assemble (you can even snap fit almost all parts) and offered at a really cheap price, this unpretentious little fellow is well done in its own manner. It is perfect not only for introducing someone (let alone a youngster) to the magic world of modeling, but also for more experienced modelers who want to take a break and build something simple.
Happy Modeling!
15 April 2024
Copyright ModelingMadness.com. All rights reserved. No reproduction in part or in whole without express permission from the editor.
If you would like your product reviewed fairly and fairly quickly, please contact the editor or see other details in the Note to Contributors.