| KIT #: | 72104 |
| PRICE: | $25.00 or so |
| DECALS: | Two options |
| REVIEWER: | Joel Hamm |
| NOTES: | Short run resin kit with vac transparencies. |
| HISTORY |
LF is a Czech company that devotes much of its output to 1/72 kits of US military planes; usually oddities, under-dogs, also-rans, and experimentals that fell by the wayside during the inter-war and early WWII years. The Spartan Executive fits that category as a civilian transport drafted into war service by the caught-with-its-pantaloons-down military scarfing up every nut and bolt of useful hardware.
 The plane
was conceived and constructed by and for rich oil executives desiring, and in
their thoughts deserving, rapid luxurious personal transport. J. Paul Getty
owned the company, directing its product design and production in the do nothing
halfway manner that made him Earth’s Money Man Number One. The company name had
to be a cruel joke, because while a world full of common folk starved through
the Great Depression, the nothing Spartan about it airplane lavished unmatched
speed and comfort on its upper crusty owners. No wonder the USAAC used the
excuse of war to impress every available specimen (16 by Wiki count) as top
brass limos designated UC-71. Post war production continued half heartedly with
a trike geared version until 1968. The firm became the Spartan School of
Aeronautics and most of its production run are still flying, making the rounds
of air shows and fly-ins.
The plane
was conceived and constructed by and for rich oil executives desiring, and in
their thoughts deserving, rapid luxurious personal transport. J. Paul Getty
owned the company, directing its product design and production in the do nothing
halfway manner that made him Earth’s Money Man Number One. The company name had
to be a cruel joke, because while a world full of common folk starved through
the Great Depression, the nothing Spartan about it airplane lavished unmatched
speed and comfort on its upper crusty owners. No wonder the USAAC used the
excuse of war to impress every available specimen (16 by Wiki count) as top
brass limos designated UC-71. Post war production continued half heartedly with
a trike geared version until 1968. The firm became the Spartan School of
Aeronautics and most of its production run are still flying, making the rounds
of air shows and fly-ins.
| THE KIT |
Reviews are amusing that begin: “The kit comes in a sturdy cardboard box…”, but LF’s packaging deserves mention. Is Eastern Europe in the throes of a paper shortage? Or is product presentation there still in the cracker barrel stage? LF’s come in a flimsy 4X6 stapled together bottom with a top that is not even cardboard.
The contents deserve
better. Early resin renderings were amorphous, solid, bubble-flawed blobs. LF
parts by sight and touch (also taste and smell for those into such practices)
are indiscernible from Hasemiya league injections. Wings are single piece, but
they, and tail fins, are appropriately thin and sharp. Surfaces are smooth,
except for properly scaled incised panel lines and fasteners. Even petite parts,
such a props a nd
struts are delicately cast, though sometimes attached to thin flash that must be
carefully cut (never snipped) away.
nd
struts are delicately cast, though sometimes attached to thin flash that must be
carefully cut (never snipped) away.
The ability of the resin process to cast intense detail led to a fit of lily gilding by the mold maker. Formers, longerons, and stringers are embossed inside the aft fuselage; and the engine mount tubes are shaped on the block holding the engine; all to remain unseen and unknown but to the model maker and the model maker’s maker. 3X magnification reveals fine wood grain etched into the propeller blades. Nice try, but no cigar. Spartans swung polished metal Hartzels; and wood would be sanded and varnished to a glass gloss. But give the guy an A for effort. Excellent detail is also molded into the cabin interior; which could be seen if the see-through parts could be seen through; but that peeve will be covered a few paragraphs further on.
Resin kits are actually easier to build than their injected forebears. Epoxy or cyanoacrylate glue must be used because cured resin is impervious to plastic cements. That’s a save for fuddle-fingered builders prone to solvent-etching thumbprints into wings and fuselages. Sure, you can still get sticky-fingered, but CA dries instantly and sands away easily with no waiting or filling needed to fix the boo-boo.
Resin also grinds and sands smoother than styrene, feathering invisibly with fillers. Brittleness is its drawback, hence the warning against snippers. Micro-saws or fresh #11 blades only!
 Instructions
are not much, but not much is needed other than the three pages of exploded
views. They are worthy of mention only for including the enjoinder “Be careful
to use sharp metal parts”, which likely means something sensible in the original
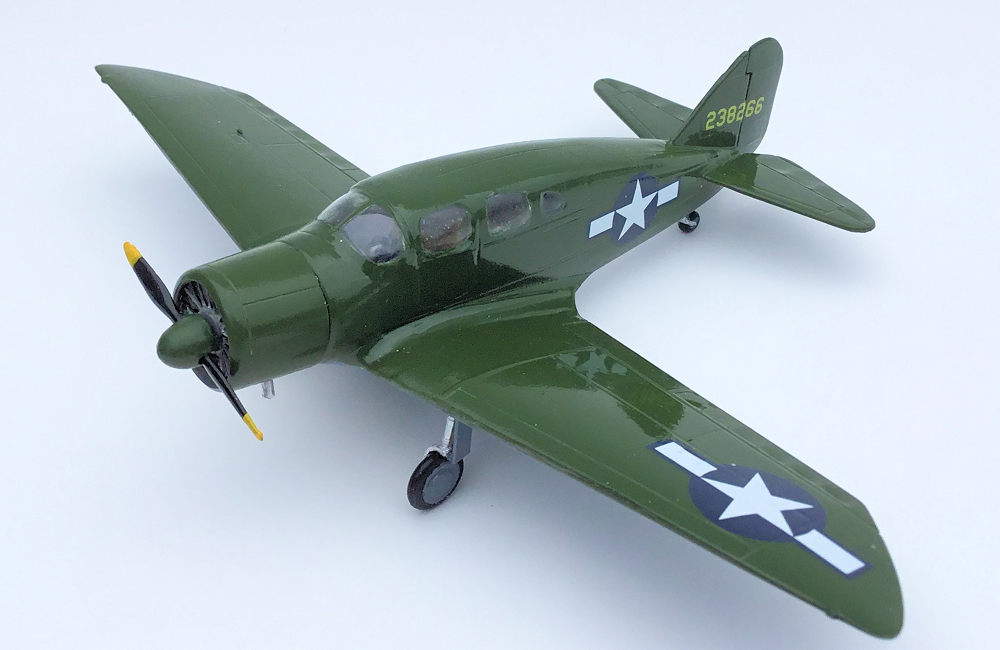
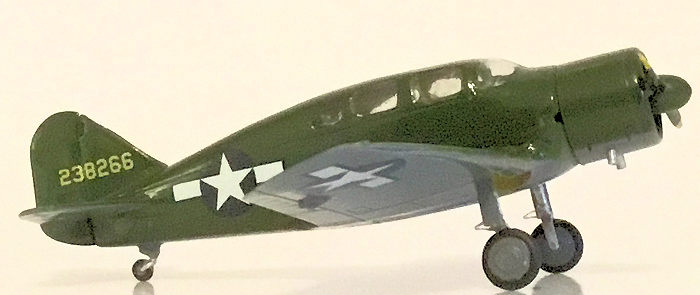
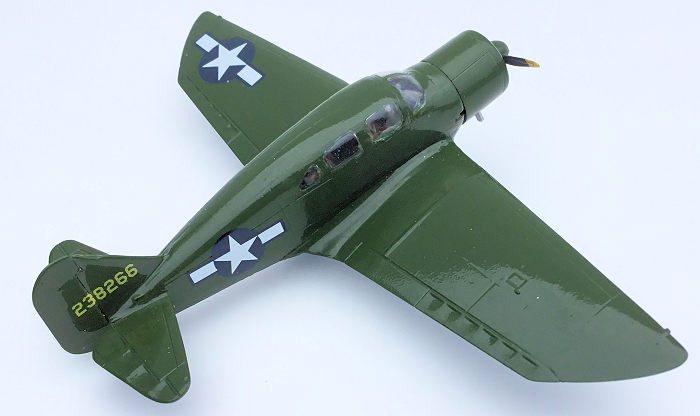
Czech language. A color 2 page marking guide depicts a mid-war O.D. over Neutral
gray machine and a NMF post-warrior.
Instructions
are not much, but not much is needed other than the three pages of exploded
views. They are worthy of mention only for including the enjoinder “Be careful
to use sharp metal parts”, which likely means something sensible in the original
Czech language. A color 2 page marking guide depicts a mid-war O.D. over Neutral
gray machine and a NMF post-warrior.
The one place (besides packaging) where LF falls flat is transparencies. Their vacu-forms are invariably poorly shaped and require re-molding and re-sucking. Those provided with this kit are indistinctly formed, hinting at too little heat and vacuum in the process. To make the badie bad-er side windows are formed individually, rather than as banks of three. The kitters must have realized this because they included a fret of cast epoxy translucencies, made less useable by brown discoloration, unpolishable roughness, and lack of mounting flanges.
| CONSTRUCTION |
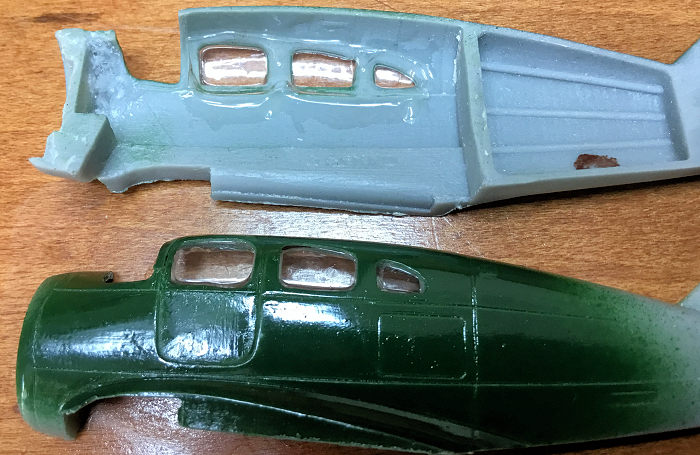
Since cabin windows had to be inserted from within, the first order of business (after sealing the separate port entry door, which can be displayed open) was creating positive vacu-molds. I taped over the window openings from outside, then used Blue Tack gummy stuff to form a well inside. This got filled with Durham’s Rock Hard Wood Putty mixed to pourable consistency; and the fuselage half was repeatedly rapped against the table to force out trapped air bubbles.
After an overnight of drying the tape and tacky stuff was removed and with a bit of prodding out popped a perfect mold of the three-window bank. Perfect was not good, because room had to be made for the thickness of the melted acetate. A few hours of dental sculpting was spent shrinking and steepening the “plateaus” that would form the side windows.
 The
windshield demanded a different approach, free-hand forming from something soft
that could set hard. Sculpey, the oven baked clay compound, would work, but
Hobby Lobby was a three hour round trip. Living ”off the grid” has its
disadvantages. A rummage through the shop brought forth a marine grade epoxy
stick which had the correct consistency and setting property, but was too sticky
when mixed to be easily molded. I found that rolling the kneaded bolus in talcum
powder (not mixing it in) gave it the shapability of floured bread dough (flour
would also work). I taped the fuselage halves together, shoved a glob of the
stuff through the windshield opening, and with a spatula sculpted it to the
correct curvature. After another overnight of setting, a touch of 600 grit
sanding brought it to final shape.
The
windshield demanded a different approach, free-hand forming from something soft
that could set hard. Sculpey, the oven baked clay compound, would work, but
Hobby Lobby was a three hour round trip. Living ”off the grid” has its
disadvantages. A rummage through the shop brought forth a marine grade epoxy
stick which had the correct consistency and setting property, but was too sticky
when mixed to be easily molded. I found that rolling the kneaded bolus in talcum
powder (not mixing it in) gave it the shapability of floured bread dough (flour
would also work). I taped the fuselage halves together, shoved a glob of the
stuff through the windshield opening, and with a spatula sculpted it to the
correct curvature. After another overnight of setting, a touch of 600 grit
sanding brought it to final shape.
The three completed molds were set up on the vacuum box of my DIY vacu-former, the construction and operation of which is explained in one of MM’s archived HOW-TO articles. My first efforts produced nothing better than the kit supplied transparencies. I tried a variety of clear plastic sheets, but could not get any hot enough without charring or clouding. On a hunch I continued heating a sheet beyond the clouded stage. It worked. The cloud turned clear and the plastic sagged into a Jello state. Just before it flops onto the hot plate and bursts into flame and poisonous smoke is the correct time to lay it over the molds and hit the foot switch of the vacuum source. I did and produced a master and several spares.
When the cabin windows were trimmed and glued in place with clear epoxy they fit passably but not flush. That could be corrected later. Fixing the windshield in place was also deferred until the airframe was assembled.
The
fuselage halves needed a bit of coaxing, clamping, taping, and cursing to mate
properly. CA stuff was flowed into the joint, the whole schpritzed with
accelerator, and the seam smoothed with a tad of
 wet sanding.
The previously assembled and painted cabin interior, which comprises a mini
model kit on its own, was slid in place from below. The glue set before I
noticed that the floor should be shortened a half centimeter so the seats could
sit closer to the instrument panel.
wet sanding.
The previously assembled and painted cabin interior, which comprises a mini
model kit on its own, was slid in place from below. The glue set before I
noticed that the floor should be shortened a half centimeter so the seats could
sit closer to the instrument panel.
Before the wing could be fit to seal the deal it needed some grinding around the wheel wells and at the beaver tail. The real surprise was a bilateral two silly millimeter gap at the wing roots. After contemplating and cogitating fixes, I settled on in-situ filling with slow set epoxy, which levels and sands better than the five minute stuff. I surgically draped the gap with tape then dribbled in and squeegeed several applications. When the tape came off only a swipe or two of 600 grit turned the repair invisible.
Attaching the loverly molded stabs and rudder brought the airframe to the point of windshield placement. This was trimmed while still filled with epoxy, freed, and stuck on with slow set clear epoxy. Best product yet found is Devcon Home 2 Ton brand. Sure, several futuristic UV activated insta-set ultra crystal clear concoctions have recently escaped the dental practice to perch on box store shelves; but a mini-tube will set you back the cost of a high tech Hasegawa 1/32nd. The windshield fit and finish emerged surprisingly perfect, except for a sanding stick slip that couldn’t be entirely disappeared by multiple coats of Future.
| COLORS & MARKINGS |
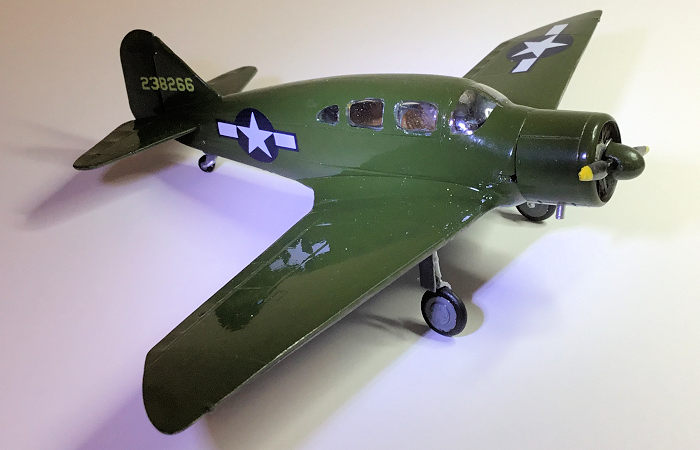
The slightly sunken vacu-windows now became an advantage, facilitating liquid masking with a mix of white glue and dish detergent. The windshield got covered with Tamiya tape.
Despite
the flawless finish on LF’s castings, this was no place for post-war gleaming
bare aluminum. A gloppy gloss coat was called for to cover all the bloopers,
boogers, and boobles. Close enough dark green was compounded out of Testors
green, black, and orange. Neutral gray came straight from the little square
bottle.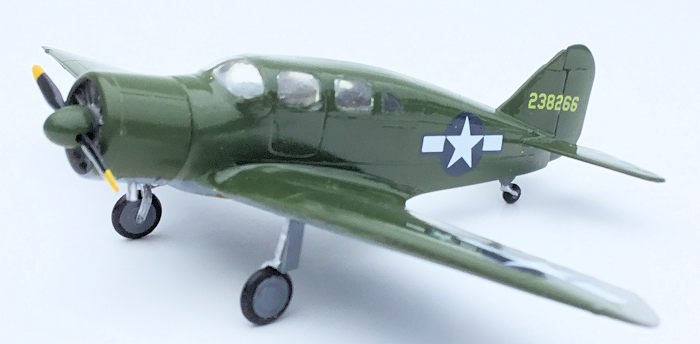
On paper the decals looked excellent with no visible clear surround. Looks can be deceiving. No clear surround was visible because the surrounding clear layer covered the entire sheet, requiring each marking to be Exacto’ed out to precise tolerances. Except for the unique tail codes, that effort was not worth the trouble; as the markings were thick, non- conforming, and easily replaced from the spares trove.
After the masking came out the recessed cabin windows were brought up flush by filling with Devcon 2 Ton. An overall coat of Future improved their reflectivity and made the whole all purdy and shiny, as it surely was when carting around all those purdy ribbons and shiny brass.
| FINAL BITS |
The kit
radial was OK, but button faced engines – or is it engine faced buttons – never
really look the part. Whacking away the interstitial webbing would work, but
within the bowels of the spare parts cache lurked a perfect Pratt and Whitney
from the defunct Engine ‘n Things Co. It had lain patiently since the days of
the mimeographed Lencraft Hot Sheet, whence it was procured, for jus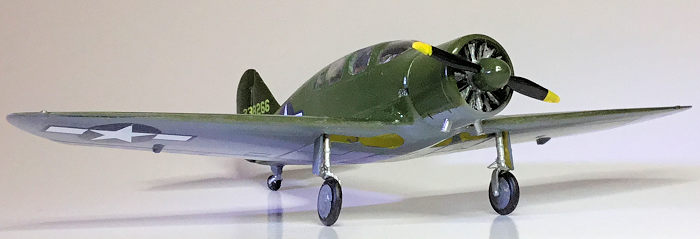 t
this chance to endow the Spartan’s schnoz with the realism of wide open spaces
twixt it cylinders. A few filing strokes on the rocker covers press fit it
perfectly into the cowl.
t
this chance to endow the Spartan’s schnoz with the realism of wide open spaces
twixt it cylinders. A few filing strokes on the rocker covers press fit it
perfectly into the cowl.
The main gear wheels are molded with those cartoonish bulging flat spots so faddish a few fortnights ago, before modelers realized that properly inflated tires don’t bulge (check your driveway). Since they also appeared bloated in both dimensions (couldn’t fit into the wheel wells) they were swapped out for a more svelte set of unknown provenance. By contrast the spindly, sure to be busticated gear struts needed sturdier styrene replacements, but nothing in the spares box seemed suitable. Oh well – they would be supported by the gear doors – and sincere best wishes. One of those gear doors had gone astray, or mistaken for a snippet of flash got flung. New ones from card stock were no problem.
Aluminum tube exhaust pipes and the painted spinnered prop brought the project to completion.
| CONCLUSIONS |
Resin isn’t just for masochists anymore. Anyone with a hankering for off the beaten path should try one of these.
13 November 2018
Copyright ModelingMadness.com
If you would like your product reviewed fairly and fairly
quickly, please
contact
the editor
or see other details in the
Note to
Contributors.
Back to the Main Page
Back to the Review Index Page
Back to the Previews Index Page