Monogram 1/48 AT-6 Texan
| KIT #: | 5306 |
| PRICE: | $20.00 |
| DECALS: | Two Options |
| REVIEWER: | H Davis Gandees |
| NOTES: | Aeromaster 48-387 decals. . |
| HISTORY |
This model represents an AT-6A from Luke Army Airbase where over 17,000 pilots and gunners were trained beginning in early 1942. More pilots were trained at Luke than any other USAAF training base
| THE KIT |
 This is in
my opinion one of Monograms best and accurate kits. Raised panel lines are not a
problem as the real aircraft had pronounced panels and rivet detail. It is still
readily available today by Revell. Any model of AT-6A-G kits were produced from
1979 until 2010.
This is in
my opinion one of Monograms best and accurate kits. Raised panel lines are not a
problem as the real aircraft had pronounced panels and rivet detail. It is still
readily available today by Revell. Any model of AT-6A-G kits were produced from
1979 until 2010.
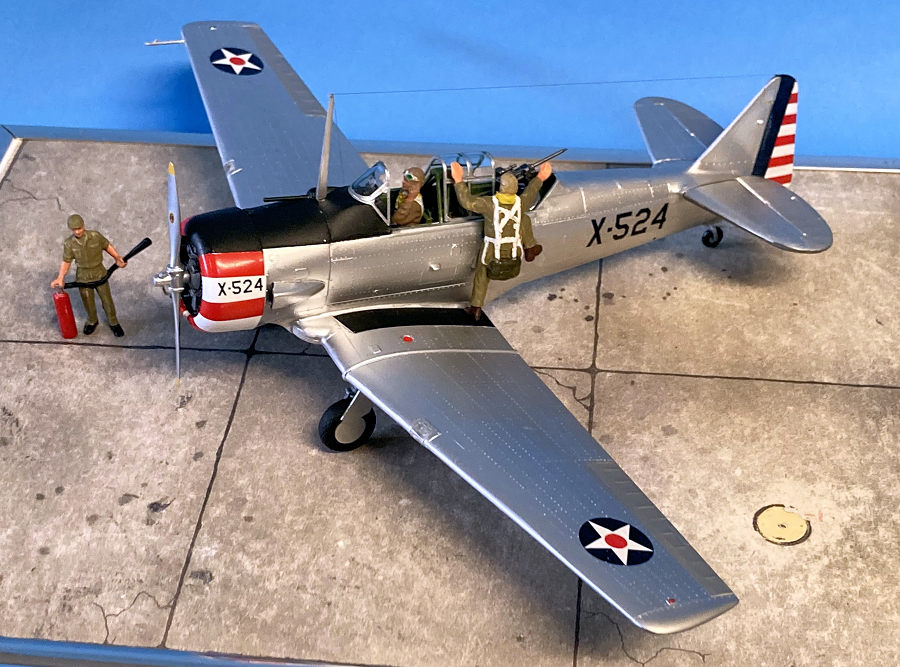
Four pages of excellent illustrated steps and accurate color callouts. There is some minor flash and parting lines. The cockpit is very well detailed with a tubular structure and accurate panels, seats, control sticks, and even a molded fire extinguisher that was found in every AT-6 or SNJ. There is a clear molded red-green-yellow ID lights that must be installed when the fuselage is closed up. There is also a nicely molded early.30 machine gun with telescopic sight for an aerial gunnery trainer as well as a cowl mounted .30 gun for pilot gunnery training. The P&W R-985 radial engine and prop are accurately molded. There are also 3 excellent figures that I used to create a vignette of a pilot, student gunner and ground crew armed with a fire extinguisher preparing for engine start. In many modelers opinion this is still the best Texan in 1:48 scale.
| CONSTRUCTION |
 Starting
with the excellent cockpit, removal of parting lines on the tubing structure and
other flash was accomplished with a small sanding stick. The rear seat was
mounted facing the rear for the student gunner. I installed an Eduard lap belt
and also an olive drab back cushion made from 1/8 “ sheet styrene with the kit
early US Air Corp decal applied. The instrument panels were painted flat black,
the cockpit was painted interior green and the fire extinguisher red. The rear
bulkhead was painted interior green and the ammo boxes flat black. A light dry
brushing of aluminum finished the cockpit. I added an ammo box to the machine
gun. It and the gun swivel ring were installed after the model was completed.
Starting
with the excellent cockpit, removal of parting lines on the tubing structure and
other flash was accomplished with a small sanding stick. The rear seat was
mounted facing the rear for the student gunner. I installed an Eduard lap belt
and also an olive drab back cushion made from 1/8 “ sheet styrene with the kit
early US Air Corp decal applied. The instrument panels were painted flat black,
the cockpit was painted interior green and the fire extinguisher red. The rear
bulkhead was painted interior green and the ammo boxes flat black. A light dry
brushing of aluminum finished the cockpit. I added an ammo box to the machine
gun. It and the gun swivel ring were installed after the model was completed.
The engine cylinders were painted aluminum and the crankcase engine gray and a light Tamiya black panel line wash applied.
The tiny prop counterweights were installed and the prop assembly painted Alclad II polished aluminum with yellow tips. The kit prop decals were applied and the prop put aside until the model was completed. The carburetor and oil cooler intakes were opened up to a more scale look with a small file.
The wing halves were put
together and seams cleaned up and the landing light lenses installed and blended
in 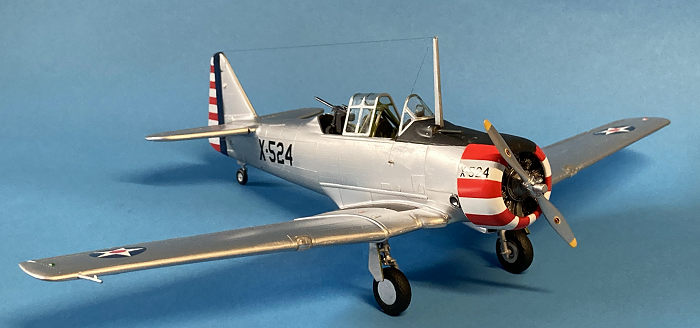 with a
sanding stick and then polished back to clear and masked for painting. The
dropped flaps were painted interior green and Tamiya Silver leaf and put aside
until the model was completed. The interior of the wings where the flaps would
retract was painted interior green and masked. The cockpit was masked with foam
and tape in preparation for painting. The fabric control surfaces were painted
with Tamiya Aluminum and the trim tabs left unmasked to be painted natural
aluminum with the rest of the aircraft. The wings were installed to the fuselage
and carefully aligned. The sliding canopy sections were deleted as on the
gunnery training aircraft. It also made for a cooler flight in the hot Arizona
climate. The windshield and fixed canopy were masked with the excellent Kitmasx
masks that fit the panels perfectly. A gunsight from the scrap box was installed
and the windscreen and canopy were installed with white glue after the model was
painted.
with a
sanding stick and then polished back to clear and masked for painting. The
dropped flaps were painted interior green and Tamiya Silver leaf and put aside
until the model was completed. The interior of the wings where the flaps would
retract was painted interior green and masked. The cockpit was masked with foam
and tape in preparation for painting. The fabric control surfaces were painted
with Tamiya Aluminum and the trim tabs left unmasked to be painted natural
aluminum with the rest of the aircraft. The wings were installed to the fuselage
and carefully aligned. The sliding canopy sections were deleted as on the
gunnery training aircraft. It also made for a cooler flight in the hot Arizona
climate. The windshield and fixed canopy were masked with the excellent Kitmasx
masks that fit the panels perfectly. A gunsight from the scrap box was installed
and the windscreen and canopy were installed with white glue after the model was
painted.
| COLORS & MARKINGS |
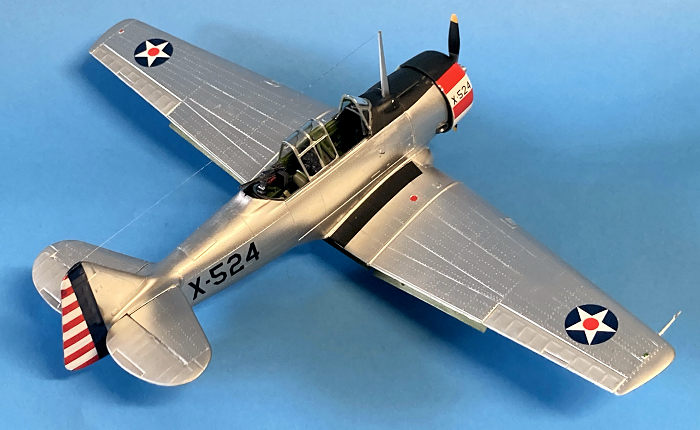
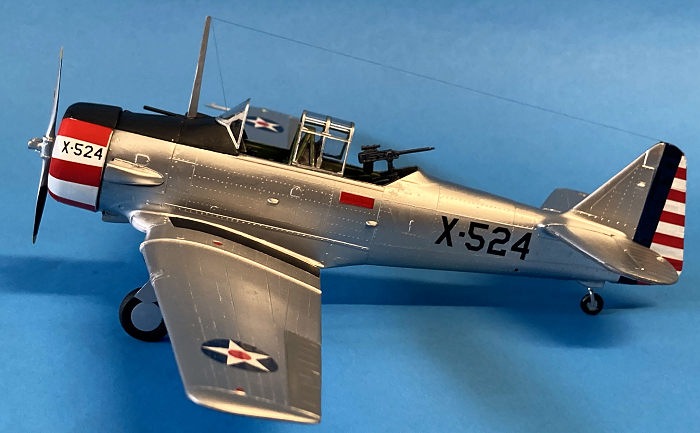 To represent
a fairly new aircraft, I painted the airframe with Tamiya TS-30 Silver leaf that
looks like a clean if not new AT-6A. The colorful Luke airfield early 1942 paint
scheme came from the 25-year-old Aeromaster 48-387 Texan sheet and performed
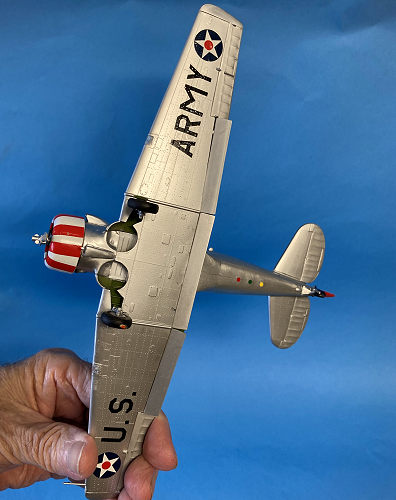
like new. The wing walks and anti-glare panel were painted Testors flat black.
When the model was finished the red-green-yellow ID lights were covered with
decal material cut with a punch and die. A piece of red decal material was
fitted to the fire extinguisher access panel on the left fuselage. Red fuel caps
were also cut from red decal material and applied. A nylon thread antenna wire
was installed in a #80 hole in the rudder top and attached to the mast and a
down wire to an insulator on the fuselage finishing the model.
To represent
a fairly new aircraft, I painted the airframe with Tamiya TS-30 Silver leaf that
looks like a clean if not new AT-6A. The colorful Luke airfield early 1942 paint
scheme came from the 25-year-old Aeromaster 48-387 Texan sheet and performed
like new. The wing walks and anti-glare panel were painted Testors flat black.
When the model was finished the red-green-yellow ID lights were covered with
decal material cut with a punch and die. A piece of red decal material was
fitted to the fire extinguisher access panel on the left fuselage. Red fuel caps
were also cut from red decal material and applied. A nylon thread antenna wire
was installed in a #80 hole in the rudder top and attached to the mast and a
down wire to an insulator on the fuselage finishing the model.
| CONCLUSIONS |
The model was completed in 40 hours and placed on a tarmac base with the figures representing a scene that was repeated thousands of times at Luke Army Airbase in Arizona during WWII. I highly recommend this kit. I am amazed I did not break off the molded pitot tube during the build!
| REFERENCES |
Squadron Signal AT-6/SNJ #94 and the Aeromaster color illustration.
29 September 2025
Copyright ModelingMadness.com. All rights reserved. No
reproduction in part or in whole without express permission from the editor.
If you would like your product reviewed fairly and fairly quickly, please
contact the editor or see other details in the
Note to
Contributors.