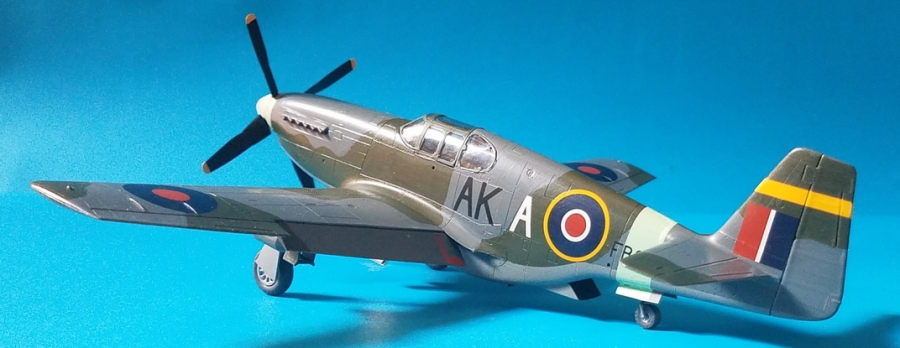
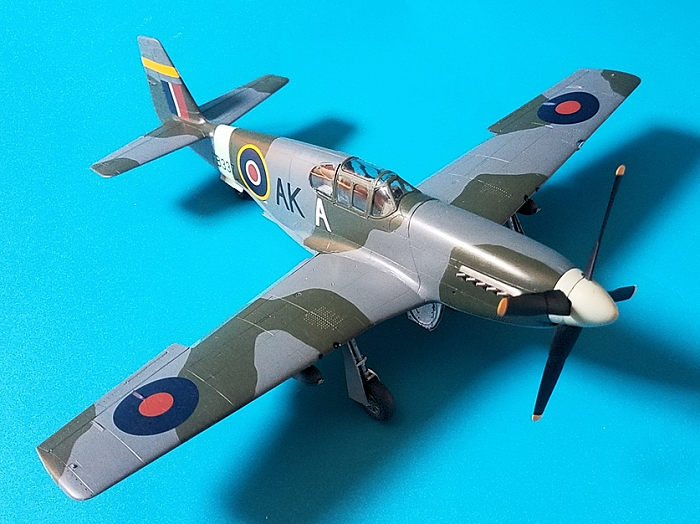
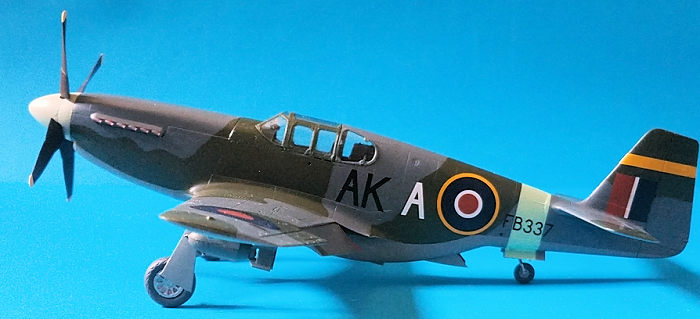
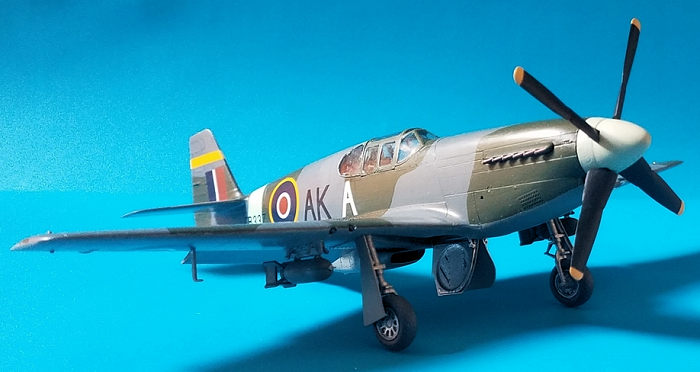
Tamiya 1/48 Mustang III
| KIT #: | 61047 |
| PRICE: | $ |
| DECALS: | Four options |
| REVIEWER: | Francisco Santoro |
| NOTES: | Revell/ICM Mustang III 1:48 decals used. |
| HISTORY |
 From the Revell/ICM instructions: "The
prototype of the North American P-51 Mustang first flew on 26 October 1940 in
response to a British request for a fighter suitable for use in the European
theatre. The first Mustang Mk.Is arrived in England in November 1941, and early
combat experience showed the speed and altitude limitations of the American
designed Allison engine. Mustangs powered by the Rolls-Royce Merlin 61, built by
Packard in the United States as the V-1650, were designated P-51B/C by the
USAAF, and known as Mustang Mk.III by the Royal Air Force.
From the Revell/ICM instructions: "The
prototype of the North American P-51 Mustang first flew on 26 October 1940 in
response to a British request for a fighter suitable for use in the European
theatre. The first Mustang Mk.Is arrived in England in November 1941, and early
combat experience showed the speed and altitude limitations of the American
designed Allison engine. Mustangs powered by the Rolls-Royce Merlin 61, built by
Packard in the United States as the V-1650, were designated P-51B/C by the
USAAF, and known as Mustang Mk.III by the Royal Air Force.
Entering service with 19th Squadron in February 1944, the first version of the Merlin powered Mustang flew with a total of nineteen RAF squadrons on long range escort and fighter bomber missions. Many aircraft were modified with the blown Perspex rear sliding "Malcolm Hood" in place of the original heavily framed hinged canopy, giving outstanding visibility for the pilot.
The Mustang Mk.III was armed with four 12.7mm (50 calibre) Browning machineguns in the wings and could also carry two 225kg (500lb) bombs in place of the wing mounted drop tanks.
Total P-51 production was over 15,500, of which the P-51B/C version totalled 3738 aircraft, 910 of these being RAF Mustangs Mk.IIIs.
| THE KIT |
I was amazed by how simple the kit was, two dark grey sprues in two different bags, with the clear sprue bagged inside another bag. Two polycaps are also included to allow for the propeller to spin.
 There´re two types of clear parts, the heavily
framed one and the Malcolm Hood. The heavily framed one has the option to be
posed open.
There´re two types of clear parts, the heavily
framed one and the Malcolm Hood. The heavily framed one has the option to be
posed open.
As for the decal sheet, four options are provided:
1) Mustang Mk.III PKoH FB353, 316th (Polish) Squadron, painted in Dark Green, Ocean Grey and Medium Grey.
2) Mustang Mk.III PKoG FB387, 315th (Polish) Squadron, painted in Dark Green, Ocean Grey and Medium Grey.
3) Mustang Mk.III GAoQ FB309, 112th Squadron, Squadron, painted in Dark Green, Ocean Grey and Medium Grey.
4) Mustang Mk.III PKoV FX985, 315th (Polish) Squadron, left in natural metal.
| CONSTRUCTION |
 I had first bought
Revell´s Mustang Mk.III, which actually was the ICM kit, which at the same time
was clone of the Tamiya Mustang III. When I opened the bags, I realised the kit
didn´t have locating pegs for the fuselage halves, I thought this wouldn´t be
too much trouble. However, one of the halves was warped, a problem exacerbated
by the ill fitting cockpit. After that, I put the pieces back into their bag,
and kept the decals at hand. I then asked a friend on Facebook if he had the
Tamiya RAF Mustang and if he wanted to swap it for an Eduard Fw 190, to which he
agreed.
I had first bought
Revell´s Mustang Mk.III, which actually was the ICM kit, which at the same time
was clone of the Tamiya Mustang III. When I opened the bags, I realised the kit
didn´t have locating pegs for the fuselage halves, I thought this wouldn´t be
too much trouble. However, one of the halves was warped, a problem exacerbated
by the ill fitting cockpit. After that, I put the pieces back into their bag,
and kept the decals at hand. I then asked a friend on Facebook if he had the
Tamiya RAF Mustang and if he wanted to swap it for an Eduard Fw 190, to which he
agreed.
I began by painting all the cockpit parts with Revell 48 Sea Green. The rear of the cockpit was painted in flat black, and the radio equipment was painted with Revell 91 Steel and Revell 78 Tank Grey. The instrument panel was painted with flat black, and the rudder pedals were painted with Revell 91. When all the pieces were dry, they were glued to the cockpit floor and left to set.
The wings were next. I removed the wing pieces
from the sprue, and opened the holes for the bomb racks on the lower wing. I
also glued the landing light to its opening on the lower wing. The wheel wells
were 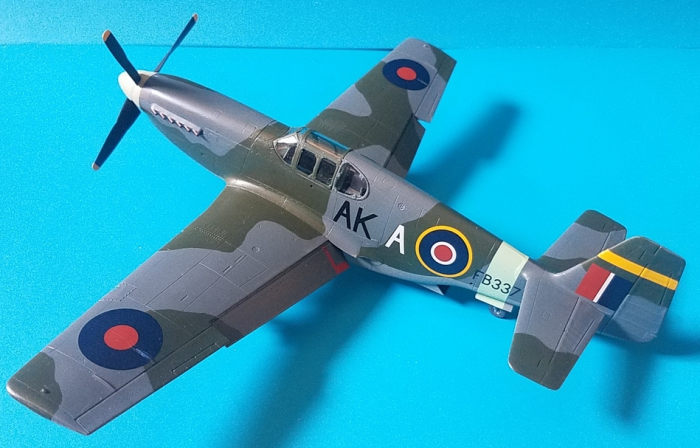 also painted at this time with Revell 48 Sea Green and glued to the lower
wing. I found that gluing the upper wings to the lower ones would be a tight
fit, so after fitting I decided to align the trailing edges of both wings, so I
could get a the leading edges to line up properly. I left the wings alone to dry
while I worked some more on the cockpit.
also painted at this time with Revell 48 Sea Green and glued to the lower
wing. I found that gluing the upper wings to the lower ones would be a tight
fit, so after fitting I decided to align the trailing edges of both wings, so I
could get a the leading edges to line up properly. I left the wings alone to dry
while I worked some more on the cockpit.
While the wings were drying, the cockpit was glued to the side of one of the fuselage halves, and let it set for some minutes. When that was done, I glued the other fuselage half to the cockpit floor and to the other fuselage half, and let it dry. The fit was really good. I glued the exhausts to the nose, and then the cowling was glued in place.
I glued next the wings to the fuselage, which proved to be a really tight fit, so I sanded the wings a bit to make them fit better. I also glued the flaps in the lowered position at this time with CA. I also glued the radiator intake, the radiator shutter, and the engine cooling intake.
Before proceeding to the painting stage, I glued the horizontal stabilisers. I test fit the left stabiliser first, and this showed the part would droop if left as is, so I removed some plastic and test fit again, this time with a much better fit. The right stabiliser didn´t have any issues, so it was glued straight away.
| COLORS & MARKINGS |
I followed the Revell instructions on this part, because I was going to use the decals from the Revell kit. I chose the decals for a Mustank Mk.III based at Leverano, Italy, in 1943.
I first painted the areas that needed to go in
dark green. I used for this Revell 68 Dark Green, giving the surfaces several
thin coats to avoid brush strokes. I then painted several thin coats of Revell
79 Blue Grey. I then masked the upper surfaces with Tamiya tape (great stuff),
and painte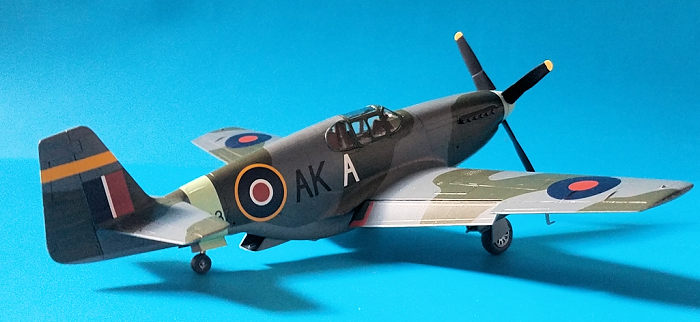 d the lower sides with Revell 43 Medium Grey. When thoroughly dry, I
coated the entire aircraft twice with Revell´s 01 Gloss Varnish, to prepare the
model for the decals.
d the lower sides with Revell 43 Medium Grey. When thoroughly dry, I
coated the entire aircraft twice with Revell´s 01 Gloss Varnish, to prepare the
model for the decals.
I began with the decals by putting the fuselage tailband. Even though I gave it several coats of Vallejo decal softener, it refused to fully conform to the fuselage. The roundels on the upper wings then added. These need to be placed over raised detail, so using Microsol (I used Vallejo decal softener) would be a good idea. I ended up slicing the part of the roundels on the raised areas, and touching up the damaged areas with Revell 56 Dark Blue. Then I applied the fuselage rounders, which need to have the red circle added after the base roundel is applied. With those roundels as reference added, I proceeded to add the aircraft´s code and aircraft number. The tail was then busied up with the inclusion of the British flag and two yellow bars on the fin of the aircraft. I then added the roundels for the lower wing, which also need to have the red bits added separately. The decals were then brushed with Vallejo´s decal softener, with mixed results, the ones on the upper parts of the aircraft settled down nicely, but the decals on the undersides didn´t even sink into the panel lines. I really need Microsol.
Anyways, with the decal solution dry, I removed the excess with some water, and then the model was matt varnished with Revell´s 02 Matt Varnish.
| FINAL CONSTRUCTION |
This involved painting the landing gear, the wheels, the landing gear doors, bombs, canopy, and gluing said parts to their respective area on the aircraft. I painted the landing gear struts with Revell 91 Steel, the wheels were painted first with flat black, and the tyres were picked up with Revell 78 Tank Grey. The landing gear doors were painted Revell 91 Steel on the inside and Revell 43 Medium Grey on the outside.
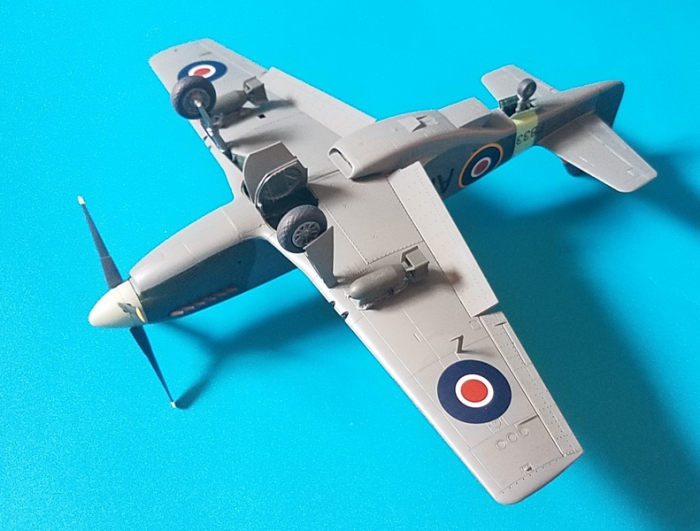 The landing gear was glued one at a time,
checking it with the instructions for the correct position (they should hang
straight down and slightly forward), I also glued the tailwheel to its opening.
When the landing gear was completely dry, I glued the wheels to the struts, and
then the landing gear doors were added.
The landing gear was glued one at a time,
checking it with the instructions for the correct position (they should hang
straight down and slightly forward), I also glued the tailwheel to its opening.
When the landing gear was completely dry, I glued the wheels to the struts, and
then the landing gear doors were added.
The bombs were painted with Revell 66 Olive Grey, which I was told it was Olive Drab (both on Scalemates and by another MM member), it looks too grey though.
Finally, it was time to paint the clear parts. These were painted first with the fuselage interior colour (Revell 48 Sea Green), and then painted according to the position they had on the aircraft regarding the camouflage. Before gluing the clear parts to the aircraft, I glued the gunsight.
The propellers were painted flat black with yellow tips, while the spinner and propeller base were painted with Revell 59 Duck Egg Blue. I then glued the propeller blades to the base, while also placing the polycap for the spinning prop. The blades were left to dry, and when that was done, I glued the spinner over them. The whole assembly was then mounted onto the propeller shaft.
I then added the pitot tube, left it to dry for a bit, and made some bombing runs over the enemy lines with the complete aircraft.
| CONCLUSIONS |
A great fitting kit, which should be picked by those who want an easy model, their first Mustang, or just a weekend build. The fit is great all around, and with some sanding, it should be a kit which shouldn´t need any filler.
| REFERENCES |
Kit instructions.
21 August 2020
Copyright ModelingMadness.com
If you would like your product reviewed fairly and fairly quickly, please contact the editor or see other details in the Note to Contributors.